
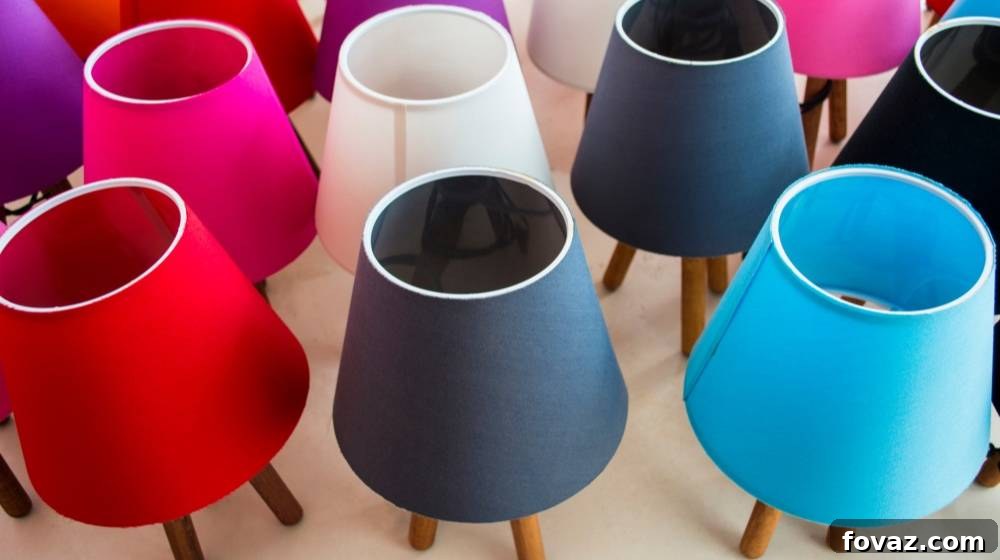
A lampshade might seem like a minor detail in your home decor, but its impact on a room’s ambiance and aesthetic is profound. Far more than just a functional cover for your bulb, a well-chosen lampshade can serve as a focal point, tie together a design scheme, or infuse a space with personality and warmth. Why settle for generic lighting when you can craft a piece that truly reflects your unique style?
Embrace your inner interior designer and elevate the aesthetic value of your living spaces with these 11 ingenious DIY lampshade ideas. Each project offers a fantastic opportunity to personalize your home, breathe new life into old fixtures, and create lighting that’s both beautiful and functional.
RELATED: DIY Project: The Easiest Way to Update Your Lighting
Brighten Up Your Room With These 11 Creative DIY Lampshade Designs
Tired of bland, off-the-shelf lighting? It’s time to unleash your creativity! Whether you’re a seasoned crafter or a complete beginner, these DIY lampshade projects offer accessible ways to transform your home. From textural wonders to vibrant bursts of color, prepare to be inspired and create custom lighting fixtures that captivate and charm, making your home truly your own.
1. DIY Rope Lampshade: Rustic Charm & Textured Elegance
Infuse your living space with natural texture and rustic appeal by crafting a DIY rope lampshade. This project is incredibly straightforward, requiring minimal materials and offering maximum visual impact. The beauty of this design lies in its simplicity and the warm, inviting glow it creates when illuminated, perfect for coastal, farmhouse, or bohemian interiors looking for a touch of organic charm.
You truly don’t need a vast array of supplies to pull off this charming craft. All you’ll typically need are a sturdy, old lampshade frame (or even a plain existing lampshade that needs a refresh), strong adhesive like fabric glue or a reliable hot glue gun, and a generous supply of jute, sisal, or cotton rope. Consider the thickness of your rope; thicker ropes will provide a bolder, more pronounced textured look, while thinner ropes allow for more intricate wrapping and a finer finish. The type of rope will also influence the overall aesthetic, from rough and rustic to soft and elegant.
To begin, apply a line of glue near the bottom edge of your old lampshade. Carefully start wrapping the rope around the lampshade, ensuring each coil sits snugly against the previous one. The key is to minimize any visible gaps as you work your way upwards, meticulously covering the entire surface. Apply glue in small sections as you go to prevent it from drying prematurely, which helps maintain a neat and consistent wrap. This meticulous process ensures a clean, professional finish that looks store-bought, but with a handmade touch.
Once you’ve covered the entire lampshade, securely fasten the end of the rope with additional adhesive. To give your finished piece a truly polished appearance, don’t forget to trim any excess or stray strands of rope. For an added touch of personalization and visual interest, you could experiment with different colors of rope, creating an alternating pattern or stripes. Imagine a combination of natural jute with a pop of indigo or terracotta, or even a monochromatic scheme using varying shades of the same color! This project is not just about covering a lampshade; it’s about adding a handmade, textured piece of art to your home lighting collection that speaks volumes about your style.
2. Crochet Lampshade: Handcrafted Warmth & Intricate Details
Crocheting isn’t solely for creating cozy items like winter warmers or blankets. This beautiful fiber art can also be harnessed to create exquisite home decorations, offering a unique blend of texture, pattern, and personalized charm. A crochet lampshade not only transforms an ordinary fixture into a unique statement piece but can also serve as a delicate, protective cover that diffuses light beautifully, casting soft, inviting patterns across your room.
Take your crochet skills, whether beginner or advanced, to the next level by creating this bespoke DIY lampshade. You can either crochet a flat panel to wrap around an existing lampshade frame or construct a three-dimensional cover that slips over it. The choice of yarn weight, fiber type, and stitch pattern will dramatically influence the final look, allowing for endless creative possibilities. From delicate lace patterns that offer an ethereal glow to dense, textured stitches that provide a robust and cozy feel, your crochet hook is your magic wand for custom lighting.
To make the final look truly eye-catching and harmonized with your existing decor, use various shades of yarn. Consider creating a beautiful gradient effect using ombré yarns, or craft striking patterns with contrasting colors for a more dynamic appeal. The most important tip here is to ensure that your chosen colors work well together and complement your existing room ornaments, textiles, and furniture. A well-coordinated color palette will make your crocheted lampshade feel like a custom-designed piece rather than a standalone craft, integrating seamlessly into your home’s aesthetic.
This project is also a fantastic way to utilize leftover yarn scraps or explore new stitch patterns you’ve been eager to try. Imagine a lampshade adorned with floral motifs, geometric designs, or even simple, elegant shells that allow light to peek through. It’s a craft that combines practicality with artistic expression, resulting in a lampshade that’s not just unique, but also imbued with the warmth of handmade love, making your home feel more personal and inviting.
- JMark’s 63-Piece Beginner Crochet Kit for Adults is the ultimate crochet set for both newbies and experts. This comprehensive crochet kit for beginners comes with 24 vibrant 100% Acrylic Yarn Balls and 9 Crochet Hooks. Additional items like 6 Weaving Needles, 10 Stitch Markers, and a Tape Measurer round out this crochet kit beginner package. It also includes 3 Storage Bags and a helpful eBook to guide your crochet journey, making it the perfect crochet kits for beginners.
- Premium Acrylic Craft Yarn Kit in 24 Different Colors – Our crochet kits for beginners and experts offers a wide range of bright colors without any duplicates; Each yarn for crochet contains 55 yards per skein for a total of 1320 yards of acrylic yarn for crocheting; Our crochet kit for beginners adults with yarn set is suitable for beginners, experts, children and adults
- Reusable Storage Bags & Ergonomic Crochet Hooks Set – Our crotchet kit with yarn pack includes a storage case for each item set, perfect on the go or for gifts; JMark unique crochet hook case features an ergonomic design to slide easily and prevent hand fatigue or cramping allowing hours of use of the knitting kit for beginners; Our crochet set for beginners with yarn for crafts is therefore suitable for arthritic hands
- Ideal Gift & Machine Washable – Our crochet for beginners kit is the perfect gift for Christmas, Birthdays, Holidays, Valentine’s Day and works for mothers, children, daughters, grandmothers, nieces, beginners, experts, girls, boys and more; Each convenient crochet starter kit beginner for adults and kids is also machine washable and tumble dry low without bleach or ironing
- Versatile Knitting Kits with Accessories Set – Our knitting starter kit for adults and kids is ideal for arts and crafts projects, crochet patterns, granny squares, amigurumi, pom poms, DIY crafts, accent works, yarn crochet flowers and much more; We ensure that our crochet beginners kit with knitting yarn will meet your expectations and offer returns no questions asked; Contact us if you have any issues with our yarn sets for knitting
Buy on Amazon
3. Embroidered Lampshade: Personalize with Needlework Art
If your old lampshade is looking drab and uninspired, an embroidered makeover is the perfect way to revive its beauty and imbue it with handcrafted elegance. This project allows you to showcase your exquisite needlework techniques, adding a bespoke, artistic charm to your lighting fixture that store-bought options simply can’t match. It’s an opportunity to turn a functional item into a personal work of art, reflecting your creativity in every stitch.
Adding a personal touch through embroidery lets you apply your unique sense of texture, color, and design to your lampshade fabric. Imagine embroidering delicate birds and vibrant flowers to achieve a fresh, tropical look, perfect for a sunroom or a cheerful bedroom. These motifs can transport you to an exotic paradise. Alternatively, stitch playful animals, whimsical characters, or charming plants for a child-friendly vibe in a nursery or playroom, creating a truly enchanting and stimulating atmosphere for little ones.
You can sew quirky patterns, intricate monograms, or sophisticated geometric designs onto any plain fabric lampshade. The key is to select a fabric that is easy to stitch through and holds tension well, such as linen, cotton canvas, or even a sturdy silk. For those who find freehand embroidery daunting, making the process easier is simple: print out templates or stencils to serve as your pattern. Transfer the design onto the fabric using a water-soluble pen or chalk, and then let your needle and thread bring it to life. Consider using different types of embroidery floss—like metallic threads for a subtle shimmer, pearl cotton for a raised, textured effect, or even satin ribbon for dimension—to add even more depth and visual interest. This DIY lampshade is a celebration of artistry and individuality, making your lighting a true conversation piece.
4. Sweater Lampshade: Upcycled Coziness & Warm Ambiance
Give new life to your old, beloved sweaters by transforming them into cozy covers for your existing lampshades. This upcycling project is not only environmentally friendly, preventing textiles from going to waste, but also results in a wonderfully tactile and warm-looking lighting fixture, perfect for adding hygge and comfort to any room. It’s an ingenious way to extend the lifespan of cherished garments while enhancing your home decor with a unique, textured element that feels incredibly inviting.
When selecting a sweater for this project, opt for pieces that are clean, free of rips, and ideally made from a material that drapes well and isn’t too flimsy, such as a soft wool, cashmere, a chunky knit cotton, or even a thick fleece. A well-preserved sweater will ensure your craft has a neat and polished appearance. Don’t be afraid to choose a pullover with interesting details; for instance, a sweater adorned with decorative buttons, intricate cable knits, Fair Isle patterns, or even small pom-poms can significantly add to the texture and visual appeal of your DIY lampshade, making it truly one-of-a-kind and a charming focal point.
The process is surprisingly simple. Carefully pull your chosen sweater over your lampshade, positioning it so the most appealing part of the sweater (e.g., a patterned section, the collar, or a textured front) is visible and centered. Once you’re happy with the placement, smooth out any wrinkles and then carefully cut away the excess parts, such as the sleeves and the bottom hem, leaving enough fabric to secure neatly around the top and bottom rims of the lampshade. You can use strong fabric glue or a needle and thread to hand-stitch the edges to the lampshade frame, ensuring a snug and secure fit. Remember to save those extra fabric scraps! They can be excellent resources for future small DIY projects, like making decorative patches, mini fabric flowers, or even stuffing for small cushions. This sweater lampshade will not only diffuse light beautifully but also add an unparalleled sense of comfort and warmth, making your space feel more like a cozy retreat.
5. Space Lampshade: Galactic Glow & Cosmic Decor
Embark on an interstellar journey from the comfort of your room by bringing the vastness of the solar system to your DIY lampshade. This cosmic creation will make you feel as if you’re gazing into outer space, adding a sense of wonder, imaginative flair, and unique aesthetic to your home decor. It’s a fantastic project for astronomy enthusiasts, children’s rooms, or anyone looking to add a touch of celestial magic and intrigue to their lighting.
There are several exciting approaches to achieve this galactic look. You can either seek out a fabric with a stunning galaxy print – readily available in craft stores or online – and neatly cover your lampshade with it using fabric adhesive. Alternatively, unleash your inner artist and design your own star system directly onto a plain lampshade. For a shimmering, otherworldly effect, spray paint metallic colors like silver, gold, and deep blues or purples onto your lampshade’s surface. While the paint is still wet, you can carefully engrave delicate parts of constellations, like individual stars or star trails, using a fine-tipped tool or even the blunt end of a paintbrush. To ensure precision, consider creating stencils of planets, stars, or nebulae beforehand, which will provide a clear outline for your design, allowing for crisp, professional-looking details.
Another wonderfully artistic technique involves using markers in vibrant galaxy colors. Apply dots, swirls, and washes of blues, purples, blacks, and hints of pink or green. Then, dip a cotton ball or a stiff brush in rubbing alcohol and gently smudge the lines and blend the colors. This creates a beautifully blended, nebulous effect that mimics the swirling gases and dust clouds of a real galaxy. You can even add tiny glitter elements or apply glow-in-the-dark paint for an extra magical touch that truly comes alive when the room lights are dim. This space lampshade isn’t just a light source; it’s a captivating window to the cosmos, bringing infinite wonder right into your home and inspiring dreams of distant galaxies.
6. Ombré Lampshade: Gradient Hues & Stylish Transitions
Who says ombré effects are exclusively for hair? You can easily apply this stylish gradient technique to your fabric lampshade, creating a sophisticated and visually appealing lighting fixture. An ombré lampshade offers a subtle yet striking way to introduce color into your room, with a smooth transition from one shade to another, or from a deep hue to a lighter one. It’s a modern and elegant design choice that instantly elevates any space, adding depth and visual interest without overwhelming the decor.
One surprisingly effective option for achieving a beautiful ombré effect on a fabric lampshade is to use fabric dyes or even certain hair dyes specifically formulated for textiles. If using fabric dye, dilute it to create different concentrations for various shades, or use multiple colors of dye that blend well together. The key is to apply the darkest shade at one end (top or bottom) and gradually lighten the application or switch to lighter dye colors as you move across the lampshade, ensuring a seamless fade. This requires careful dipping or painting in progressive stages, allowing each layer to absorb before adding the next.
Another popular and often easier option involves using paint colors, particularly acrylic or fabric paints, which work wonderfully for this project. Start by painting your darkest color at one section, then gradually mix in a lighter shade of the same color (or a carefully chosen complementary color) as you progress. The most crucial tip for a successful ombré effect is to maintain an even transition among different shades. This requires careful blending. Ensure you wet your brush with water frequently, especially when blending the edges of two colors. This keeps the paint workable and helps to seamlessly merge the tones, preventing harsh lines. It would be challenging, if not impossible, to blend the tones once the paint has dried, so work quickly and meticulously in small sections. The result will be a beautifully diffused light and a lampshade that adds a refined, custom pop of color to your decor, making it feel effortlessly chic.
RELATED: Turning a Table Lamp into a Floor Lamp | Furniture Rehab
7. Origami Lampshade: Architectural Folds & Geometric Artistry
Paper and card stock are incredibly versatile materials when it comes to crafting, and one of their most elegant applications is in the ancient Japanese art of origami. An origami lampshade transforms simple sheets of paper into a stunning piece of architectural art, casting beautiful shadows and diffusing light in a unique, captivating way. If you appreciate clean lines, minimalist design, and intricate geometric patterns, this DIY lampshade is a perfect, sophisticated addition to your room, offering both visual interest and a serene ambiance.
While an origami lampshade may appear complex and far from effortless at first glance, the process is surprisingly achievable with patience and precision. The secret lies in accurate measurements and exact folds. Begin by drawing a precise grid on your chosen paper or card stock using a ruler and pencil. This grid will serve as your essential guide for all subsequent folds, ensuring symmetry and consistency across the entire lampshade structure. There are numerous online tutorials, printable templates, and instructional videos available for various origami lampshade patterns, ranging from simple pleats and accordion folds to more elaborate three-dimensional forms like modular designs.
You can use any color of paper that complements your room’s aesthetic, but it’s important to consider how the color will affect the light output. White or lighter-colored papers will allow more light to pass through, creating a brighter and more airy glow, while darker or textured papers will produce a softer, more atmospheric illumination, casting intriguing patterns. Just be sure that the paper’s thickness (or grammage) is ideal enough to keep its shape once folded. Thicker card stock will hold sharp creases better and provide more structural integrity, resulting in a durable and impressive lampshade that maintains its form over time. This project is a testament to how simple, affordable materials can be transformed into extraordinary, high-design elements, adding an artistic touch to your home decor.
8. Spooky Lampshade: Gothic Glamour & Eerie Enchantment
Why confine spine-chilling designs and mysterious embellishments solely to Halloween? If you’re a fan of gothic aesthetics, unique conversation pieces, or simply enjoy a touch of eerie enchantment and playful darkness in your daily decor, then this DIY spooky lampshade is the perfect choice for you. It’s an imaginative way to infuse your space with personality, intrigue, and a year-round sense of charming mystery, regardless of the season.
To give your lampshade an immediately scary yet stylish look, consider adding whimsical googly eyes of varying sizes – they can be surprisingly effective at creating a playful, haunted vibe when affixed to a plain lampshade. Silhouettes of bats, spiders, or ghostly figures cut from black cardstock or felt and glued strategically to the lampshade can also add an instant element of spooky charm, especially when backlit. For a classic Halloween-inspired palette, paint your lampshade in rich, deep oranges and mysterious blacks, or explore more sophisticated gothic hues like dark purples, emerald greens, or deep grays for a more subtle, elegant spookiness.
To achieve a truly atmospheric effect, consider covering your existing lampshade with any black lace cloth or a richly textured gothic textile like velvet or brocade. Delicate lace patterns can cast intricate shadows, adding to the mysterious ambiance and creating an alluring play of light. You can also opt for fabrics featuring pre-printed designs of skulls, cobwebs, ghosts, or other macabre motifs for an instant themed look. Another creative idea is to use decoupage with cutouts from vintage horror comics, old scientific illustrations of skeletons and creatures, or even antique botanical prints of poisonous plants. The key is to embrace the darker, more whimsical side of design, creating a lampshade that’s not just a light source, but a captivating piece of art that tells a story and adds an unforgettable character to your room.
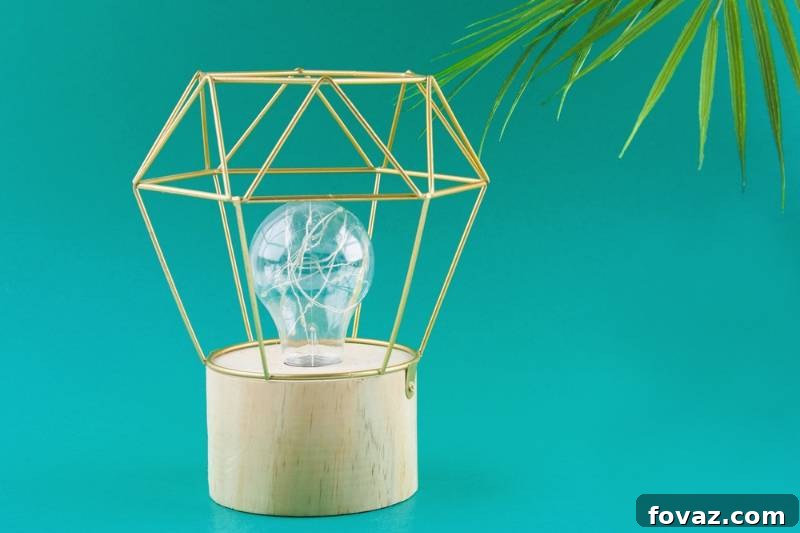
9. DIY Geometric Lampshade: Modern Angles & Contemporary Appeal
Make a bold statement with your lighting by crafting a cool and distinctly modern DIY geometric lampshade. This project allows you to create striking polygonal patterns and dynamic structures out of various materials, resulting in a contemporary art piece that doubles as a functional light fixture. It’s an excellent way to introduce sharp lines, architectural interest, and a touch of avant-garde design into your interior decor, perfectly suited for minimalist or industrial-themed spaces.
One of the best aspects of this lampshade design is its versatility and the ability to utilize readily available, and often inexpensive, resources around you. For forming sturdy, defined structures, consider using materials like foam board, thick cardboard, or even upcycled plastic sheets. These can be precisely cut into geometric shapes – triangles, squares, hexagons, or custom polygons – and then carefully assembled and glued together to create a stunning three-dimensional form around your light source. For an incredibly budget-friendly yet visually interesting option, you could even use random paint chips from your local hardware store, arranging them in an overlapping, mosaic-like pattern to form a colorful geometric shell, adding unexpected texture and color.
If your vision leans towards simpler, open-frame shapes that allow light to escape freely, you can easily use thin wooden sticks or dowels to construct elegant cubes, pyramids, or more complex polyhedrons. These can be joined securely with strong wood glue, small corner brackets, or even intricate notching techniques. For those with a more adventurous spirit and access to basic tools, you can be even more creative and use lightweight pipes, metal tubing, or even PVC segments to construct intricate geometric forms with numerous sides and angles. The interplay of light and shadow through these angular structures will create a truly captivating display, making your DIY geometric lampshade a true centerpiece of modern design that is both functional and sculptural.
10. DIY Map Lampshade: Vintage Journeys & Wanderlust Inspiration
Transport your room to distant lands and infuse it with a delightful vintage appeal by decorating your DIY lampshade with an atlas or old maps. This creative project not only adds a unique visual element to your decor but can also serve as a wonderful conversation starter, evoking exciting memories of past vacations or inspiring future adventures around the world. It’s a perfect blend of personal history, geographical fascination, and decorative charm, ideal for a study, living room, or travel-themed bedroom.
The beauty of a map lampshade lies in its ability to be deeply personal. You can carefully select and use old maps of your favorite places – perhaps the city where you grew up, a memorable honeymoon destination, a beloved national park, or even a vintage world map highlighting all the countries you’ve visited. Decoupaging these maps onto your lampshade allows you to reminisce about your past travels every time you switch on the light, literally illuminating your cherished memories. Alternatively, you can put maps of your dream destinations or places on your bucket list. This serves as a constant source of inspiration, encouraging you to save up, plan, and take on that journey you’ve always dreamed of, keeping your wanderlust alive.
While most people might think of pasting maps on the outside of the lampshade, consider a more subtle and equally captivating approach: paste the map sections inside your lampshade. When the light is off, your lampshade appears conventional and understated. But once illuminated, the internal map details glow through the fabric, casting a soft, intriguing geographical pattern and making your fixture even more interesting and revealing a hidden world to those who look closely. This technique offers a delightful surprise and a truly unique way to display your love for travel and geography. Ensure the maps are securely adhered with a clear, non-yellowing decoupage medium to preserve their beauty and prevent fading for years to come, allowing your memories to shine brightly.
11. DIY Photo Lampshade: Cherished Memories & Personalized Glow
Add an incredibly personal and heartwarming touch to your DIY lampshade by adorning it with your favorite photographs. Beyond merely hanging your best shots on the wall, printing and carefully pasting them onto your lampshade offers a unique and intimate way to display cherished memories, transforming a functional object into a personalized heirloom. This project creates a truly cozy and inviting atmosphere, where light illuminates not just the room, but also the stories of your life and the faces of those you love.
The creative possibilities with a photo lampshade are endless. You can mix and match different photos, creating a captivating collage of your favorite scenes, loved ones, or significant moments. Arrange them chronologically for a timeline effect, or randomly for a more eclectic look. Alternatively, you might come up with a specific theme that perfectly matches the mood and purpose of your room. For example, decorating a lampshade with sweet, romantic photos of you and your partner, or images from your wedding day, would be ideal for a master bedroom, adding an extra layer of warmth, intimacy, and shared history to your personal sanctuary.
On the other hand, for a child’s bedroom or nursery, you could put adorable baby photos, family snapshots, or pictures of their favorite cartoon characters, animals, or even their own artwork on the lampshade. This not only brightens their room but also surrounds them with comforting, familiar images that can spark imagination and offer a sense of security. Ensure that you use high-quality prints that can withstand light exposure and consider applying a clear sealant (like a decoupage medium or matte Mod Podge) to protect them from dust and fading, ensuring your precious memories remain vibrant. This DIY photo lampshade is more than just decor; it’s a glowing tapestry of your life, designed to bring joy, personal connection, and a unique narrative into your everyday space.
Customizing your room with handmade elements is one of the most fulfilling ways to create a truly unique and comfortable living environment. By crafting your own DIY lampshade decoration, you’re not just making a light fixture; you’re creating a piece that genuinely reflects your personality, style, and cherished memories. Let your creativity shine and transform ordinary spaces into extraordinary sanctuaries of light and charm, making every corner of your home feel personally curated and deeply loved.
What other imaginative designs do you have in mind that you’d love to use for your next DIY lampshade project? Share your brilliant thoughts and creative ideas with us in the comments section below!
Up Next:
- How to Make a Cigar Box Lamp | DIY Lamp Tutorial
- Awesome Wood Lamp To Warm Up your Room | DIY Lighting Projects
- Make Your Own Fire Starter At Home | 11 DIY Fire Starter Ideas
Calling all crafting DIYhards, DIY Projects needs YOU! Click here if you want to write for us.
Don’t forget to stay connected with us on Facebook, Twitter, Pinterest, and Instagram!