
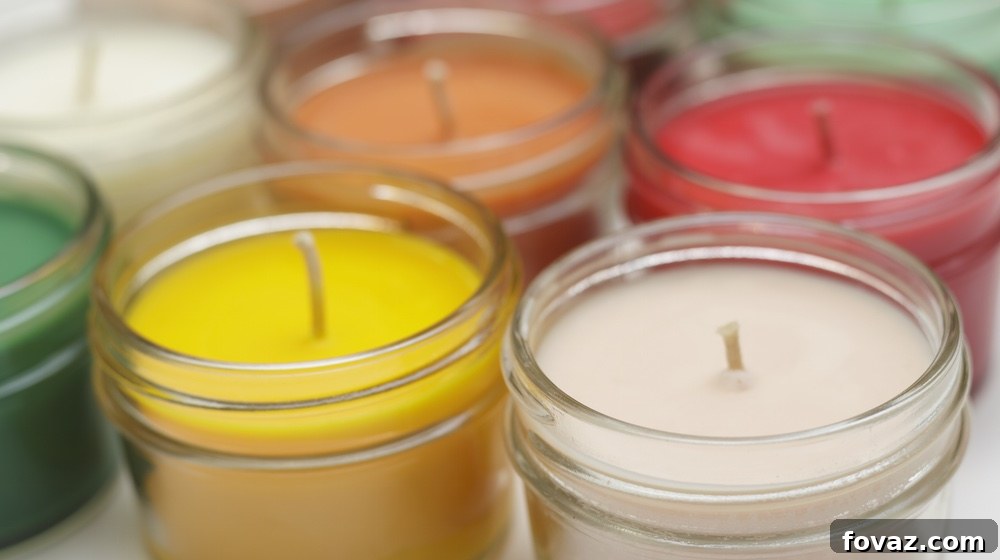
Transform Old Wax: Your Ultimate Guide to Reusing Candle Wax for New Creations
Do you ever find yourself with a collection of candle jars, each harboring a stubborn layer of wax at the bottom that just won’t burn? This leftover candle wax is a common and often overlooked waste product, leaving many beautiful candles deemed “unusable” long before they’re truly empty. But what if there was a simple, creative, and eco-friendly way to give that wax a second life?
You’ve come to the right place! This comprehensive guide will walk you through the rewarding process of repurposing leftover candle wax, transforming it into brand new, beautiful candles. Not only is this a fantastic way to save money and reduce waste, but it’s also a wonderfully satisfying DIY project that allows for endless creative possibilities. Get ready to unlock the full potential of your favorite candle scents and colors!
RELATED: Soothing DIY Lavender Candles To Melt Your Stress Away
Why Reuse Candle Wax? Embrace Sustainability and Creativity!
Before we dive into the how-to, let’s explore the compelling reasons to embark on this eco-conscious crafting journey:
- Reduce Waste: Every year, countless candle jars with residual wax end up in landfills. By reusing this wax, you’re directly contributing to waste reduction and promoting a circular economy.
- Save Money: High-quality candles can be expensive. Repurposing your leftover wax means you get “new” candles for virtually no cost, extending the life and value of your initial purchase.
- Unleash Creativity: This DIY project is a blank canvas! Experiment with layering different colors, blending scents, adding embellishments, and choosing unique containers to create truly personalized candles that reflect your style.
- Sustainable Living: It’s a small but impactful step towards a more sustainable lifestyle. By maximizing the use of products, we lessen our environmental footprint.
- Personalized Gifts: Hand-poured, upcycled candles make thoughtful and unique gifts for friends and family, demonstrating care for both the recipient and the planet.
Essential Tools and Materials for Your Candle Upcycling Project
Gathering your supplies is the first exciting step in your candle-making adventure. Most of these items you might already have around your home!
Here’s What You Will Be Needing:
- Wax Warmer or Double Boiler Setup: A dedicated electric wax warmer is ideal for gentle, even melting. Alternatively, a double boiler (a heat-safe bowl set over a pot of simmering water) works perfectly for melting wax safely without direct heat. Avoid microwaving wax directly, as it can heat unevenly and pose a fire hazard.
- Heat-Resistant Container(s) for Melting: The old candle jars themselves can be placed on a warmer. If using a double boiler, a metal pouring pot or an old, sturdy glass measuring cup is essential.
- Pair of Scissors: For trimming wicks and removing old wick bases.
- New Candle Wicks: Choose wicks appropriate for the size of your new container. Cotton wicks are common, but wooden wicks offer a unique crackling sound. Ensure they have metal wick clips at the bottom for stability.
- Leftover Candle Wax from Old Candle Jars: This is your primary ingredient! Collect all those nearly-finished candles.
- A New Jar or Recycled Container: This will be the home for your new candle. Heat-safe glass jars, ceramic pots, or even cleaned-out food jars (like jam or salsa jars) are excellent choices.
- Wick Centering Tools (Optional but Recommended): Clothes pins, skewers held with rubber bands, or specialized wick clips help keep your wick upright and centered while the wax sets.
- Stirring Stick: A wooden craft stick or old spoon for stirring wax and removing debris.
- Fine Mesh Sieve or Coffee Filter (Optional): For straining out impurities.
- Fragrance Oil or Essential Oils (Optional): To add or enhance the scent of your new candle.
- Candle Dye (Optional): To achieve vibrant, custom colors.
Step-by-Step Guide: How to Reuse Candle Wax Creatively
This simple, three-step process will guide you through transforming your forgotten candle remnants into delightful new luminaries. Pay close attention to the details for the best results!
Step 1: Safely Melt and Prepare Your Leftover Wax
The first crucial step is to gently melt your existing wax. This process requires patience and attention to safety to ensure a smooth, clean base for your new candle.
Grab your chosen wax melting device. If using an electric candle warmer, simply place your candle jar with leftover wax directly onto it. If opting for a double boiler, carefully scoop the leftover wax into your heat-safe pouring pot, then place it into the simmering water. Ensure the water doesn’t boil over into your wax.
Allow the wax to melt completely. As the wax liquefies, the old wick holder at the bottom will become loose. Using a pair of scissors or tongs, carefully remove the old wick clips and any other debris (like bits of burnt wick or dust) from the melted wax. You can also strain the melted wax through a fine-mesh sieve or coffee filter if you want to ensure it’s completely free of impurities, resulting in a cleaner-burning candle.
This is also the stage where you decide on your aesthetic! You can melt different colored waxes separately to create a stunning layered candle, or mix them all together for a unique, marbled, or blended color effect. Keep track of separate colors if you’re aiming for distinct layers.
Things to Keep in Mind During Melting:
- Extreme Heat Warning: Always use tools (scissors, tongs) to remove wick bases, as the melted wax is extremely hot and can cause severe burns if it touches your skin.
- Ventilation: Work in a well-ventilated area, especially if melting a large quantity of wax or if your original candles had strong fragrances.
- Avoid Direct Heat: Never place wax directly over an open flame or high heat source, as this can cause the wax to overheat, smoke, or even catch fire. The double boiler method is the safest for stovetop melting.
- Cleanliness: A clean wax base free of debris ensures a better burn and a more professional-looking finished product.
RELATED: Fun Fall DIY! Make Your Own Rustic Candle Sconces
Step 2: Prepare Your New Candle Vessel and Wick
While your wax is melting, prepare your new container. The right vessel and wick are crucial for a successful and safe candle.
Select your new jar or recycled container. Ensure it’s clean, dry, and heat-resistant. If you’re recycling old food jars, wash them thoroughly and remove all labels and residue. Place a new wick in the exact center of the bottom of the container. You can secure it using a specialized wick sticker, a dab of hot glue, or by melting a small drop of wax onto the wick clip and pressing it firmly to the bottom of the jar.
For wider jars, you might consider using multiple wicks to ensure an even burn pool. Just make sure to space them out appropriately, maintaining at least an inch between wicks and from the edge of the container.
Once the wick is secured at the bottom, use a wick centering tool (like two pencils held together with a rubber band, a clothespin, or specialized metal wick clips) to keep the wick upright and perfectly centered as you pour the wax. This prevents the wick from leaning and ensures an even burn.
If you’re adding fragrance or color, now is the time to incorporate them into your melted wax. Remove the wax from the heat source and stir in your chosen candle dye and/or fragrance oil. Follow the manufacturer’s recommendations for ratios, usually around 1 oz of fragrance oil per pound of wax. Stir gently for at least two minutes to ensure even distribution.
Things to Keep in Mind During Preparation and Pouring:
- Wick Selection: Choosing the correct wick size for your container diameter is vital for a good melt pool and to prevent tunneling or excessive flickering. Larger jars need thicker wicks or multiple wicks.
- Wick Centering is Key: A properly centered and taut wick will burn evenly and avoid touching the sides of the container, which could cause the glass to overheat.
- Layered Candle Technique: If you’re creating a layered candle with different colors, pour one color at a time. It’s imperative to allow each layer to completely solidify before pouring the next. Rushing this step will cause the colors to bleed and mix, losing your distinct layered effect.
- Marble Effect: If a marbled look is what you’re after, you can pour a second, partially melted (but not fully liquid) layer of wax onto the first layer while it’s still slightly soft, then gently swirl with a stick.
- Pouring Temperature: While not strictly necessary for this simple reuse method, advanced candle makers often pour wax at specific temperatures (usually between 160-180°F or 71-82°C) to prevent frosting and ensure a smooth top. If your wax is too hot, it can cause the wick to sink or create sinkholes upon cooling.
You can also recycle old containers for your new candle, adding another layer of eco-friendliness to your project!
Step 3: Pour, Cure, and Finish Your Upcycled Candle
With your wax melted and your container ready, it’s time for the grand finale: pouring and allowing your new creation to solidify and cure.
Carefully pour the melted candle wax into your prepared container, making sure not to disturb the centered wick. Pour slowly and steadily to minimize air bubbles. Fill the container, leaving about half an inch of space from the top for safety and easier lighting.
Now comes the most important, albeit passive, step: letting everything solidify. Place your freshly poured candle in a cool, undisturbed area away from drafts or direct sunlight. This allows the wax to cool and harden evenly. Depending on the size of your candle and the room temperature, this can take anywhere from a few hours to overnight.
As the wax cools, you might notice a slight “sinkhole” or depression forming around the wick. This is normal! If it happens, simply remelt a small amount of your leftover wax and pour a thin top-up layer to fill the depression, creating a smooth, flat surface. Let this top-up layer cool completely as well.
Once completely solidified, carefully remove your wick centering tool. Trim the wick to about ¼ inch (0.6 cm) from the surface of the wax. A shorter wick ensures a cleaner, safer, and longer burn. Congratulations, your beautiful, upcycled candle is almost ready!
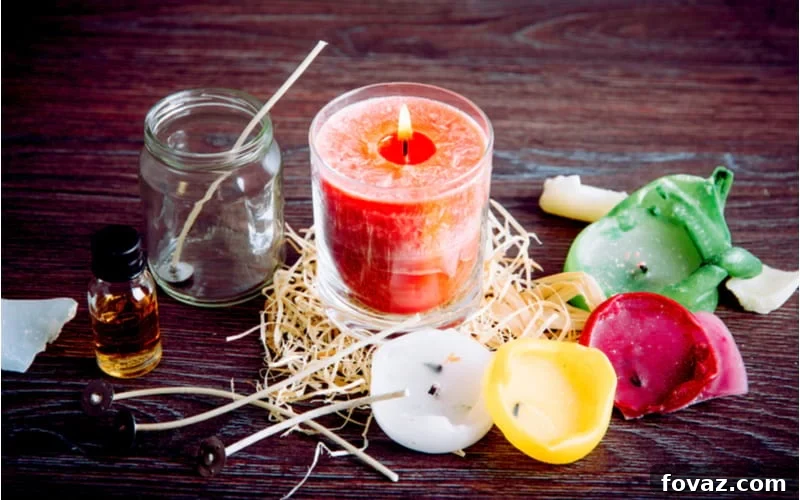
The Curing Process: For optimal performance, especially if you added fragrance oils, it’s highly recommended to let your candle “cure” for 24-48 hours (or even up to a week for stronger scents). This allows the wax and fragrance oils to bond fully, resulting in a stronger scent throw and a more even burn when you finally light it.
Grab your finished candle, marvel at its unique patterns or vibrant layers, and prepare to enjoy its renewed glow! Light the wick safely with a lighter and relish the satisfaction of your sustainable, handmade creation.
For layered candle inspiration and visual guidance, watch this video from With Love Marium:
Important Safety Precautions for DIY Candle Making
While reusing candle wax is a fun and eco-friendly activity, safety should always be your top priority. Adhere to these guidelines:
- Never Leave Melting Wax Unattended: Wax can overheat quickly and become a fire hazard. Stay in the room and monitor the process closely.
- Use a Double Boiler or Wax Warmer: Avoid direct heat on a stovetop. Water baths provide a gentle, controlled heat source.
- Work in a Well-Ventilated Area: Fumes from melting wax can be strong, especially from scented candles.
- Keep Water Away from Hot Wax: Water can cause hot wax to splatter violently, leading to burns.
- Keep a Fire Extinguisher Nearby: Just in case of an emergency, it’s wise to have one accessible.
- Store Materials Safely: Keep wicks, wax, and oils out of reach of children and pets.
- General Candle Safety: Once your new candle is complete, always burn it on a heat-resistant surface, away from drafts, flammable materials, and out of reach of children and pets. Never leave a burning candle unattended.
Frequently Asked Questions About Reusing Candle Wax
Can I mix different types of wax?
Yes, you can typically mix different types of wax (e.g., soy, paraffin, beeswax) when reusing them. However, be aware that mixing may alter the burning characteristics, scent throw, and appearance (like frosting) of your new candle. Experimentation is part of the fun!
How do I clean old candle jars for reuse?
To clean old candle jars, place them in the freezer for a few hours. The remaining wax will shrink and become brittle, making it easy to pop out with a butter knife. Any residue can be wiped away with a paper towel and hot, soapy water. Alternatively, place the jars in a shallow bath of hot water (not boiling) to soften the wax for easy removal.
What if my new candle has a weak scent?
The strength of the scent depends on the original wax, how much fragrance oil was added, and the curing time. If your upcycled candle has a weak scent, consider adding more fragrance oil during the melting stage next time, or allow for a longer curing period (up to a week) to help the scent fully develop.
Conclusion: Ignite Your Creativity and Embrace Sustainability
We hope you learned something truly valuable today! Who knew that creating a new, beautiful, and personalized candle from old, seemingly unusable ones could be this easy and rewarding? By following these steps, you’re not just making a candle; you’re contributing to a more sustainable lifestyle, unleashing your inner crafter, and extending the life of products you love.
Now that you know exactly how to reuse candle wax creatively, go on and make your own! Experiment with colors, scents, and containers, and enjoy the cozy ambiance your handmade creations bring.
What did you think of this creative and very rewarding DIY on how to reuse candle wax? Tell us in the comments section below!
UP NEXT:
- Fun & Festive DIY! Make Your Own Funfetti Candle
- How To Make a Candle | DIY Homemade Candles
- How To Restore A Rusty Cast Iron Griddle Using A Ball Of Steel Wool
Calling all crafting DIYhards, DIY Projects needs YOU! Click here if you want to write for us.
Don’t forget to stay connected with us on Facebook, Twitter, and Instagram!