
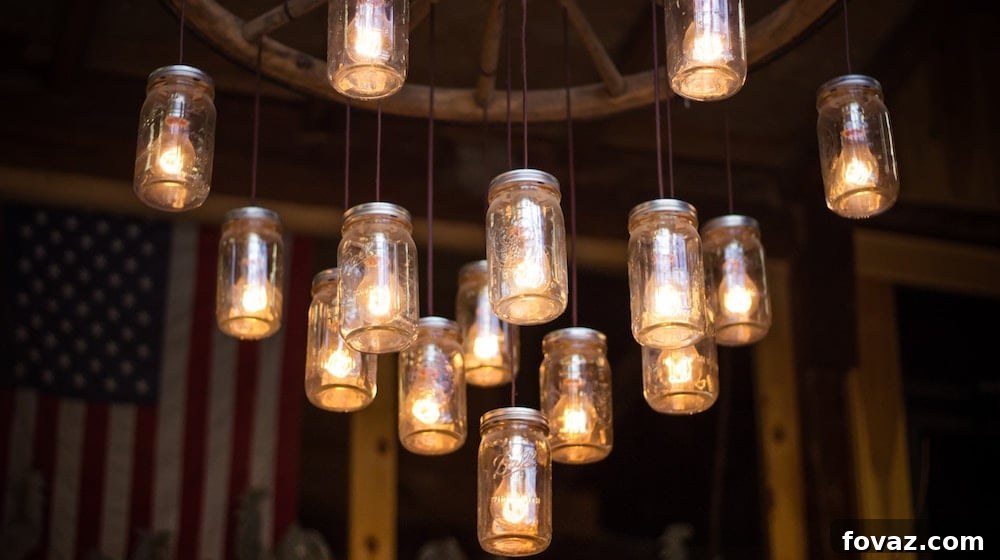
Are you searching for a unique way to enhance your home’s ambiance without breaking the bank? Look no further! This DIY prism candle holder project, crafted from simple mason jars, offers a captivating solution. It’s an ingenious and budget-friendly decor idea that transforms ordinary light into a mesmerizing display of colors and shapes. Imagine soft, radiant light scattering through colorful glass elements, creating a magical atmosphere in any room or outdoor space. This simple yet elegant mason jar craft allows your light to take on a brand new, prismatic dimension. Get ready to unleash your creativity, add a personal touch to your surroundings, and illuminate your world in style. Let’s dive into this exciting project!
How to Craft a Dazzling Prism Candle Holder from Mason Jars
Creating your own prism candle holder is a remarkably satisfying and easy project, perfect for beginners and seasoned crafters alike. This detailed guide will walk you through each step, ensuring you achieve a beautiful, professional-looking result. Prepare to impress your guests and add a touch of handmade charm to your decor with these luminous creations.
Essential Supplies for Your Prism Mason Jar Light Project:
Before embarking on your crafting journey, gather all the necessary materials. Having everything at hand will make the process smoother and more enjoyable. Most of these items are readily available at craft stores, hardware shops, or online retailers, making this a highly accessible DIY endeavor.
- Mason Jars: Opt for clean, clear glass mason jars of various sizes (pint, quart, or wide-mouth jars work best) to create a diverse collection. Different sizes can hold different types of candles and offer varied light dispersion. Ensure they are thoroughly clean and dry before starting.
- Round Glass Decorative Elements: These are the stars of your prism effect! Look for flat-backed glass marbles, glass gems, polished river stones, or even small, colorful glass nuggets. They come in an array of colors and transparencies, allowing for endless design possibilities. Consider clear, iridescent, or multicolored options to achieve different visual effects when light passes through them.
- Strong Adhesive for Glass (e.g., E6000 Glue): A reliable, clear adhesive that bonds securely to glass is crucial. E6000 is an excellent choice due to its strong, flexible, and waterproof bond. Other suitable options include clear silicone adhesive or a strong epoxy designed for glass. Always ensure the glue dries clear and is appropriate for permanent adhesion to non-porous surfaces.
- Decorative Ribbon or Twine: To add a charming finishing touch and personalize your creation. Natural twine, rustic jute, satin ribbon, lace, or even colorful fabric strips can be used to adorn the jar’s neck or lid.
- Tea Lights or Small Candles: Classic tea lights are perfect, but you can also use small votive candles, battery-operated LED tea lights (a safer, flameless option), or even small pillar candles if your jar is wide enough.
- Lighter or Matches: For illuminating your candle once the project is complete (if using real flames).
- Small Brushes or Applicators: For precise and controlled application of the adhesive, especially if working with smaller glass pieces or intricate designs. Toothpicks or craft sticks can also work well.
- Gloves (Optional but Recommended): To protect your hands from glue and ensure a clean working surface.
- Newspaper or Drop Cloth: To protect your work surface from glue spills.
Step-by-Step Instructions to Craft Your Beautiful Prism Candle Holder:
Patience and precision are key to achieving a stunning result. Take your time with each step, especially the gluing process, to ensure a durable and visually appealing finished product.
Step 1: Prepare Your Mason Jar and Apply Adhesive
Begin by ensuring your mason jar is immaculately clean and completely dry. Any residue or moisture can compromise the glue’s adhesion. Work in a well-ventilated area, as some glues can have strong fumes. Lay down newspaper or a drop cloth to protect your workspace.
Take your chosen adhesive, such as E6000 glue, and apply it in small, manageable patches to the outer surface of the mason jar. It’s best to work in sections, perhaps starting from the base of the lid downwards, or from the bottom rim upwards, depending on your preferred design flow. Apply enough glue to create a firm bond, but avoid excessive amounts that might squeeze out from between the glass elements. Using a small brush or applicator can help you control the spread of the glue, ensuring it stays within the area where you intend to place your glass pieces. Focus on an area roughly 2-3 inches square at a time, allowing you to carefully position your decorative elements before the glue begins to set.
Step 2: Carefully Apply Glass Decorative Elements to the Jar
Once you’ve applied a patch of glue, immediately begin adding your round glass decorative elements over the adhesive. This is where your creativity truly shines! Take your time to plan out the design. You can arrange the glass pieces randomly for a mosaic-like effect, create a more structured pattern, or even alternate colors and sizes for visual interest. Some round glass elements may be bigger or smaller than others, so experiment with their placement to fill gaps and create a harmonious look. Gently press each glass piece firmly into the glue to ensure good contact and secure adhesion. Avoid sliding them around too much once placed, as this can smear the glue.
After you’ve covered a section with glass elements, allow it to dry and cure sufficiently before moving on to the next section. This process took me a few hours per section, and sometimes even a full day for complete curing, so there’s absolutely no rush! For a truly secure bond, it’s often best to let the glue cure overnight before handling the jar extensively or starting the next section. Gradually cover the entire body of the mason jar, section by section, until it’s adorned with a beautiful tapestry of glass. Remember to maintain consistent spacing (or intentional varied spacing) between your glass pieces for the best light diffusion and aesthetic appeal.
Step 3: Add the Finishing Touches and Prepare for Display
With all the glass elements securely attached and the glue fully cured (which can take 24-72 hours, depending on your adhesive), it’s time to add those special finishing touches that truly make your prism candle holder unique. You can add your own decor to the lid of the mason jar, perhaps painting it, covering it with fabric, or even attaching more small glass elements. Alternatively, you can tie a simple yet elegant ribbon or a rustic twine around the neck of the jar. Add a small charm, a wooden bead, or a personalized tag to enhance its charm and make it truly your own. Consider using contrasting colors or textures for the ribbon to complement the glass elements.
If you’re feeling extra crafty, why not make your own DIY scented soy candle to place inside your newly created prism candle holder? Crafting your own candles allows you to customize the scent, color, and size, perfectly matching your decor and mood. Once your candle is ready, gently place it inside the jar. Light it up with a lighter, and voilà! You’ve just created a stunning prism candle holder that also functions as a beautiful prism candle lantern. The light will dance through the glass, casting enchanting patterns and colors around your space. It’s not just cool; it’s a piece of functional art!
Unlock Your Inner Chandler: Make Your Own Candles
For those eager to dive deeper into the world of candle making (and we know many of you are!), creating your own candles adds another layer of personalization and satisfaction to this project. Imagine a prism candle holder radiating light from a candle you poured and scented yourself! Crafting candles from scratch allows you to choose eco-friendly waxes, therapeutic essential oils, and dyes that perfectly match your home’s color scheme. It’s a wonderful hobby that complements your DIY decor efforts.
Whether you opt for soy wax, beeswax, or paraffin, the process of making candles is surprisingly straightforward and incredibly rewarding. From melting the wax and adding fragrance to setting the wick and pouring, each step is an opportunity to create something truly unique. Homemade candles also make for thoughtful, personalized gifts when paired with your handmade prism jar. You can find numerous resources and beginner kits available that provide everything you need to start making beautiful, aromatic candles right away.
See It In Action: Video Tutorial
Sometimes, seeing is believing! For a visual guide and a detailed demonstration of the steps involved in crafting these exquisite prism candle holders, check out this helpful video tutorial. It provides a fantastic overview, illustrating the application of glue and the placement of glass elements, helping you visualize the process with clarity.
https://www.youtube.com/watch?v=MyqQuyL-9F4
This video offers additional tips and tricks, ensuring you can replicate the project with confidence and achieve dazzling results. It’s a great complement to these written instructions, providing a comprehensive learning experience.
Transform Your Space with the Magic of Prism Candles
Prism candles are more than just decorative items; they are mood enhancers, conversation starters, and sources of serene beauty. Their versatility makes them fantastic additions to both indoor and outdoor decor, effortlessly elevating any setting. The dreamy, star-like effect they give off when illuminated is simply captivating, creating an atmosphere of warmth and wonder.
Indoor Ambiance:
- Living Room Centerpiece: Arrange a cluster of prism candle holders of varying heights on your coffee table or mantelpiece to create a stunning focal point.
- Bedroom Sanctuary: Place one or two on your bedside table or dresser for soft, relaxing light that encourages tranquility and calm.
- Dining Table Decor: Use them as unique centerpieces for dinner parties, casting beautiful patterns across your table and walls.
- Bathroom Retreat: Add a touch of spa-like luxury by placing them around your bathtub for a truly relaxing soak.
- Shelf and Nook Embellishment: Tuck them into bookshelves or display cabinets to highlight treasured items and add subtle illumination.
Outdoor Enchantment:
These prism candle mason jar crafts truly shine outdoors, transforming ordinary spaces into magical realms. When hosting an evening party outdoors, a few of these scattered strategically can dramatically enhance the ambiance.
- Patio and Deck Decor: Line them along railings, steps, or place them on outdoor tables to cast a festive glow.
- Garden Path Lighting: Hang them from shepherd’s hooks or tree branches along pathways to guide guests and create an ethereal effect.
- Fairy Wonderland: Imagine transforming your bare backyard into a whimsical fairy wonderland at night, with dozens of twinkling lights dancing through the glass.
- Special Events: Perfect for outdoor weddings, engagement parties, or anniversary celebrations, adding a handcrafted, elegant touch.
- Camping Ambiance: Bring them along on your next camping trip to add a cozy, inviting glow to your campsite.
Remember to always prioritize safety, especially when using real flames. Ensure candles are placed on stable surfaces, away from flammable materials, and never leave them unattended. For outdoor use or areas with children and pets, flameless LED candles are an excellent, safe alternative that still provide that magical flicker.
Have fun experimenting with different colors of glass, arrangements, and candle types to create a collection that perfectly suits your style and needs. These handmade treasures are not only beautiful but also infuse your space with a sense of personal accomplishment and unique charm.
Share Your Creativity!
We absolutely love seeing your handmade creations! Will you give this DIY prism candle from mason jar craft a try? We’d be thrilled to hear how your project turned out, any unique twists you added, or tips you discovered along the way. Share your experiences and photos in the comments below! Your insights could inspire fellow crafters and help build a vibrant community of DIY enthusiasts.
Explore More DIY Inspiration:
If you’re passionate about transforming ordinary items into extraordinary decor, you’re in the right place! Continue your crafting adventure with more exciting projects.
Up Next: 21 Bright DIY Outdoor Lantern Ideas For A Cool Garden Design
Discover even more ways to illuminate your outdoor spaces with creative and easy-to-make lanterns that will add character and charm to your garden or patio.
Stay Connected with Our Creative Community!
Never miss out on new DIY projects, crafting tips, and inspiring ideas. Join our growing community of makers and shakers across our social media channels. We regularly share fresh content, engage with our followers, and celebrate the joy of handmade living.
Stay connected with us on Facebook, Twitter, Pinterest, and Instagram!
We look forward to seeing you there and sharing more exciting DIY adventures together!
Editor’s Note: This post was originally published on May 15, 2014, and has been updated for quality, relevancy, and to provide a more comprehensive and engaging guide for our readers.