
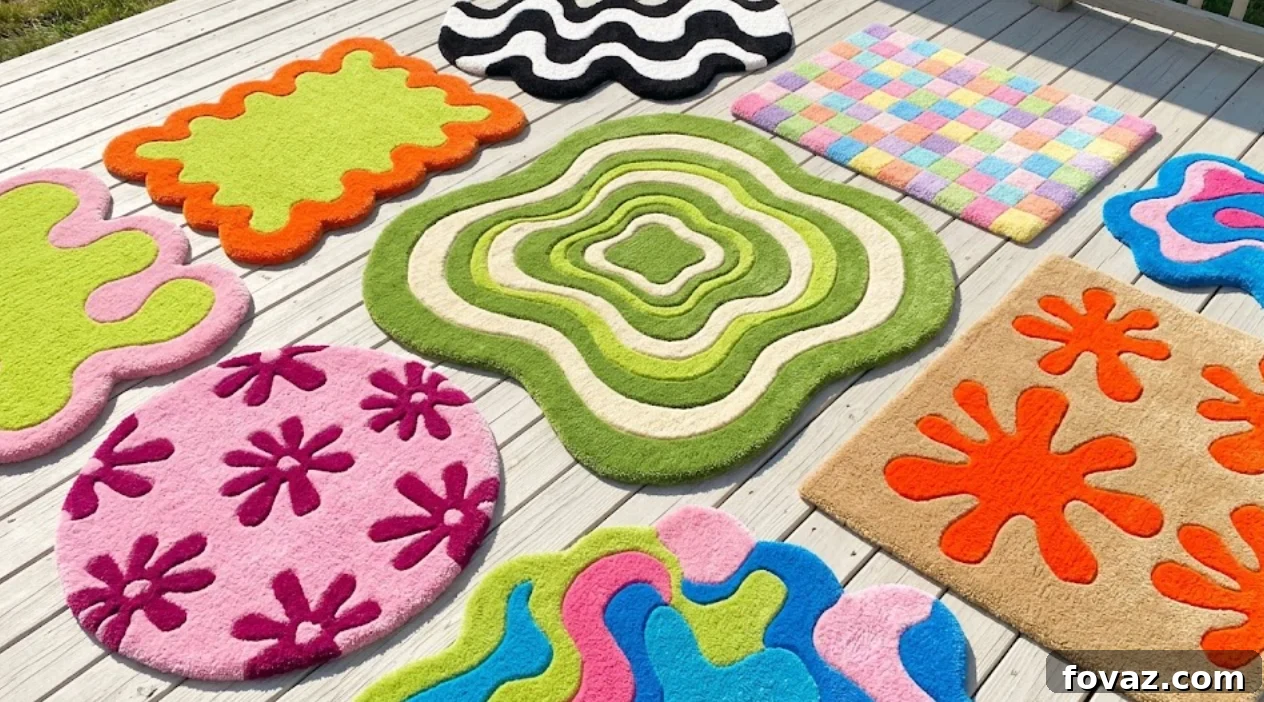
Have you ever been mesmerized by those satisfying rug-making videos online? That hypnotic buzz of the tufting gun, turning simple yarn into a plush, custom piece of art, is more than just a viral trend. It’s a deeply rewarding craft that offers a unique creative outlet. Imagine transforming a blank canvas into a professional-quality rug for your home in just a single weekend. This comprehensive guide to rug tufting for beginners will walk you through everything you need to know, from the essential supplies to the final trim.
For any DIY enthusiast, rug tufting is the ultimate way to break free from generic, store-bought designs. You get to design and create something that is vibrant, textured, and uniquely yours. There’s a special kind of magic in watching a plain piece of fabric evolve into a functional, beautiful rug right before your eyes. And the best part? When it’s finished, you get to place it in your home and proudly tell everyone, “I made that.” This step-by-step guide is designed for absolute beginners, using plain English with no prior experience necessary.
Your Essential Rug Tufting Toolkit for Beginners
Getting started with rug tufting requires a specific set of tools and materials. While you can buy these items individually, many companies offer convenient starter kits. Here is a complete checklist of what you’ll need to begin your first project:
- Tufting Tool: You’ll need either an electric tufting gun or a manual punch needle. We’ll explore the differences between these two options below.
- Tufting Frame: A sturdy wooden frame is necessary to hold your backing fabric taut. You can easily build one yourself with basic lumber and screws.
- Primary Backing Fabric: This is the foundation of your rug. Monk’s cloth is the most recommended option for beginners, though burlap can also be used.
- Yarn: Acrylic or wool yarn are the best choices for tufting. The right yarn is crucial for a successful project.
- Carpet Adhesive: A strong, flexible adhesive, like synthetic rubber carpet glue, is essential to lock the yarn in place.
- Finishing Supplies:
- Staple gun or carpet tack strips to attach the fabric to the frame.
- Secondary backing fabric, such as non-slip matting or felt, to give your rug a finished look.
- Spray adhesive and a hot glue gun to attach the secondary backing and seal the edges.
- A palette knife for spreading the glue evenly.
- Scissors and a permanent marker for cutting fabric and tracing your design.
- Clippers or shears for trimming the final pile.
Tufting Gun vs. Punch Needle: Which is Right for a Beginner?
Your first major decision in rug tufting is choosing your primary tool. The choice between a tufting gun and a punch needle primarily comes down to your budget, desired speed, and the level of hands-on involvement you prefer.
The Manual Punch Needle
A punch needle is a simple, handheld tool that requires you to manually push yarn through the fabric, one loop at a time. It’s a much slower and more methodical process, offering a meditative, hands-on experience. If you enjoy crafts that allow you to zone out and work with your hands, this is an excellent starting point. It helps you understand the fundamental mechanics of how a rug is constructed. The low cost of entry, typically between $20 and $60, makes it a low-risk way to try out the craft without a significant investment.
The Electric Tufting Gun
An electric tufting gun automates the punching process. When you pull the trigger, the gun rapidly punches the yarn through the fabric for you. A section of a rug that might take an hour to complete with a punch needle can be finished in just ten minutes with a gun. If your goal is to produce a finished rug quickly and you’re ready to make a larger initial investment, a tufting gun is the way to go. These tools typically range from $150 to $300. Both methods produce authentic, high-quality rugs; the best choice depends on whether you have more time or more money to invest upfront.
How to Tuft Your First Rug: A Step-by-Step Guide
Ready to get started? Follow these steps carefully to ensure your first rug is a success.
Step 1: Build and Prepare Your Tufting Frame
Your tufting frame is a large wooden square that holds your backing fabric perfectly taut while you work. Think of it as an easel for your textile art. You can construct a simple frame by screwing four pieces of lumber together at the corners. To prevent the wood from splitting, always pre-drill your screw holes. The inner dimensions of your frame will determine the maximum size of your rug. A good starting size is a 90cm x 90cm (or 3ft x 3ft) interior, which works well with standard fabric widths. You can add small feet to the bottom so it stands independently, or you can clamp it to a sturdy table. Ensure it’s at a comfortable working height to avoid hunching over.
Step 2: Stretch Your Primary Backing Fabric
The primary backing fabric is the grid-like canvas that will hold all of your yarn. For beginners, Monk’s cloth is the ideal choice. Its clear grid lines help you keep your tufted rows straight, and it holds tension exceptionally well. To attach the fabric, start on one side of the frame, pull it tight, and secure it with a staple gun or carpet grippers. Move to the opposite side, pull the fabric taut, and secure it. Repeat this process for the remaining two sides, working your way around the frame and gradually increasing the tension. When you’re finished, the fabric should be as tight as a drum; tapping it should produce a deep, resonant sound. A sagging fabric will lead to uneven tufts and potential tears.
Step 3: Choose and Transfer Your Design
For your first project, the most important rule is to keep your design simple. Choose bold, graphic shapes with minimal detail. Think geometric patterns, simple lettering, or a classic smiley face. Limit yourself to two or three colors. Avoid thin lines, intricate details, and complex patterns, as these are difficult to execute cleanly while you’re still learning to control the tufting gun. A simple design will be more forgiving of any wobbly lines and will look fantastic once finished. To transfer your design, you can use a projector to trace the image onto the fabric with a permanent marker, or you can draw it freehand. Don’t worry, the marker lines will be completely covered by the yarn.
Step 4: Thread Your Tufting Gun
Threading the gun may look intimidating, but it’s a straightforward process. First, feed your yarn through the guide on top of the gun. Next, use a wire threader (a bent paperclip works perfectly) to pull the end of the yarn through the tiny hole in the needle at the tip. For a lush, dense rug, you should always tuft with at least two strands of yarn at the same time. A single strand is often too thin and results in a sparse-looking pile. Using two to four strands creates a full, professional finish. The thicker your yarn, the fewer strands you’ll need.
Step 5: Practice Your Technique on a Scrap Piece
This step is not optional! Before you start on your actual design, clamp a scrap piece of backing fabric to your frame and practice. Begin by tufting straight lines. Get a feel for the gun’s speed, which is typically adjustable via a knob on the handle. Start on a slower setting. Once you’re comfortable with straight lines, practice gentle curves. Remember two key principles: the flat metal foot of the gun must remain pressed firmly against the fabric at all times, and you must move the entire gun in the direction you want to tuft, not just pivot your wrist.
Step 6: Begin Tufting Your Rug
It’s time to bring your design to life. Start by tufting the outlines of each colored section of your design. This creates a clean, defined border that you can then fill in. Work from the bottom of the frame upwards, filling in each color block with neat, closely spaced rows. The back of the rug (the side you are working on) will look like tight loops, while the front will have a shaggier, cut-pile appearance. Ensure your rows are close enough that no backing fabric is visible from the front.
Step 7: Apply the Adhesive
This is the most critical step for ensuring the longevity of your rug. While the rug is still stretched on the frame, use a palette knife to apply a generous, even layer of carpet adhesive to the entire back (the looped side). Make sure every single piece of yarn is thoroughly coated. Extend the glue about an inch beyond the tufted area to seal the edges of the fabric and prevent fraying. Let the glue dry completely for at least 24 hours without moving or touching it. If you remove the rug from the frame before the glue is fully cured, it will curl up at the edges.
Step 8: Finish Your Rug
Once the glue is rock hard, you can cut your rug from the frame. Leave a 1-2 inch border of excess fabric around your design. To create a clean edge, carefully fold this border over onto the glued back and secure it with a hot glue gun. For a professional finish, cut a piece of secondary backing material (like felt or non-slip matting) to the exact shape of your rug. Use spray adhesive to attach it to the back, covering the folded edges. Finally, use electric shears or sharp scissors to trim the front pile of your rug. This evens out the yarn length and makes the design crisp and clean. You can also use the shears to carve details between colors, creating a 3D effect.
Frequently Asked Questions for Tufting Beginners
Here are answers to some of the most common questions new tufters have.
What is the best yarn for a beginner to use?
Acrylic yarn is the ideal choice for beginners. It’s affordable, durable, and comes in a vast array of colors. It feeds smoothly through a tufting gun and cuts cleanly. Wool is another excellent option, known for its softness and resilience, but it is more expensive. Avoid using cotton yarn, as its fibers can be too slippery for the gun’s cutting mechanism, leading to an uneven pile.
How much does it cost to start rug tufting?
The initial investment can vary. For a budget-friendly start using a punch needle, you can gather all the necessary supplies for under $100. If you opt for an electric tufting gun, expect the initial setup cost to be between $250 and $400. Remember that most of these supplies, including the frame and the gun, are a one-time purchase that can be used for many future projects.
Why is my yarn falling out of the rug?
If your yarn tufts are pulling out easily, it’s almost always an issue with the glue. This usually means the adhesive layer was applied too thinly or the rug was not allowed to cure for the full 24 hours. The fix is to apply another thorough coat of adhesive to the back and let it dry completely before handling.
What’s the best backing fabric for tufting?
Monk’s cloth is highly recommended for beginners. Its even weave and visible grid lines make it easy to stretch properly and keep your lines straight. Primary tufting cloth is another premium option. While cheaper, burlap can be more difficult for beginners to work with as it can stretch unevenly and is more prone to tearing.
Your first rug doesn’t need to be perfect. The goal is to learn the process and have fun creating something with your own two hands. Every expert tufter started with a simple design and a pile of practice pieces. Embrace the learning curve, don’t rush the crucial gluing step, and you’ll soon have a finished rug you can be proud of. Now go make something amazing!