
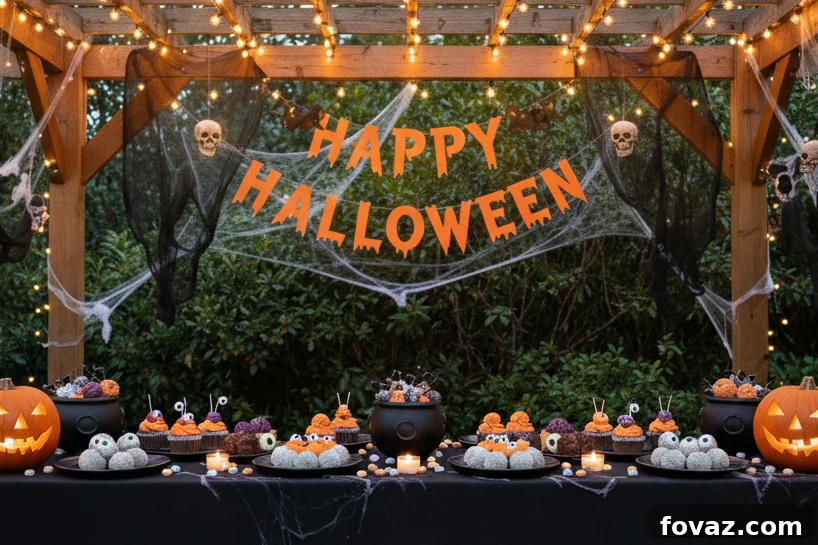
Transform your Halloween dinner party into an unforgettable, enchantingly spooky affair without breaking the bank! This year, conjure up a bewitching atmosphere with incredibly creative, budget-friendly DIY table decor that promises both safety and style. Our carefully curated collection features projects that are not only simple to craft but also prioritize a family-friendly environment, utilizing LED lights and low-odor materials to ensure a hazard-free celebration.
- Unearth 7 beginner-friendly projects, each costing $15 or less.
- Embrace safety with LED lighting and non-toxic, low-odor craft materials.
- Discover ingenious ideas for centerpieces, ghostly candles, and delightful party favors.
Hosting a Halloween dinner party for your friends and family is an exciting tradition. Beyond a tantalizingly eerie menu, it’s the table decor that truly elevates a spooky soirée from good to ghastly-great. A thoughtfully decorated tablescape sets a hauntingly fun ambiance, instantly immersing everyone in the spirit of trick-or-treat and creating lasting memories. Imagine your guests’ delight as they gather around a table adorned with unique, handmade creations that sparkle with Halloween magic!
This year’s spooktacular tablescape projects are designed with a focus on safe, family-friendly DIY centerpieces and accents. They boast a high-end, sophisticated look that belies their incredibly affordable price tag. We’ve meticulously gathered a Halloween table decor roundup that showcases truly unique items, such as mesmerizing glowing mushroom terrariums and captivating floating candles, guaranteed to impress even the most discerning spirits. Our commitment to safety is paramount: all projects utilize battery-operated LED lights instead of open flames and low-odor paints instead of strong-scented formulas, ensuring a perfectly safe and pleasant gathering for guests of all ages, including your little monsters and furry friends.
The Best DIY Halloween Table Decor Ideas for 2025
Get ready to cast a spell on your guests with a stunning, handcrafted setup that’s all treat and no trick! We’ve brewed up seven boo-tiful Halloween table decor projects, each costing a mere $15 or less. Each idea comes with clear, concise steps and essential safety tips to ensure a worry-free and wonderfully wicked celebration. Let’s dive into these enchanting creations and transform your dining space!
1. Gothic Mushroom Terrarium Centerpieces
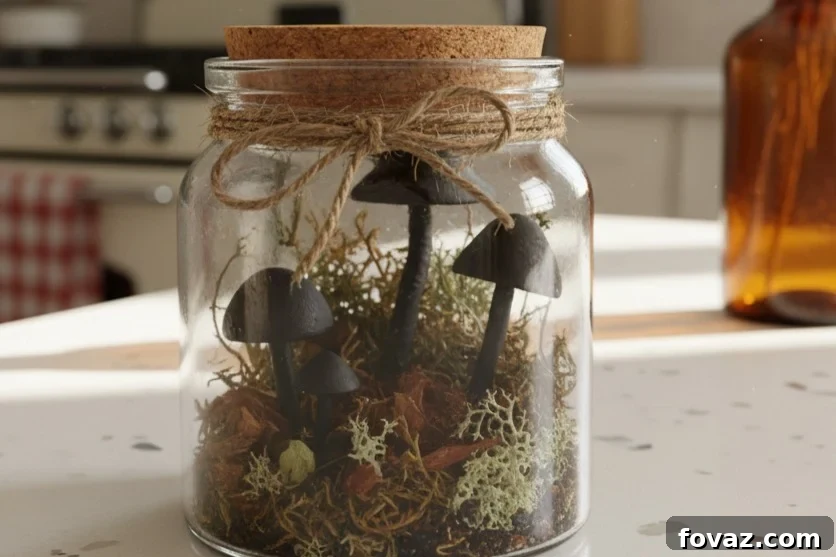
Difficulty: Easy
Time: Approximately 20 minutes
Cost: $6–$12
Materials: A clean, thrifted glass jar (various sizes work well for a varied display), sheet moss (natural or artificial), a selection of faux mushrooms, tiny bone or beetle charms for an eerie touch, warm-white LED tea light or puck light, hot glue gun with glue sticks, iridescent glitter (optional, for an extra sparkle).
Steps:
- Begin by pressing a piece of sheet moss firmly into the bottom and sides of your clean glass jar, creating a natural, earthy base.
- Using hot glue, artfully arrange faux mushrooms and tiny charms onto the moss and the inner glass surface. Create small, intriguing clusters for a miniature enchanted forest effect.
- Carefully place the warm-white LED light inside the jar, nestled within the moss, or attach it securely under the lid if your jar allows, ensuring the glow illuminates your tiny scene.
- For a touch of whimsy, add a very light pinch of iridescent glitter (optional) before closing the lid securely. Position these magical terrariums as your primary table centerpieces or line them up for an impressive display.
Safety/Cleanup Tip: Always opt for battery-powered LEDs to completely eliminate the risk of open flames, especially important around food and guests. When using glitter, ensure any stray particles are meticulously dusted off the table and surrounding areas to maintain food safety and cleanliness.
2. Wire Pumpkin Fairy-Light Centerpieces
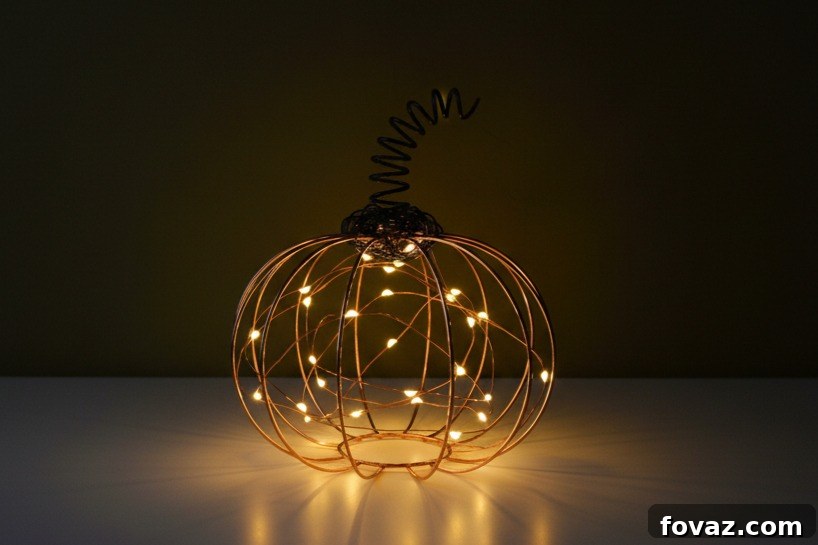
Difficulty: Easy
Time: Approximately 20 minutes per pumpkin
Cost: $8–$14 (per pumpkin)
Materials: 16–18 gauge craft wire (easy to bend but sturdy), micro-LED fairy lights (battery-operated), wire cutters or pliers, a round form like a bowl or ball (for shaping), decorative ribbon or natural twine, strong tape (to discreetly secure the battery pack).
Steps:
- To form the classic pumpkin curve, carefully shape 6–8 lengths of craft wire over your chosen round form (e.g., a bowl). These will serve as the “ribs” of your pumpkin.
- Gather and twist all the wire ends together securely at both the top and bottom of your pumpkin form. This crucial step holds the overall pumpkin shape firmly in place.
- Begin wrapping the micro-LED fairy lights around the wire ribs, distributing them evenly to create a soft, enchanting glow. Position and secure the battery pack discreetly underneath the pumpkin.
- Conclude your creation by tying a festive ribbon or rustic twine around the top twisted wire section, cleverly forming a natural-looking pumpkin stem.
Safety/Cleanup Tip: Always ensure that any sharp wire ends are bent inward or covered with a dab of hot glue to prevent accidental pokes. Secure all cords and battery packs firmly to avoid any potential electrical hazards or tripping risks on your busy Halloween table.
3. Ghost Face Taper Candles (No-Pour)
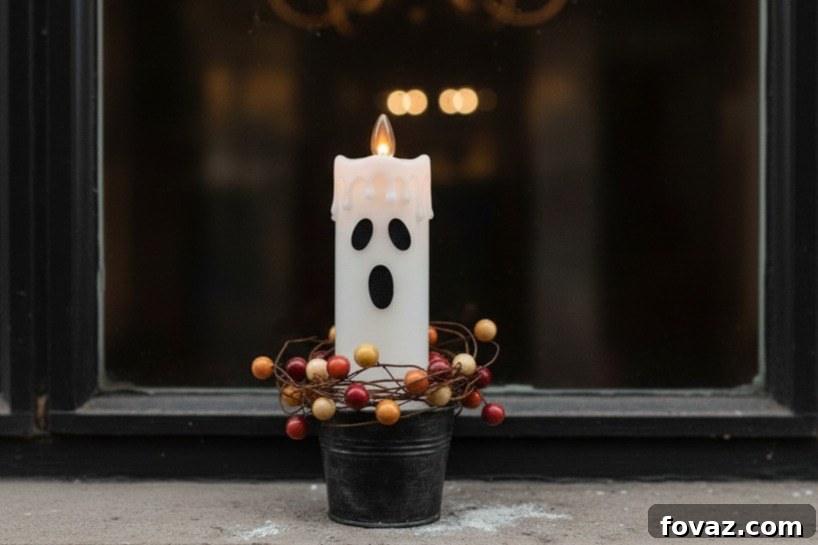
Difficulty: Easy
Time: Approximately 15 minutes for a set of 6–8 candles
Cost: $3–$7
Materials: White taper candles (traditional or safer LED tapers), a black paint pen (or black acrylic paint with a fine-tipped brush for precision), candle holders, rubbing alcohol and a cotton pad (optional, for pre-cleaning).
Steps:
- If desired, gently clean the surface of each taper candle with rubbing alcohol and a cotton pad. This helps to remove any oils or residue, ensuring the paint adheres better and lasts longer.
- With your black paint pen or fine brush, dot two distinct oval shapes for eyes and a tiny “O” shape for a classic ghost mouth onto each candle. Experiment with different expressions for varied character.
- Allow the painted faces to dry completely for a few minutes. If the color appears too translucent, apply a second, thin layer of paint to achieve a more opaque and striking look.
- Once dry, place the ghost-faced candles securely into their holders and arrange them elegantly down the center of your table, creating a captivating and slightly eerie glow.
Safety/Cleanup Tip: For crowded tables or prolonged use, it is highly recommended to use LED tapers to eliminate fire risk. If using real flame candles, maintain at least a 12-inch distance from any other decor, flammable materials, and never, under any circumstances, leave burning candles unattended. Always extinguish them before leaving the room or going to bed.
4. Skeleton-Hand Napkin Rings
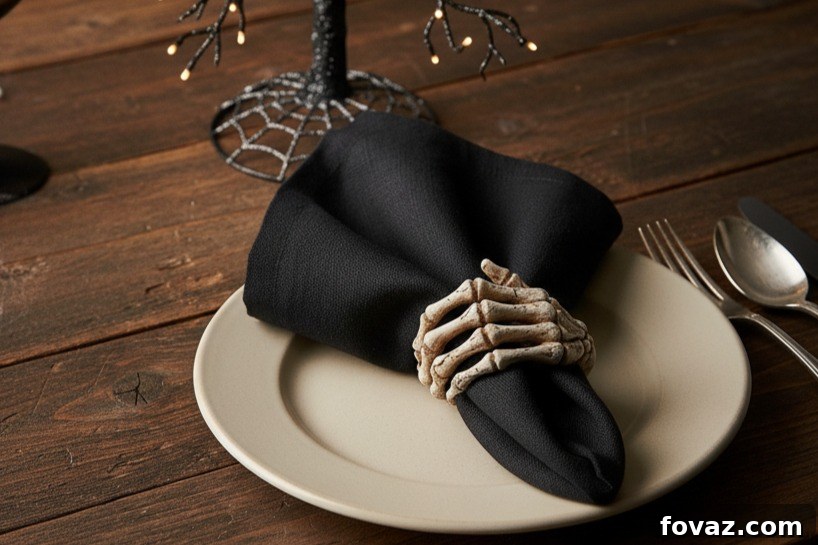
Difficulty: Easy
Time: Approximately 15 minutes for a set of 6
Cost: $5–$10
Materials: Small plastic skeleton hands (often found in party supply aisles), plain napkin rings (metal or wood are ideal), black or pewter spray paint for a sophisticated gothic finish, strong craft adhesive or gel super glue, scrap paper or cardboard to protect your work surface.
Steps:
- On a protected surface outdoors or in a well-ventilated area, spray paint both the plastic skeleton hands and the plain napkin rings with your chosen black or pewter color. Allow them to dry completely according to paint instructions.
- Once thoroughly dry, apply a strong craft adhesive or gel super glue to the back of one skeleton hand. Carefully position and press it firmly across each napkin ring, holding for 20–30 seconds to ensure a secure bond.
- Inspect your creations. If needed, apply small paint touch-ups to cover any missed spots or to enhance details, ensuring a polished finish.
- Once the glue is fully cured, slide these unique skeleton-hand napkin rings onto your folded napkins and place them artfully on each dinner plate, adding a macabre touch to your place settings.
Safety/Cleanup Tip: Always use spray paint in a well-ventilated outdoor area or by an open window to avoid inhaling fumes. Once the paint is dry, immediately discard the scrap paper or cardboard used for protection to prevent any accidental paint transfer.
5. Hanging “Floating” Candles
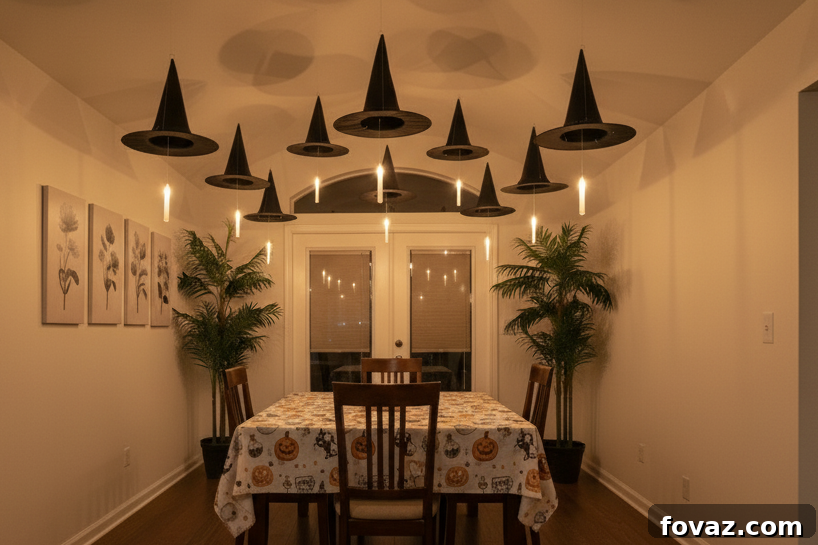
Difficulty: Easy
Time: Approximately 15 minutes for a set of 6–8
Cost: $6–$15
Materials: LED taper candles (essential for safety), clear fishing line (thin but strong), removable ceiling or command hooks, sharp scissors. (Optional alternative for water-based floating candles: glass vases/cylinders, water, submersible or floating LED tealights, glass pebbles for weight and sparkle).
Steps:
- Carefully attach removable adhesive hooks to your ceiling directly above your dining table, spacing them out as desired for your display. Ensure they are strong enough to hold the lightweight LED candles.
- Cut several equal lengths of clear fishing line. Securely tie one end of each line to the top “wick” section of your LED taper candles. Double knots are recommended for security.
- One by one, hang each prepared candle from a ceiling hook. Adjust the lengths of the fishing line to create a magical, staggered “floating” effect, reminiscent of a wizarding hall.
- Just before your guests arrive, switch on all the LED candles. Then, dim your room lights to truly enhance the illusion of candles magically suspended in mid-air, creating an enchanting glow.
Safety/Cleanup Tip: For this project, it is absolutely crucial to stick with LED candles. Real candles are a significant fire hazard when suspended. After your event, gently and carefully remove the adhesive hooks from the ceiling following the manufacturer’s instructions to avoid leaving any unsightly marks or damaging your paintwork.
6. Mini Cauldrons as Place Settings
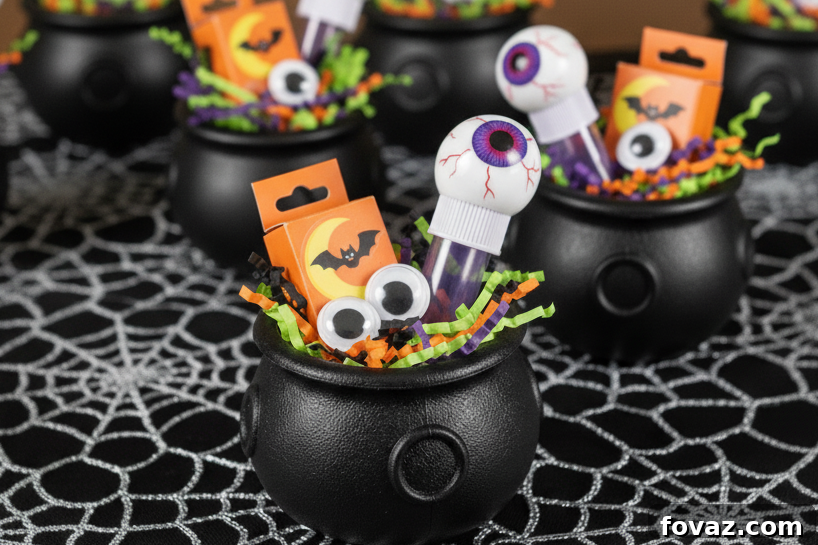
Difficulty: Easy
Time: Approximately 10–15 minutes for a set of 6–8
Cost: $6–$14
Materials: Mini plastic cauldrons (party favors work perfectly), an assortment of wrapped candies or decorative sheet moss, small LED tealights (optional, for an extra glow), cardstock or pre-made name tags, twine or ribbon, a hole punch, tissue paper or crinkle paper filler.
Steps:
- Thoroughly rinse and dry each mini cauldron to ensure they are clean. Then, place a small amount of tissue or crinkle paper inside to provide a base and cushion for your fillers.
- Fill each cauldron with a generous handful of wrapped candies for a sweet treat, or create a mystical display by adding a pinch of sheet moss and a small LED tealight for a gentle, eerie glow.
- Personalize each cauldron by tying a decorative ribbon or twine bow around the handle. For place settings, attach a small name tag, either punched with a hole and tied, or simply nestled within the contents.
- Finally, set one charming mini cauldron on each dinner plate, serving as both a delightful party favor and a unique, personalized place card for your guests.
Safety/Cleanup Tip: If using for edibles, always wash the cauldrons thoroughly before use. For the quickest and easiest cleanup, fill the cauldrons exclusively with individually wrapped candies. This prevents direct contact of food with the plastic and makes tidying up after the party a breeze.
7. Cheesecloth Ghost Minis
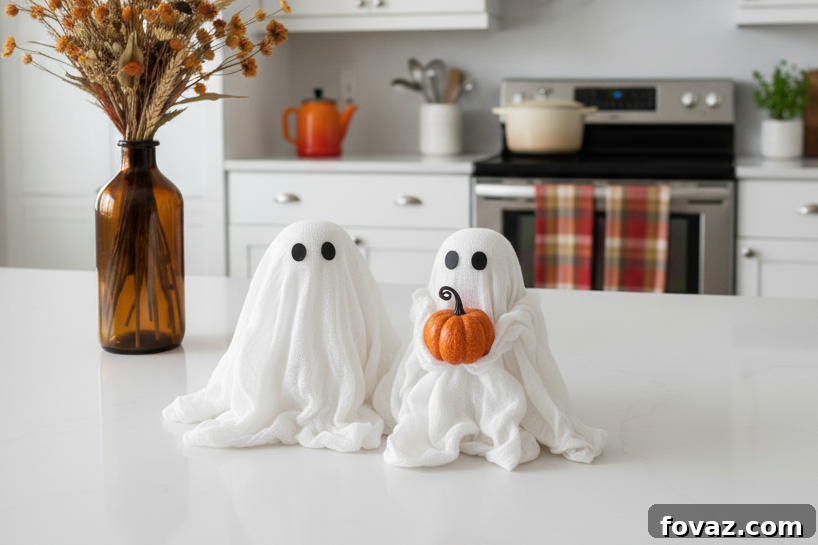
Difficulty: Easy
Time: Approximately 20 minutes active time (+ 1–2 hours drying time)
Cost: $4–$10
Materials: Cheesecloth (a generous amount), liquid starch or diluted Mod Podge (for stiffening), various forms for shaping ghosts (jars, cones, small inflated balloons), wax paper or parchment paper to protect your surface, tape, small black felt dots or googly eyes, small LED tealights, wood slices (optional, as bases).
Steps:
- Prepare your ghost forms: Rest small inflated balloons on top of jars or cones to create the desired height and shape for your mini ghosts. Secure the balloons with tape if needed.
- Cut squares of cheesecloth to size. Drape each square over a prepared form, then thoroughly soak the cheesecloth in liquid starch or a diluted Mod Podge solution, ensuring it’s fully saturated.
- Allow the cheesecloth ghosts to dry completely until they are stiff and hold their shape. This typically takes 1–2 hours, depending on humidity and the stiffening agent used. Once dry, carefully remove the internal balloons/forms.
- Once rigid, stick on small black felt dots or googly eyes to give each ghost a unique personality. Finally, place each finished ghost over a small LED tealight, allowing it to glow spookily from underneath.
Safety/Cleanup Tip: It is crucial to let the cheesecloth ghosts dry in a well-ventilated area or even outdoors. Liquid starch can have a strong scent while drying, and proper ventilation will prevent lingering odors indoors. Ensure all surfaces are covered with wax paper for easy cleanup of starch residue.
Halloween Table Decor Ideas: Craft ‘Til Midnight!
With a cauldron full of wickedly easy and enchanting DIY ideas, you are now perfectly equipped to host the most memorable Halloween dinner party yet. These projects are designed to inspire creativity, spark joy, and create a truly immersive experience for your guests. Remember, the ultimate goal is to have fun, express your unique spooky style, and create lasting, happy memories with all your favorite ghouls and goblins.
Which of these captivating and cost-effective Halloween table decor ideas will you be crafting to bewitch your guests this year? Share your plans and get ready for a hauntingly good time!
Related Projects
Don’t stop the crafting fun there! Explore even more Halloween-inspired ideas and projects on DIYProjects.com to complete your festive transformation:
- DIY Halloween Makeup Looks 2025: Cool Ideas For $10 or Less
- DIY Ghosts: Create Floating Halloween Decorations with Cheesecloth
- 9 Halloween Wood Crafts To Decorate Your Spooky Home With
Frequently Asked Questions (FAQs) About DIY Halloween Table Decor
Curious about these DIY projects? Here are answers to some common questions to help you get started:
Q1. Are these Halloween table decor projects safe for children and pets?
A: Absolutely! Safety is our top priority. All featured projects exclusively use battery-operated LED lights, eliminating any fire hazards associated with open flames. We also recommend and prioritize low-odor paints and non-toxic materials wherever possible, ensuring a safe, flame-free, and pleasant setup suitable for all family-friendly spaces and curious pets.
Q2. Can I prepare these Halloween decorations in advance of my party?
A: Definitely! Most of these ingenious DIY projects can be crafted and prepped several days, or even weeks, in advance. This allows you to spread out your crafting time and reduce last-minute stress. Once completed, simply store your decorations in a cool, dry place away from direct sunlight to keep everything fresh, vibrant, and intact until your big Halloween bash.
Q3. I consider myself not very crafty. Are these DIYs truly easy for beginners?
A: Yes, absolutely! These projects have been specifically selected and designed with the beginner crafter in mind. They feature straightforward, step-by-step instructions, require only basic crafting skills, and utilize easy-to-find, affordable materials. You’ll be amazed at what you can create, even if you don’t have extensive crafting experience!
Q4. How can I customize these DIY Halloween decorations to fit my specific theme?
A: Customization is part of the fun! For example, you can use different colored LED lights for your terrariums or pumpkins to match a specific color scheme (e.g., purple for a witchy theme). Experiment with various types of charms, ribbons, or paint colors to infuse your unique style into each project. Even simple additions like glitter or spooky lace can dramatically alter the look and feel.
Q5. What’s the best way to store these decorations for future Halloween parties?
A: To ensure your DIY Halloween decor lasts for many spooky seasons to come, store them carefully in clearly labeled, airtight containers or bins. Disassemble any delicate hanging elements and wrap fragile items in tissue paper or bubble wrap. Keep them in a cool, dry place like a closet or attic, away from extreme temperatures and humidity, which can damage materials.