
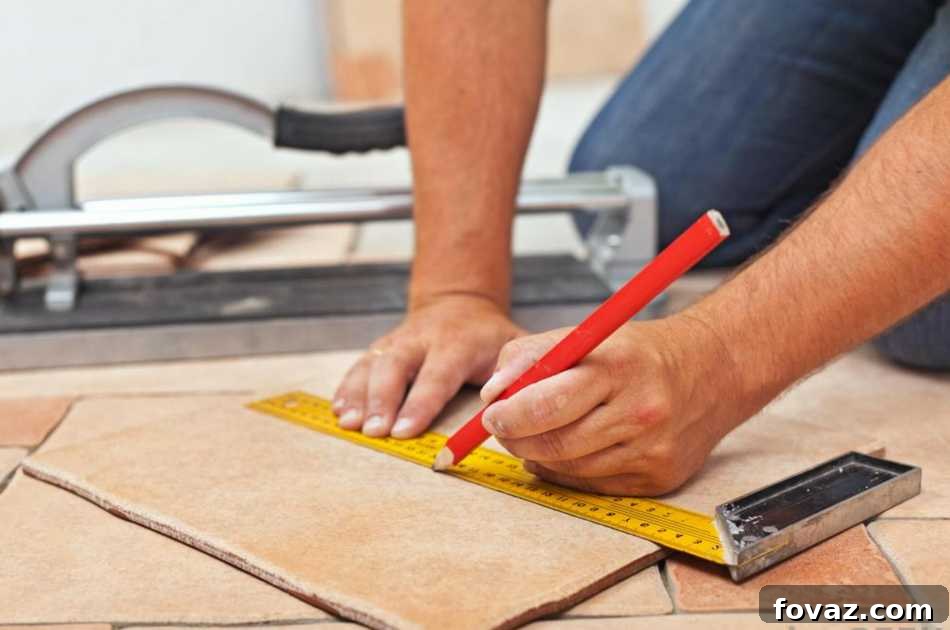
Transforming a space in your home with new flooring can seem like a daunting task, often prompting homeowners to call in professionals. However, when it comes to tile installation, you might be surprised at how achievable and rewarding a DIY approach can be. Learning how to lay tile floor yourself not only saves a significant amount of money but also imbues your home with a personal touch of craftsmanship. With the right tools, quality materials, and a bit of patience, you can successfully complete this amazing home improvement project.
Mastering Tile Installation: A Comprehensive DIY Guide
Tiling can appear complex and physically demanding, but by understanding the proper techniques and breaking the process down into manageable steps, it becomes far less intimidating. This comprehensive guide will walk you through everything you need to know about laying tile floors, empowering you to add beautiful, durable, and personalized flooring to any room in your home. From selecting the perfect tiles that complement your design vision to mastering the art of grouting, we’ll cover all the essential aspects. Prepare your tools, choose your ideal tiles, and let’s embark on this rewarding DIY journey together.
Why DIY Tile Flooring is a Smart Choice
Before diving into the practical steps, let’s explore the compelling reasons why undertaking a tile flooring project yourself is an excellent decision:
- Significant Cost Savings: Professional tile installation can be expensive, with labor costs often matching or exceeding the material costs. Doing it yourself dramatically reduces the overall expense, allowing you to invest in higher quality tiles or save for other home projects.
- Personal Satisfaction: There’s immense pride in stepping back and admiring a floor you’ve installed with your own hands. It’s a tangible accomplishment that enhances your connection to your home.
- Customization and Control: You have complete control over the design, layout, and pace of the project. This means you can take your time, ensure every tile is perfectly placed, and achieve a result that exactly matches your aesthetic preferences.
- Skill Development: Tiling is a practical skill that can be applied to future home renovations, from bathroom remodels to kitchen backsplashes. Once you’ve mastered the basics, you’ll be more confident tackling other DIY tasks.
- Increased Home Value: Well-installed tile floors are durable, easy to clean, and aesthetically pleasing, contributing positively to your home’s market value.
Essential Supplies for Your Tiling Project
Gathering all your supplies before you begin is crucial for a smooth and efficient tiling process. Here’s what you’ll need:
- Tiles of your choice: Ensure you buy at least 10-15% more than your calculated area to account for cuts, waste, and future repairs. Consider the type (ceramic, porcelain, natural stone) and their suitability for the room’s traffic and moisture levels.
- Thin-Set Mortar: This is the adhesive that bonds your tiles to the subfloor. Choose a high-quality, polymer-modified thin-set for better adhesion and flexibility. Some thin-sets are specifically designed for large format tiles or wet areas.
- Grout: The material that fills the spaces between your tiles. Available in sanded (for wider joints, usually 1/8 inch or more) and unsanded (for narrower joints) varieties. Pick a color that complements or contrasts with your tiles and matches your desired aesthetic.
- Sponge: Essential for cleaning excess grout from the tile surface. Keep several on hand.
- Water: For mixing mortar and grout, and for cleaning tools and tiles.
- Tile Spacers: These small plastic crosses or T-shapes ensure consistent spacing between your tiles, creating uniform grout lines. Available in various sizes (e.g., 1/16″, 1/8″, 1/4″).
- Safety Glasses: Protect your eyes, especially when cutting tiles.
- Gloves: Protect your hands from mortar and grout.
- Kneepads: Tiling involves a lot of kneeling, and good kneepads will save you from discomfort and injury.
Indispensable Tools for Tile Installation
Having the right tools makes all the difference in achieving professional-looking results and making the job easier. Here’s a list of tools you’ll need:
- Tile Saw (Wet Saw): Indispensable for making precise, clean cuts on tiles. A wet saw uses water to cool the blade and minimize dust. For smaller projects or straight cuts, a manual tile cutter can also be used.
- Tape Measure: For accurate measurements of the room and individual tiles.
- Trowel: Used to spread the thin-set mortar. The size and shape of the notches (e.g., 1/4″ x 1/4″ square notch, 1/2″ x 1/2″ square notch) depend on the size of your tiles. Larger tiles generally require larger notches to ensure adequate mortar coverage.
- Rubber Grout Float: Specifically designed for pushing grout into the tile joints and scraping off excess without damaging the tiles.
- Mixing Bucket: For thoroughly mixing thin-set mortar and grout.
- Margin Trowel or Drill with Mixing Paddle: A margin trowel is useful for scooping and mixing small amounts of mortar, while a drill with a mixing paddle is ideal for larger batches, ensuring a smooth, consistent mixture.
- Level: A long level (2-4 ft) is crucial for checking the flatness of your subfloor and ensuring your laid tiles are perfectly level.
- Chalk Line: To snap straight layout lines on your subfloor, guiding your tile placement.
- Rubber Mallet: For gently tapping tiles into the thin-set to ensure good contact and levelness.
- Utility Knife and Nippers: For cutting cement board or making small, irregular cuts on tiles (nippers).
Step-by-Step Guide to Laying Tile Floor
Successfully laying tile involves careful planning and execution of each stage. Follow these steps for a professional finish.
1. Prepare Your Space and Plan Your Layout
This is arguably the most critical step, as proper preparation ensures a durable and aesthetically pleasing finish. Start by thoroughly cleaning the subfloor. Remove all dust, dirt, grease, and any old flooring material. The subfloor must be structurally sound, dry, and perfectly level. If your subfloor isn’t level, you may need to apply a self-leveling compound or use shims. For most floor tiling, a cement backer board (or cement board) is recommended over plywood subfloors to prevent cracking and provide a stable, moisture-resistant base. Secure the backer board according to the manufacturer’s instructions, taping and mudding the seams.
Next, plan your tile layout. This step helps minimize cuts and ensures the most visually appealing result. Find the center of the room by snapping chalk lines from the midpoint of opposing walls. This intersection is your starting point. Perform a “dry run” by laying out tiles without mortar, using spacers, to see how the pattern fits the room. Adjust your starting point slightly if necessary to avoid small, awkward cuts at visible edges. You generally want to avoid slivers of tile at the room’s most prominent edges. Think about how you want your tiles to lay, considering their size and the area you’re tiling. Popular patterns include straight lay, diagonal, or brick pattern. This careful planning will save time and frustration later.
2. Measure and Mark the Space
Once your layout is planned, transfer those lines to your prepared subfloor using a chalk line. These lines will serve as your guides for laying the first rows of tiles, ensuring a straight and consistent start. Measure the space of the area you will lay tiles on precisely. Mark your layout lines clearly, usually starting from the center and working outwards. This helps ensure that any necessary cuts are distributed evenly and appear less noticeable.
3. Mix and Apply Thin-Set Mortar
Following the manufacturer’s instructions, mix your thin-set mortar in a clean bucket. Use a drill with a mixing paddle for best results, ensuring a smooth, lump-free consistency similar to peanut butter or thick oatmeal. Mix only as much as you can use within 30-45 minutes, as it will start to set. Apply the mortar to the subfloor using the notched trowel, holding it at a 45-degree angle. Spread the mortar evenly over a small section (about 2×2 or 3×3 feet) at a time, creating consistent ridges. “Back-butter” larger tiles by applying a thin layer of mortar to the back of the tile as well; this ensures maximum adhesion and prevents hollow spots.
4. Place the Tiles
Carefully set your first tile into the mortar, aligning it with your chalk lines. Gently press it down with a slight twisting motion to ensure full contact with the thin-set. Insert tile spacers at each corner to maintain uniform grout lines. Continue laying tiles in small sections, working your way out from your starting point. As you lay each tile, check its levelness with a spirit level and tap it gently with a rubber mallet if needed to ensure it’s flush with its neighbors. Work efficiently but deliberately, regularly checking your alignment and levelness. Allow the mortar to cure for at least 24 hours, or as recommended by the manufacturer, before walking on the tiles or proceeding to the next step. This allows the mortar to achieve its full strength and prevents tiles from shifting.
5. Cut Tiles to Size
Once the main field tiles are laid and the mortar has cured, it’s time to cut tile pieces to accommodate the edges of the room, around obstacles, or for spaces that take less than a full tile. Use your tile saw (wet saw) for straight, precise cuts. Always wear safety glasses and hearing protection when operating a wet saw. Measure each space carefully and mark the tile before cutting. For irregular shapes, you may need to make multiple cuts or use tile nippers for small adjustments. Practice on a scrap tile if you’re new to using the saw. This step requires patience and precision to ensure a clean, finished look around the perimeter of the room.
6. Fill Grout Lines and Clean
After the mortar has fully cured, it’s time to grout. Mix your grout according to the manufacturer’s instructions, aiming for a consistency similar to toothpaste. Work in manageable sections (e.g., 10×10 feet) to prevent the grout from drying too quickly. Scoop a generous amount of grout onto your rubber grout float and spread it across the tiles, pressing firmly to force the grout into the joints. Hold the float at close to a 90-degree angle as you pull it across the floor, making sure to pull the float diagonally across the grout line so that you don’t pull the grout out of them. Ensure all joints are completely filled.
Immediately after grouting a section, use a damp sponge to wipe off any excess grout from the tile surface. Rinse your sponge frequently in clean water. Be careful not to pull too much grout out of the joints. After the initial wipe, allow the grout to “haze” for 15-30 minutes, then perform a second, lighter wipe with a clean, damp sponge to remove any remaining haze and smooth the grout lines. You may need to do a final polish with a dry cloth after the grout has fully dried to remove any lingering haze.
Allow the grout to cure for the recommended time (usually 24-72 hours) before exposing it to heavy traffic or moisture. For certain types of tiles or grout, a grout sealer may be recommended after the curing period to protect against stains and moisture. Always refer to your product manufacturer’s guidelines for curing and sealing recommendations.
Watch the full video tutorial on how to lay tile floor from Craftsman to see these steps in action:
Tips for a Successful Tiling Project
- Take Your Time: Rushing can lead to mistakes. Work steadily and methodically.
- Work Clean: Clean up mortar and grout as you go to prevent hardened residue.
- Safety First: Always wear appropriate safety gear, especially eye protection when cutting tiles.
- Don’t Skip Steps: Each step, especially preparation, is crucial for a lasting finish.
- Practice Makes Perfect: If you’re new to tiling, consider practicing your cuts and mortar spreading on a spare piece of cement board with some scrap tiles.
- Ventilation: Ensure good ventilation when working with thin-set and grout.
Conclusion: Embrace the DIY Challenge
While laying tile floors requires a little bit of practice and a good deal of patience, it is by no means an impossible task for the dedicated DIY enthusiast. The sense of accomplishment and the significant savings on professional help make learning how to lay tile floors an invaluable skill for any homeowner. You’ll not only enhance the beauty and functionality of your home but also gain confidence in your ability to tackle future home improvement projects. So, roll up your sleeves, follow this guide, and transform your space with stunning new tile floors!
Click here for more DIY tiling tips and ideas, including advice on tackling bathroom walls!
You Might Also Like These DIY Projects:
DIY Flooring | Different Types Of Home Gym Flooring
These DIY Concrete Stepping Stones Will Lighten Up The Entire Yard
Minimalist Interior Design: 21 Inspiring Spaces Where Less Is More
Featured Image from Wise Geek