
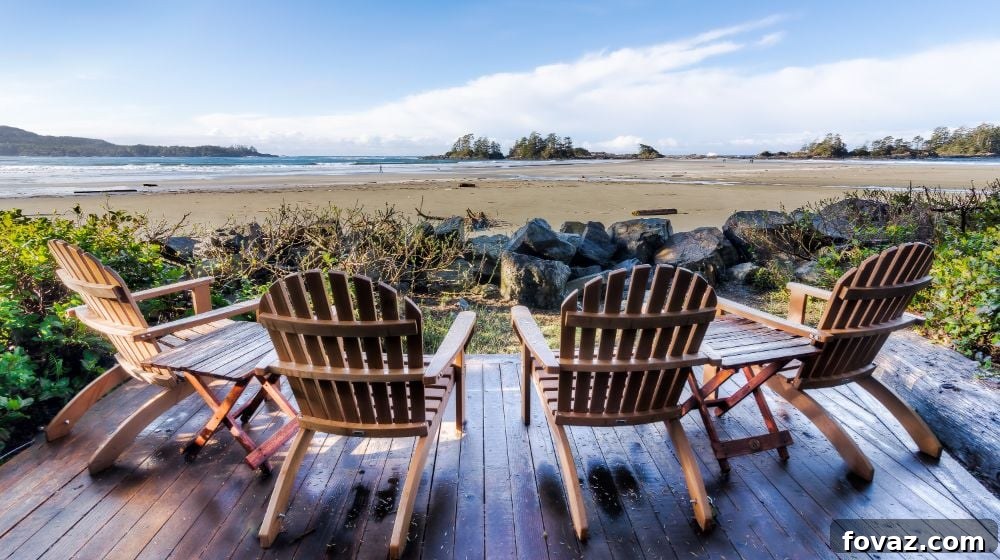
Transforming ordinary wooden pallets into extraordinary backyard furniture is a rewarding DIY endeavor. Among the myriad of pallet projects, the classic Adirondack chair stands out for its timeless appeal, comfortable design, and robust structure. This comprehensive guide will walk you through every step of crafting your very own DIY pallet Adirondack chair, perfect for those relaxing moments in your outdoor space. Embrace sustainability, unleash your creativity, and enjoy the satisfaction of building a beautiful, sturdy piece of furniture from repurposed materials.
RELATED: Pallet 101: Types, Standard Pallet Size And More
Build Your Own Backyard Oasis: The Ultimate DIY Pallet Adirondack Chair Guide
Why Choose Pallets for Your Adirondack Chair?
Wooden pallets are an abundant and often free resource, making them an excellent choice for budget-friendly DIY projects. Opting for reclaimed pallet wood not only saves you money on lumber but also contributes to environmental sustainability by diverting materials from landfills. With a bit of elbow grease and creativity, these sturdy wooden components can be transformed into a comfortable and stylish Adirondack chair that will be the envy of your neighborhood.
Pre-Project Essentials: Safety First!
Before diving into any woodworking project, prioritizing safety is paramount. Pallet wood can sometimes hide nails, staples, or splinters, and working with power tools requires careful attention. Always wear appropriate personal protective equipment (PPE), including safety glasses to protect your eyes from flying debris, a dust mask to prevent inhalation of wood dust, and sturdy gloves to shield your hands from splinters and rough edges. Ensure your workspace is well-lit, clear of clutter, and that you understand how to safely operate all your tools.
Tools and Equipment You’ll Need
Having the right tools makes all the difference in the efficiency and quality of your DIY pallet Adirondack chair build. Here’s a list of the essential equipment:
- Drill: For pre-drilling pilot holes and driving screws.
- Hammer: Essential for disassembly and general adjustments.
- Pry Bar / Crowbar: Crucial for safely dismantling pallets.
- 3/8″ Spade Bit: For creating larger holes or recesses.
- Hand Saw: Useful for smaller, precise cuts or when power tools aren’t suitable.
- Reciprocating Saw: Excellent for quick and efficient pallet disassembly.
- Circular Saw: Ideal for making long, straight cuts on boards.
- Jigsaw: Perfect for cutting curves and intricate shapes, especially for the backrest and armrests.
- Orbital Sander or Sandpaper: For smoothing all surfaces to prevent splinters and prepare for finishing.
Materials Required for Your Pallet Adirondack Chair
Gathering your materials before you begin will ensure a smooth and uninterrupted building process. Here’s what you’ll need:
- Four Pallets in Good Condition: Look for “HT” (heat-treated) stamped pallets, avoiding “MB” (methyl bromide) treated ones. Ensure they are clean and free from excessive damage.
- Wood Screws: A variety of lengths, typically 1.5-inch to 2-inch wood screws, suitable for outdoor use.
- Wood Putty: For filling screw holes, gaps, and imperfections.
- Wood Glue: For extra strength and durability at critical joint connections.
- Measuring Tape and Pencil: For precise marking and measurements.
- Safety Gear: Gloves, dust mask, and eye protection (as mentioned above).
Step 1: Thoughtful Disassembly and Preparation of Your Pallets
The foundation of a great pallet project lies in careful disassembly and proper wood preparation. Start by selecting your four pallets. Using a reciprocating saw to cut through stubborn nails, or a pry bar and hammer to gently separate the boards, begin taking your pallets apart. Aim to keep the planks as intact as possible to maximize usable material. Once all the boards are separated, the real preparation begins. Carefully remove any remaining nails or staples using a hammer or nail puller. Next, sand every retrieved wooden plank thoroughly. This step is critical for removing splinters, rough edges, and any residual dirt or markings, which not only ensures safety during assembly and use but also prepares the wood for a smooth finish. Begin with a coarser grit sandpaper (e.g., 80-100 grit) to remove major imperfections, then progress to a finer grit (e.g., 150-220 grit) for a beautifully smooth surface that’s ready for staining or painting.
Step 2: Precision Measuring and Marking Key Components
Accuracy in measuring and marking is vital for a well-built Adirondack chair. Take your time with this step to ensure all components fit together perfectly. Begin by preparing a detailed cutting guide for your main structural pieces: the rear legs/seat stringers, armrests, and backrest rails. Use a pencil and a measuring tape to clearly mark your cuts.
- For Rear Legs / Seat Stringers: Grab a 35″ long, 1×6 pallet board. Since a standard 1×6 pallet board is typically 5.5″ wide, create a grid of 1″ blocks on its surface. This will help you precisely draw the unique curved pattern of the rear legs. The design should result in a series of 1/2″ blocks at the top edge, defining the ergonomic slope. Draw the pattern for the first stringer, then use this cut piece as a template to trace the second, ensuring they are mirror images for a symmetrical chair.
- For the Armrests: Follow a similar process using a 32″ long, 1×6 pallet board. Repeat the grid technique or use an existing template to achieve the desired armrest shape, remembering you’ll need two mirror-image pieces.
- For the Bottom Backrest Rail: Take a 21.5″ long, 1×4 pallet board (approximately 3.5″ wide). Again, draw 1″ blocks to guide your cuts. This will define the straight bottom support for your back slats.
- For the Top Backrest Rail: Use a 22″ long, 1×4 pallet board. This piece will have a slightly rounded profile to accommodate the fan-shaped backrest.
Step 3: Cutting Out the Structural Elements
With all your measurements and markings complete, it’s time to bring your chair components to life. Ensure your cutting tools are sharp and your work area is stable. Always clamp each piece down firmly to prevent movement and ensure precise, safe cuts. This stage requires patience and careful execution.
- Begin by cutting out the two armrest brackets from one of your marked armrest boards. These pieces will measure approximately 7.75″ x 2.5″.
- Next, switch to either a bandsaw or a jigsaw – these tools are ideal for following the curved lines you’ve drawn for the seat stringers and armrests. Carefully cut out all the pieces according to your markings. Remember, you will need two armrests and two rear stringers. After cutting the first of each, use it as a template to trace and cut the second, ensuring they are identical mirror images. This method saves time and ensures consistency, eliminating the need to redraw intricate grids. Precision in these cuts will directly impact the comfort and stability of your finished Adirondack chair.
Step 4: Preparing the Front Assembly Pieces
For the front section of your DIY pallet Adirondack chair, you’ll need to prepare three crucial components: the front crosspiece, the front seat slat, and two front legs. Grab two 20″x3.5″ boards from your disassembled pallet wood. You can cut these to size using a circular saw for straight, clean cuts, a hand saw if you prefer manual precision, or a table saw for efficiency and accuracy. Once cut, it’s a good practice to lightly label each piece with chalk or pencil. Make these markings small and unobtrusive, preferably on the back or inside surfaces, so they won’t interfere with the final aesthetic. These clearly marked pieces will simplify the assembly process later on, ensuring you connect the right components in the correct positions.
Step 5: Crafting the Rear Supports
Continuing with the main frame of your DIY pallet Adirondack chair, you’ll now cut the rear crosspiece and the two rear back supports. For the rear crosspiece, simply cut an 18.5″x3.5″ board. This piece provides essential stability to the rear of the chair. Next, for the two rear back supports, select a 1×4 pallet board. Measure and mark 23″ on one side of the board and 26″ on the opposite side. Then, draw a straight line connecting these two points. This creates the specific angle needed for the backrest of the Adirondack chair, ensuring comfort and proper posture. Carefully cut along this line for both rear back supports. These angled cuts are critical to the chair’s design, so take your time to ensure accuracy.
Step 6: Cutting and Preparing the Seat and Back Slats
Now, let’s prepare the individual slats that form the comfortable seat and backrest of your pallet Adirondack chair. For the seat, you will need nine 1.75″ wide seat slats. You can easily create these by splitting a 3.5″ board down its center lengthwise. Once split, cut each piece to a length of 20″. After cutting, it’s good practice to pre-drill pilot holes in each end of these slats. Drill these pilot holes approximately 3/4″ from each end and as close to the edge as possible without compromising the wood. Follow up by countersinking these holes. Countersinking creates a shallow recess for the screw heads, allowing them to sit flush with or slightly below the surface of the wood, which results in a cleaner finish and prevents snags.
For the backrest, you’ll need seven back slats. This is a perfect opportunity to utilize some of your slightly less perfect boards, as they will be shaped later. Choose boards that are approximately 34″-36″ long, as their length will be adjusted during the “fan tail” shaping process. These slats will form the distinctive fanned backrest of your Adirondack chair, adding to its classic aesthetic and ergonomic comfort.
Step 7: Shaping the Unique Fan Tail Backrest
The fanned backrest is a hallmark of the Adirondack chair’s design, and this step brings that iconic look to your pallet creation. To cut your fan tail, follow these instructions carefully:
- Lay all seven of your back slats down on a flat surface, such as the floor or a large workbench. Arrange them side-by-side in the shape of a fan, spreading them out naturally at the top.
- To ensure consistent alignment at the base, press the bottom edges of the slats against a straight board or a wall. This will keep their bases in a straight line while allowing their tops to fan out.
- Once aligned, take a pencil and carefully etch a smooth, elegant arc across the top edges of all the fanned boards. This arc will define the final curved shape of your backrest.
- Finally, grab your jigsaw and meticulously trim the edges of the boards, following the etched lines you just created. Take your time to achieve a smooth, consistent curve.
IMPORTANT: After cutting, number each board on its back or bottom edge. This will help you remember the correct order and orientation when you assemble the backrest later, ensuring the fanned shape is perfectly recreated.
RELATED: Easy Lawn And Garden Tool Storage Pallet Project | How-To
Step 8: Assembling the Main Frame: Legs, Stringers, and Back Support
|
Now, let’s begin assembling the foundational components of your pallet Adirondack chair. This step connects the front leg, seat stringer, and rear back support, forming the side frame of your chair. Precision in alignment here is crucial for the chair’s overall stability and squareness.
- Arrange the front leg, rear back support, and seat stringer on your workspace. The front leg should fit snugly underneath the seat stringer, while the rear back support will overlap the stringer.
- Use the edge of a table or a long, straight board to help perfectly line up the bottom edges of these pieces. This ensures the base of your chair is even and stable.
- Once everything is aligned, secure the joint. Drill two staggered pilot holes, going halfway through the lower board and then continuing through the top board. Apply a generous amount of wood glue between the pieces to create a strong bond, then firmly attach them using 1″ wood screws.
- Repeat this process for the rear back support, ensuring it’s securely attached to the stringer. After completing one side assembly (front leg/seat stringer/backrest support), place it on your workspace. Use this completed assembly as a guide to construct the opposing mirror-image side, ensuring perfect symmetry.
REMINDER: As you assemble, frequently measure the distance separating the back support and the front leg, both at the top and bottom. This helps you verify that the assembly is straight and square. Small adjustments might be needed due to minor warps in reclaimed pallet wood, so don’t be afraid to fine-tune as you go.
Step 9: Connecting the Front and Rear Crosspieces
|
With the two side frames of your Adirondack chair assembled, it’s time to connect them using the front and rear crosspieces. These pieces are essential for the chair’s rigidity and structural integrity.
- Start by connecting your rear crosspiece. Take your 18.5″ x 3.5″ board and position it between the two side support assemblies you just created. Leave approximately an inch of space from the stringer’s top edge.
- To secure it, pre-drill pilot holes, countersink them, and then apply wood glue to the joining surfaces before driving in the screws. It’s also helpful to mark the precise locations where you intend to place your screw holes on both the crosspiece and the stringers for consistent attachment.
- Repeat this process for the other front leg, making sure to connect the rear crosspiece at exactly the same height and alignment as on the opposite side. Again, apply wood glue for maximum strength before screwing.
- Next, finish this step by connecting the chair’s front crosspiece. Mark and measure the center of the front legs on both sides. Hold the front crosspiece in position, ensuring it doesn’t touch the seat stringers but provides solid support.
- Once aligned, attach it securely using screws and wood glue, following the same drill, countersink, and glue method. This completes the basic box frame of your chair, providing a solid foundation for the seat and backrest.
Step 10: Installing the Bottom and Top Backrest Rails
|
These rails will provide the framework for attaching your backrest slats, contributing to both the comfort and aesthetics of your DIY pallet Adirondack chair. Proper placement and secure fastening are key.
- Take your squared bottom backrest rail (the 21.5″ x 1×4 piece) and position it over the two grooves or notches that are typically cut into the seat stringers of an Adirondack chair design. This ensures it sits flush and creates the correct angle for the backrest. With four 1″ wood screws, pre-drill your pilot holes before countersinking and applying wood glue. This securely attaches what will serve as your bottom backrest rail.
- For the top backrest rail, you’ll be using the slightly longer, often rounded 22″ x 1×4 piece. Make small markings at 2.5″ in from both ends of this rail. At these marked points, drill two pilot holes and then countersink them on each side.
- Now, place this top backrest rail over the rear back support assemblies, aligning it carefully. Screw it firmly into place, again using wood glue between the surfaces for enhanced durability. These rails form the top and bottom anchors for your fanned backrest slats.
Step 11: Assembling the Armrest Brackets and the Front Seat Board
|
With the main frame established, it’s time to integrate the armrest brackets and the front seat board, bringing more structure and defining the seating area of your DIY pallet Adirondack chair. Precision in alignment is crucial here for both functionality and appearance.
- Locate the top edge of your chair’s front legs and mark the centerline on each. Afterward, drill pilot holes into these points, then countersink them. Position your armrest brackets, ensuring they are perfectly level with the top edge of the front leg. Attach them securely using screws and glue. Repeat this process for the other side, making sure both brackets are symmetrical.
- Once the armrest brackets are firmly in place, grab your 20″ front seat board. This board will be the first and most forward piece of your seat. Drill pilot holes into it, countersink them, and then screw it securely into position, connecting it to the front crosspiece and the seat stringers. Applying wood glue here will provide additional stability and strength to this crucial part of the seat. Ensure it is level and flush with the surrounding components.
Step 12: Integrating the Backrest Slats
|
You’re just a few steps away from completing your stunning pallet Adirondack chair! This stage involves attaching the backrest slats, which create the iconic fanned back of the chair. Remember the numbering you applied in Step 7; it will be very helpful now.
- Begin by finding the exact center of both the bottom and top backrest rails. Mark these points clearly. Then, take your middle back slat (the one you numbered accordingly), drill a pilot hole, and countersink it on the bottom side of that slat.
- Attach this center slat to your chair’s bottom backrest rail, ensuring perfect alignment with your center mark. Line up the top piece of this slat with the top backrest rail, drill, and countersink before attaching it. A key tip for the back slats: avoid using wood glue on them initially. This allows for small adjustments later on, should you need to fine-tune the spacing or alignment for optimal comfort and aesthetics.
- Next, attach the outermost back slats – the first and seventh slats – to your bottom back rail. Before permanently securing them, it’s highly recommended to dry-fit the two armrests into position. This crucial step allows you to ensure you’re leaving enough space for the armrests to fit comfortably once installed, preventing any frustrating rework later.
- After connecting the bottom of all the slats (center, then outer, then filling in between), proceed to attach their top pieces to the top backrest rail. As you work your way through the remaining slats, be sure to space them evenly to create a harmonious and visually appealing fanned effect. Consistent spacing is essential for both comfort and the overall look of the chair.
Step 13: Assembling the Seat Boards
|
The seat boards are what provide the ultimate comfort for your DIY pallet Adirondack chair. This step requires careful placement and secure fastening to ensure a sturdy and inviting seating surface. You should have nine individual seat boards prepared from Step 6.
- Before permanently attaching any boards, perform a dry fit of all nine-seat boards. Lay them out on the seat frame without drilling or screwing them in. This will allow you to visualize and approximate how you’ll want them spaced. Consider leaving small, even gaps between each board for drainage and aesthetics. This dry-fit stage is crucial for planning your spacing and making any necessary adjustments to individual boards.
- Once you are satisfied with the spacing and alignment, begin attaching the seat boards one by one, starting from the front seat board (which you attached in Step 11) and working your way back. For each board, align it, pre-drill pilot holes into the seat stringers, and then countersink these holes.
- Exercise extreme caution when drilling pilot holes into the stringers. Ensure your drill bit is the correct size and that you don’t drill too deep or at an awkward angle, which could split or ruin the underlying stringer pieces. Secure each seat board firmly with screws, and consider adding wood glue between the seat boards and stringers for extra strength and longevity. Even spacing and consistent attachment will result in a comfortable and durable seat.
Step 14: Final Armrest Attachment
|
You’re almost there! The armrests are a key feature of the Adirondack chair, providing comfort and completing its classic silhouette. This step is about securely attaching them to your chair’s frame.
- Start by routing the edges of your armrests, if desired, to give them a smoother, more finished feel and to prevent splinters. A slight round-over or chamfer will greatly enhance comfort. Once the edges are smooth, carefully position an armrest on one side of the chair. Make a small marking on the rear back support, approximately 20″ up from its bottom. This mark should roughly align with the bottom edge of the armrest, guiding its placement.
- Move the armrest into its final position, ensuring it’s level and sits correctly on the armrest bracket and front leg. Use a screw or a clamp to temporarily tack the armrest in place, allowing for adjustments before permanent fastening. Afterward, drill three pilot holes through the top of your pallet Adirondack chair’s armrest, strategically aiming into its front leg and the armrest bracket below. Finally, countersink these pilot holes and secure the armrest firmly with wood screws.
- To attach the armrest’s rear part, where it meets the back support, drill two pilot holes and countersink them. Use two 1.25″ screws to secure it. For superior strength and durability, especially for a high-traffic area like an armrest, consider incorporating a washer, nut, and carriage bolt instead of just screws. This provides a much stronger mechanical fastener that can withstand more stress and movement over time. Repeat the entire process for the second armrest on the opposite side, ensuring symmetry and stability.
Step 15: Applying the Finishing Touches
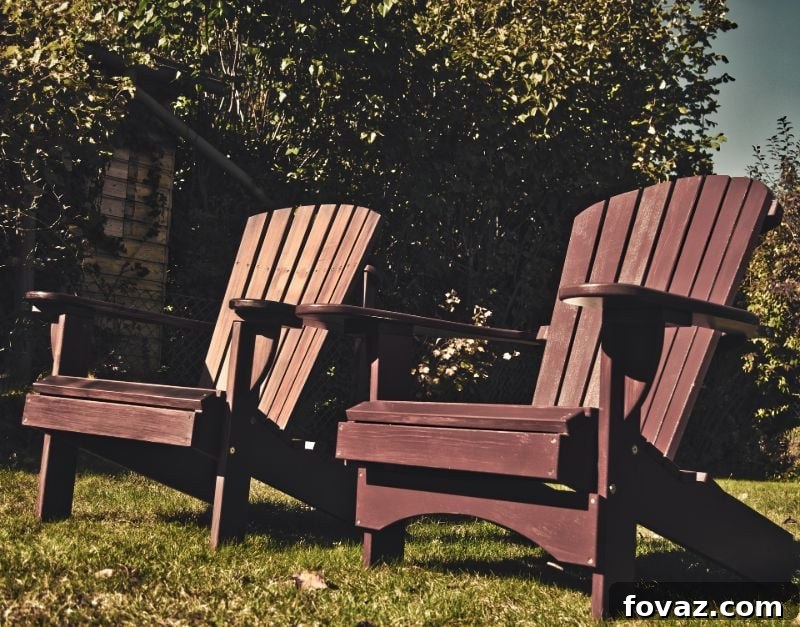
At this point, your DIY pallet Adirondack chair is about 99% complete in terms of construction. It just needs a few more finishing touches to protect the wood, enhance its appearance, and ensure it’s ready for years of outdoor enjoyment. This final stage allows you to personalize your creation.
Start by meticulously inspecting your chair for any visible screw holes, gaps, or minor imperfections. Use high-quality wood putty to fill in all manageable holes and blemishes. Apply the putty smoothly, ensuring it fills the void completely. Before the putty dries, wipe off any excess with a damp cloth; this will save you a lot of sanding time later. Once the putty is completely dry, proceed to sand the entire chair down carefully. Start with a medium-grit sandpaper (e.g., 120-150 grit) to smooth out any rough patches and dried putty, then move to a finer grit (e.g., 200-220 grit) for a silky-smooth finish. Ensure all surfaces are splinter-free and pleasant to touch. Take your time with sanding; a well-sanded piece is the foundation for a beautiful finish.
When you’re satisfied with the smoothness, you can apply your chosen finish. For recycled pallet wood, which often has character from its previous life, a dark wood stain can be an excellent choice. Darker stains help to subtly hide those small imperfections, nail holes, or color variations inherent in reclaimed wood, giving the chair a rich, uniform, and elegant appearance. Alternatively, you could opt for a vibrant outdoor paint to match your existing patio décor or a clear sealer to highlight the natural beauty of the wood grain. Whichever finish you choose, ensure it is rated for outdoor use to protect your chair from the elements.
Beyond this pallet Adirondack chair, you can also explore more outdoor furniture ideas with this DIY pallet outdoor chair tutorial courtesy of Ollari’s:
Embrace Your Handmade Creation!
If you’ve been dreaming of a comfortable, stylish chair for relaxing in your backyard without breaking the bank, this DIY pallet Adirondack chair guide offers the perfect solution. Not only is it a fantastic way to repurpose old pallets and contribute to a more sustainable lifestyle, but it also serves as an immensely satisfying DIY project. Dedicate a weekend to this build, and you’ll be rewarded with a durable, handcrafted piece of outdoor furniture that reflects your skill and creativity. Imagine sinking into your custom-built Adirondack chair, a cool drink in hand, enjoying the fruits of your labor. This project is more than just building a chair; it’s about creating a personal oasis and making a statement with sustainable craftsmanship.
Do you have innovative ideas on how to enhance this DIY pallet Adirondack chair or clever tips for working with reclaimed wood? Share your thoughts and experiences with us in the comments section below!
UP NEXT:
- 18 Clever DIY Wood Pallet Projects You Can Do Now
- How To Know If A Pallet Is Safe To Use
- 25 DIY Outdoor Fireplace Ideas To Combat The Winter Chill
Calling all crafting DIYhards, DIY Projects needs YOU! Click here if you want to write for us.
Don’t forget to stay connected with us on Facebook, Twitter,and Instagram!