
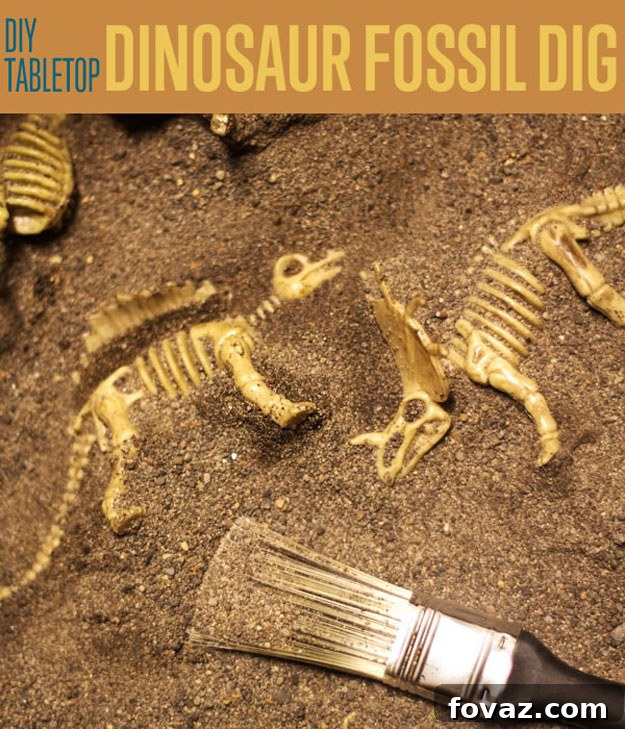
Unlock an exciting world of prehistoric adventure and hands-on discovery for your children with this incredible tabletop dinosaur fossil dig. Designed for immersive playtime, this DIY project can be crafted for under $50, offering endless hours of engaging fun and becoming a cherished activity your little paleontologists will want to revisit again and again!
PREHISTORIC DIY GROW JAR: A Journey into Living History
The Ultimate STEM Gift for Every Dino Enthusiast!
Prepare to unleash a mighty roar of excitement with our captivating Prehistoric DIY Grow Jar! This unique terrarium beautifully merges the thrilling world of dinosaur figurines with fundamental life science principles, creating an unforgettable educational experience. Watch as your favorite dinosaurs coexist with fertile soil and fast-sprouting clover seeds, transforming a simple science lesson into a vibrant, living ecosystem. With a dash of imagination and the commanding presence of a T-Rex, learning comes alive in the most engaging way possible. Don’t miss out on this fantastic opportunity to cultivate curiosity and discovery—order your very own Prehistoric DIY Grow Jar today and embark on a botanical adventure right here!
Craft Your Own Ultimate Dinosaur Fossil Dig Game for Kids
Inspire budding paleontologists with a hands-on, reusable dinosaur fossil dig game that transforms any tabletop into an exciting archaeological site. This DIY project is not only cost-effective but also incredibly rewarding, offering a sensory-rich experience that promotes fine motor skills, patience, and a love for discovery. Imagine the thrill on your child’s face as they carefully brush away sand to uncover ancient dinosaur bones, just like a real explorer! Let’s dive into creating an unforgettable adventure right in your home.
Essential Supplies for Your Dino Dig Adventure:
Gathering your materials is the first exciting step in constructing your very own dinosaur excavation site. We’ve meticulously chosen items that are affordable and easily accessible, ensuring your journey into the prehistoric past is smooth and budget-friendly.
- 50lb. Bag of Play Sand: Available at most hardware stores for around $5, this forms the bulk of your dig site. Look for fine, clean play sand for the best texture.
- Dollar Tree Elmer’s Glue (7 packs of 2 – 14 total): Elmer’s white school glue is essential for binding the sand to create a durable, reusable fossil bed. Its non-toxic formula makes it safe for kids’ projects.
- Plastic Dinosaur Fossil Pack: Find realistic dinosaur skeletal figures like this pack on Amazon.com for about $7.19. The variety of bones and shapes will keep the excavation exciting.
- Paint Brushes for Archeological Dusting (Dollar Tree): Soft-bristled paintbrushes make perfect excavation tools, allowing little hands to delicately brush away sand without damaging their discoveries.
- Wooden/Plastic Box: This will serve as the container for your dig site. A trip to Goodwill or a local thrift store can yield fantastic, unique finds like a wooden crate on wheels. Look for sturdy containers that are relatively shallow (around 4-6 inches deep) and have enough surface area for multiple discoveries.
- Dinosaur Stencils (Amazon.com): These add a fun, decorative touch to the outside of your dig box, enhancing the prehistoric theme.
- Craft Paint in Your Color Choice: A simple ivory or earthy tone works beautifully to complement the natural aesthetic of a fossil dig. Acrylic craft paint is durable and easy to work with.
- Disposable Foil Cooking Pan for Mixing Sand Compound (Dollar Tree): This provides an easy-to-clean mixing container, preventing your main bucket from getting too messy.
Household & Craft Room Staples:
Before you begin, ensure you have these common items ready for a smooth crafting process.
- Paint Sponge: Ideal for applying paint evenly when stenciling.
- Paper Towels: For quick clean-ups and drying.
- Water: Essential for mixing the sand compound and cleaning brushes.
- Big Bucket for Stirring: A robust container capable of holding and mixing a significant volume of sand and glue.
Step 1: Laying the Foundation – The Fossil-Rich Bed
This crucial step creates the “fossil bed” where your dinosaurs will be safely encased, ready for repeated excavation. Precision here ensures the longevity and reusability of your dig site.
Begin by preparing your unique “quick-sand” mixture. In your large stirring bucket, combine approximately 1 part Elmer’s Glue with 2 parts water. Gradually add play sand, mixing thoroughly as you go. The goal is to achieve a consistency that is squishy and moist, much like wet beach sand that you can still mold, but not so runny that it separates easily. It should hold its shape when pressed but still feel pliable.
The quantity of this mixture you need will depend on the size of your chosen container. You’ll want enough to create an initial base layer of about 1 inch (2.5 cm) across the entire bottom of your archaeological dig site container. This foundational layer will serve as the sturdy, semi-permanent resting place for your dinosaur fossils.
Once your mixture reaches the desired texture, carefully dump it into your dino dig container. Use your hands or a smoothing tool to create an even, level base. Now comes the exciting part: embedding your little plastic dinosaur fossils! The glue mixed into the sand is vital; it will dry into a resilient, cement-like base, securely encasing the fossils. This innovative technique allows children to excavate around their ancient discoveries again and again without dislodging them, ensuring endless replay value.
Strategically place your plastic dinosaur fossils into the wet sand-glue mixture. Push them down gently so they are partially submerged but still visible enough to entice discovery. Then, meticulously build small hills and mounds of the sand mixture around them, smoothly integrating each fossil into the foundation. This creates a natural-looking landscape that mimics a real archaeological site.
As I built up the mounds around each dinosaur, I found myself pulling sand from the middle of the container, inadvertently creating a bare swath down the center. This sparked a brilliant idea! When children are busy brushing away sand to reveal their discoveries, all that loose sand needs a designated space. Without it, piles can accumulate dangerously close to the edge of the box, risking spills onto your carpet. Since this particular dino dig was destined for two enthusiastic brothers, I decided to intentionally divide the container into two distinct excavation zones. Each side would house its own set of dinosaurs, and the central bare space would become a convenient “spoil pile” area for them to push their excavated sand with their paintbrushes, keeping the play organized and mess-contained.
Step 2: Solidifying the Prehistoric Landscape
This step ensures your fossil bed is robust and ready for countless explorations, creating a durable casing that protects your embedded treasures.
To further solidify the dinosaurs within the sand and create a protective, semi-hard casing over the entire foundation, apply an additional layer of Elmer’s Glue. For a container divided into two sides, I used approximately three (Dollar Tree) bottles of Elmer’s Glue for each section, pouring them evenly over the embedded dinosaurs and the surrounding sand. Then, using a disposable paintbrush, gently spread the glue across the entire surface, ensuring even coverage and a smooth finish. This top layer will act as a transparent sealant, reinforcing the sand-glue mixture and providing a sturdy, yet still diggable, surface.
Now comes the most important part of this step: letting it dry. And dry, and dry! Patience is truly a virtue here. The foundation of your fabulous fossil dig needs to become completely nice and solid. Depending on humidity and air circulation, this can take anywhere from 24 to 72 hours. If you find yourself a bit impatient (like many enthusiastic crafters!), a hairdryer set on a low, cool setting can help accelerate the drying process. Just ensure you move it constantly to prevent localized overheating. Wait until the entire base is rock-hard and no longer tacky to the touch. In my experience, it reached a perfectly solid state within 48 hours, ready to withstand the rigors of enthusiastic little excavators.
Step 3: Personalizing Your Dig Site – Creative Decoration
Adding decorative touches transforms your functional dig box into a visually engaging piece, stimulating imagination even before the digging begins.
With your fossil bed now solid and secure, it’s time to add some prehistoric flair to the exterior of your container. Grab your dinosaur stencils, chosen craft paint, and a paint sponge. Carefully position your stencils onto the sides of your container and dab the paint gently with the sponge, ensuring crisp, clean images. This simple step adds a ton of fun character and visual appeal, truly making the box feel like a part of the dinosaur era.
Beyond dinosaur shapes, consider using letter stencils to personalize the container with your child’s name, or perhaps a creative title for their archaeological institute. You could also freehand paint some fossil outlines, prehistoric flora, or even a volcano! This is where your child’s (or your own!) creativity can truly shine, making each dig site unique and special.
Step 4: The Final Touch – Ready for Excavation!
The moment of truth! This final step prepares your dig site for immediate play, turning anticipation into action.
Once your painted designs are completely dry, it’s time to add the loose “topsoil” layer. Pour about 2-3 inches (5-7.5 cm) of fresh play sand directly into your dino dig container, spreading it evenly over the solidified fossil bed. This loose sand is what your little archaeologists will excitedly brush away to reveal the hidden treasures beneath. And just like that, you’re done! Your magnificent, reusable, and endlessly entertaining dino dig is now fully prepared for excavation and promises hours upon hours of imaginative play and thrilling discoveries.
The Educational Power of a DIY Dino Dig:
Beyond just fun, this dinosaur fossil dig offers a wealth of developmental benefits. It’s a fantastic STEM activity that subtly introduces concepts of geology, paleontology, and scientific exploration. Children develop fine motor skills as they carefully use brushes to uncover fossils, enhancing hand-eye coordination and precision. The activity also fosters patience and problem-solving, as they strategize how to best unearth their prehistoric finds. Moreover, it sparks imaginative play, encouraging kids to create stories about the dinosaurs they discover and the ancient world they inhabit. It’s an excellent way to combine sensory play with cognitive development.
Tips for a Seamless Dino Dig Experience:
To ensure your DIY dinosaur fossil dig remains a source of joy and not stress, consider these practical tips:
- Drying Environment: When drying the glue layers, place the container in a well-ventilated area. If drying indoors, ensure good air circulation.
- Supervised Play: While the materials are safe, young children should always be supervised during play, especially with small fossil pieces and sand.
- Designated Play Area: Designate a specific area for the dino dig, perhaps on a large mat or outdoors, to contain any loose sand that escapes the box.
- Easy Cleanup: A small hand vacuum or brush and dustpan can quickly take care of any stray sand. The glue-bound base makes overall cleanup much easier.
- Storage: When not in use, you can cover the dig box with a lid or a cloth to keep the sand clean and prevent dust accumulation. The durable construction ensures it can be stored and brought out for play whenever inspiration strikes.
Expand the Adventure: Variations and Extensions:
The beauty of a DIY project lies in its adaptability. Here are some ideas to further enhance your dinosaur fossil dig:
- Themed Digs: Instead of dinosaurs, try burying plastic gems for a “Jewel Hunt,” or ancient coins for a “Pirate Treasure Dig.”
- Add Tools: Provide magnifying glasses, small trowels, or even tiny sieves to enrich the archaeological experience.
- Storytelling Prompts: Encourage children to invent stories about how their dinosaurs lived, what they ate, and why they became fossils.
- Educational Integration: Pair the dig with books about dinosaurs, paleontology, or geology to deepen their understanding.
- Difficulty Levels: For older children, you could bury smaller, more delicate “fossils” or create a multi-layered dig with different types of discoveries at varying depths.
Why Choose DIY for Kids’ Activities?
Crafting a DIY project like this dinosaur fossil dig offers numerous advantages over store-bought alternatives. Firstly, it’s significantly more cost-effective, allowing you to create a high-quality, engaging toy without breaking the bank. Secondly, the customization options are limitless; you can tailor the theme, colors, and complexity to perfectly match your child’s interests and developmental stage. Thirdly, the process of creating the project together becomes an activity in itself, fostering a sense of accomplishment and teamwork. Finally, DIY projects like this promote sustainability by often utilizing recycled or repurposed materials, teaching children the value of resourcefulness.