
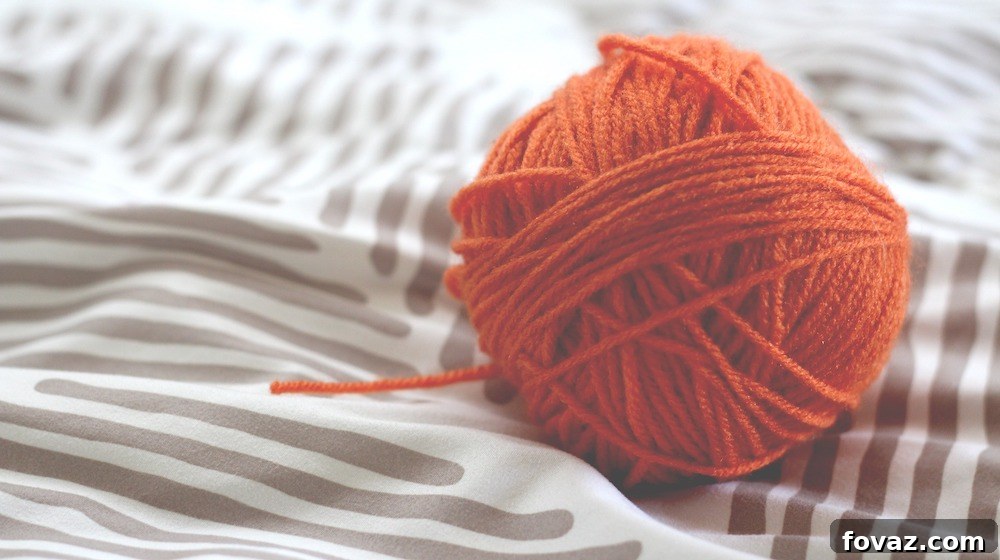
Transform your laundry routine into an eco-friendly, cost-effective, and delightfully fragrant experience by crafting your own wool dryer balls. This comprehensive guide will walk you through every step, ensuring your clothes emerge softer, drier, and infused with natural freshness, all while ditching harsh chemicals and reducing energy consumption.
Embrace Sustainable Laundry: The Magic of DIY Wool Dryer Balls
In a world increasingly focused on sustainability and mindful consumption, taking control of the products we use daily has become a priority for many. Just as opting for homemade laundry detergent empowers you to know precisely what goes into cleaning your clothes, creating your own wool dryer balls offers a natural, chemical-free alternative to conventional dryer sheets. These ingenious creations not only soften fabrics and reduce static but also significantly cut down drying time and allow for personalized scents using natural essential oils. If you’re ready to elevate your laundry game the natural way, this detailed DIY tutorial is your perfect starting point.
Why Choose Homemade Wool Dryer Balls? Unveiling the Benefits
The decision to switch from conventional dryer sheets to wool dryer balls is a smart one, laden with advantages for both your wallet and the planet. Here’s a deeper look into why these simple wool spheres are a game-changer for your laundry:
Environmental Impact: A Greener Laundry Routine
- Reduce Waste: Unlike single-use dryer sheets that contribute to landfill waste, wool dryer balls are reusable for hundreds of loads, significantly reducing your household’s ecological footprint.
- Chemical-Free: Commercial dryer sheets often contain synthetic fragrances and chemicals that can irritate sensitive skin and contribute to indoor air pollution. Wool dryer balls offer a completely natural softening solution, free from harmful additives.
- Sustainable Material: Wool is a renewable and biodegradable resource, making it an environmentally responsible choice for your laundry needs.
Cost Savings: A Smart Investment
- Long-Term Economy: While there’s an initial small investment in materials, the cost of making wool dryer balls is quickly recouped. They can last for several years, eliminating the recurring expense of buying dryer sheets.
- Reduced Energy Consumption: Wool dryer balls help separate clothes in the dryer, allowing hot air to circulate more efficiently. This can reduce drying time by 25-50%, translating directly into lower electricity bills.
Healthier Laundry: Gentle on You and Your Clothes
- Hypoallergenic: For those with allergies or sensitive skin, wool dryer balls are an excellent choice as they are free from the dyes, perfumes, and chemicals often found in commercial fabric softeners.
- Fabric Longevity: The gentle tumbling action and lack of harsh chemicals can be kinder to your clothes, potentially extending their lifespan.
Enhanced Performance: Beyond Just Softening
- Natural Softening: The natural lanolin in wool helps to soften fabrics without any chemical residues.
- Static Reduction: Wool dryer balls help to reduce static cling by absorbing moisture as clothes dry, preventing the buildup of electrical charges.
- Customizable Scents: Add a few drops of your favorite essential oils to the dryer balls before a cycle for a naturally fragrant laundry load, without artificial perfumes.
Gathering Your Toolkit: What You’ll Need
The beauty of this DIY project lies in its simplicity and minimal material requirements. Here’s a detailed breakdown of what you’ll need to gather:
- 100% Wool Yarn: This is the most crucial ingredient. Ensure it’s 100% wool (merino, alpaca, or even standard sheep’s wool works great). Avoid “superwash” wool, acrylic, or wool blends, as these often won’t felt properly. The felting process requires the wool fibers to bind together, a property inherent only in natural, untreated wool. Choose a light color if you’re concerned about potential color transfer to light-colored laundry, though this is rare with proper felting.
- Essential Oils (Optional): This is where the magic of customizable scent comes in! Choose your favorite natural essential oils. Popular choices include lavender for relaxation, lemon or orange for a fresh citrus boost, peppermint for an invigorating scent, or tea tree oil for its purifying properties. Make sure they are pure essential oils and not synthetic fragrance oils.
- Scissors: Any standard pair of sharp scissors will do for cutting the yarn and the tights.
- Old Tights (Pantyhose/Stockings): These are essential for the felting process. You’ll be using them to keep your wool balls separate and contained during the hot wash and dry cycles. An old pair of knee-high stockings or even tube socks can work in a pinch, as long as they are thin enough to allow water and agitation through, and sturdy enough to withstand the washing machine.
Crafting Your Eco-Friendly Laundry Solution: Step-by-Step Guide
Follow these simple steps to transform yarn into durable, effective wool dryer balls that will revolutionize your laundry day:
Step 1: Crafting the Yarn Ball Core
Begin the creative process by forming the core of your wool dryer ball. Take the end of your 100% wool yarn and wrap it around your index and middle fingers about 10-15 times. Carefully slide this looped yarn off your fingers, keeping its shape. Now, wrap the yarn tightly around the center of this loop 2-3 times to create a figure-eight shape, effectively cinching the bundle together. From this point, you will continue wrapping the yarn around the developing ball in various directions. The key is to wrap tightly and consistently, constantly changing the direction of your wrap to create a firm, dense, and spherical shape. Think of it like building a snowball, adding layers evenly from all angles. Continue this process until your yarn ball is roughly the size of a tennis ball. The firmer and denser the ball is at this stage, the better it will felt. Repeat this entire process until you have created approximately five individual wool balls. Five balls are typically a good starting number for an average household’s laundry needs.
Step 2: Preparing for Felting with Tights
Once you have your collection of perfectly wound yarn balls, it’s time to prepare them for the felting process. Take an old pair of tights (or pantyhose) and cut off one of the legs. Place one of your yarn balls deep into the cut leg of the tights. Once it’s comfortably nestled at the bottom, tie a tight knot directly above the ball. This knot serves two purposes: it prevents the first ball from unraveling and creates a partition for the next ball. Now, insert your second yarn ball above the knot you just tied, and tie another tight knot directly above it. Continue this process, adding each subsequent yarn ball and securing it with a tight knot, creating a “sausage” string of yarn balls within the tights. Ensure each knot is pulled taut to keep the balls compact and prevent them from shifting too much during the wash cycle. This containment is crucial for successful felting.
Step 3: The Felting Magic (Washing and Drying)
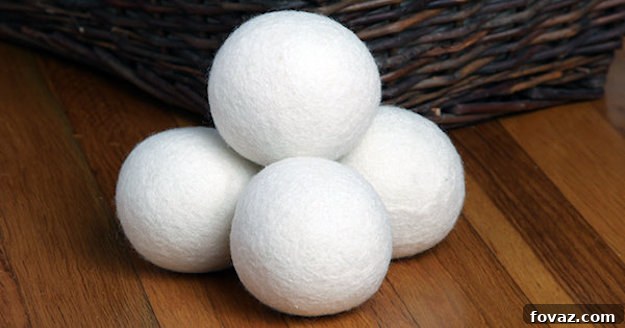
This is the most critical step in transforming your yarn balls into durable dryer balls. The goal of felting is to cause the wool fibers to shrink, lock together, and become a dense, solid mass. To achieve this, place your string of wool balls, encased in the tights, into your washing machine. Add a few towels or a pair of jeans to the load – the friction from these items will aid the felting process. Wash them on the hottest possible setting with the highest agitation cycle. After the wash cycle is complete, transfer the tights containing the balls directly to the dryer. Dry them on the hottest setting as well. The combination of hot water, agitation, and hot air is essential for the wool to felt properly. You will likely need to repeat this wash-and-dry cycle 2-3 times. For optimal results, check the balls between cycles.
PRO TIP: You’ll know your wool dryer balls are adequately felted when the individual strands of yarn are no longer visible, and the ball feels solid, dense, and slightly fuzzy, resembling a compact piece of felt rather than just wound yarn. They should not unravel if you try to pick at a strand. If they still feel loose or show distinct yarn lines, run them through another hot wash and dry cycle. The more felted they are, the more durable and effective they will be.
Using and Caring for Your New Wool Dryer Balls
Congratulations! You’ve successfully crafted a batch of natural, reusable wool dryer balls. Here’s how to get the most out of them and ensure they last for many laundry cycles:
How Many Dryer Balls Do You Need?
The number of dryer balls required depends on the size of your laundry load:
- Small Loads: 2-3 dryer balls
- Medium Loads: 4-5 dryer balls (this is a good general purpose amount)
- Large Loads or Heavy Items (e.g., blankets, towels): 6-8 dryer balls
More dryer balls provide more separation and air circulation, leading to faster drying times and better softening.
Scenting Your Laundry with Essential Oils
If you desire a fresh scent for your clothes, essential oils are your natural solution. Before placing your clothes and dryer balls into the dryer, add 3-5 drops of your chosen essential oil directly onto 2-3 of the dryer balls. Allow the oil to absorb for 5-10 minutes before starting the dryer to prevent oil stains on your clothes. Reapply essential oils every few loads, or as needed, to maintain the desired fragrance intensity. Experiment with different scents or blends to create your signature laundry aroma!
Longevity and Care Tips
- Durability: Well-felted wool dryer balls can last for hundreds, if not thousands, of loads – often several years of regular use.
- Refreshing: If your dryer balls start to look a bit worn or accumulate lint, you can occasionally give them another hot wash and dry cycle (without the tights) to refresh them and re-felt the outer layer.
- When to Replace: You’ll know it’s time to replace them when they start to unravel significantly, lose their shape, or become less effective at drying and static reduction.
- Storage: Store them right in your dryer or in a breathable basket near your laundry area.
Troubleshooting Common Issues with Wool Dryer Balls
While making wool dryer balls is straightforward, sometimes minor issues can arise. Here are solutions to common problems:
Unraveling Yarn Balls During Felting
If your yarn balls are unraveling during the washing machine cycle, it’s usually due to one of two reasons: either the yarn wasn’t wrapped tightly enough initially, or the knots in the tights weren’t secure enough. Ensure you wrap the yarn very tightly in various directions when forming the ball, making it as dense as possible. When putting them in tights, tie extremely snug knots between each ball to prevent movement and allow proper felting.
Insufficient Felting
If your dryer balls still feel loose, soft, or you can distinctly see individual yarn strands after 2-3 wash/dry cycles, they haven’t felted enough. This often happens if the water temperature wasn’t hot enough, the agitation was too low, or if you used “superwash” wool or a wool blend that resists felting. Ensure you’re using 100% untreated wool and repeat the hot wash and hot dry cycles, perhaps adding more friction items like jeans to the load.
Fading Scent
Essential oils naturally dissipate over time and with heat. If your laundry isn’t as fragrant as you’d like, simply add more drops of essential oil to your dryer balls before each load or every few loads. For a stronger, longer-lasting scent, you might try adding the essential oils to the dryer balls right before placing them in the dryer, allowing them to absorb for a short period. Avoid over-saturating the balls to prevent oil residue.
Beyond Laundry: Gifting and Customization Ideas
Wool dryer balls are not only practical for your own home but also make thoughtful, eco-conscious gifts. Personalize your creations and share the benefits of natural laundry with friends and family:
- Charming Gift Sets: Present your handmade wool dryer balls in a cute, reusable container – perhaps a small fabric bag, a mason jar, or a decorative basket. Pair them with a small bottle of high-quality essential oil and a label containing simple usage instructions and the benefits.
- Creative Labeling: As an optional touch, you can use colorful paint chips as unique labels. Write “Wool Dryer Balls” or “Natural Fabric Softener” on them, punch a hole, and tie them around the gift packaging. This adds a handmade, personal touch.
- Varying Colors: Don’t limit yourself to natural-colored yarn! Experiment with different yarn colors to create vibrant, multi-colored dryer balls. This can be a fun way to categorize them (e.g., darker balls for dark laundry, lighter for whites, or just for aesthetic appeal).
The joy of making these DIY dryer balls extends beyond utility; it’s about embracing a more sustainable lifestyle, saving money, and enjoying the simple pleasure of crafting something useful with your own hands. They not only make your clothes dry faster and remove static but also contribute to a healthier home environment.
Visual Learner? Watch the Video Tutorial!
For those who prefer a visual demonstration, dive into this helpful video tutorial that brings the crafting process to life. See each step in action and gain even more confidence in making your own wool dryer balls:
Join Our DIY Community: Share Your Insights!
We hope you thoroughly enjoyed this comprehensive tutorial on how to make wool dryer balls. Your thoughts and experiences are invaluable to our community! Please share your insights, tips, or any creative variations you’ve discovered in the comments section below. Do you have other fantastic DIY projects or craft ideas you’d like to share or see featured? We’re always eager to try new things and foster a vibrant community of DIY enthusiasts who love crafting, home decor, upcycling, cooking, and learning new skills. Connect with us on Facebook, Twitter, Pinterest, and Instagram – where your next inspiring project is just a click away!
Explore More Eco-Friendly DIY Projects
If you’re passionate about sustainable living and creating useful household items, check out more of our popular posts for further inspiration: