
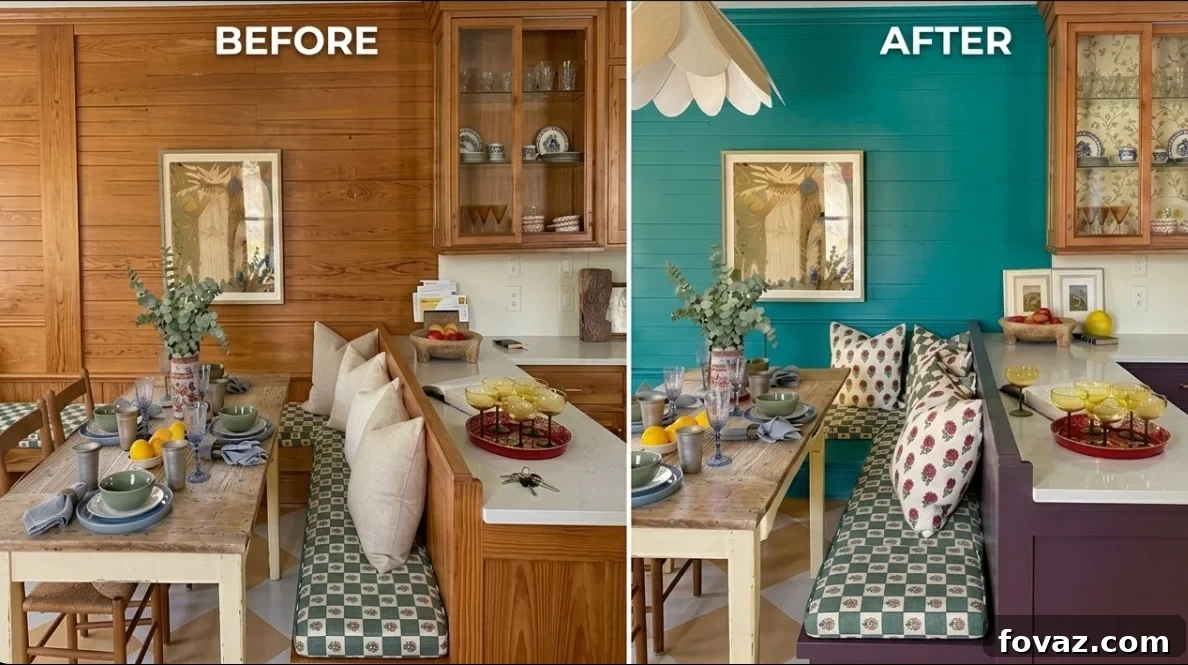
Embrace the Season: Easy Spring Home Makeovers for 2026 (No Major Overhaul Required!)
- Discover simple yet impactful spring home makeovers that genuinely revitalize your living spaces in 2026.
- Transform your living room, kitchen, balcony, or pantry with projects you can complete in a single afternoon.
- From a single accent wall of paint to stylish peel-and-stick wallpaper or quick interlocking deck tiles, these updates deliver big results with minimal effort.
Spring has officially arrived, bringing with it that irresistible urge to refresh and renew our surroundings. While I wholeheartedly appreciate the satisfaction of a weekend-long, deep-dive DIY project, sometimes what we truly need are smart, swift updates that don’t consume our entire calendar. I’ve personally discovered several ingenious ways to infuse a vibrant, new energy into a room using nothing more than a fresh coat of paint, a clever texture swap, or a strategic decorative element. These aren’t just quick fixes; they are impactful transformations designed to elevate your home’s aesthetic and your mood. Let’s dive right into these inspiring and achievable spring home makeovers.
RELATED: 7 Spring Organizing Ideas: Clever Ways to Declutter Your Home
Why Micro-Makeovers are Your Best Bet for Spring 2026
In a world that constantly demands our time and attention, the concept of “micro-makeovers” has surged in popularity, especially as we usher in the fresh energy of spring 2026. These small-scale projects offer a unique blend of efficiency and impact, allowing you to breathe new life into your home without committing to extensive renovations or significant financial outlay. This year, the focus is on thoughtful, personalized touches that reflect your style and enhance your daily living experience. Whether you’re a busy professional, a new homeowner, or a renter looking for temporary yet stylish solutions, these quick refreshes provide an accessible pathway to a more beautiful and inspiring home. They prove that even the smallest changes can create a profound sense of renewal, making your space feel brand new and perfectly aligned with the season’s vibrant spirit.
6 Spring Home Makeovers You Can Finish In An Afternoon
I’ve curated a list of spring home makeovers that are truly worth your time and effort this season. Each project is designed to be completed quickly, ensuring you spend less time working and more time enjoying your beautifully refreshed space.
1. The Captivating Accent: Moody Blue One-Wall Paint Refresh
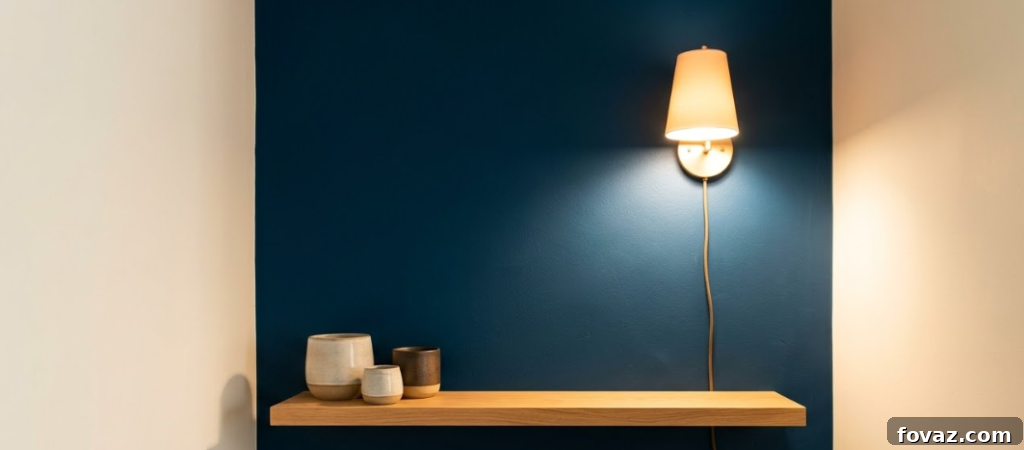
My living room wall felt incredibly nondescript, lacking character and visual interest. I yearned for a change that would infuse personality without requiring an entire room repaint. With 2026’s embrace of vibrant, yet sophisticated, colors, I decided to tackle one small area with a deep, invigorating teal. This singular accent wall completely transformed the space, adding depth and a focal point that was previously missing. It’s astonishing how a quart of paint and a couple of hours can elevate an ordinary room into something truly special and inviting.
Materials You’ll Need
- 1 quart of high-quality interior paint (consider deep teal, navy-adjacent, stormy blue, or even rich emerald tones for a contemporary feel)
- Painter’s tape (choose a good quality tape for crisp lines)
- 2″ angled brush (essential for precision cutting in)
- Small foam roller + paint tray (for smooth, even coverage on larger areas)
- Drop cloth or old sheet (to protect your flooring and furniture)
Step-by-Step Guide to Your Accent Wall
- Prepare Your Space: Begin by carefully moving all furniture at least 3 feet away from the wall you intend to paint. This provides ample working space and prevents accidental splatters. Lay down your drop cloth to protect the floor.
- Clean the Surface: Use a damp cloth to thoroughly wipe down the wall, removing any dust, grime, or cobwebs. A clean surface ensures better paint adhesion. Allow the wall to dry completely before proceeding.
- Tape Your Edges: Apply painter’s tape meticulously along the ceiling line, adjacent walls, baseboards, window and door trim, and around any outlets or light switches. Press firmly to seal the edges and prevent paint bleed.
- Cut In First: Using your 2-inch angled brush, carefully paint a 2-3 inch wide strip along all taped edges. This technique, known as “cutting in,” ensures clean, straight lines where the roller can’t reach.
- Roll the Main Area: Load your foam roller with paint, removing any excess on the tray. Apply paint to the wall in a “W” pattern, then fill it in by rolling vertically. This method helps distribute the paint evenly and avoids lap marks.
- Apply a Second Coat: Allow the first coat to dry for at least 2 hours (or as per paint manufacturer instructions). Once dry to the touch, repeat steps 4 and 5 to apply a second, thin coat for rich, uniform color saturation.
- Remove Tape While Tacky: This is a crucial step for clean lines! As soon as you finish the second coat (or while the paint is still slightly tacky), gently pull off the painter’s tape at a 45-degree angle. Waiting until the paint fully cures can cause the paint to peel with the tape.
Estimated Time: 60-90 minutes (including dry time between coats)
For those looking for specific shades, I personally sourced my paint online:
- PAINT + PRIMER: KILZ TRIBUTE is a low VOC, 100% acrylic advanced technology paint and primer in one…
- ADVANCED FORMULA: Our technologically advanced acrylic product combines paint and primer properties…
Buy on Amazon
(As an Amazon Associate, we earn from qualifying purchases.)
2. Instant Elegance: Renter-Friendly Peel-and-Stick Wallpaper Panels
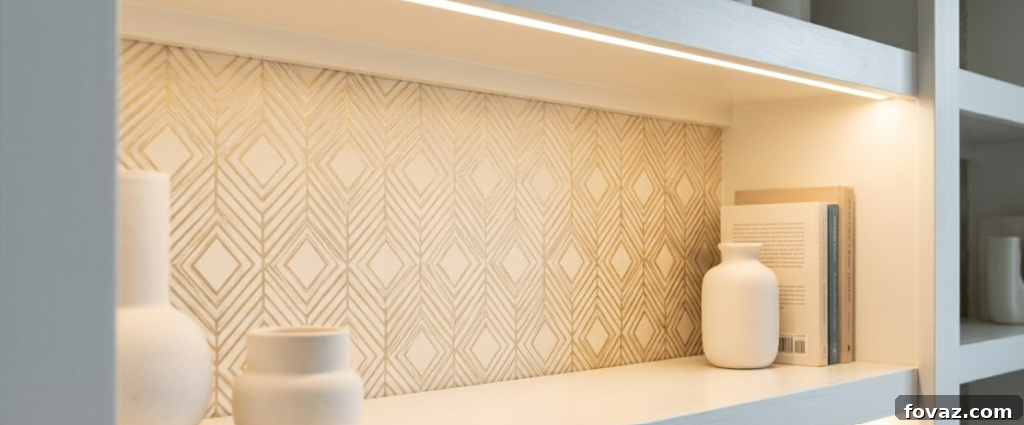
For those living in rental properties, the fear of losing a security deposit often means resigning yourself to bland, uninspiring walls. I’ve been there, and I understand the frustration. However, the emergence of high-quality peel-and-stick wallpaper panels has completely revolutionized the game. These incredible panels allow you to introduce sophisticated patterns, textures, and colors to your walls or furniture without any permanent commitment. It’s the ultimate solution for renters who desire a luxurious, high-end look without investing in a renovation that can’t move with them. This clever trick adds instant style and personality, ensuring your space feels uniquely yours, even if it’s temporary.
Materials for Peel-and-Stick Magic
- 1 roll of peel-and-stick wallpaper (look for sample sizes or smaller rolls, like 2’x4′, perfect for accent areas)
- Measuring tape (for accurate dimensions)
- Pencil (for marking cuts)
- Sharp scissors or a utility knife (for clean, precise cuts)
- Plastic smoothing tool or an old credit card (to eliminate air bubbles)
Applying Your Temporary Wallpaper: A Simple Guide
- Precise Measurement: Begin by accurately measuring the height and width of the specific area you wish to cover. Precision is key for a seamless finish.
- Cut Your Panel: Carefully cut your wallpaper panel to size, adding an extra inch on all sides. This gives you valuable wiggle room for adjustments during application and ensures a perfect fit.
- Clean the Surface: It’s vital to wipe down the application surface with rubbing alcohol to remove any oils, dust, or residue. A clean, smooth surface is essential for proper adhesion. Allow it to dry completely.
- Initial Peel and Align: Peel back only the top 6 inches of the backing paper. Fold the backing down to keep it out of the way. Carefully align the top edge of the wallpaper with your starting point on the wall or furniture.
- Smooth as You Go: Once the top is aligned, use your plastic smoothing tool (or credit card) to firmly press the wallpaper onto the surface. Work from the center outwards to push out any air bubbles, ensuring a smooth application.
- Peel and Smooth in Sections: Continue peeling off the backing paper in 6-inch increments, progressively smoothing the wallpaper downwards. This controlled approach minimizes wrinkles and bubbles.
- Trim Excess for a Crisp Finish: Once the entire panel is applied, use a sharp utility knife to carefully trim any excess wallpaper along the edges, outlets, or trim. A straight edge can help achieve a perfectly neat and professional-looking finish.
You can also explore using washi tape for similar creative, temporary wall accents.
Estimated Time: 20-45 minutes
3. Your Personal Oasis: “Micro Escapes” Balcony/Porch Corner Glow-Up
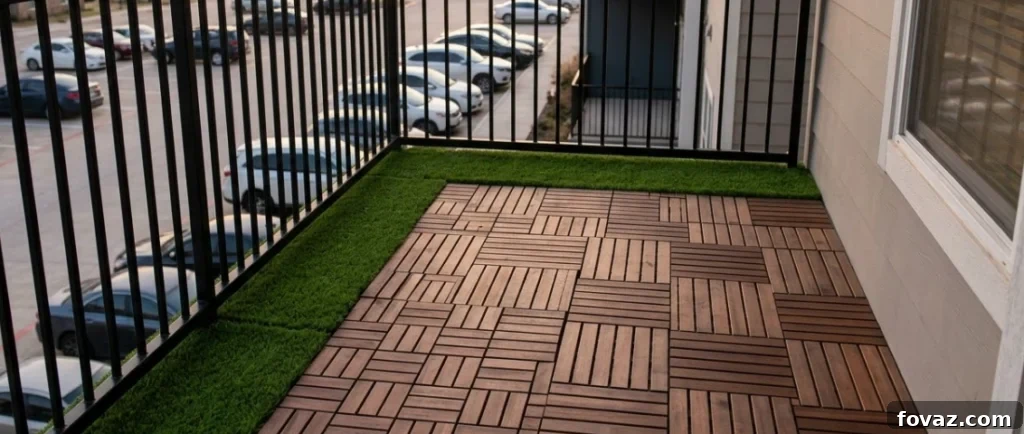
My outdoor space was, to put it mildly, neglected – a forgotten corner often serving as a temporary storage area for old boxes. That all changed the moment I discovered interlocking deck tiles. These ingenious tiles simply snap together, eliminating the need for complex tools or professional installation. In less than an hour, my dreary balcony was transformed into a charming “micro escape” with the warm, inviting look of real wood flooring. It’s a game-changer for anyone wanting to elevate their outdoor living without the expense or permanence of traditional flooring solutions. Pair it with some string lights, and you’ve created an instant haven.
Materials for Your Balcony Oasis
- Interlocking wood deck tiles (carefully measure your balcony’s square footage to determine how many you’ll need)
- Artificial grass tiles or turf strips (optional, for decorative borders or accents)
- 1 strand of outdoor string lights or a solar lantern (to enhance the ambiance)
- Tape measure (for accurate planning)
- Rubber mallet (optional, but highly recommended for securing tiles tightly)
- Utility knife (for trimming turf or making small adjustments to tiles if necessary)
Transforming Your Balcony: A Step-by-Step Guide
- Accurate Balcony Measurement: Measure the length and width of your balcony to calculate the total square footage. Most standard deck tiles cover 1 square foot each, so a 4×8-foot balcony would typically require around 32 tiles.
- Thorough Surface Cleaning: Sweep or hose down your balcony floor to remove any dirt, leaves, or debris. Allow the surface to dry completely before laying tiles to ensure a stable base.
- Layout Planning: Before snapping anything into place, experiment with your layout. Decide where you want your wood tiles to go and if you’ll incorporate artificial turf for borders or specific zones. Lay out a few tiles loosely to visualize the final look, much like the photo which uses turf as a railing border.
- Start in a Corner: Begin laying your first deck tile in one corner of your balcony. This provides a clear starting point and helps maintain alignment.
- Alternate Tile Direction (Optional): For a visually dynamic “parquet” effect, rotate every other tile 90 degrees. This creates a beautiful, checkerboard-like pattern as seen in many stylish outdoor spaces.
- Click Tiles Together: Firmly press each new tile against the interlocking tabs of the adjacent tile until you hear a click. For extra security and a tighter fit, use a rubber mallet to gently tap the edges of the tiles into place. No adhesive is needed!
- Customizing with Turf: If you’re using artificial grass, use a utility knife to trim the turf tiles or strips to fit perfectly along your desired border edges. Position them snugly against the deck tiles for a polished look.
- Add Ambiance: Complete your “micro escape” by draping string lights along the railing or hanging a charming solar lantern. Add a comfortable cushion, a small plant, and suddenly, you have a private oasis.
Estimated Time: 45-90 minutes (depending on the size and complexity of your balcony layout)
These interlocking deck tiles were exactly what I needed:
- …
- …
Buy on Amazon
4. Chic Kitchen Refresh: Aubergine or Sage Lower-Only Cabinet Paint
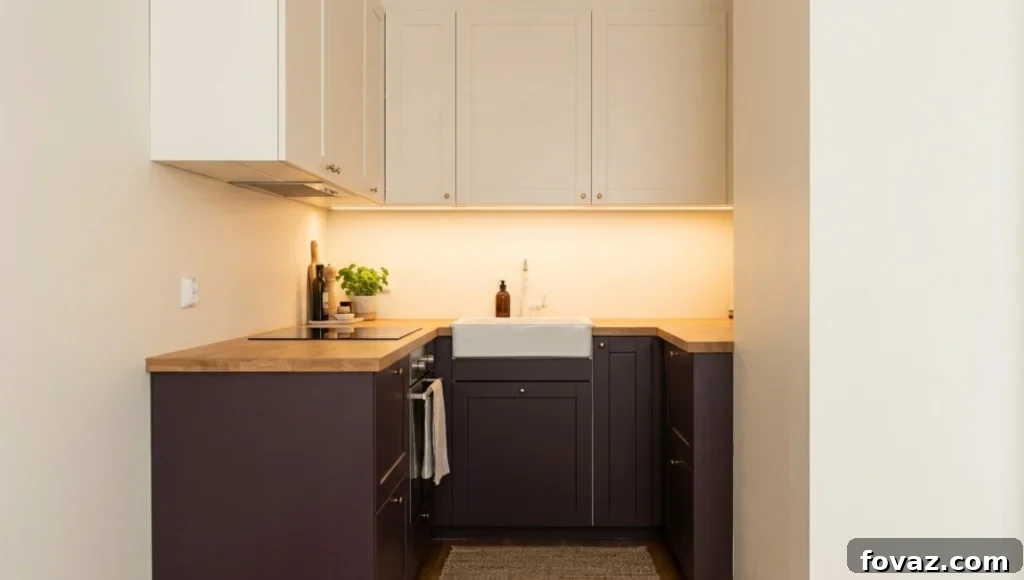
I’ve always admired bold colors but hesitated to commit to a full kitchen transformation, especially with a deep hue like burgundy. There was a lingering worry that it might overpower the space. However, 2026’s trend towards embracing richer, deeper tones inspired me to reconsider. I discovered that applying a luxurious aubergine or a calming sage green exclusively to the lower kitchen cabinets creates an incredibly stylish and grounded look without overwhelming the room. This strategic approach offers a significant aesthetic upgrade, making the kitchen feel sophisticated, modern, and utterly unique – a stylish statement that truly revitalizes the heart of the home.
Materials for Your Cabinet Makeover
- 1 quart of cabinet-specific paint in your chosen hue (aubergine, sage green, or deep forest green are trending choices; look for “no-sand” formulas for easier application)
- Painter’s tape (essential for protecting surrounding surfaces)
- 2″ angled brush (for cutting in around details and corners)
- Small foam roller + tray (for smooth, even coverage on flat surfaces)
- Screwdriver (to remove cabinet hardware)
- Drop cloth (to protect countertops and flooring)
- Degreaser or TSP substitute (crucial for proper paint adhesion)
Steps to Painting Your Lower Cabinets
- Remove Hardware: Start by carefully unscrewing all knobs, pulls, and hinges from your lower cabinets. Place them in a labeled bag with their screws to ensure they don’t get lost and are easy to reattach.
- Thorough Cabinet Cleaning: This step cannot be overstated! Kitchen cabinets accumulate grease and grime, which can prevent paint from adhering properly. Use a strong degreaser or TSP substitute to clean all cabinet surfaces thoroughly. Rinse with clean water and allow to dry completely.
- Mask Off Edges: Use painter’s tape to meticulously mask off any areas you don’t want painted: countertops, adjacent flooring, and the edges of your upper cabinets. Ensure the tape is firmly pressed down.
- Cut In Edges: Dip your angled brush into the paint and carefully “cut in” around the cabinet panel grooves, corners, and any other detailed areas that the roller won’t reach. Work slowly for clean lines.
- Roll Flat Surfaces: Load your foam roller with paint and apply thin, even coats to the flat surfaces of the cabinet doors and frames. Roll in one consistent direction for the smoothest possible finish.
- Allow Adequate Drying Time: Let the first coat dry for 4-6 hours, or according to the paint manufacturer’s instructions. Perform a touch-test before applying the second coat to ensure it’s fully cured.
- Apply Second Coat: Repeat steps 4 and 5 to apply a second thin coat of paint. This will ensure full coverage and a durable, professional-looking finish.
- Reinstall Hardware: Wait at least 24 hours after applying the final coat before reinstalling your cabinet hardware. This allows the paint to fully cure and harden, preventing accidental scratches or damage.
Estimated Time: 45-60 minutes of active work (plus necessary dry time between coats)
- Use for a variety of indoor and outdoor project surfaces including wood, metal, plaster, masonry or…
- Water-based acrylic formula is low odor, resist chips and provides long-lasting protection
Buy on Amazon
5. Handcrafted Welcome: Spring Equinox 3-Material Wreath

While the convenience of buying a pre-made wreath is undeniable, there’s a profound satisfaction that comes from creating one yourself, especially to celebrate the Spring Equinox. Crafting my own wreath, choosing my favorite combination of lush greenery, delicate florals, and vibrant colors, felt infinitely more rewarding than a store-bought version. It became a personal act of welcoming the new season, a tangible expression of renewal and fresh starts. This simple DIY project not only adds a beautiful decorative touch to your home but also instills a sense of pride and connection to the changing seasons.
Materials for Your Custom Spring Wreath
- 1 grapevine or wire wreath base (a 10-14″ diameter is versatile for most doors or walls)
- 2-3 bundles of faux or fresh greenery (eucalyptus, ferns, various spring florals like tulips or cherry blossoms, or even dried grasses for texture)
- Floral wire or a hot glue gun with glue sticks (your preferred method for securing elements)
- Ribbon (optional, for hanging or adding a decorative bow)
Crafting Your Spring Wreath: A Simple How-To
- Organize Your Materials: Lay out all your greenery and floral elements on a clean surface. Pre-arrange them in the order or pattern you envision attaching them to the wreath base. This helps in visualizing the final design.
- Establish Your Base: Begin by securing your first greenery bundle firmly to the wreath base, typically starting at the 6 o’clock position. Use floral wire to tightly wrap the stems to the base, or apply hot glue for a quicker hold.
- Work in One Direction: Continue adding subsequent bundles, overlapping each slightly to create a fuller, more natural look. Work your way around the wreath in a consistent direction (e.g., clockwise) to maintain flow and uniformity.
- Vary Textures and Colors: To add visual interest, alternate between different types of greenery and florals. Combine fuller, leafy pieces with wispier sprigs or delicate flowers to create depth and a dynamic aesthetic.
- Fill Any Gaps: Once the main elements are in place, step back and identify any bare spots or areas that need more volume. Tuck smaller sprigs, leaves, or flower buds into these gaps, securing them as needed.
- Add a Hanging Ribbon (Optional): If you plan to hang your wreath, cut a piece of sturdy ribbon, form a loop, and secure it firmly to the top back of your wreath base.
- Display and Enjoy: Hang your beautiful, handmade spring wreath on your front door, above a mantel, or as a centerpiece on a wall. Take a moment to admire your creative work and the fresh, seasonal touch it brings!
Estimated Time: 30-60 minutes
For more inspiration on unique wreath designs, explore our guide: Create Stunning DIY Wreaths and Garlands for Your Home.
6. Organized Elegance: Hidden Pantry Fabric Door
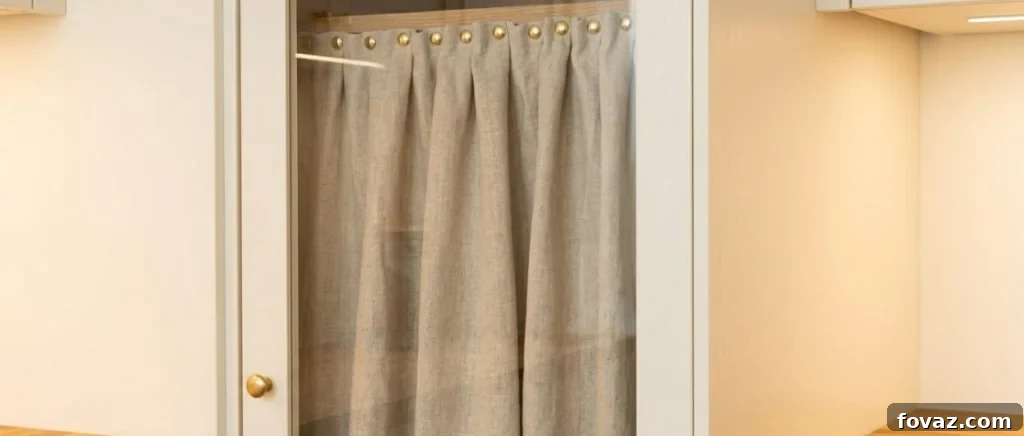
There’s nothing quite like the visual clutter of mismatched cereal boxes, half-empty snack bags, and various pantry items peeking through a glass door. This constant visual noise can make an otherwise tidy kitchen feel chaotic and less relaxing. My solution? A simple, elegant linen curtain. This effortless addition instantly conceals the pantry’s contents, transforming an eyesore into a soft, calming focal point. The subtle texture of the fabric introduces a soothing element, giving the entire room a more harmonious and serene vibe. It’s an incredibly quick and effective way to achieve both organization and elevated style in your kitchen.
Materials for Your Hidden Pantry Door
- Tension rod (measure the inside width of your doorframe for the correct size)
- Fabric panel or a pre-made curtain (measure the desired height of coverage, then add at least 6 inches for hemming or a rod pocket)
- Curtain clips (if your fabric doesn’t have a rod pocket) or sewing supplies (if you plan to create a rod pocket)
- Iron (optional, but highly recommended for a crisp, professional look)
Installing Your Fabric Pantry Door: Step-by-Step
- Measure Precisely: Carefully measure the inside width of your pantry doorframe. Then, determine the height you wish the fabric to cover, from the tension rod placement down.
- Select or Cut Your Fabric: Choose a fabric panel or curtain that complements your kitchen’s existing decor. Natural fibers like linen or cotton, or a subtle, neutral pattern, often work best for a soft, understated look. Cut or select your fabric based on your height measurement, remembering to add extra for hemming or a rod pocket.
- Prepare for Hanging: Decide on your hanging method. If using curtain clips, ensure they are securely attached to the top edge of your fabric. Alternatively, if you prefer a rod pocket, fold down the top edge of your fabric by about 3 inches and sew a neat hem to create a channel for the tension rod.
- Press the Fabric (Optional but Recommended): For a polished and wrinkle-free appearance, gently iron your fabric panel before installation. This step makes a significant difference in the final presentation.
- Install the Tension Rod: Position the tension rod inside your pantry doorframe at the desired height. Twist or extend the rod until it is securely wedged between the two sides of the frame, ensuring it is level and stable.
- Hang the Fabric Panel: If using clips, simply attach the fabric to the clips on the tension rod. If you’ve sewn a rod pocket, gently slide the tension rod through the pocket of the fabric panel.
- Adjust and Style: Arrange the fabric so it hangs evenly and gracefully, completely concealing the contents of your pantry. You can gather it slightly for a softer look or leave it flat for a more streamlined aesthetic.
Estimated Time: 20-40 minutes
General Tips for a Flawless Spring Refresh
To ensure your spring home makeovers are not just quick but also successful and stress-free, consider these additional tips. Firstly, **plan ahead**. Even for small projects, a little foresight goes a long way. Gather all your materials before you begin, so you don’t face interruptions. Secondly, **declutter first**. Before painting a wall or adding new decor, take a few minutes to clear the area. Removing clutter not only makes the project easier but also amplifies the impact of your fresh update. A clean slate truly highlights the new changes. Thirdly, **test colors or patterns**. If you’re unsure about a paint color or wallpaper pattern, purchase a small sample. Paint a swatch on your wall or tape up a wallpaper sample to see how it looks in different lighting throughout the day. This simple step can prevent disappointment and save you time and money. Finally, **don’t be afraid to experiment**. These micro-makeovers are designed to be low-commitment. If something doesn’t work out exactly as planned, it’s often easy to adjust or even reverse. Embrace the process, have fun, and let your creativity flourish!
FAQ: Your Quick Answers to Spring Home Makeovers
What’s the easiest spring home makeover for beginners?
Without a doubt, applying peel-and-stick wallpaper or vinyl decals to a small accent area is ideal for beginners. It requires no paint, minimal tools, and can be completed in as little as 20 minutes. If you can handle a large sticker, you can master this project effortlessly.
Do micro-makeovers actually make a noticeable difference in a home?
Absolutely, yes! The power of a micro-makeover is often underestimated. Introducing a single moody blue accent wall or installing interlocking deck tiles on a previously neglected balcony can dramatically shift the entire energy and perception of a space. You truly don’t need a complete overhaul to feel like you’ve moved into a brand new, revitalized home.
How do I ensure paint or wallpaper doesn’t damage my rental property?
When working in a rental, always opt for products explicitly rated as “renter-friendly” or “removable.” For peel-and-stick wallpaper, test a small, inconspicuous spot first to ensure it removes cleanly. If painting, stick to accent pieces like removable panels, furniture, or small, easily reversible areas. Critically, always review your lease agreement for specific rules on modifications and take detailed “before” photographs of everything to protect your security deposit.
What are the top color trends for spring 2026 home makeovers?
Spring 2026 embraces a blend of calming neutrals and bold, nature-inspired hues. Expect to see popular choices like deep teals, dusty sages, rich aubergines, and warm terracotta tones. Soft yellows and serene blues are also trending for creating a fresh, uplifting atmosphere.
How can I incorporate more greenery into my spring home refresh?
Bringing nature indoors is a classic spring refresh. Consider adding potted plants, creating a simple floral arrangement with fresh-cut blooms, or incorporating faux greenery into your decor. Even a small terrarium or a living wall can add significant life and vibrancy to your space. The DIY wreath project is also a fantastic way to introduce fresh elements.
Share Your Thoughts!
Which of these easy spring home makeovers are you most excited to try this season? Or do you have your own quick refresh ideas that deliver big impact? We’d love to hear your experiences and tips!
Tell us more in the comments below and let’s inspire each other to create beautiful spaces this spring!