
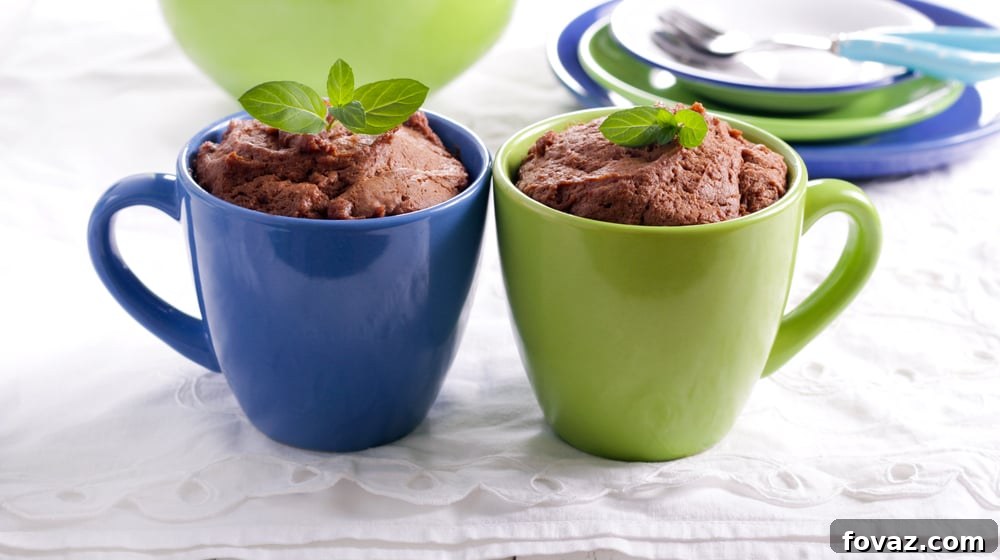
Are you ready to transform your dessert game with minimal effort and maximum deliciousness? Imagine a warm, fluffy cake, perfectly portioned for one, ready in just a minute. Yes, a single minute! Microwave mug cakes are the ultimate solution for those sudden sweet cravings, late-night indulgences, or simply when you need a quick pick-me-up without the fuss of traditional baking. Forget lengthy preparation, countless dishes, and oven preheating – these instant sweet treats are designed for speed, simplicity, and pure satisfaction.
Whether you’re a seasoned baker looking for a shortcut or a complete novice in the kitchen, these mug cake recipes will become your new go-to. They’re incredibly cute, endlessly customizable, and guaranteed to put a smile on your face. Get ready to discover the magic of microwave baking and whip up delightful individual cakes in practically no time at all!
Indulge in Minutes: The Ultimate Guide to 1-Minute Microwave Mug Cakes
For anyone with a sweet tooth, the allure of a freshly baked cake is undeniable. Yet, the reality of baking often involves meticulous measuring, preheating ovens, and a significant time commitment. That’s where the humble mug cake steps in as a culinary superhero. This innovative approach to dessert offers all the joy of a homemade cake with none of the hassle. In just sixty seconds, you can go from craving to complete satisfaction, sinking your fork into a warm, moist, and utterly delightful creation straight from your microwave.
The beauty of mug cakes lies not only in their speed but also in their simplicity. They require only a handful of common pantry ingredients and minimal equipment – essentially, just a mug and a microwave. This makes them perfect for busy weeknights, spontaneous dessert desires, or even a fun, quick project with kids. We’ve rounded up five fantastic recipes that promise to deliver big on flavor and ease. So, grab your favorite mug, prepare your ingredients, and let’s embark on a delicious journey into the world of instant microwave mug cakes!
Watching that video probably got your taste buds tingling! Let’s dive into the delicious details and get baking.
Why Mug Cakes Are Your New Favorite Dessert: The Benefits of Microwave Baking
Before we jump into the recipes, let’s appreciate why mug cakes have become such a phenomenon. Beyond their incredible speed, these miniature marvels offer a range of advantages that make them a preferred choice for many dessert lovers:
- Unbeatable Speed: The most obvious benefit is the cooking time. Most mug cakes are ready in 60-90 seconds, making them the fastest way to satisfy a dessert craving.
- Effortless Portion Control: Designed for a single serving, mug cakes help manage portion sizes, preventing overindulgence and reducing waste.
- Minimal Cleanup: With just one mug and a few measuring spoons/forks, cleanup is a breeze. No need for multiple mixing bowls, baking pans, or complicated utensils.
- Simple Ingredients: These recipes typically call for basic pantry staples that you likely already have on hand, eliminating the need for special grocery trips.
- Versatile and Customizable: Mug cakes are a fantastic canvas for creativity. Easily add chocolate chips, nuts, fruit, or different toppings to suit your mood and preferences.
- No Oven Required: Perfect for dorm rooms, small apartments, or anyone without access to a conventional oven. Your microwave is all you need!
Now that you understand the many reasons to love mug cakes, let’s explore some irresistible flavors!
A special shout-out to Bigger Bolder Baking for inspiring some of these fantastic ideas!
1. Dazzling Funfetti Mug Cake: A Party in a Mug!
Bright, cheerful, and utterly delightful, a Funfetti mug cake is like a mini birthday party you can enjoy anytime. This vibrant cake is perfect for celebrating small victories or simply adding a splash of joy to your day. It’s incredibly easy to make and promises a tender crumb dotted with colorful sprinkles, making every bite a festive treat.
What you’ll need to make your Funfetti Mug Cake:
- 2 tablespoons (2oz/ 60g) unsalted butter
- 1 large egg
- 2 tablespoons milk
- 1 teaspoon pure vanilla extract
- ¼ cup (50g) granulated sugar
- 6 tablespoons (50g/ 1¾ oz) self-rising flour (To make self-rising flour: add 2 tsp of baking powder to 150g/6oz/1 cup plain flour, then measure out 6 tablespoons.)
- Tiny pinch of kosher salt
- 1-2 tablespoons rainbow sprinkles (for folding into batter and optional topping)
Step-by-Step Instructions for Funfetti Bliss:
Step 1: Melt the Butter
In a standard microwave-safe mug (preferably an oversized one to prevent overflow), place your unsalted butter. Microwave it on high for about 15-20 seconds, or until it is completely melted but not browned.
Step 2: Whisk in the Egg
Add the large egg directly into the mug with the melted butter. Using a fork, beat the egg thoroughly until it’s well incorporated with the butter and slightly frothy. This helps create a lighter texture.
Step 3: Combine Wet Ingredients
Next, pour in the milk, pure vanilla extract, and granulated sugar. Mix everything together vigorously with your fork until the sugar has largely dissolved and the mixture is smooth and well combined.
Step 4: Incorporate Dry Ingredients and Sprinkles
Now, add the self-rising flour and the tiny pinch of kosher salt to the wet mixture. Stir continuously until the batter is smooth and no lumps of flour remain. Be careful not to overmix, as this can lead to a tough cake. Once smooth, gently fold in about half of your rainbow sprinkles. Reserve the rest for topping.
Step 5: Microwave to Perfection
Place your mug in the microwave. Cook on high for approximately 50-60 seconds. The exact time may vary depending on your microwave’s wattage. The cake is ready when it has risen significantly and springs back slightly when gently touched. It’s crucial not to overcook it, as mug cakes can dry out very quickly.
Step 6: Garnish and Enjoy!
Once out of the microwave, let it cool for just a moment. For an extra special touch, you can optionally top it with a generous dollop of bubble gum buttercream frosting and a sprinkle of additional rainbow sprinkles. Serve immediately and savor your instant party in a mug!
Pro Tip: For an extra moist cake, ensure your egg and milk are at room temperature before mixing!
2. Decadent Chocolate Banana Mug Cake: A Healthy-ish Indulgence
Craving chocolate and something satisfying? This Chocolate Banana Mug Cake is a wholesome yet incredibly delicious option. Utilizing ripe bananas for natural sweetness and moisture, combined with rich cocoa and creamy peanut butter, this mug cake feels incredibly indulgent while being packed with flavor. It’s a fantastic way to use up those overripe bananas and treat yourself to a guilt-free pleasure.
What you’ll need to make your Chocolate Banana Mug Cake:
- 1 ripe banana (the riper, the sweeter!)
- ¼ cup (4 tbsp) peanut butter (or any nut butter of your choice, like almond or cashew butter)
- 1 large egg
- 2 teaspoons granulated sugar (adjust to taste based on banana ripeness)
- 3 tablespoons unsweetened cocoa powder
Step-by-Step Instructions for Chocolate Banana Heaven:
Step 1: Mash the Banana
In a large, microwave-safe mug, place your ripe banana. Using a fork, mash the banana thoroughly until it forms a smooth paste with very few lumps. The smoother the mash, the smoother your cake will be.
Step 2: Add Nut Butter and Egg
To the mashed banana, add the peanut butter (or your chosen nut butter) and the large egg. Mix these ingredients together well with your fork until they are fully combined and the mixture has a uniform consistency.
Step 3: Introduce Sugar and Cocoa
Now, add the granulated sugar and unsweetened cocoa powder to the mug. Continue mixing vigorously until all the dry ingredients are fully incorporated into the wet mixture. Ensure there are no streaks of cocoa powder left and the batter is smooth and lump-free.
Step 4: Microwave to Fluffy Perfection
Place the mug in your microwave. Cook on high for approximately 1 minute. The cake should rise beautifully and feel firm to the touch when ready. Just like with other mug cakes, be cautious not to overcook, as this can make the cake dry and rubbery.
Step 5: Garnish and Devour
Remove the mug from the microwave. For an enhanced banana flavor and presentation, top your warm chocolate banana mug cake with a few thin slices of fresh banana. You can also add a sprinkle of chocolate chips or a drizzle of honey if desired.
TIP: This cake is truly best eaten right away while it’s warm and moist, so have your fork ready the moment it comes out of the microwave!
3. Classic Red Velvet Mug Cake: A Touch of Elegance in Minutes
Experience the luxurious taste and beautiful hue of a Red Velvet cake in a fraction of the time with this amazing mug cake recipe. Known for its subtle cocoa flavor, moist texture, and signature vibrant red color, this mug cake delivers all the classic charm without the elaborate baking process. It’s an elegant treat that’s surprisingly simple to create, perfect for a moment of sophisticated indulgence.
What you’ll need to make your Red Velvet Mug Cake:
- 4 tablespoons all-purpose flour
- 4½ tablespoons granulated sugar
- ⅛ teaspoon baking powder
- 1½ tablespoons unsweetened cocoa powder
- Pinch of salt
- Pinch of cinnamon (enhances cocoa flavor)
- 3 tablespoons vegetable oil (or melted butter)
- 3 tablespoons buttermilk (substitute with sour cream or plain yogurt if buttermilk is unavailable, or mix 3 tbsp milk with ½ tsp lemon juice/vinegar and let sit for 5 minutes)
- 1 large egg
- 1 teaspoon vanilla extract
- ½ teaspoon red food coloring (gel food coloring provides a more vibrant color)
Step-by-Step Instructions for Red Velvet Perfection:
Step 1: Mix Wet Ingredients
In an oversized, microwave-safe mug (to accommodate rising), combine all your wet ingredients: vegetable oil, buttermilk, egg, vanilla extract, and red food coloring. Whisk them together thoroughly with a fork until the mixture is smooth and uniformly red.
Step 2: Incorporate Dry Ingredients
To the wet mixture in the mug, add all the dry ingredients: flour, sugar, baking powder, cocoa powder, salt, and cinnamon. Mix well with your fork until the batter is smooth, vibrant red, and completely free of any dry spots or lumps. Again, mix just until combined to maintain a tender crumb.
Step 3: Microwave for a Soft Texture
Place your mug in the microwave. Cook on high for approximately 50-60 seconds. Keep a close eye on it; the cake should be risen and slightly firm to the touch. It’s especially important not to overcook red velvet mug cakes, as they can quickly become dense, dry, and rubbery if microwaved for too long.
Step 4: Cool and Frost
Carefully remove the hot mug from the microwave and let the cake cool for a few minutes. This allows it to set and makes it even more delicious. Once slightly cooled, top it generously with a luscious dollop of classic cream cheese frosting. The tanginess of the frosting perfectly complements the sweet, subtle cocoa notes of the cake.
Pro Tip: For an extra moist result, use gel food coloring for a more intense red without adding excess liquid.
Have you seen what our sister site, HomemadeRecipes.com, is up to???
Oreos + peanut butter + brownies = THIS https://t.co/hcoV49KDtS pic.twitter.com/hdP70AeZ8d
— Homemade Recipes (@BestHomeRecipes) 17. helmikuuta 2016
4. Cozy Apple Crumble Mug Cake: A Taste of Autumn
Embrace the comforting flavors of autumn with this delightful Apple Crumble Mug Cake. This recipe beautifully combines tender, spiced apple cake with a buttery, crumbly topping, all prepared in your microwave. It’s the perfect treat for a chilly evening or whenever you’re craving a warm, fruit-filled dessert that tastes like it came straight from a cozy kitchen, but ready in moments.
What you’ll need to make your Apple Crumble Mug Cake:
- 3 tablespoons all-purpose flour
- 1 heaping tablespoon light brown sugar
- ½ teaspoon ground cinnamon
- ⅛ teaspoon baking powder
- 1 tablespoon unsweetened applesauce
- ½ tablespoon vegetable oil (or melted butter)
- ½ tablespoon milk (any kind)
- ⅛ teaspoon vanilla extract
- For the Crumble Topping:
- 1 tablespoon unsalted butter, softened
- 2 tablespoons all-purpose flour
- 1 tablespoon light brown sugar
Step-by-Step Instructions for Apple Crumble Delight:
Step 1: Mix Dry Cake Ingredients
In a small, microwave-safe mug, combine the dry ingredients for the cake: flour, heaping brown sugar, ground cinnamon, and baking powder. Whisk them together thoroughly with a fork until well combined and lump-free.
Step 2: Add Wet Cake Ingredients
Now, add the wet ingredients to the dry mix in the mug: unsweetened applesauce, vegetable oil, milk, and vanilla extract. Stir gently until all the ingredients are just combined. Be careful not to overmix; this batter will be noticeably thicker than some of the other mug cake batters, which is perfectly normal.
Step 3: Prepare the Crumble Topping
In a separate small bowl, combine the softened butter, flour, and brown sugar for the crumble topping. Use your fingertips or a fork to mix and rub the ingredients together until they form coarse crumbs. This creates that irresistible streusel texture.
Step 4: Top the Batter
Carefully spoon the prepared crumble topping evenly over the top of your apple cake batter in the mug. Gently press it down slightly to ensure it adheres.
Step 5: Microwave to Warm Goodness
Place the mug in your microwave. Cook on a high setting for about 45-60 seconds. The crumble topping should look slightly browned and the cake underneath should be set. As always, avoid overcooking, as this can quickly dry out your delicious apple cake.
Step 6: Serve with Optional Toppings
Let the mug cake cool for a minute or two. For the ultimate indulgence, top it with a scoop of vanilla ice cream and a drizzle of salted caramel sauce. The contrast of warm cake and cold ice cream is simply divine!
Pro Tip: For extra texture, you can add a pinch of chopped walnuts or pecans to your crumble topping.
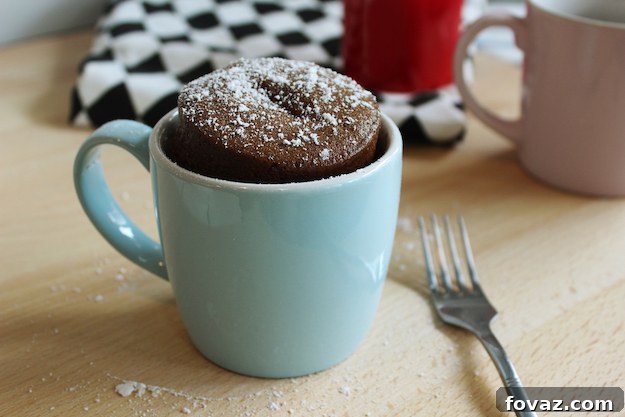
5. Magical Rainbow Mug Cake: A Burst of Color and Flavor!
Unleash your inner artist with this absolutely enchanting Rainbow Mug Cake! This recipe transforms simple cake batter into a vibrant masterpiece, layering colors to create a stunning visual and delicious treat. While it takes a tiny bit more effort than the other single-step cakes, the visual reward is immense, making it perfect for special occasions or just a fun way to brighten your day. Get ready to bake a cake that looks as good as it tastes!
What you’ll need to make your Rainbow Mug Cake:
- ½ cup (100g) white granulated sugar
- 1 stick (100g) unsalted butter, softened at room temperature
- 2 large eggs at room temperature, lightly beaten
- 1 teaspoon vanilla extract
- 1 cup (110g/ 4oz) all-purpose flour
- ½ teaspoon baking powder
- ¼ teaspoon baking soda
- Pinch of salt
- Red, orange, yellow, green, and blue food coloring (gel food coloring works best for vibrant hues)
Step-by-Step Instructions for a Colorful Creation:
Step 1: Cream Sugar and Butter
In a large mixing bowl (you’ll need a bit more room for this one), use a hand whisk or electric mixer to cream together the softened butter and granulated sugar. Beat them vigorously for about 3 minutes until the mixture is light, fluffy, and pale in color. This step is crucial for a tender cake texture.
Step 2: Incorporate Eggs and Vanilla
Add one lightly beaten egg to the creamed butter and sugar mixture, mixing well until fully incorporated. Then, add the second egg and mix thoroughly again. The mixture should look emulsified and smooth. Finally, stir in the vanilla extract, ensuring it’s evenly distributed.
Step 3: Add Dry Ingredients
To the wet mixture, add all the dry ingredients: all-purpose flour, baking powder, baking soda, and salt. Gently fold or mix these ingredients until they are just combined and there are no visible streaks of dry flour. Overmixing at this stage can lead to a tough cake.
Step 4: Divide the Batter
Carefully divide the unified cake batter evenly into 5 separate small bowls. Aim for roughly equal portions so each color has a good presence.
Step 5: Color the Batter
To each bowl, add a single drop (or more, depending on desired intensity) of a different food coloring: red, orange, yellow, green, and blue. Gently mix each bowl until the color is vibrant and uniformly distributed. Be sure not to overmix, as gentle handling keeps the cake tender.
TIP: Use gel food coloring for brighter, more concentrated colors without thinning the batter!
Step 6: Layer the Colors
Now for the fun part! Spoon the colored batters into your microwave-safe mug one at a time, layering them on top of each other. You can create distinct layers or gently swirl them with a toothpick for a marbled effect. Start with red, then orange, yellow, green, and blue, or any order you prefer.
Step 7: Microwave Your Rainbow
Place the mug in the microwave. Cook on high for approximately 45-60 seconds. The cake should be fully risen and set in the center. As with all mug cakes, watch carefully to prevent overcooking, which can make it dry.
Step 8: Decorate and Delight!
Allow the rainbow mug cake to cool slightly. Top with a generous swirl of fluffy cream cheese frosting or simple whipped cream, and finish with a sprinkle of extra colorful sprinkles to enhance the rainbow theme. Prepare for oohs and aahs!
Pro Tip: For a cleaner layered look, gently tap the mug on the counter after adding each color layer to settle the batter.
Mastering Your Microwave Mug Cake: Tips for Success
While mug cakes are incredibly simple, a few expert tips can elevate your experience and ensure a perfect cake every time:
- Choose the Right Mug: An oversized, microwave-safe mug is ideal. This prevents the batter from overflowing as it rises during cooking and gives the cake a good shape.
- Don’t Overmix: Just like traditional cakes, overmixing the batter can develop the gluten too much, leading to a tough, rubbery cake. Mix only until the ingredients are just combined.
- Know Your Microwave: Microwave wattages vary significantly. Start with the lower end of the suggested cooking time and add 5-10 second increments until your cake is perfectly cooked. An overcooked mug cake is a dry mug cake!
- Test for Doneness: The cake should appear set and spring back slightly when gently touched. A toothpick inserted into the center should come out with moist crumbs, not wet batter.
- Let it Cool Briefly: While tempting to dive in immediately, letting the cake cool for 1-2 minutes allows it to set fully and makes it easier to eat without burning your tongue.
- Room Temperature Ingredients: For a more consistent and tender cake, try to use room temperature eggs and milk, especially in recipes like the Rainbow Mug Cake.
- Experiment with Toppings: Don’t limit yourself to frosting. Fresh fruit, chocolate sauce, whipped cream, a dusting of powdered sugar, or even a scoop of ice cream can transform your mug cake.
Unleash Your Inner Baker: Customizing Your Mug Cake
The beauty of mug cakes extends to their incredible versatility. Once you’ve mastered these basic recipes, feel free to get creative and customize them to your heart’s content. Here are some ideas:
- Add-ins: Stir in chocolate chips (dark, milk, white), chopped nuts (walnuts, pecans, almonds), dried fruit (raisins, cranberries), or shredded coconut into your batter before microwaving.
- Spices: Enhance flavors with a pinch of nutmeg, cardamom, ginger, or extra cinnamon, especially in fruit-based cakes like the Apple Crumble.
- Extracts: Beyond vanilla, try almond, peppermint, lemon, or orange extract for different flavor profiles.
- Fillings: For an extra surprise, spoon half the batter into the mug, add a spoonful of Nutella, jam, or a small square of chocolate, then cover with the remaining batter.
- Frostings & Sauces: Experiment with different frostings (cream cheese, buttercream, ganache), or simply drizzle with caramel, chocolate syrup, or a fruit compote.
With these tips and recipes, you’re now equipped to become a mug cake maestro, creating delightful desserts on demand. The convenience, speed, and sheer deliciousness of these microwave wonders make them an essential addition to any dessert repertoire.
Which delightful mug cake will you be trying today? Let us know below in the comments! We love hearing about your sweet successes! 🙂
For more DIY and craft news, follow us on Facebook, Twitter, Pinterestand Instagram!
You’ll also love these quick and easy dessert ideas:
-
How To Bake Cake in a Jar
-
10 Undeniable Dump Cake Recipes
-
13 Healthy Energy Bar Recipes For An Afternoon Pick Me Up