
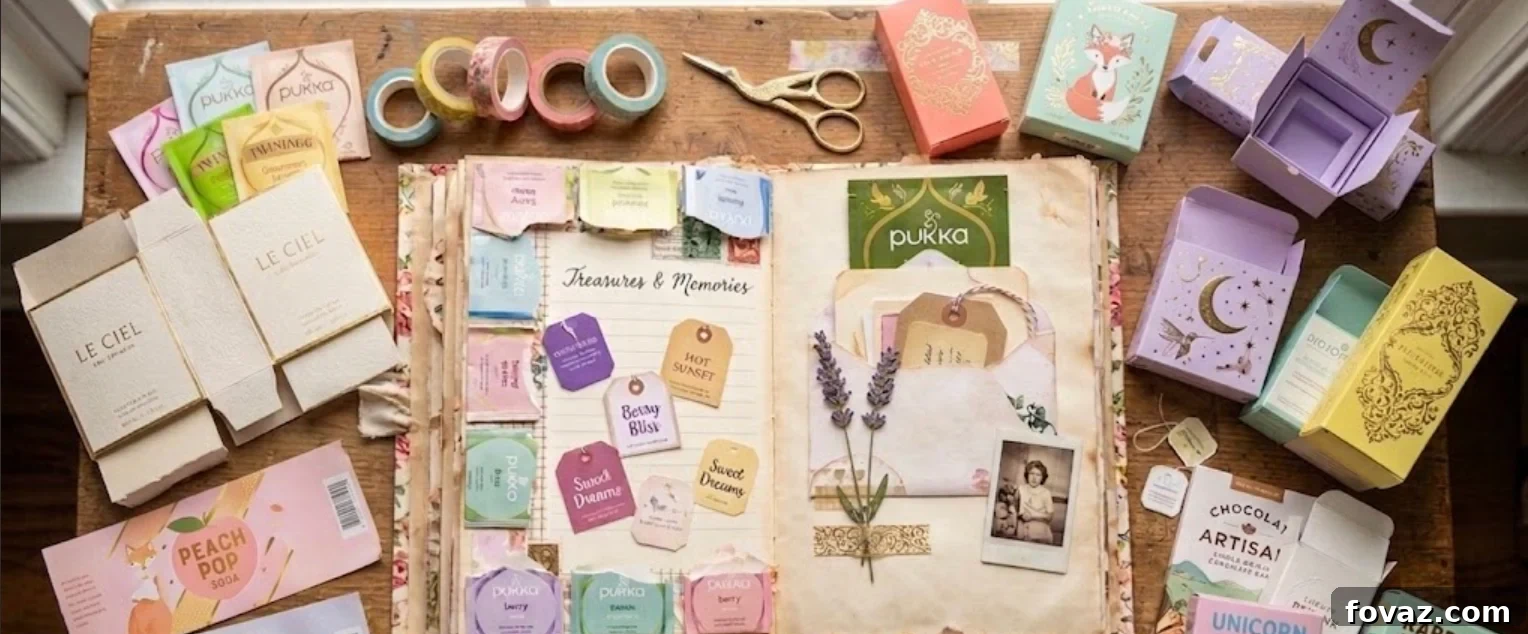
At a Glance: 9 Easy Ways to Turn Empty Packaging into Paper Crafts
- Transform boxes, tags, and labels into useful paper crafts in under three minutes each.
- No special tools required—just scissors and a glue stick.
- Nine quick ideas plus one bonus trick to give new paper a vintage, aged look.
9 Easy Ways to Turn Empty Packaging into Paper Crafts
Have you ever opened a new tea box, skincare package, or clothing tag and thought, “This is too pretty to throw away”? Brands are using textured papers, matte finishes, and metallic accents to make packaging attractive—but most of that paper gets tossed. If you enjoy paper crafts or journaling, those bits are a small treasure trove.
With nothing more than scissors and a glue stick, you can repurpose packaging into beautiful journal elements. Each idea below takes about three minutes or less. Try them in any order, but save #8 for last—it’s a favorite trick that creates a delicate, aged divider.
1. Cereal & Gourmet Snack Boxes → Sturdy Notebook Covers
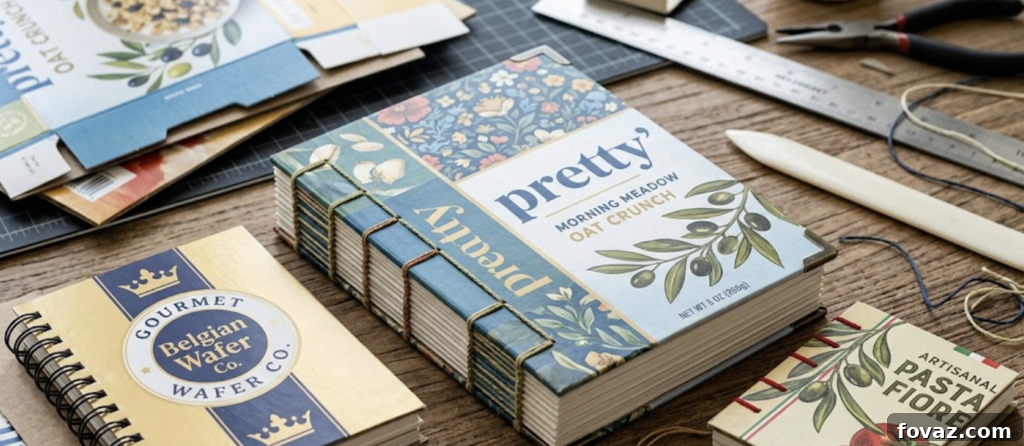
Pretty cereal, cookie, or pasta boxes often have thick, colorful cardboard that makes excellent mini notebook covers. They’re lightweight but protective—perfect for keeping pages flat in a bag.
The Paper Scrap: Thick, colorful cardboard panels from food boxes.
⚡ 2-Minute How-To:
- Snip: Cut a clean 4×6 inch rectangle from a flat side of the box.
- Score: Run the scissor edge lightly down the middle to create a crease.
- Fold: Press it flat along the crease to form the cover.
✨ The Instant Upgrade: A strong cover that protects pages without buying extra cardstock.
2. Soft-Touch Skincare Boxes → Minimalist Bookmarks
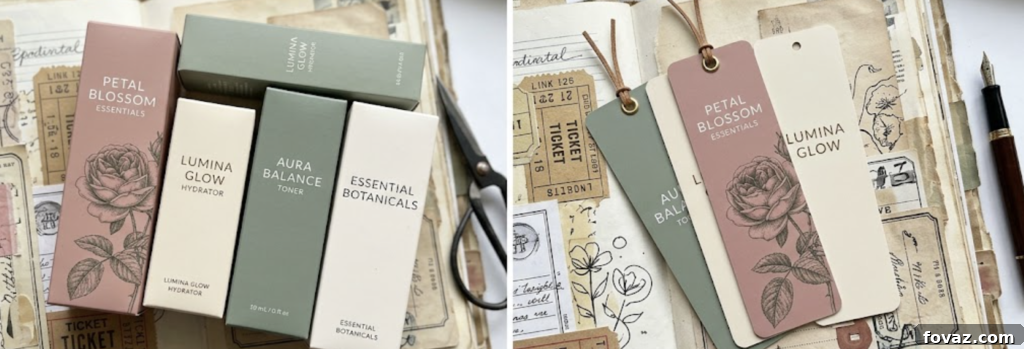
Skincare packaging often uses silky matte cardstock that feels luxurious—ideal for elegant bookmarks that look store-bought.
The Paper Scrap: Smooth matte cardstock from serum, lotion, or lip balm boxes.
⚡ 2-Minute How-To:
- Snip: Cut a 2×6 inch strip from a flat panel.
- Finish: Angle the top corners or punch a small hole.
- Thread: Add a ribbon or twine for a polished touch.
✨ The Instant Upgrade: You get a high-end bookmark from packaging you’d otherwise recycle.
3. Glass Bottle & Jar Labels → Eye-Catching Page Stickers
Labels from bottles or jars can be removed and used as ready-made art on journal pages. They bring color and design without any drawing.
The Paper Scrap: Paper labels from glass bottles, jam jars, or syrups.
⚡ 2-Minute How-To:
- Soak: Submerge the empty jar in warm water for a few minutes.
- Peel: Slide off the softened label and pat it dry.
- Stick: Apply glue to the back and press onto your page.
✨ The Instant Upgrade: Instant artwork for your journal without any design work.
4. Skincare & Boutique Tissue Paper → Soft “Painted” Backgrounds
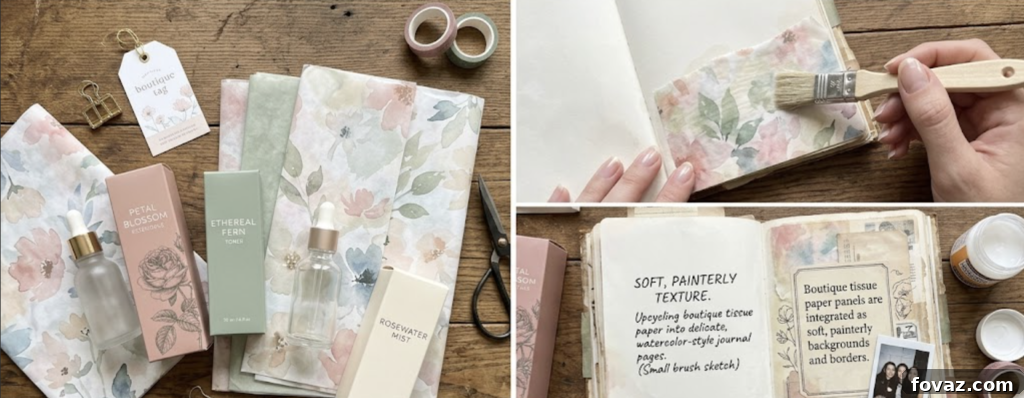
Pastel or printed tissue from orders and gifts gives pages a translucent, painted look without any paint or brushes.
The Paper Scrap: Thin tissue sheets from beauty or gift packaging.
⚡ 2-Minute How-To:
- Tear: Rip a piece slightly larger than the page.
- Position: Lay it over the page and smooth it flat.
- Glue: Apply a thin layer of glue under the tissue and press down gently.
✨ The Instant Upgrade: A soft color wash that lets underlying text and art show through.
5. Tea & Matcha Box Flaps → Secret Peek-a-Boo Doors
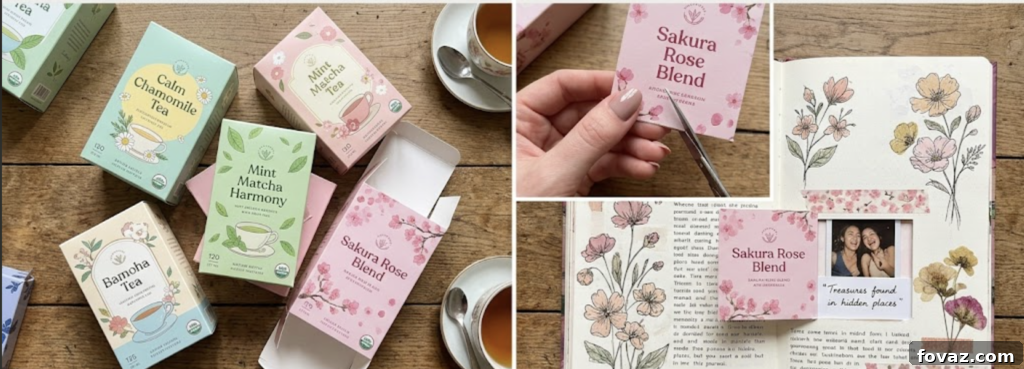
Flip-top lids from tea, cocoa, or specialty food boxes can become little doors on your page—perfect for hiding notes, dates, or photos.
The Paper Scrap: Foil or graphic flip-top flaps from boxed foods.
⚡ 2-Minute How-To:
- Snip: Cut the lid flap along its fold line.
- Place: Position it where you want the hidden compartment.
- Glue: Attach only the folded edge to create a hinge.
✨ The Instant Upgrade: A tactile flap that adds interactivity to any page.
6. Thick Clothing Price Tags → Ready-Made Note Cards
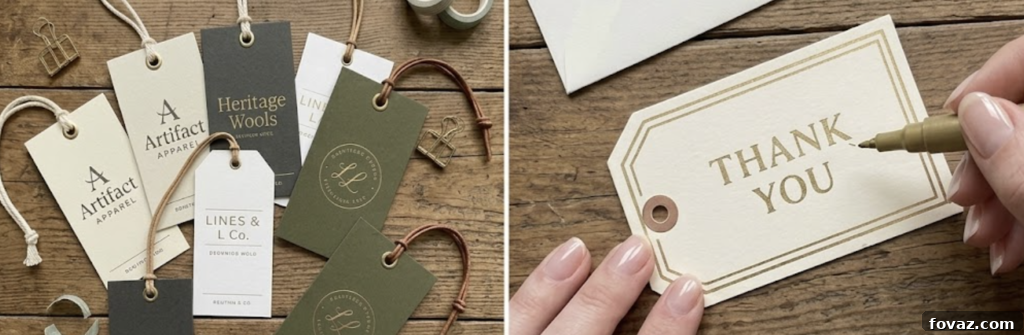
Retail tags are designed to be sturdy and textured—ideal for quick journal cards or memory notes.
The Paper Scrap: Heavy, textured tags from clothing or lifestyle items.
⚡ 2-Minute How-To:
- Remove: Peel off any price stickers or cover them with scrap paper.
- Write: Use the back for a short memory, quote, or date.
- Tuck: Slide the tag into a pocket or clip it to a page.
✨ The Instant Upgrade: A durable, pre-made card that adds authenticity to your pages.
7. Cardboard Coffee Sleeves → Quick Paper Note Holders
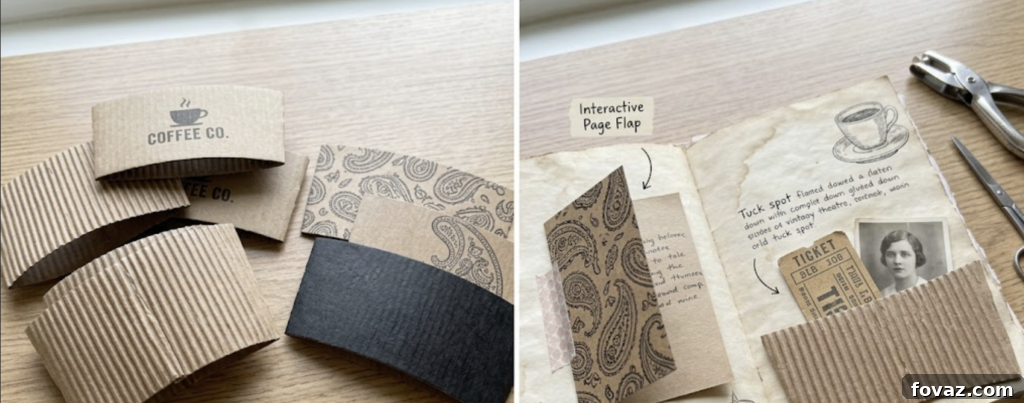
The curved top and sturdy shape of a coffee sleeve make an instant pocket for receipts, tickets, or small notes.
The Paper Scrap: Textured cardboard sleeves from coffee or bubble tea cups.
⚡ 2-Minute How-To:
- Open: Cut down the glued seam to lay the sleeve flat.
- Attach: Glue the bottom and sides to form a pocket, leaving the top open.
- Mount: Press it onto your notebook page where you want a pocket.
✨ The Instant Upgrade: A ready-made pocket that holds loose pieces securely and looks intentional.
8. Waxy Bakery Paper → Crinkly Sheer Page Dividers
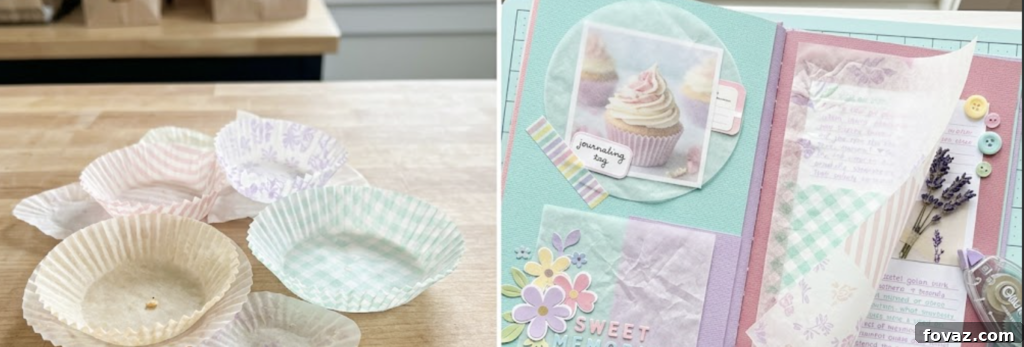
Waxy paper from bakery bags or pastry liners becomes a soft, translucent divider that adds age and texture to a journal. This trick creates a gentle rustle and a peek-through effect.
The Paper Scrap: Clean waxed paper from bakery bags, pastry liners, or wrapping.
⚡ 2-Minute How-To:
- Clean: Wipe the paper with a dry napkin.
- Trim: Cut a rectangle the size of your page.
- Insert: Slip it between two finished pages or place it near the spine.
✨ The Instant Upgrade: A delicate divider that reveals hints of the artwork beneath and gives your book a vintage feel.
9. Perfume & Cosmetic Cartons → Torn Paper Borders
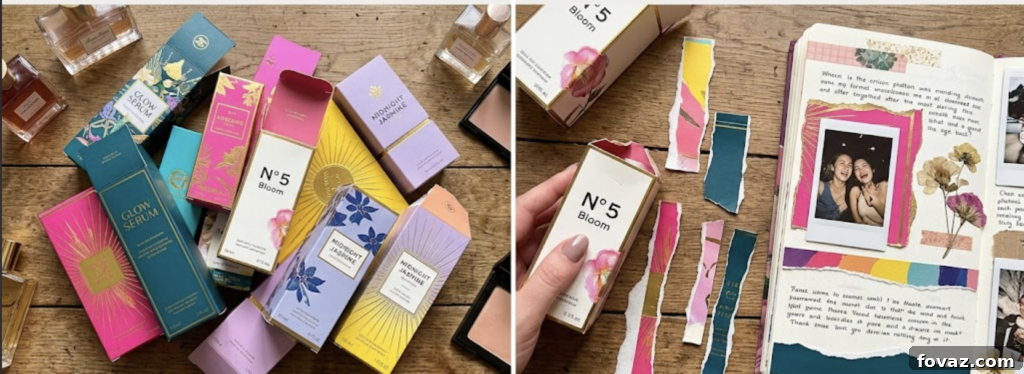
Thick, textured paper from perfume and cosmetic boxes tears beautifully, creating soft, tactile borders that frame your pages naturally.
The Paper Scrap: Heavy, ribbed, or linen-like paper from high-end product boxes.
⚡ 2-Minute How-To:
- Tear: Rip strips by hand to reveal soft, irregular edges.
- Layer: Place the strips along page edges or overlap for depth.
- Glue: Secure them with a glue stick and press flat.
✨ The Instant Upgrade: A handmade frame with real texture that breaks up plain margins.
What’s next for all these upcycled pages?
Once you’ve made a handful of tags, pockets, and dividers, you have the core materials for a full junk journal. Buyers and gift recipients are drawn to journals filled with authentic, repurposed pieces—those unique details can’t be bought in a mass-produced notebook.
You’ve already done most of the creative work. The remaining steps are simple: bind your pages, organize layouts, and consider small packaging or pricing if you plan to sell. Turning a paper stash into a sellable product is mostly about presentation and consistent batches.
If you’re curious about turning this hobby into extra income, a clear guide that covers basic binding methods and pricing can help you move from finishing pages to making your first sale. Start small, test what buyers respond to, and scale up the layouts and kits that sell best.
FAQs
What packaging is best for paper crafts?
Thick, matte, or textured packaging works best—skincare boxes, clothing tags, and cereal boxes are ideal. Shiny or waxy materials like bakery liners are great for translucent dividers.
How do you remove a label from a glass jar without tearing it?
Soak the jar in warm water for a few minutes to loosen the adhesive, then peel the label off gently for a clean result.
Do you need special tools to upcycle packaging into paper crafts?
No. A good pair of scissors and a glue stick are enough for every project here. Most take less than three minutes each.
Can tissue paper be used in journaling?
Absolutely. Tissue from gifts or beauty orders makes a soft, translucent background—glue it flat for a painted effect without any paint.
What’s the easiest packaging craft for beginners?
Removing bottle and jar labels is the quickest and simplest: peel, glue, and you have instant page art with no cutting or design needed.