
Valentine’s Day offers the quintessential opportunity to craft a truly romantic and personal dinner experience right at home. While bustling restaurants and their often-overpriced, set menus might appeal to some, nothing quite compares to the intimate atmosphere and heartfelt warmth of a meal lovingly prepared and presented in your own cherished space. By incorporating unique and creative DIY centerpieces, you can effortlessly transform your dining table into a bespoke work of art that feels profoundly personal and speaks volumes of your affection.
These romantic tablescape ideas are designed to inspire, whether your vision leans towards rustic charm, sophisticated elegance, or playful whimsy. They are wonderfully accessible for crafting novices, yet possess enough refined detail to impress even seasoned DIY enthusiasts. More than just decorations, these centerpieces become a focal point, setting the perfect mood for an unforgettable evening. So, gather your crafting tools, ignite your imagination, and let’s embark on a journey to create something truly magical and memorable!
Crafting an Unforgettable Valentine’s Day: The Art of DIY Centerpieces
This Valentine’s Day, go beyond the ordinary and infuse your celebration with a dose of personal flair and genuine emotion. DIY centerpieces are not just decorative elements; they are conversation starters, memory makers, and a beautiful testament to the effort and love you pour into making the occasion special. They allow you to tailor every detail to your unique relationship, preferences, and style, ensuring your romantic dinner is an authentic reflection of your connection. From flickering candlelight to vibrant blooms and sentimental keepsakes, each centerpiece idea is a canvas for your creativity, promising to elevate your dinner into an experience that will be cherished long after the plates are cleared.
Set the Stage for Love with Charming DIY Centerpieces
Transforming your Valentine’s dinner into an unforgettable experience begins with setting the right ambiance, and creative, handmade table decorations are key. These DIY centerpiece ideas beautifully blend romance and charm, perfect for cultivating a heartfelt and intimate mood that will make your special someone feel truly cherished. Each project is designed to be enjoyable to create and impactful in its presentation, ensuring your table is as inviting as the company you share.
Create a Romantic Glow with Enchanting Mason Jar Luminaries
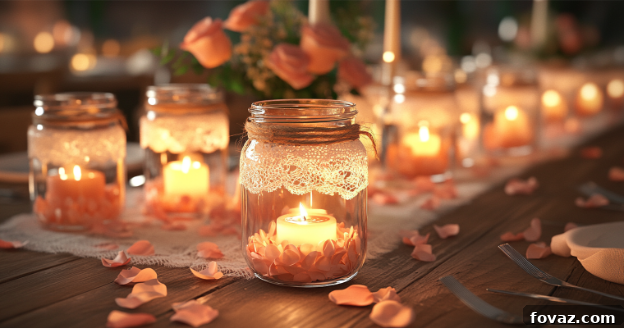
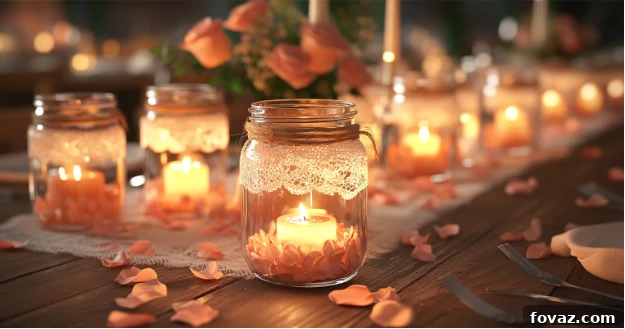
Nothing quite sets a romantic tone like the soft, flickering glow of candlelight. Mason jar luminaries are a classic choice – simple to craft, yet incredibly effective at creating a warm, inviting, and deeply charming ambiance. Their rustic elegance makes them versatile enough for various decor styles, from farmhouse chic to sophisticated minimalist, and they lend themselves beautifully to personalized touches.
What You’ll Need to Craft Your Luminaries:
- Mason jars (clear glass allows for maximum light, but tinted jars can add a specific color accent)
- Tea lights or battery-operated flameless LED candles (for safety, especially around fabrics, and for extended illumination without wax mess)
- Decorative elements: delicate lace ribbon, natural burlap, rustic twine, elegant satin ribbon, or even painted designs (e.g., small hearts, initial monograms)
- Mod Podge glue or a similar craft adhesive (for adhering fabrics/twine to glass)
- Real or high-quality faux rose petals, small decorative pebbles, clear acrylic gems, or fine decorative sand (for internal flair)
Simple Steps to Assemble Your Charming Luminaries:
- Begin by thoroughly cleaning and completely drying each mason jar. Ensure there are no smudges, fingerprints, or dust, as these can detract from the finished look once the light shines through.
- Apply a thin, even layer of Mod Podge or your chosen adhesive around the outer surface of the jar. If you’re covering the entire jar, work in sections to prevent the glue from drying too quickly.
- Carefully press your chosen decorative material—be it lace ribbon, burlap, or twine—onto the adhesive. Smooth it down gently with your fingers or a soft brush to remove any air bubbles, wrinkles, or unevenness. Allow the adhesive to dry completely according to the product instructions.
- For an extra touch of romance and visual interest, place a handful of real or faux rose petals, small decorative stones, clear acrylic crystals, or a layer of fine colored sand inside each jar. This adds texture and reflects the light beautifully.
- Finally, insert a tea light or flameless candle. For optimal ambiance, light them just before your dinner begins, allowing them to cast a soft, enchanting glow that fills your space with warmth and romance.
Pro Tip for Enhanced Visual Appeal:
Elevate your display by arranging mason jars of varying heights. You can achieve this by using different sized jars, or by placing some on subtle risers like small, inverted saucers or decorative coasters. To create a truly cohesive and romantic tablescape, scatter additional rose petals, delicate sprigs of baby’s breath, or even a few scattered small heart-shaped candies around the base of the jars. For a subtle, lingering fragrance, consider adding a drop of your favorite essential oil (like rose or lavender) to the Mod Podge before application, allowing the scent to subtly release as the jars dry.
For more inspiration on creating cozy and inviting table settings that truly capture the spirit of romance, explore Country Living’s extensive collection of romantic dinner tips and ideas. They offer a wealth of suggestions for every aspect of your special evening, from recipes to decor.
Float Fresh Blooms for a Sophisticated and Effortless Look
Floating flower arrangements epitomize elegance with minimal effort, making them a fantastic choice for those seeking a sophisticated yet simple Valentine’s Day centerpiece. This style works beautifully for both intimate dinners for two and larger romantic gatherings, instantly adding a touch of serene beauty and natural grace to any table. The reflective quality of water combined with delicate blooms creates a truly captivating visual.
Essential Materials for Your Floating Floral Display:
- A shallow glass bowl, an elegant crystal dish, a decorative ceramic plate with a raised lip, or even a clear glass baking dish.
- An assortment of fresh flowers such as classic red roses, lush pink peonies, vibrant carnations, delicate orchids, or even simple gardenias. Choose blooms with relatively flat bases that can easily float.
- Small floating candles, either unscented to allow the flowers’ natural fragrance to shine, or lightly scented to complement your chosen blooms.
- Clean, fresh water (distilled water can sometimes help prevent cloudiness).
Simple Steps to Craft Your Elegant Floating Centerpiece:
- Carefully fill your chosen bowl or dish with clean water, ensuring you leave approximately an inch of space from the rim to prevent any accidental spills when the flowers are added.
- Gently snip the stems off your chosen flowers, ensuring only the bloom or the flower head remains. For roses, you may wish to remove any bruised or imperfect outer petals for a pristine look.
- Thoughtfully arrange the individual blooms on the water’s surface. Distribute them evenly, considering color balance and pattern, to create a balanced, visually pleasing composition.
- Nestle the floating candles among the flowers. For optimal effect and safety, light them just before your dinner is served to cast a warm, captivating glow across your table, enhancing the romantic ambiance.
Expert Tip for a Polished Presentation:
Achieve a truly cohesive and polished aesthetic by coordinating the colors of your chosen flowers with your table linens, dinnerware, or even the overall theme of your Valentine’s Day decor. For an extra touch of luxury, select a sparkling crystal dish as your base. Alternatively, subtly tint the water with a tiny, food-safe drop of food coloring (red or pink for Valentine’s, or even a soft purple) to add depth and a unique visual element, making your floating centerpiece truly stand out. Consider adding a few sprigs of baby’s breath, small decorative leaves, or even thin slices of citrus fruit (like lemon or lime) to the water for additional texture and a subtle aroma.
For a broader spectrum of exquisite flower arrangement ideas and comprehensive home decorating inspiration, visit Better Homes & Gardens, a premier resource for all things home and garden, offering countless ideas to beautify your space.
Infuse Rustic Charm with Handcrafted Twine-Wrapped Bottles
For those who appreciate a touch of natural, farmhouse-inspired aesthetics, twine-wrapped bottles are an ideal Valentine’s Day centerpiece. These charming decorations are not only affordable and stylish but also endlessly customizable, allowing you to perfectly match them to your personal decor scheme. They bring a warm, textural element to your table, evoking a sense of cozy intimacy and homespun care.
Supplies You’ll Need for Your Rustic Bottles:
- Assorted empty glass bottles (wine bottles, soda bottles, milk bottles, or even decorative glass jars work exceptionally well). Ensure they are thoroughly cleaned and completely dry before starting.
- Natural twine, jute rope, sisal cord, or even different colored yarns for varied textures and appearances.
- A hot glue gun with an ample supply of glue sticks (a low-temperature gun is often safer for beginners).
- Faux greenery like eucalyptus sprigs, small fern fronds, sprigs of lavender, or single-stem fresh flowers such as daisies, tulips, or even dried pampas grass for a modern touch.
- Optional: Small decorative charms, beads, personalized tags, or ribbons to add a special Valentine’s touch.
Crafting Your Rustic Twine-Wrapped Bottles:
- Begin by applying a small, discreet dot of hot glue to the base of your chosen bottle. Securely press and hold one end of the twine onto this glue spot until it adheres firmly.
- Carefully and tightly wrap the twine around the bottle, working your way upwards in a consistent pattern. Apply a small, strategic bead of hot glue every few inches, or whenever you feel the twine loosening, to ensure it remains securely in place and prevents unraveling. Maintain consistent tension for a smooth and even finish.
- Continue this meticulous wrapping process until you reach the neck of the bottle, or your desired height. Once you’re satisfied with the coverage, trim the twine and secure the end with another small dot of hot glue, carefully tucking it under the last wrapped layer for a seamless and tidy look.
- To complete your rustic masterpiece, insert a single fresh flower, a sprig of faux greenery, a delicate dried flower, or even a decorative feather. Grouping several different sizes and shapes of these bottles together creates an attractive and dynamic focal point on your table.
Design Tip for a Harmonious Arrangement:
To create a visually dynamic and engaging display, group bottles of varying heights, shapes, and sizes together. This adds dimension and artistic interest to your tablescape. For a bespoke Valentine’s Day touch, consider tying a small, heart-shaped charm, a delicate ribbon in red or pink, or even a personalized tag with an initial or a short love note around the neck of each bottle. You can also experiment with different colors of twine, or even paint the bottles a subtle base color (like white or cream) before wrapping for unique effects that peek through the twine. For added texture, consider wrapping some bottles partially and leaving sections of glass exposed.
Delight Guests with Playful and Sweet Candy Heart Vases
For a centerpiece that combines playful charm with functional beauty, candy heart vases are an excellent and utterly sweet choice. They are particularly well-suited for family-friendly Valentine’s Day celebrations or for those who simply adore a whimsical and colorful aesthetic. This clever design not only holds beautiful flowers but also doubles as an edible (and adorable!) decoration.
What You’ll Need for Your Sweet Centerpiece:
- A clear glass vase or jar (a cylindrical shape or one with straight sides generally works best for even candy distribution).
- A smaller glass container or vase that can fit snugly inside the larger vase, leaving a noticeable gap around the edges (this inner container will hold the water and flowers).
- Plenty of candy conversation hearts, colorful jelly beans, vibrant gumballs, small decorative hard candies, or even small, individually wrapped chocolates.
- Your favorite fresh flowers, perhaps classic red roses, cheerful tulips, fragrant lilies, or a vibrant mixed bouquet that complements the candy colors.
Crafting Your Adorable Candy Heart Vases:
- Carefully place the smaller, inner container inside the larger clear vase. Take a moment to ensure it is centered, as this will affect the symmetry of your candy border.
- Begin filling the space between the two containers with your chosen candy. Pour slowly and gently to ensure the candies settle evenly and create a beautiful, colorful, and consistent border around the inner vase. Tap the outer vase gently on the table a few times to help the candies settle.
- Once the candy gap is filled to your desired height (usually just below the rim of the inner vase), carefully pour clean water into the inner container. Avoid pouring water directly onto the candies.
- Finally, artfully arrange your fresh flowers within the inner, water-filled container, letting their natural beauty provide a striking contrast with the playful and colorful candy exterior.
Creative Tip for a Whimsical Touch:
Amplify the visual appeal of your candy heart vases by meticulously matching the candy colors to your dinnerware, napkins, or other elements of your table decor. This creates a beautifully coordinated and thoughtful look that ties the entire tablescape together. For an even more captivating effect, experiment with layering different types or colors of candies to create a vibrant, striped, or ombre design. For example, a layer of red jelly beans at the bottom, followed by pink conversation hearts, and topped with white candies. This centerpiece is particularly charming for a more casual, playful, or family-friendly Valentine’s Day celebration.
Personalize Your Table with a Heartfelt DIY Photo Garland
A DIY photo garland is a wonderfully sentimental addition to your Valentine’s table, turning your centerpiece into a celebration of your shared love story. This decoration goes beyond mere aesthetics, doubling as a meaningful tribute that invites reflection and conversation. It’s a beautiful way to display cherished memories and make your loved ones feel truly special.
Materials for Your Sentimental Photo Garland:
- Strong twine, decorative string, elegant ribbon, or even a delicate chain.
- A collection of mini clothespins or small decorative clips (heart-shaped clips would be ideal).
- A curated selection of your favorite printed photos, perhaps showcasing cherished memories, significant milestones, funny candid moments, or key events in your relationship.
- Craft paper in romantic colors (classic red, soft pink, crisp white, or even metallic gold), scissors, and a good pen for creating decorative paper hearts or personalized notes.
Assembling Your Cherished Photo Garland:
- Carefully clip your chosen printed photos to the length of twine or string using the mini clothespins. Space them out thoughtfully to allow each photo to stand out and tell its part of your story. Consider arranging them chronologically or by theme.
- From your craft paper, cut out various sizes of heart shapes. On these hearts, write sweet love notes, significant dates, inside jokes, romantic quotes, or even lyrics from ‘your song’.
- Attach these decorative paper hearts between your photos, or alongside them, using additional mini clothespins. This adds visual interest, reinforces the romantic theme, and provides additional opportunities for personal messages.
- Once complete, artfully drape the photo garland across the center of your dining table. Alternatively, hang it along a mantelpiece above the dining area, suspend it elegantly from a light fixture, or create a charming backdrop on a wall near your table.
Enchanting Pro Tip:
For an added layer of magic and a truly romantic ambiance, consider replacing the simple twine with a delicate string of warm white LED fairy lights. As evening falls and the tiny lights twinkle, they will beautifully illuminate your cherished memories, creating a soft, inviting glow that truly enhances the sentimental value of this centerpiece. This option is especially impactful in dimly lit settings, adding a dreamlike quality to your Valentine’s dinner.
Elegant Candle & Greenery Centerpiece: A Touch of Natural Sophistication
Beyond traditional floral arrangements, combining lush natural greenery with the warm, inviting glow of candles creates an incredibly sophisticated and deeply intimate tablescape. This centerpiece is remarkably versatile, surprisingly simple to assemble, and provides a rich, earthy elegance that beautifully complements any Valentine’s dinner theme, from rustic and natural to modern and chic. It’s perfect for those who appreciate understated beauty and a tranquil atmosphere.
What You’ll Need for Your Greenery & Candle Display:
- A long, narrow decorative tray (e.g., wooden, metallic, or mirrored), a flat wooden board, or a simple runner made of natural fabric.
- Various sizes of pillar candles (white, cream, ivory, or a soft blush work best for a romantic, natural look). Taper candles in candlesticks can also be incorporated.
- An abundance of fresh greenery such as flowing eucalyptus branches, delicate olive branches, lush fern fronds, aromatic rosemary sprigs, or even clippings from your garden.
- Optional: Small decorative elements like natural pinecones, faux berries (red or white), tiny metallic ornaments, or scattered river stones for added texture.
How to Create Your Greenery & Candle Display:
- Carefully place your chosen tray, board, or runner in the exact center of your dining table, ensuring it forms a clear base for your arrangement.
- Arrange the pillar candles along the tray, varying their heights and diameters for visual interest and dynamic appeal. Ensure they are stable and spaced safely apart from each other and the greenery to prevent fire hazards.
- Artfully weave and layer the fresh greenery around the base of the candles, allowing it to spill gracefully over the edges of the tray. Create a lush, natural bed that makes the candles appear to emerge from a verdant landscape.
- If desired, tuck in small decorative elements like faux berries, tiny roses (fresh or silk), or subtle metallic accents among the greenery for pops of color, texture, and a touch of festive flair.
- For the ultimate romantic effect, light the candles just before your guests arrive or the dinner begins. The warm, dancing flames will cast beautiful shadows and fill the space with an inviting, cozy glow.
Styling Pro Tip for a Luxurious Touch:
For an extra layer of luxury and sparkle, incorporate metallic accents like small gold-painted stones, copper wire lights subtly woven through the greenery, or a mirrored tray as your base. You can also engage the sense of smell by choosing subtly scented pillar candles (vanilla, sandalwood, or a delicate rose) or by lightly misting the greenery with an essential oil spray before guests arrive. This thoughtful approach creates a multi-sensory experience that significantly elevates the entire dining atmosphere, making the evening truly unforgettable.
General Tips for Crafting the Perfect Romantic Tablescape
While the centerpiece is undoubtedly the star of your Valentine’s Day table, a truly romantic dinner experience involves more than just a beautiful focal point. Consider these additional elements to create a cohesive, enchanting, and utterly unforgettable dining atmosphere that delights all the senses:
- Elegant Linens and Thoughtful Place Settings: Opt for soft, luxurious table linens in romantic colors such as deep reds, blush pinks, elegant creams, or crisp whites. High-quality cloth napkins, perhaps folded into a charming heart shape or secured with a decorative ring, instantly add a touch of sophistication. Choose your finest dinnerware, sparkling crystal glassware, and polished silverware to make the meal feel truly special and refined.
- Harmonious Ambiance Lighting: Beyond your centerpiece candles, pay close attention to the overall room lighting. Dim harsh overhead lights, and instead, incorporate additional sources of soft, warm light. This could include string lights draped across a nearby wall, floor lamps with warm-toned bulbs, or even the inviting glow of a fireplace if you have one. The objective is to create an intimate, cozy glow that avoids any harsh or unflattering illumination.
- A Curated Soundtrack for Love: Thoughtfully curate a playlist of soft, romantic music that can play gently in the background throughout your dinner. Avoid anything too distracting, loud, or fast-paced; the music should enhance the conversation and mood, not overpower it. Instrumental pieces or acoustic versions of favorite love songs work wonderfully.
- Personalized Touches That Speak Volumes: Elevate the thoughtfulness of your tablescape with small, personalized details. Hand-written place cards, small favors like gourmet chocolates or a single long-stemmed rose at each setting, or a framed photo on a nearby buffet of a cherished memory can make the evening feel even more unique and deeply personal.
- Subtle and Inviting Scent: A subtle, pleasant aroma can significantly impact the mood without being overwhelming. If your centerpiece includes strongly scented fresh flowers, opt for unscented candles to avoid conflicting fragrances. Alternatively, use a light, romantic diffuser scent (such as rose, vanilla, sandalwood, or a hint of citrus) to gently perfume the room. Always avoid overpowering fragrances that might interfere with the enjoyment of your carefully prepared food.
Elevate Your Valentine’s Day with Thoughtful DIY Centerpieces
This Valentine’s Day, go beyond the expected and transform your home into a sanctuary of romance and personal connection with these captivating DIY centerpieces. Each design, from the softly glowing mason jar luminaries to the elegantly floating fresh blooms and the whimsical candy heart vases, is an invitation to express your affection and creativity in a truly unique way. By investing your time and heart into crafting these distinct table decorations, you infuse your dinner table with personality, charm, and a profound sense of care that store-bought items simply cannot replicate.
The effort you invest in creating these beautiful centerpieces isn’t just about aesthetics; it’s about crafting an unforgettable experience for your loved ones. It’s a tangible act of love, showing them how much they mean to you through thoughtful detail and personal touch. So, gather your materials, let your imagination take flight, and prepare to set a table that speaks volumes without uttering a single word. Light the candles, arrange your chosen blooms, and savor an intimate dinner surrounded by the warmth of beauty, the depth of thoughtfulness, and an abundance of love that only a homemade touch can truly provide. Make this Valentine’s Day one for the books, filled with memories created right at your own beautifully adorned table.
Join the Conversation!
Which of these romantic DIY centerpiece ideas are you most excited to try this Valentine’s Day? Do you have any unique DIY tips, personal traditions, or creative suggestions for crafting the perfect Valentine’s Day table décor? We’d absolutely love to hear your thoughts, experiences, and ingenious ideas in the comments section below! Sharing your inspiration can help others make their own celebrations even more magical and special.
Frequently Asked Questions About DIY Valentine’s Centerpieces
- How far in advance can I prepare these DIY centerpieces to ensure everything is perfect?
Many of these DIY centerpieces can indeed be prepared a day or two in advance, allowing you to reduce stress on Valentine’s Day itself. For example, twine-wrapped bottles and photo garlands can be fully assembled well ahead of time. Mason jar luminaries can be prepared in advance, but it’s best to hold off on adding fresh petals or lighting candles until just an hour or two before your dinner to ensure maximum freshness, safety, and impact. For floating flower arrangements, it is highly recommended to assemble them on the day of your event to keep the blooms vibrant and the water clear. - Where can I find the best materials for these projects without breaking the bank?
Most of the essential materials for these DIY centerpieces are readily available and can be quite affordable with a little savvy shopping. Check your local craft stores (like Michaels or Hobby Lobby), dollar stores (Dollar Tree, Dollar General), discount retailers (Target, Walmart), and even online marketplaces like Amazon or Etsy for competitive prices and unique finds. Don’t forget to look for sales, utilize coupons, and sign up for store newsletters for exclusive discounts! Recycling old glass jars and bottles you already have at home is also a fantastic and eco-friendly way to save money and add a personal touch. - Are there ways to make these romantic centerpieces more eco-friendly and sustainable?
Absolutely! To enhance the eco-friendliness and sustainability of your DIY centerpieces, prioritize using recycled materials such as glass jars and bottles. Opt for real, locally sourced fresh flowers whenever possible, and consider growing your own herbs or small flowers for arrangements. Choose natural decorative elements like twine, jute, or natural fabric ribbons over synthetic options. Use soy or beeswax candles, which are more sustainable and burn cleaner than traditional paraffin candles. Minimizing plastic decorations and choosing reusable components will significantly reduce your environmental impact. - I’m not particularly “crafty” or artistic – which centerpieces are best for beginners?
Don’t worry if you’re new to crafting! Several of these ideas are designed to be incredibly beginner-friendly and offer stunning results with minimal effort or specialized skills. The “Candy Heart Vases” and “Floating Fresh Blooms” are especially forgiving and simple to assemble, requiring mostly assembly rather than intricate crafting. The “Mason Jar Luminaries” and “Twine-Wrapped Bottles” are also straightforward once you get the hang of basic gluing and wrapping techniques. Start with the project that appeals most to you, and remember, perfection isn’t the goal – the heartfelt effort and personal touch are what truly count! - Can these DIY centerpiece ideas be easily adapted for other special occasions or holidays throughout the year?
Yes, these ideas are incredibly versatile and can be easily customized for a wide range of holidays, seasons, and celebrations throughout the year! Simply swap out the Valentine’s-themed decorations for elements appropriate to the occasion. For autumn, think mini pumpkins, fall leaves, and warm-toned berries. For Christmas, incorporate pinecones, cranberries, and evergreen sprigs. For birthdays, integrate balloons or party-themed colors. For a spring brunch, use pastel flowers and delicate ribbons. The basic concepts provide a fantastic and adaptable foundation for year-round festive decor. - How can I ensure my centerpiece doesn’t block guests’ views across the table, making conversation difficult?
This is an important consideration for any dining tablescape to maintain easy conversation and eye contact. Aim for centerpieces that are either low-profile (below eye level when seated, typically less than 12-14 inches tall) or tall and slender enough that guests can easily see around them. Floating flower arrangements, candy heart vases, and horizontally laid greenery and candles work wonderfully for this. If using taller elements like photo garlands or twine bottles, ensure they don’t form a solid barrier that prevents comfortable interaction across the table. - What if I want to incorporate a specific theme or color scheme that goes beyond traditional Valentine’s Day red and pink?
Embrace your personal style and creativity! All these DIY ideas are highly adaptable to virtually any theme or color scheme you envision. If you prefer a minimalist look, choose clear glass, white flowers, and simple twine or metallic accents. For a vintage or bohemian feel, use antique-looking jars, lace, and dried flowers. If your chosen color scheme is unconventional (e.g., deep blues and silver, or vibrant purples and gold), simply select flowers, candies, ribbons, and other decorative elements that match your desired palette. The core instructions and techniques remain the same; it’s the specific decorative details you choose that define the unique theme and atmosphere.