
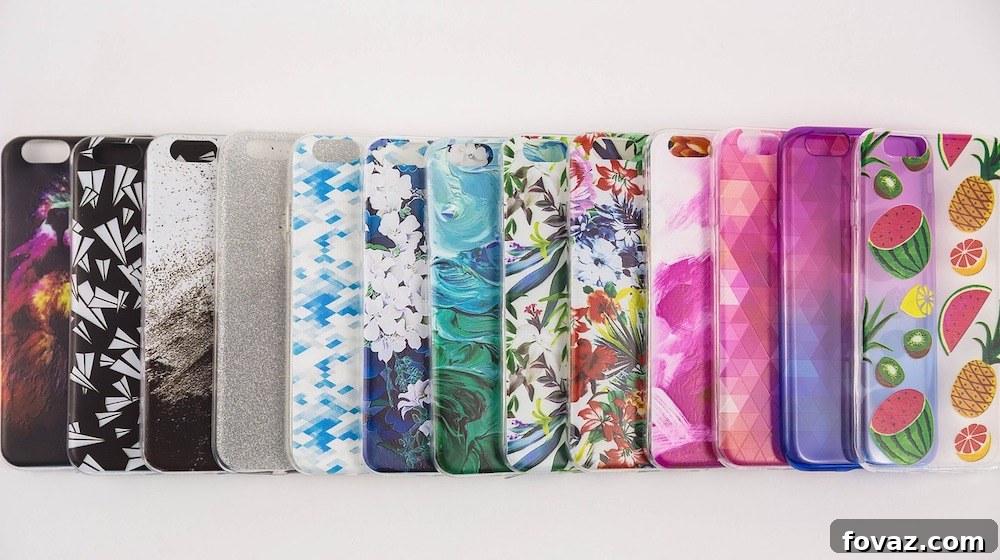
DIY Hot Glue Gun Phone Case: Craft Your Own Custom Smartphone Cover
In a world where smartphones are indispensable and often represent a significant investment, protecting them from everyday bumps, scratches, and drops is paramount. While the market is flooded with countless phone cases—from designer brands to budget-friendly options found at every corner store—there’s a unique satisfaction in creating something entirely your own. What if you could design a personalized, protective phone case in under 15 minutes, using materials you likely already have at home? Get ready to unleash your creativity and save some money with this incredibly simple, yet highly effective, DIY hot glue gun phone case tutorial!
Forget the hassle of searching for the perfect case or waiting for online orders. This guide will walk you through crafting a custom phone cover that perfectly fits your device, reflects your style, and offers reliable protection, all with just a hot glue gun and some baking paper. Intrigued? Let’s dive into the fascinating world of homemade phone accessories and discover how easy it is to make a durable and unique smartphone case!
Why Craft Your Own Phone Case? The Benefits of DIY Protection
You might be wondering, “Why bother making a phone case when I can just buy one?” The answer lies in a blend of practicality, creativity, and personal satisfaction. Here are compelling reasons to consider embarking on this rewarding DIY project:
- Unbeatable Customization: Mass-produced cases rarely capture your unique personality. With a hot glue gun, you become the designer! You have complete freedom to experiment with textures, patterns, and even different colored glue sticks to create a cover that truly stands out from the crowd. No one else will have a phone case exactly like yours!
- Cost-Effective Protection: High-quality, protective phone cases can be surprisingly expensive, often ranging from $20 to $50 or more. This DIY method uses incredibly cheap, readily available materials, making it an exceptionally budget-friendly way to protect your valuable device without compromising on safety.
- Instant Solution for Emergencies: Dropped your phone and suddenly need a case? Lost your old one? This project is a quick fix, offering immediate protection without a trip to the store or the wait time for online shipping. You can create a functional case in minutes.
- Emergency Back-Up Option: Even if you have a favorite store-bought case, having a homemade hot glue case as a back-up can be incredibly useful. It’s perfect for those times when your primary case gets damaged, dirty, or you simply want a different look for a day.
- Fun and Engaging Craft: It’s more than just a phone case; it’s a creative outlet! This project is simple enough for beginners, offering immediate gratification, but also provides ample room for artistic expression for experienced crafters. It’s a rewarding activity for all ages (with adult supervision when using a hot glue gun).
- Eco-Friendly Potential: By making your own case, you contribute to reducing consumption of new plastic products. If you already own a hot glue gun and baking paper, you’re repurposing existing materials, which is a step towards a more sustainable approach to tech accessories.
Getting Started: Your Tools and Materials for Success
Before you embark on your DIY phone case adventure, it’s crucial to gather all your materials and set up a safe, organized workspace. This ensures a smooth crafting process and helps you achieve a professional-looking finished product. The beauty of this project lies in its simplicity; you won’t need any specialized tools, just a few common household items.
Materials You’ll Need:
- Your Smartphone: This is the star of the show and will serve as your mold. Ensure your phone is clean, free of dust, and fully charged before you begin. It’s a good idea to put your phone on airplane mode or turn it off to avoid accidental calls or notifications during the process.
- Hot Glue Gun: The primary tool for this project. Any standard hot glue gun will work. Make sure it’s in good working order and you have plenty of hot glue sticks. Clear glue sticks are common and versatile, but colored or even glitter glue can add an extra flair to your custom design!
- Baking Paper (Parchment Paper): This is an absolutely essential component! Its superior non-stick properties prevent the hot glue from adhering to your phone, allowing for effortless removal of the finished case. Ensure you have a roll that’s wide enough to comfortably wrap around your entire phone.
- Scotch Tape (or similar clear adhesive tape): Used to securely attach the baking paper to your phone. Clear tape is ideal as it won’t leave sticky residue or obscure any markings you make. Avoid using opaque tapes that might block light or heat.
- Scissors: A sharp pair of scissors will be needed for cutting the baking paper to size and, more importantly, for trimming any excess glue or refining the edges of your finished case. Precision here will greatly impact the final look.
- Pencil or Fine-Tip Marker: To accurately trace around all essential phone features such as buttons, charging ports, speaker grilles, and especially the camera lens and flash. These precise markings will become your “no-glue zones.”
- Optional but Recommended: A heat-resistant mat, an old cutting board, or several layers of newspaper to protect your work surface from accidental hot glue drips or heat. A small bottle of rubbing alcohol and cotton swabs can also be handy for meticulously cleaning up any tiny, accidental glue residues (use with extreme caution on your phone’s surfaces).
Safety First! Important Considerations for Hot Glue Gun Use:
Working with a hot glue gun involves heat and requires a degree of caution to prevent burns. Always supervise children closely if they are participating in this project. Ensure your workspace is well-ventilated to avoid inhaling any fumes from the hot glue. Use a clear, flat, heat-resistant surface for your project. Always avoid touching the metal nozzle of the glue gun or freshly applied hot glue directly with your skin. If you do accidentally get hot glue on your skin, immediately run the affected area under cold water to cool it down and gently peel off the glue once it has hardened.
For a dynamic visual walkthrough of this ingenious hot glue gun phone case technique, we highly recommend checking out this concise tutorial by YouTube user short tutorial from DaveHax. It’s an excellent resource to see each step in action, providing valuable context before you begin your own DIY project.
Step-by-Step Guide: Crafting Your Custom Hot Glue Phone Case
Now that you have all your materials ready and are fully aware of the necessary safety precautions, let’s get down to the exciting business of crafting! Follow these detailed instructions carefully to ensure a perfect fit and a durable, aesthetically pleasing custom phone case that truly protects your device.
1. Prepare Your Phone with Baking Paper for a Non-Stick Surface
Begin by laying out a single, clean sheet of baking paper on your designated clean and heat-resistant work surface. Place your smartphone centrally on this sheet. Using your scissors, carefully cut around the entire perimeter of your phone, making sure to leave a generous margin of approximately 1 to 2 inches (2.5 to 5 cm) on all sides. This extra space is crucial; it will allow the baking paper to comfortably wrap around and fully cover your entire device, creating a completely protective barrier for your phone and an ideal non-stick surface for the hot glue application.
2. Securely Tape the Baking Paper to Your Phone
With your phone screen facing upwards, meticulously wrap the pre-cut baking paper around it. The primary goal here is to completely cover the back and sides of your phone with baking paper, ensuring that no part of your phone’s casing is directly exposed to the hot glue. Use several small pieces of clear Scotch tape to firmly secure the baking paper only to the front edges of your phone screen. It is absolutely crucial that the tape adheres solely to the screen side, leaving the back and sides of the phone completely tape-free. This meticulous taping prevents the baking paper from shifting during the intricate gluing process and ensures a smooth, easy removal of your finished case later.
3. Mark Essential Features: Buttons, Ports, and Camera Cut-Outs
This is a critical and precision-dependent step for maintaining your phone’s full functionality. With your pencil or a fine-tip marker, carefully and meticulously trace around all the essential features on your phone that need to remain exposed. This includes the power button, volume buttons, the charging port (USB-C, Lightning, or Micro-USB), any headphone jacks (if applicable), speaker grilles, and most importantly, the entire camera lens assembly and flash. These precise drawn outlines will serve as your designated “no-glue zones.” Any hot glue applied directly to these areas will either permanently block access to your buttons and ports or obscure your camera, rendering your custom case impractical and frustrating to use. Take your time and be as accurate as possible with these markings.
4. Lay the Foundation: Glue the Perimeter Edges of the Case
Plug in your hot glue gun and allow it ample time to fully heat up (this typically takes a few minutes, depending on the gun). Once the glue is flowing smoothly, turn your phone over so the screen is facing down, with the baking paper still securely taped to the front. Begin by carefully applying a continuous, even bead of hot glue around the entire perimeter of your phone. This action will form the “bumper” or the initial frame of your phone case. Ensure this initial layer is thick enough to provide sturdy structural integrity and impact protection but not overly bulky. This edge layer is the fundamental foundation of your case, providing crucial impact protection and defining its overall shape. Work slowly and steadily, maintaining consistent pressure for a neat and strong finish.
5. Design and Build the Back of Your Phone Case
With the sturdy edge foundation now in place, it’s time to unleash your creativity and design the back of your custom phone case! Start filling in the entire back area of the phone with hot glue. You can apply the glue in various ways: create neat straight lines, dynamic cross-hatch patterns, artistic swirling designs, or any unique texture you desire. The key here is to ensure an even and consistent layer of glue across the entire back for optimal protection. Remember to meticulously avoid the “no-glue zones” you marked earlier for your camera, flash, and other ports; precision here prevents functional issues. For added durability and enhanced protection, you can opt to build up multiple thin layers of glue, allowing each layer to cool and partially harden slightly before adding the next. This layering technique also provides an excellent opportunity to refine your design and add depth.
6. Allow to Dry Completely and Refine Your Custom Case
Once you are fully satisfied with the glue design on the back and the perimeter edges are robustly formed, carefully set your phone aside on a flat surface and allow the hot glue to cool and completely harden. This curing process typically takes approximately 10 to 15 minutes, though larger or thicker cases might require a bit more time for full solidification. It is crucial to resist the urge to touch or attempt to remove the case prematurely, as this can easily distort its shape or create unsightly imperfections. Once the glue is completely firm, cool, and rigid to the touch, gently peel the baking paper away from your phone and slowly, carefully remove your phone from its brand-new hot glue case. Use your sharp scissors to meticulously trim away any excess glue strands, rough edges, or uneven areas, creating a clean, professional finish. Pay close attention to the cut-outs for ports and buttons, ensuring they are perfectly clear and accessible.
7. Enjoy Your New Custom Phone Case!
Once your custom hot glue gun phone case has been meticulously trimmed, perfected, and inspected for full functionality, it’s ready for use! Gently pop your smartphone back into its new protective cover, ensuring that all buttons are easily accessible and all ports are completely clear for charging and accessories. Take a moment to test out its fit, feel, and the functionality of all buttons and camera. Congratulations! You’ve just created a truly unique, personalized accessory that not only provides robust protection for your valuable device but also proudly showcases your crafting skills and personal style. Share your amazing creation with friends and family, and inspire them to try this fantastic and rewarding DIY project!
Pro Tips for Crafting the Perfect Hot Glue Phone Case
Elevate your crafting experience and ensure the best possible outcome with these expert tips and tricks:
- Layering for Enhanced Durability: For significantly enhanced protection and a sturdier, more resilient case, always apply your hot glue in multiple thin, even layers rather than attempting to create one very thick layer. Allow each layer to cool and partially set slightly before meticulously adding the next.
- Maintain Consistent Pressure: To achieve smoother lines, even surfaces, and a more uniform finish across your case, strive to maintain consistent pressure on your hot glue gun’s trigger throughout the application process.
- Experiment with Vibrant Colors: Don’t limit your creativity to just clear glue! Hot glue sticks are available in an exciting variety of colors, including glitter-infused options. Mix and match different hues to create vibrant, eye-catching designs, or even attempt marbled effects by blending two colors before they fully dry.
- Add Embellishments (Post-Drying): Once your hot glue case is completely dry, cool, and fully cured, you can carefully glue small, flat-back embellishments such as rhinestones, decorative beads, or tiny charms onto the surface for an extra touch of sparkle and personalized flair.
- Consider Unique Textures: Before the hot glue fully hardens (this requires quick action!), you can gently press textured items like a piece of lace, a small stamp, or even a leaf into the surface to create fascinating and unique imprints on your case.
- Achieve Smooth Edges: After the initial trimming phase, if you notice any particularly rough or uneven edges, you can gently warm them with a hairdryer (on a low setting and held at a safe distance) and then carefully smooth them with your finger (exercise extreme caution to avoid burns!) or a specialized craft tool for a refined finish.
- Practice Makes Perfect: If you are new to working with hot glue or crafting in general, consider doing a small practice run on a spare piece of baking paper. This will allow you to get a better feel for the glue gun’s flow, understand how quickly the glue sets, and practice your desired designs before working on your actual phone.
Troubleshooting Common Issues with Your DIY Phone Case
Even with careful planning and execution, minor hiccups can sometimes occur during any DIY project. Here’s how to effectively address some of the most common issues you might encounter while crafting your hot glue phone case:
- The Case Feels Flimsy or Too Flexible: If your newly crafted case feels too thin, excessively flexible, or doesn’t seem to offer adequate protection, it most likely needs additional layers of glue. To remedy this, simply re-tape the baking paper securely to your phone, place the existing hot glue case back onto the phone as a guide, and then carefully add another layer or two of glue, specifically focusing on areas that feel particularly weak or lacking in thickness.
- Accidental Glue Stuck to Phone: While baking paper is renowned for its non-stick properties, a tiny bit of glue might sometimes accidentally transfer to your phone, especially if the paper shifts. For stubborn, small spots, a very small amount of rubbing alcohol applied to a cotton swab can help loosen and remove the residue. However, use this method with extreme caution and always test it on an inconspicuous area of your phone first to ensure it doesn’t cause any damage.
- Buttons or Ports Are Partially Blocked: If, after removing the case, you find that a button, charging port, or headphone jack is partially or completely covered by glue, it means your initial markings weren’t precise enough. Use a sharp craft knife (exercising extreme care and away from your phone!) or small, pointed scissors to precisely trim away the obstructing glue. Go slowly and make small cuts to avoid over-trimming.
- Uneven or Rough Edges: Minor unevenness or small, jagged edges can be corrected by carefully trimming with a sharp pair of scissors. For larger irregularities or more noticeable rough patches, a small amount of fresh hot glue can be applied to the affected area and skillfully blended into the existing structure, then smoothed out before it hardens.
- Case Doesn’t Fit Snugly: If the case feels too loose, it might be due to the baking paper shifting or not being taped tightly enough during the process. If it’s only slightly loose, you might try adding another thin layer of glue to the inside edges of the case to tighten the fit. If it’s significantly too loose, it might be best to start over to ensure optimal protection.
Unleash Your Creativity: Beyond the Basic Hot Glue Case Designs
The hot glue gun method for crafting phone cases truly opens up a world of creative possibilities. Once you’ve mastered the basic, functional case, consider these innovative ideas to take your designs to the next level and create a truly unique masterpiece:
- Two-Tone and Marbled Designs: Experiment with using different colored hot glue sticks for distinct sections of your case to create bold, two-tone designs. For a more artistic flair, try creating beautiful marbled effects by carefully blending two or more colors of hot glue together before they fully dry.
- Glitter Bomb Effect: For those who love a bit of sparkle, mix fine glitter directly into clear hot glue for a shimmering, embedded effect. Alternatively, sprinkle glitter generously onto wet glue before it sets for a dazzling, surface-level sparkle.
- Architectural and Geometric Patterns: Instead of a flat back, build up intricate geometric shapes, delicate lattices, or even abstract architectural patterns on the back of your case. This creates a unique sculptural feel and adds a distinct three-dimensional element to your design.
- Textured Grip for Enhanced Handling: Incorporate raised dots, parallel lines, or unique wavy patterns on the sides of your case to create an improved, non-slip grip. This clever trick combines practical functionality with an attractive tactile design element.
- Painted Masterpiece: Once your hot glue case is completely dry, cool, and fully cured, it becomes an excellent canvas for further artistic expression. You can paint it with acrylic paints to achieve a solid, vibrant color, or painstakingly create a detailed artistic design. Once your paint is dry, seal it with a clear topcoat or mod podge for added durability and to protect your artwork.
Conclusion: Protect Your Tech, Express Your Style with DIY!
Who knew that such a simple and accessible combination of a hot glue gun and baking paper could lead to such a practical, personalized, and robust accessory for your smartphone? This DIY phone case project offers an ingenious, cost-effective, and highly creative way to protect your valuable smartphone, confidently express your individual style, and engage in a fun, rewarding craft—all without breaking the bank or waiting for shipping. Whether you’re in urgent need of an emergency case, looking to craft a unique, thoughtful gift, or simply enjoy hands-on projects, this hot glue gun method consistently delivers fantastic and satisfying results.
So, gather your simple materials, meticulously follow these detailed steps, and get ready to transform a few common household items into a bespoke, protective masterpiece. Your smartphone (and your wallet) will undoubtedly thank you for this innovative and stylish upgrade! Don’t forget to share your amazing custom creations with us online and inspire others to embrace the joy of DIY!
Looking for more inspiring DIY projects to spark your creativity? Check out these fantastic ideas:
Explore 3 More DIY Phone Cases You Can Make Today to expand your collection of custom covers, and discover how to build your very own futuristic DIY Hologram Projector For Your Smartphone!