
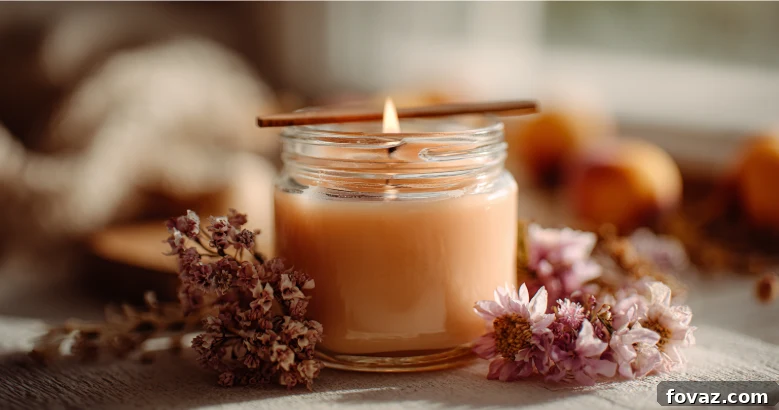
Craft Your Own Southern Comfort: The Ultimate Guide to DIY Peach-Scented Candles
Imagine your home filled with the warm, inviting aroma of sun-ripened peaches, reminiscent of lazy summer afternoons spent on a charming Southern front porch. There’s a unique satisfaction in creating something beautiful and fragrant with your own hands, and DIY peach-scented candles offer just that. These homemade treasures don’t just infuse your living space with a delightful summer scent; they cast a gentle, ambient glow, transforming any room into a haven of tranquility and comfort. By combining quality soy wax, authentic peach fragrance oil, and a touch of creative flair, you can craft personalized candles that evoke a sense of warmth and hospitality.
Ready to embark on a delightful crafting journey? Let’s turn your kitchen into a serene candle-making studio and infuse your home with the sweet, nostalgic charm of peach-scented bliss.
Why Choose Homemade Peach Candles? The Allure of DIY
Opting to make your own peach-scented candles goes beyond just saving money; it’s an immersive experience that offers numerous benefits. Here’s why crafting your own candles is a truly rewarding endeavor:
- Personalization and Customization: Unlike store-bought candles, your homemade creations can be tailored exactly to your preferences. Choose your desired shade of peach, the intensity of the fragrance, and the perfect container to match your home décor. This level of customization ensures each candle is uniquely yours.
- Quality and Natural Ingredients: When you make your own candles, you control every ingredient. This means you can opt for high-quality, eco-friendly materials like natural soy wax and phthalate-free fragrance oils, ensuring a cleaner burn and a healthier environment for your home.
- Cost-Effective Elegance: Crafting candles yourself is often significantly more affordable than purchasing premium scented candles from boutiques. With bulk supplies, you can create multiple candles for the price of one, allowing you to enjoy luxurious scents without breaking the bank.
- A Therapeutic and Relaxing Hobby: The process of candle making itself can be incredibly calming and meditative. From melting the wax to carefully adding the fragrance, each step offers a chance to unwind, focus, and engage in a creative outlet. It’s a wonderful way to de-stress and enjoy some mindful “me” time.
- Thoughtful and Unique Gifts: A beautifully crafted, peach-scented candle makes an exceptional gift for any occasion. It’s a personal, heartfelt present that shows you put time and effort into creating something special. Friends, family, and colleagues will appreciate the unique charm and delightful aroma.
Embrace the joy of creation and fill your home with the enchanting aroma of homemade peach candles, bringing that sought-after Southern comfort right to your doorstep.
Essential Supplies for Your Peach Candle Making Journey
Before you begin, gathering the right materials is crucial for a successful and enjoyable candle-making experience. Most items are readily available at craft stores or online, and many can even be found in your own kitchen. Each supply plays a vital role in ensuring your DIY peach-scented candles turn out beautifully and burn safely.
The Heart of Your Candle: Waxes & Fragrances
- Soy Wax Flakes: This is the foundation of your candle. Soy wax is a popular choice for its clean burn, natural origin, and excellent fragrance throw. It melts smoothly and holds scent beautifully, allowing the authentic peach aroma to truly shine. Look for 100% natural soy wax flakes for an eco-friendly option. Alternatives include beeswax for a longer, slower burn, or paraffin wax for brighter colors and stronger hot throws, though soy is generally recommended for beginners due to its ease of use and clean properties.
- Peach Fragrance Oil or Peach Essential Oil: The key to an authentic and lasting aroma. It’s imperative to choose oils specifically formulated for candle making. These “fragrance oils” are engineered to withstand the heat of burning wax and provide a strong, consistent scent throw. While essential oils offer a natural alternative, ensure they are safe for burning and understand that their scent throw might be less intense or long-lasting compared to synthetic fragrance oils designed for candles. Always check product labels for usage instructions and safety guidelines.
- Candle Dye (Optional): If you desire to give your homemade peach candles a subtle, warm peach tint, candle dye is your friend. Available in liquid or solid form, a small amount can dramatically enhance the visual appeal, creating a beautiful golden-orange hue that perfectly complements the peach scent. Remember, a little goes a long way, and you can always add more if needed.
Wick, Container & Safety Gear
- Cotton Candle Wicks: Essential for a steady, even flame. Wicks come in various sizes and types (e.g., cotton, wood). It’s crucial to match the wick size to the diameter of your container to ensure the wax melts evenly across the entire surface, preventing “tunneling.” Pre-tabbed wicks, which have a metal base, are highly recommended for beginners as they are easier to secure.
- Glass Jars, Metal Tins, or Sturdy Teacups: Your chosen container must be heat-safe and able to withstand the temperatures of melted wax and a burning flame. Repurposed jam jars, thick ceramic mugs, or specially designed candle tins all work wonderfully. Always inspect containers for cracks or chips before use. Consider wide-mouthed containers for a broader wax pool and better scent throw.
- Hot Glue Gun: A hot glue gun is the easiest and most effective way to secure the wick tab to the bottom center of your container. This prevents the wick from floating or shifting as you pour the hot wax, ensuring an even burn from start to finish. A strong adhesive can also be used as an alternative.
Essential Tools for Melting & Mixing
- Double Boiler or Old Saucepan: A double boiler is the safest method for melting wax as it prevents direct heat contact, reducing the risk of burning the wax or creating hazardous fumes. If you don’t have a dedicated double boiler, you can create one by placing a heat-safe pouring pitcher (or a smaller saucepan) inside a larger saucepan filled with a few inches of water.
- Wooden Skewer or Chopstick: This simple tool is invaluable for supporting the wick upright and centered while the wax cools and sets. You can lay it across the top of your container and secure the wick to it.
- Digital Kitchen Scale: For precise candle making, especially when calculating fragrance oil percentages, a digital kitchen scale is indispensable. Wax and fragrance oil should be measured by weight, not volume, for consistent results.
- Candle Pouring Pitcher (Optional but Recommended): A specialized pouring pitcher with a handle and spout makes pouring the hot wax much safer and easier, minimizing spills and mess.
- Thermometer (Recommended): A candy or digital thermometer allows you to monitor the wax temperature accurately, which is crucial for adding fragrance oil at the correct temperature and ensuring optimal scent throw.
Gathering these supplies is the first exciting step towards crafting beautiful, aromatic DIY peach-scented candles that will bring warmth and a delightful fragrance into your home.
Step-by-Step Guide: Crafting Your Signature Peach Candle
Making your own peach-scented candles is a surprisingly simple and deeply satisfying process. Follow these detailed steps to transform raw materials into charming, fragrant treasures that capture the essence of a sun-soaked Southern evening. Patience and precision are key to achieving perfect results.
- Prepare Your Containers: Start by ensuring your chosen jars or tins are clean, dry, and free of any debris. A clean container is vital for good wax adhesion and an aesthetically pleasing finish. Place a small dab of hot glue (or use a pre-glued wick tab) on the center bottom of each container. Firmly press the metal base of a pre-tabbed cotton wick onto the glue. Hold it in place for a few seconds until the glue sets, ensuring the wick stands perfectly straight and centered.
- Center and Secure the Wick: Once the wick is secured at the bottom, use a wick-centering device, a clothes pin, or simply lay a wooden skewer or chopstick across the top of the container. Gently wrap the top end of the wick around the skewer or clip it with a clothes pin, ensuring it remains taut and perfectly upright in the middle of the jar. This prevents the wick from shifting as you pour and cool the wax.
- Measure and Melt the Wax: Using your digital kitchen scale, accurately weigh out the desired amount of soy wax flakes. For a standard 8-ounce candle, you’ll need approximately 8 ounces of wax. Place the wax flakes into your double boiler or the heat-safe pouring pitcher set inside a larger saucepan of simmering water. Heat the wax slowly and gently, stirring occasionally with a dedicated stirring utensil. Avoid high heat or boiling, as this can scorch the wax and affect its quality. Aim for the wax to reach a temperature between 170-185°F (77-85°C), ensuring it’s fully liquid and smooth with no solid clumps.
- Add Fragrance and Color: Once the wax is completely melted and has reached the ideal temperature (usually around 185°F/85°C, but check your fragrance oil’s flash point for best results), remove it from the heat. This is a critical step for optimal scent throw. Carefully measure your peach fragrance oil – a good starting point is 1 ounce of fragrance oil per pound (16 ounces) of wax, or approximately 6-10% of the wax’s weight. Stir the fragrance oil gently but thoroughly into the melted wax for about two minutes to ensure it disperses evenly. If using candle dye, add a few drops or a small chip at this stage, stirring until the desired peach hue is achieved.
- Pour the Wax into Containers: Allow the fragranced wax to cool slightly to about 130-140°F (54-60°C) before pouring – this helps minimize frosting and air bubbles. Slowly and steadily pour the scented wax into your prepared containers, being careful not to disturb the centered wick. Fill the container, leaving approximately ½ to ¾ inch of space from the top. Pouring slowly helps prevent the formation of air bubbles, which can lead to an uneven surface.
- Cool and Set Undisturbed: This step requires patience. Allow your freshly poured candles to cool and harden completely at room temperature, away from drafts or direct sunlight. Moving the candles while they are setting can cause cracks, uneven surfaces, or tunneling issues. Soy wax typically takes anywhere from four to six hours to solidify, but for best results, let them cure overnight, or even for 24 hours. The wax will transition from clear liquid to an opaque solid.
- Trim the Wick: Once the candle wax is completely hard and cool to the touch, gently remove the wick-centering device or skewer. Using sharp scissors or a wick trimmer, cut the wick to about ¼ inch (0.6 cm) above the wax surface. A properly trimmed wick ensures a clean, steady flame and prevents excessive soot and a too-large flame during burning.
- Cure Your Candle: While your candle is ready to burn after the wax hardens, for optimal scent throw and an even burn, it’s highly recommended to “cure” your candle for at least 24-48 hours, or even up to two weeks. During this curing period, the fragrance oil bonds more fully with the wax, leading to a stronger, more consistent aroma when the candle is lit. Store them in a cool, dry place with lids on, if available, during this time.
Congratulations! You’ve successfully crafted your very own DIY peach-scented candles. The anticipation of lighting your first homemade candle, knowing the care and creativity that went into it, is truly a delightful part of the experience.
Mastering the Art of Candle Care: Extend Your Candle’s Life
A beautifully made candle is a joy, and with proper care, your DIY peach-scented creations can provide weeks of aromatic pleasure. Implementing simple maintenance routines from the very first burn will significantly enhance your candle’s performance, ensuring an even melt, a strong scent throw, and a longer lifespan. Think of it as nurturing your homemade masterpiece.
Key Practices for Optimal Burning
- Store Your Candle in a Cool, Dry Spot: Extreme temperatures, especially direct sunlight or very warm rooms, can cause wax to soften, melt, and seep out, or for fragrance oils to evaporate and colors to fade. Keep your candles in a cupboard or a shaded area to preserve their integrity and potency.
- Trim the Wick Before Each Use: This is arguably the most important candle care tip. Before lighting your candle every single time, trim the wick to about ¼ inch (0.6 cm). A shorter wick produces a smaller, more controlled flame, which in turn leads to a cleaner burn, less soot buildup on the jar, and prevents the flame from flickering excessively or becoming too large. Use a specialized wick trimmer for precision.
- Burn the Candle Long Enough on the First Use: The initial burn is crucial for establishing your candle’s “memory.” When you light your candle for the first time, allow it to burn until the entire surface of the wax melts and forms a full liquid pool that reaches the edges of the container. This prevents “tunneling,” where the wick burns straight down the middle, leaving solid wax around the edges. This first burn usually takes 2-4 hours, depending on the candle’s diameter.
- Keep the Wick Centered: After extinguishing the flame, while the wax is still soft and liquid, gently adjust the wick back to the center of the container using a non-flammable tool (like a skewer or wick dipper) if it has shifted. A centered wick ensures an even burn and prevents the flame from burning too close to the container’s edge, which could cause glass to overheat or crack.
- Watch for Drafts: Place your burning candle away from open windows, fans, or high-traffic areas. Drafts can cause the flame to flicker and create an uneven burn, leading to “sooting” (black marks on the jar) and an inefficient release of fragrance. A still environment promotes a steady flame and a consistent scent diffusion.
- Don’t Burn for Too Long: Avoid burning your candle for more than 4 hours at a time. While the first burn needs to be long, continuous burning can cause the container to overheat, the wick to mushroom, and the fragrance to dissipate faster. Allow the candle to cool completely before relighting it.
Troubleshooting Common Candle Issues
- If your candle burns unevenly: Ensure the candle is placed on a flat, level surface, and the wick is always centered. If tunneling has already occurred, you can try using aluminum foil to create a “hood” around the edges of the candle during a long burn to help melt the remaining wax, or carefully scrape out the excess wax to level the surface.
- If the flame flickers excessively or smokes: This is usually a sign that the wick is too long. Extinguish the flame, allow the wax to cool, trim the wick to ¼ inch, and relight. Ensure the candle is not in a drafty area.
- If the scent seems light: Several factors can affect scent throw. Ensure your fragrance oil was added at the correct temperature and properly mixed. Allow for a proper curing time (at least 1-2 weeks for soy wax). The size of your room can also impact how strong the scent appears; a single candle may not be enough for a very large space.
- If you notice “wet spots” or “frosting” on soy candles: These are common, mostly aesthetic issues with soy wax. “Wet spots” are areas where the wax has pulled away from the container, creating clear patches. “Frosting” is a crystalline layer on the wax surface. These do not affect the candle’s performance or scent throw and are often unavoidable due to the natural properties of soy wax.
For more comprehensive candle safety information, always refer to reputable sources. You might find valuable insights from Good Housekeeping’s candle safety guide and The Spruce Crafts’ candle-making guide.
Elevate Your Home Decor: Displaying Your Peach Candles
Your DIY peach-scented candles are more than just sources of fragrance; they are charming decorative elements that can profoundly shape the ambiance of your home. The way you arrange and display your candles can enhance your décor, create a specific mood, and welcome guests with a touch of Southern warmth and charm.
- On Your Front Porch or Patio Table: For truly capturing that “front porch feel,” place a lit candle on an outdoor table during quiet evenings. The gentle glow and sweet peach scent will create a serene, inviting atmosphere for relaxation or intimate conversations.
- Near Your Entryway: Position a candle on an entryway console or shelf to greet visitors with the delightful aroma of fresh peaches. It’s an instant sensory welcome that makes guests feel at home from the moment they step inside.
- As a Centerpiece for Dining: Arrange several peach candles of varying heights or in different containers as a stunning centerpiece for family dinners, summer brunches, or festive celebrations. The soft candlelight adds an elegant touch, while the fragrance complements the meal.
- In a Reading Nook or Beside Your Bath: Create a personal sanctuary by lighting a peach candle in your favorite reading corner or by the bathtub. The soothing light and comforting scent foster an environment of ultimate relaxation and escape.
- Grouped on a Mantle or Coffee Table: Cluster a few peach candles together on a fireplace mantle, a side table, or a coffee table. This arrangement amplifies their warm, inviting glow and creates a focal point, drawing the eye and adding depth to your décor.
- On a Bedside Table: For a gentle winding down at the end of the day, place a small peach candle on your bedside table. The subtle scent can promote a sense of calm and well-being, aiding in relaxation before sleep.
Experiment with different placements and groupings to discover how these handcrafted candles can best enhance your living spaces, bringing a continuous touch of summer’s sweetness indoors.
Thoughtful Gestures: Gifting Your Homemade Peach Candles
A DIY peach-scented candle, crafted with care and infused with a delightful aroma, transcends a simple gift. It’s a thoughtful expression of warmth and a personal touch that can brighten anyone’s day. The versatility of these homemade treasures makes them perfect for a wide array of occasions. Here are some creative ideas for sharing your candle-making talents:
- Simple, Elegant Hostess Gift: Attending a dinner party or visiting friends? Wrap a beautifully finished candle with a rustic ribbon, attach a small handmade tag, and present it as a charming hostess gift. It’s a memorable token of appreciation that’s sure to be cherished.
- Unique Party Favors: For bridal showers, baby showers, or birthday celebrations, mini peach-scented candles make delightful and memorable party favors. They offer a fragrant memento that guests can take home to remember the special occasion.
- A Highlight in a Gift Basket: Elevate a curated gift basket by including a peach-scented candle. Pair it with other homemade treats like peach preserves or baked goods, a cozy blanket, or a favorite book for a truly luxurious and comforting present.
- A Heartfelt Thank-You Present: Show your gratitude to a teacher, neighbor, coach, or any kind individual with a handcrafted candle. It’s a personal way to say “thank you” that feels both thoughtful and generous, offering them a moment of peace and a lovely scent.
- A Warm Welcome for Guests: Place a peach-scented candle in a guest room or bathroom to help visitors feel truly at home. The sweet, inviting aroma creates an instant sense of comfort and hospitality, making their stay more pleasant.
- Holiday or Seasonal Gifts: While peaches evoke summer, a peach-scented candle can be a delightful and unexpected gift for various holidays. Tie it with festive ribbon for Christmas, or add a spring-themed tag for Easter or Mother’s Day, bringing a touch of sunshine to any season.
The beauty of gifting homemade candles lies in the personal effort and thought behind them. Each peach-scented creation carries a piece of your warmth, ready to spread joy and a comforting aroma wherever it goes.
Embrace the Sweet Scent of Summer
DIY peach-scented candles offer more than just a pleasant aroma; they fill your home with the essence of ripe, sun-kissed peaches and the easygoing comfort of a Southern front porch. Each candle you craft is a simple yet profound way to infuse your space with personal charm and a touch of warmth, perfect for any room or occasion. Whether you choose to share them with loved ones, present them as thoughtful gifts, or keep one burning just for yourself, these homemade treasures promise to delight your senses.
Light your DIY peach-scented candle and allow its soft fragrance to gently settle into every corner of your home. Place one beside the kitchen sink to brighten your chores, or let its comforting glow accompany you on the coffee table as you unwind after a long day. Experience the simple luxury of a personalized scent that truly makes your house feel like a home.
We’d love to hear about your candle-making adventures! If you shared a candle, did it bring a smile? Share what techniques worked best for you, any challenges you overcame, or how you personalized your peach-scented creations in the comments below. Every idea and experience helps someone else discover the joy of crafting that cherished “front porch feeling,” no matter where they are.
Frequently Asked Questions About DIY Peach Candles
- Q: Can I use other wax types to make DIY peach-scented candles?
- A: Absolutely! While soy wax is highly recommended for beginners due to its ease of use, clean burn, and excellent fragrance throw, you can certainly experiment with other waxes. Beeswax offers a longer burn time and a natural honey scent that can complement peach, while paraffin wax allows for vibrant colors and a strong hot throw. Just be sure to research the specific melting points, fragrance load recommendations, and wick types suitable for your chosen wax, as they can differ significantly from soy wax.
- Q: Where can I buy peach fragrance oil for candles?
- A: High-quality peach fragrance oil specifically labeled for candle making can be purchased from various sources. Dedicated craft stores (like Michaels or Hobby Lobby) often carry a selection. For a wider variety and specialized options, check online candle supply retailers (e.g., CandleScience, Lone Star Candle Supply, Bramble Berry) which offer extensive collections of fragrance oils, often with detailed descriptions and usage rates.
- Q: How do I prevent my DIY peach-scented candle from tunneling?
- A: Preventing tunneling largely comes down to the “memory burn” on the first use and proper wick sizing. Always ensure that the very first time you light your candle, you allow it to burn long enough for the entire surface of the wax to melt and form a full liquid pool, reaching all the way to the edges of the container. This establishes the full burn diameter for subsequent uses. Also, double-check that you’ve selected the correct wick size for your container’s diameter, as an undersized wick is a common cause of tunneling.
- Q: What size wick should I use for my DIY peach-scented candle?
- A: Matching your wick size to your container’s diameter is crucial for an even burn. Most wick suppliers provide detailed wick sizing charts, which recommend specific wick series and sizes based on the type of wax and the diameter of your container. It’s often a process of trial and error to find the perfect wick, but starting with the supplier’s recommendations is always the best approach.
- Q: Can I add real fruit or dried peach slices to my candle?
- A: It is generally advised to avoid adding real fruit, dried fruit, or large organic materials directly into your candle wax. Real fruit can spoil, mold, or contain moisture that can react unpredictably with hot wax, potentially causing the flame to sputter, create safety hazards, or affect the burn quality. For decorative purposes, consider using safe, non-flammable elements like heat-safe decorative elements or focusing on the container’s exterior decoration.
- Q: What is “curing” and why is it important for homemade candles?
- A: Curing, also known as “setting” or “storage time,” is the period after a candle has been poured and hardened, but before it’s burned. During this time (typically 1-2 weeks for soy wax, though some prefer longer), the fragrance oil fully binds with the wax molecules. This process allows the scent to strengthen and distribute more evenly throughout the candle, resulting in a much stronger and more consistent “hot throw” (the scent released when the candle is burning). Skipping the curing step can lead to a weaker scent and a less satisfying candle experience.
- Q: How long do homemade peach-scented candles typically last?
- A: The lifespan of a homemade candle depends on several factors: the type of wax (soy wax generally burns slower than paraffin), the size of the candle, the wick size, and how well it’s cared for. On average, an 8-ounce soy candle can burn for approximately 40-50 hours, provided the wick is trimmed before each use and the candle is burned for appropriate durations (not exceeding 4 hours per session). Proper storage and care will help maximize its burn time and scent longevity.