
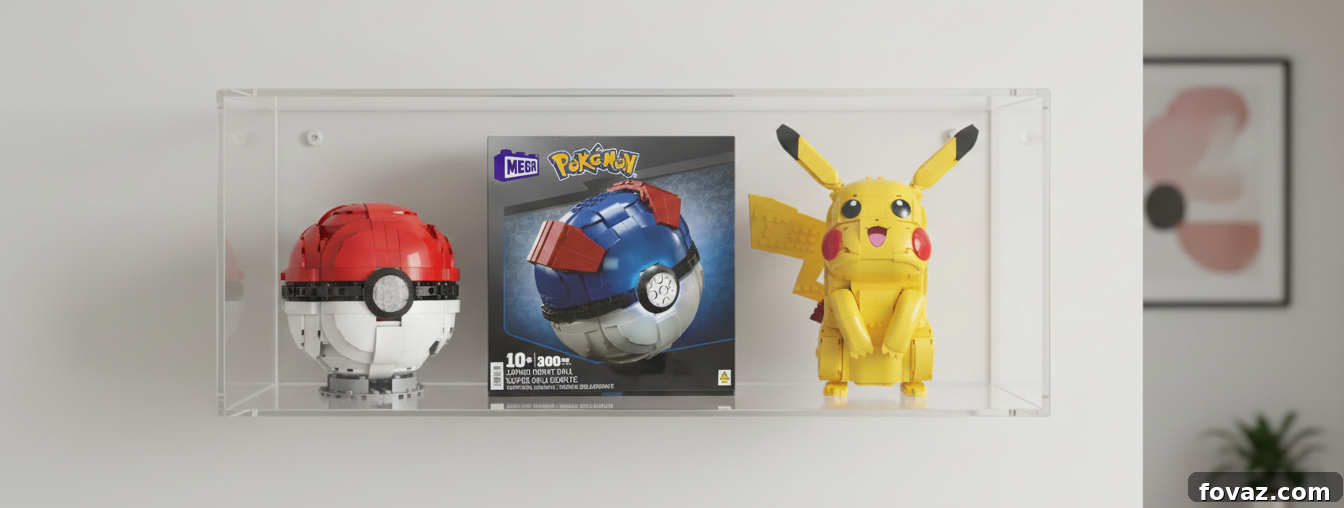
Quick Takeaways: Elevate Your LEGO Pokémon Display
- A thoughtfully designed LEGO Pokémon display not only safeguards your cherished builds from dust but also elevates them into intentional, finished art pieces.
- Clear-front wall shelves offer an elegant balance of optimal visibility and effective light dust protection, maintaining a clean, gallery-like aesthetic.
- For comprehensive, long-term preservation, shoebox-style acrylic cases provide a truly dust-proof environment, ideal for serious collectors.
- Subtle, integrated USB LED lighting dramatically enhances the atmosphere and highlights details without overshadowing the intricate LEGO creations.
- A comprehensive, single-page printable parts list simplifies the preparation, allowing you to tackle all three innovative display hacks efficiently, often within a single weekend.
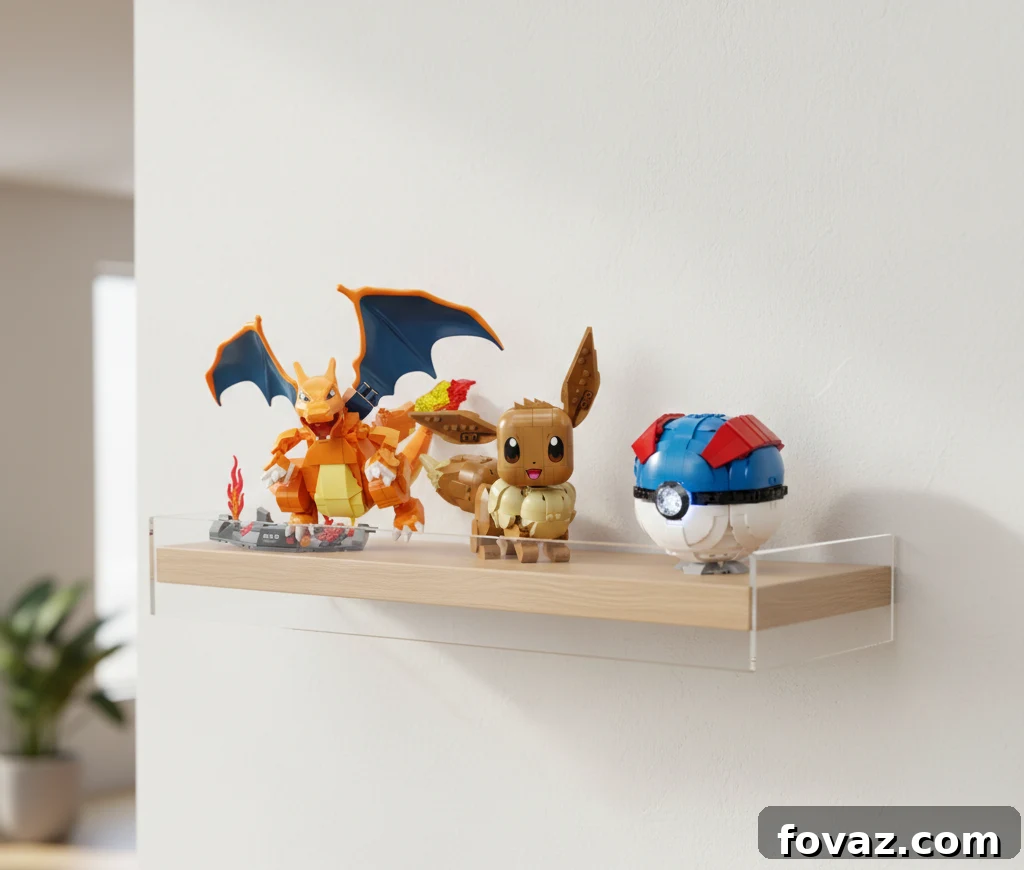
For many dedicated collectors, the journey of building a LEGO Pokémon set is a labor of love, demanding hours of meticulous assembly, careful alignment, and admiration of every tiny detail. Yet, this often culminates in the finished masterpiece being relegated to an open shelf, where it slowly succumbs to dust accumulation and surrounding clutter. The truth is, a truly exceptional LEGO Pokémon build isn’t complete until it’s properly displayed. The act of showcasing your creation is an integral part of the building process itself, transforming a simple toy into a captivating centerpiece.
Consider the difference: a bare LEGO Pikachu is merely a toy; but a LEGO Pikachu dramatically emerging from a Poké Ball, illuminated by pulsing LED “Thunderbolt” cables, transcends into a masterpiece. This profound transformation hinges on three critical elements: effective protection, artful framing, and an immersive atmosphere. Collectors universally seek these qualities in their displays. They desire their precious builds to be shielded from environmental damage, presented with crystal-clear visibility, and arranged in a manner that feels deliberate and impactful. The perennial challenge lies in achieving this trifecta without resorting to cumbersome, bulky cabinets or exorbitantly priced commercial display cases.
This comprehensive guide introduces innovative DIY display hacks, meticulously crafted to address these common collector dilemmas. By leveraging simple materials and intelligent design principles, you can create professional-looking displays that enhance your LEGO Pokémon collection, turning your hobby into a showcase.
- Acrylic Riser Display: This is a unique and elegant acrylic display riser, its simple yet attractive…
- Durable And Sturdy: Different from inferior wood and metal, our display shelves is made of…
Buy on Amazon
(As an Amazon Associate, we earn from qualifying purchases.)
Overcoming Common LEGO Pokémon Display Challenges
Most LEGO collectors, regardless of experience, encounter a predictable set of obstacles when attempting to showcase their prized Pokémon builds. Recognizing these common pain points is the first step toward crafting an effective and satisfying display solution.
- Rapid Dust Accumulation: Open shelves, while visually appealing, are notorious dust magnets, quickly diminishing the pristine appearance of your carefully assembled models.
- Temporary or Unfinished Aesthetic: Displays often lack a sense of permanence or deliberate design, making the builds feel like temporary placements rather than cherished collection pieces.
- Inadequate and Inconsistent Lighting: Poor lighting can flatten details, cast unwanted shadows, and fail to capture the dynamic energy of your Pokémon models, leaving them looking dull.
- Costly and Ill-fitting Commercial Solutions: Store-bought display cases are frequently expensive, limited in size, and rarely offer the custom fit or aesthetic integration that truly complements unique LEGO creations.
Each of the DIY display solutions presented below is specifically engineered to tackle one or more of these prevalent issues. Our goal is to provide practical, affordable, and aesthetically pleasing remedies that keep the spotlight firmly on your extraordinary LEGO Pokémon collection, ensuring they always look their best.
Build 1: The Elegant Clear-Front Wall Shelf for Your LEGO Pokémon Display
Why a Clear-Front Shelf is a Game Changer for Visibility and Protection
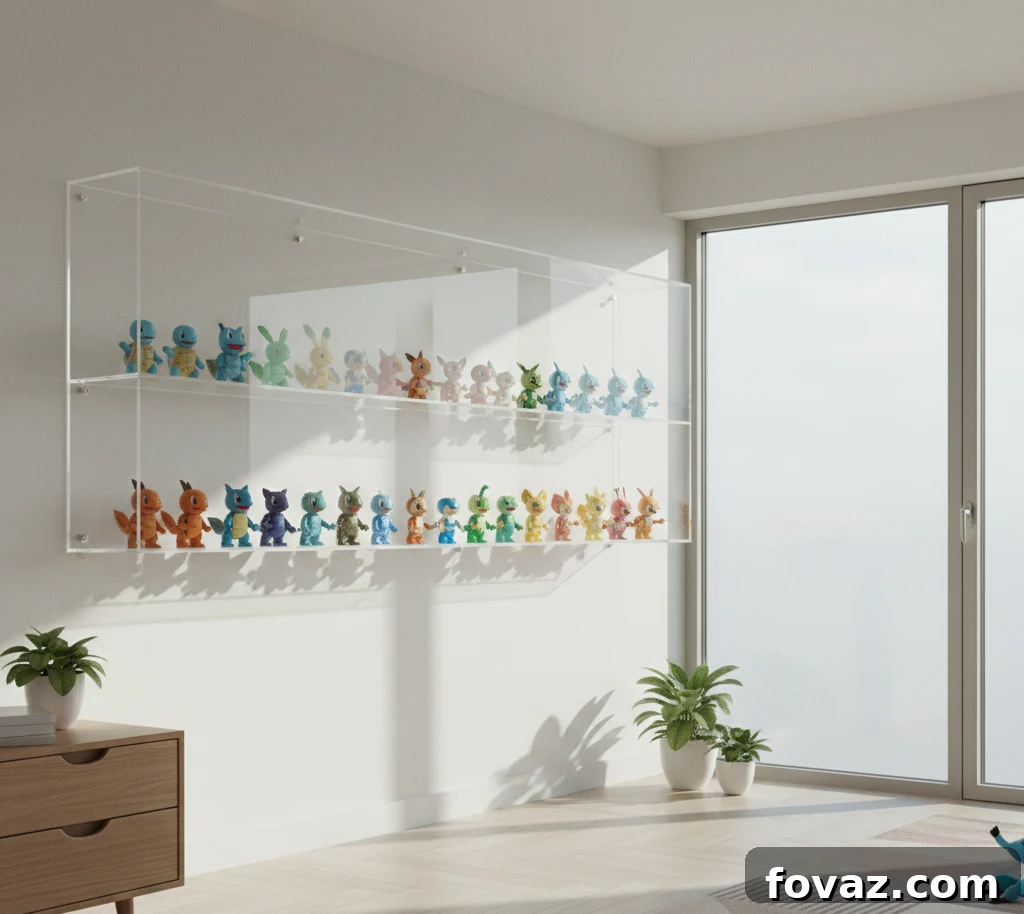
A wall-mounted acrylic LEGO display shelf, featuring a thoughtfully designed clear front panel, offers an ideal synthesis of protection and presentation. This innovative design effectively keeps bothersome dust away from your meticulously crafted builds while preserving the coveted open, gallery-style aesthetic that so many collectors adore. Unlike bulky, fully enclosed cabinets, this shelf avoids adding unnecessary visual weight to your space, instead offering meaningful and noticeable protection without sacrificing lightness or accessibility. Its streamlined design seamlessly integrates into any room, allowing your LEGO Pokémon to be admired from all angles while remaining largely shielded.
The inherent versatility of this shelf is further enhanced by its removable front panel. This feature makes it exceptionally well-suited for Pokémon displays that you frequently interact with, such as those you like to adjust for new poses, rotate for different viewing perspectives, or even swap out seasonally to match themes or new additions to your collection. It provides the perfect blend of security and dynamic flexibility.
Quick Build Overview: Your First Step to an Enhanced Display
This particular project stands out as the fastest and most straightforward of the three display hacks, making it an excellent entry point for anyone looking to upgrade their collection showcase. You can typically complete this build in about an hour, transforming your display space efficiently.
- Prepare and Cut the Shelf Board: Begin by carefully measuring your chosen display space. Cut a sturdy shelf board to a width that perfectly accommodates your LEGO Pokémon sets, ensuring ample room for each build to shine. Precision here contributes to the overall finished look.
- Mount the Shelf Level: Utilize discreet, low-profile brackets to securely mount the shelf onto your wall. Use a spirit level to ensure it is perfectly horizontal, as this is crucial for both aesthetics and stability. Proper mounting prevents sagging and ensures your display looks professional.
- Dry-Fit the Clear Acrylic Front Panel: Before making any permanent attachments, carefully position the clear acrylic front panel. Ensure it fits snugly within the shelf’s opening and that its edges align cleanly. This step helps preempt any fitting issues later on.
- Install Removable Hardware: Attach small, robust magnet catches or elegant turn-buttons to the shelf frame. These fixtures are key to keeping the front panel securely in place while allowing it to be easily removed whenever you need to access your builds or clean the interior.
- Final Inspection: Conduct a thorough final check to confirm that the shelf feels completely solid and stable on the wall. Verify that the clear acrylic panel lifts off and re-attaches smoothly and cleanly, indicating a successful and functional build.
Time estimate: Approximately 60 to 90 minutes, depending on your DIY experience.
Collector tip: Always leave the protective film on both sides of your acrylic panel until the absolute final step of the build process. This simple precaution will help prevent unsightly scratches and smudges during handling and installation, ensuring your display remains pristine.
Best Pokémon LEGO Showcase Ideas for This Versatile Shelf
This clear-front shelf is particularly effective for showcasing specific types of LEGO Pokémon configurations, where visibility and a clean, dynamic presentation are paramount.
- Dramatic Emergence Scenes: Ideal for dynamic scenes, such as a LEGO Pikachu powerfully emerging from a Poké Ball, capturing a moment of action.
- Generational Groupings: Perfectly frames starter Pokémon arranged chronologically by generation, offering a nostalgic and organized display.
- Themed Mini-Collections: Great for small, cohesive groupings based on type (e.g., Water, Grass, Fire) or color schemes, creating visually appealing vignettes.
Ultimately, this shelf excels in scenarios where maintaining high visibility of your LEGO Pokémon models is the top priority, but you also desire a significant level of protection against everyday dust and grime. It’s a perfect blend of openness and enclosure.
Build 2: The Ultimate Dust-Proof LEGO Display Case (Shoebox Style)
When Full Protection is the Undeniable Choice for Your Prized Pokémon
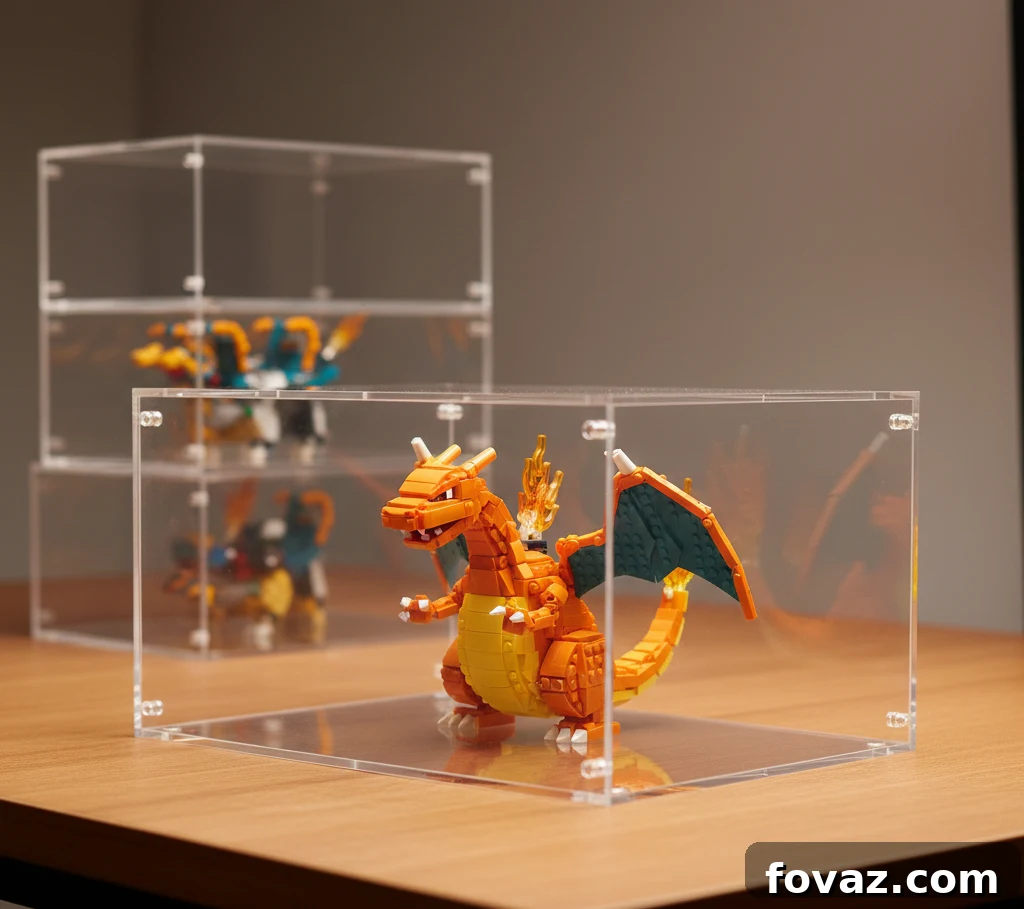
There are certain LEGO Pokémon builds that simply demand an uncompromising level of protection. Intricate details like delicate wings, vibrant flame effects, or complex layered textures are unfortunately magnets for dust, and cleaning them without risking partial disassembly can be a frustrating and time-consuming endeavor. For such precious and detailed creations, a robust, custom LEGO display case DIY solution becomes not just beneficial, but absolutely essential. It’s about preserving the build’s integrity and your investment.
The “shoebox-style” acrylic case has soared in popularity among collectors, and for excellent reasons. Its design offers comprehensive, all-around protection from dust and environmental factors, ensuring your builds remain pristine indefinitely. Beyond its protective capabilities, this style of case is remarkably lightweight, making it easy to handle and rearrange. Crucially, its modular nature means these cases are perfectly stackable, allowing you to create an organized, multi-tiered display that efficiently utilizes vertical space while presenting a cohesive and professional appearance for your entire collection.
Quick Build Overview: Precision for Perfect Preservation
This particular build truly rewards patience, careful attention to detail, and precise alignment during assembly. The extra effort invested in these steps will result in a professional-grade, seamless display case that lasts for years.
- Panel Layout and Orientation: Before applying any adhesive, lay out all your acrylic panels on a clean, flat surface. Double-check their orientation and ensure you have identified which panel goes where. This preemptive step is critical for avoiding errors during bonding.
- Square Taping for Clean Edges: Use painter’s tape or masking tape to temporarily hold the panels together. Focus on ensuring all edges are perfectly square and flush. This step guarantees clean, tight seams and a professional finish once bonded.
- Staged Panel Bonding: Apply acrylic cement (or your chosen adhesive) to one joint at a time. Allow each joint sufficient time to set and cure according to the adhesive’s instructions before moving on to bond the next panel. This staged approach prevents shifting and ensures strong, permanent bonds.
- Light Edge Sanding (Optional): Once the entire case is fully bonded and cured, you may choose to lightly sand any exposed edges with fine-grit sandpaper. This can smooth out minor imperfections and create a more polished, finished feel.
- Add Felt Feet for Secure Stacking: Apply small, adhesive-backed felt feet to the bottom corners of each case. These feet protect surfaces, prevent scratching, and, most importantly, allow cases to stack securely on top of each other without any risk of sliding or instability.
Time estimate: Approximately 90 minutes of active building, plus ample curing time for the adhesive (which can vary, often several hours).
Collector tip: If you plan to build multiple cases, complete one case fully from start to finish first. This “pilot” build allows you to perfect your technique and identify any potential issues, ensuring greater consistency and quality when you batch-produce additional cases.
Ideal Pokémon Builds for the Ultimate Acrylic Cases
This robust and fully enclosed display solution is best reserved for those LEGO Pokémon builds that are either particularly intricate, highly valuable, or simply hold immense personal significance, demanding the highest level of preservation.
- Majestic Fire-Type Heroes: Perfect for showcasing impressive models like Charizard, Arcanine, or other fire-type hero models with intricate wings or flame elements that are difficult to clean.
- Mid-Size Character Builds: Ideal for popular characters like Eevee and its evolutions, or other mid-size character builds with delicate features that could be prone to dust.
- Special, Long-Term Display Sets: Essential for limited-edition sets, custom MOCs (My Own Creations), or any build intended for permanent, long-term display where pristine condition is non-negotiable.
When the long-term preservation and absolute pristine condition of your LEGO Pokémon are your utmost priority, this dust-proof acrylic case represents the strongest and most reliable display option available. It’s an investment in the longevity of your collection.
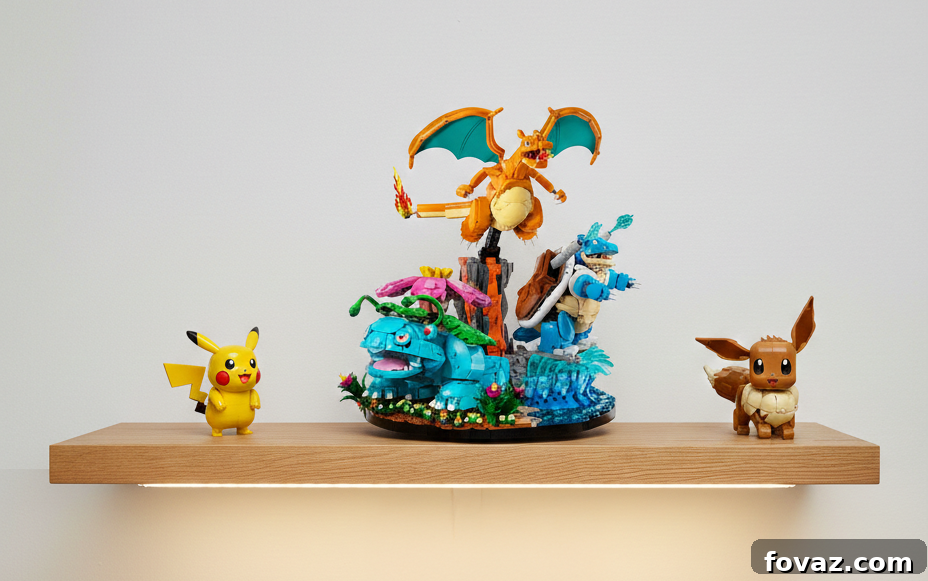
Build 3: The Illuminating Cable-Light Mod with USB LED Lighting
Why Strategic Lighting is the Key to Completing a LEGO Pokémon Display
Lighting is arguably the most transformative element you can introduce to a display. It’s what elevates a mere collection of bricks into a vibrant, living scene. With thoughtfully implemented LED lighting for LEGO shelves, the colors of your builds gain profound depth and richness, intricate details become more pronounced, and the entire creation feels significantly more dynamic and alive, all without overwhelming the viewer with harsh, unnatural brightness. The true artistry lies in its subtlety.
This innovative USB-powered mod is specifically designed to maximize atmospheric impact through discreet illumination. Its focus is on hidden cable routing and achieving a soft, ambient glow rather than showcasing visible fixtures. The goal is to make the light appear as if it emanates naturally from within the display itself, complementing the LEGO art rather than competing with it. Imagine a LEGO Pikachu exiting a Poké Ball, its “Thunderbolt” cables subtly pulsing with LED light – it feels genuinely alive and electrifying. Or picture a mighty Charizard, its fiery wings artfully backlit, appearing powerful and majestic without feeling overly staged or artificial. Strategic lighting breathes life into your static models.
- Bright LEDs: With 300 LEDs and 6500K color temperatures, you’ll enjoy an incredibly bright…
- Dimmable Lighting: 6 levels of brightness allows you to safely adjust your led light strip for…
Buy on Amazon
Quick Setup Overview: Bringing Your Pokémon to Life with Light
This lighting modification is often cited as the most immediately satisfying build, offering a dramatic visual upgrade in a relatively short amount of time. Its simplicity belies its profound impact on your display.
- Pre-Installation LED Test: Before committing to any placement, always plug in your LED strip and test it thoroughly. Ensure all lights function correctly and that the color and brightness meet your expectations. This prevents rework later on.
- Strategic Cable Routing: Carefully plan the path for your USB cable. The goal is to hide it as much as possible, ideally behind the shelf, inside a case, or along the underside of a baseplate. A clean cable run maintains the sleek aesthetic.
- Grommet for Clean Exits: If your cable needs to pass through a piece of wood or acrylic (e.g., to exit the back of a shelf or case), install a small rubber grommet. This protects the cable from fraying against sharp edges and provides a professional, finished look.
- Secure the Strip and Cable: Use the adhesive backing of the LED strip to attach it securely to your chosen surface. Then, employ small adhesive clips or cable ties to neatly secure any excess cable, keeping it out of sight and preventing it from snagging.
- Connect and Fine-Tune: Finally, connect the USB cable to a suitable power source (such as a wall adapter, power bank, or computer port). Take a moment to fine-tune the placement of the lights, adjusting angles slightly to achieve the most impactful and aesthetically pleasing glow for your LEGO Pokémon.
Time estimate: A quick 20 to 30 minutes, offering instant visual gratification.
Collector tip: When it comes to lighting, less is often more. Aim for a subtle, ambient glow that enhances the features of your LEGO Pokémon, rather than a harsh spotlight effect. The goal is to create mood and depth, not to overpower the delicate details of your builds.
One Comprehensive Printable Parts List for All Three DIY Builds
To ensure these projects remain as approachable and hassle-free as possible, all three ingenious display hacks share a meticulously compiled, single-page materials reference. This thoughtfully designed document, the one-page printable parts list, provides a comprehensive overview of every component you’ll need to successfully complete the clear-front wall shelf, the robust dust-proof case, and the captivating cable-light mod.
This invaluable printable resource includes detailed specifications for:
- Wood and Acrylic Dimensions: Precise measurements for all necessary cuts, ensuring your components fit perfectly.
- Essential Mounting Hardware: A complete list of brackets, screws, and fasteners required for secure installation.
- USB LED Lighting Components: Details on the type and quantity of LED strips, cables, and connectors for your lighting mod.
- Adhesives and Finishing Materials: Recommendations for suitable bonding agents, felt feet, grommets, and other finishing touches.
Designed as a swift and efficient reference tool, not an exhaustive step-by-step instruction manual, this list empowers you. Simply print it out, embark on a single, focused trip to gather all your materials, and then return home ready to build with confidence and clarity. This streamlined approach saves you time and eliminates the guesswork, allowing you to focus on the enjoyable aspects of creating your custom LEGO Pokémon displays.
Choosing the Right LEGO Pokémon Display Setup for Your Collection
Not every LEGO Pokémon model requires the exact same display treatment. Indeed, many seasoned collectors find that a diverse approach, mixing various display types across their shelves, offers the most dynamic and practical solution for their growing collections. Understanding the unique advantages of each display hack will help you make the best choices for your individual builds and aesthetic preferences.
Opt for a clear-front wall shelf if:
- Balanced Protection and Visibility: You prioritize an optimal balance between clear visibility of your models and light, yet effective, dust protection.
- Dynamic Display Rotation: You frequently enjoy re-arranging, re-posing, or rotating your displays to keep your collection fresh and engaging.
- Minimalist Aesthetic: You prefer a clean, open, and minimalist look that seamlessly integrates into your existing décor without adding bulk.
Select a dust-proof display case if:
- Complex Builds: Your LEGO Pokémon features intricate shapes, delicate effects, or numerous small pieces that are highly susceptible to dust and difficult to clean.
- Long-Term Preservation is Key: The long-term protection and pristine condition of your build are your absolute highest priorities, safeguarding it for years to come.
- Stackable Storage Solutions: You anticipate building a growing collection and require a modular, stackable system to maximize vertical display space efficiently.
Enhance your display with LED lighting if:
- Increased Visual Impact: You desire to add a dramatic “wow factor” and significantly boost the visual impact and appeal of your LEGO Pokémon models.
- Highlighting Energy and Motion: Your build possesses inherent motion, energy, or specific details (like a Pokémon’s attack or special ability) that you wish to emphasize and bring to life.
- Correcting Dull Spaces: Your current display area feels flat, dim, or lacks vibrancy, and you want to infuse it with atmosphere and highlight your collection more effectively.
Final Thoughts on Elevating Your LEGO Pokémon Display Design
You’ve already dedicated considerable time, effort, and passion to assembling your incredible LEGO Pokémon creations. It’s only fitting that this significant investment culminates in a display solution that truly honors your hard work. A thoughtful and well-executed LEGO Pokémon display isn’t just about showing off; it’s about transforming your hobby into a permanent, impactful statement. The synergy of protection, clarity, and atmosphere works in concert to ensure that each finished build feels intentional, complete, and an integral part of a curated collection.
These innovative DIY display hacks have been meticulously engineered to tackle common collector frustrations with clean, practical, and elegant solutions. Our designs prioritize respecting the inherent beauty of your LEGO builds, ensuring they shine without being overshadowed by overly complicated or ostentatious display mechanisms. To make the entire process as seamless as possible, every single material you’ll require has been conveniently consolidated into one easy-to-read, one-page printable parts list, designed for quick reference and efficient procurement.
Don’t let your magnificent LEGO Pokémon gather dust in obscurity any longer. Take the initiative this weekend: simply grab the printable parts list, gather all your necessary materials in one efficient trip, and embark on the rewarding journey of crafting the perfect showcase. Your extraordinary Pokémon deserve a display that is every bit as impressive and captivating as the builds themselves. Transform your collection from mere models into breathtaking displays that tell a story.
Frequently Asked Questions About LEGO Pokémon Displays
What is the absolute best LEGO Pokémon display for preventing dust?
For the highest level of dust protection, a fully enclosed, airtight acrylic display case is unsurpassed. It creates a sealed environment around your LEGO Pokémon, shielding them from virtually all airborne dust and particles. Clear-front wall shelves also offer significant dust reduction while maintaining easier access to your builds.
Are acrylic display cases truly safe for LEGO bricks over time?
Absolutely. Clear acrylic (polymethyl methacrylate) is a highly stable and inert plastic that does not react with the ABS plastic used in LEGO bricks. It is a widely accepted and preferred material for long-term display and preservation of collectibles due to its clarity, durability, and non-reactive properties.
Can LED lighting potentially damage LEGO Pokémon builds due to heat?
When used properly, low-voltage USB LED strips are perfectly safe for LEGO bricks. Modern LEDs are incredibly energy-efficient and produce minimal heat, especially the small strip lights recommended for these display hacks. Always ensure proper ventilation and avoid direct, prolonged contact between high-powered LEDs and plastic, but for typical accent lighting, heat is not a concern.
Do these DIY display hacks require advanced tools or specialized skills?
Not at all. A core principle behind all three DIY builds is accessibility. They are specifically designed to be completed with a minimal set of basic household tools such as a measuring tape, saw (for shelves), screwdriver, and possibly a craft knife for acrylic. No advanced woodworking or specialized equipment is necessary, making them perfect for DIY enthusiasts of all skill levels.
How should I approach sizing a custom LEGO display case for my Pokémon?
To accurately size a custom LEGO display case, begin by carefully measuring the widest, longest, and tallest points of your assembled LEGO Pokémon build. Once you have these dimensions, add a minimum of 1 to 2 inches (2.5 to 5 cm) of clearance on all sides. This extra space ensures that the build fits comfortably, prevents accidental bumping, and allows for better visual balance within the case.
Are these LEGO Pokémon display ideas suitable for renters who can’t make permanent changes?
Yes, absolutely. The clear-front wall shelves can be mounted using minimal hardware and small pilot holes, which are typically easy to patch upon moving. The dust-proof cases and LED lighting modifications are completely self-contained and fully removable, requiring no permanent alterations to your rental property. These solutions are designed with flexibility and minimal impact in mind.