
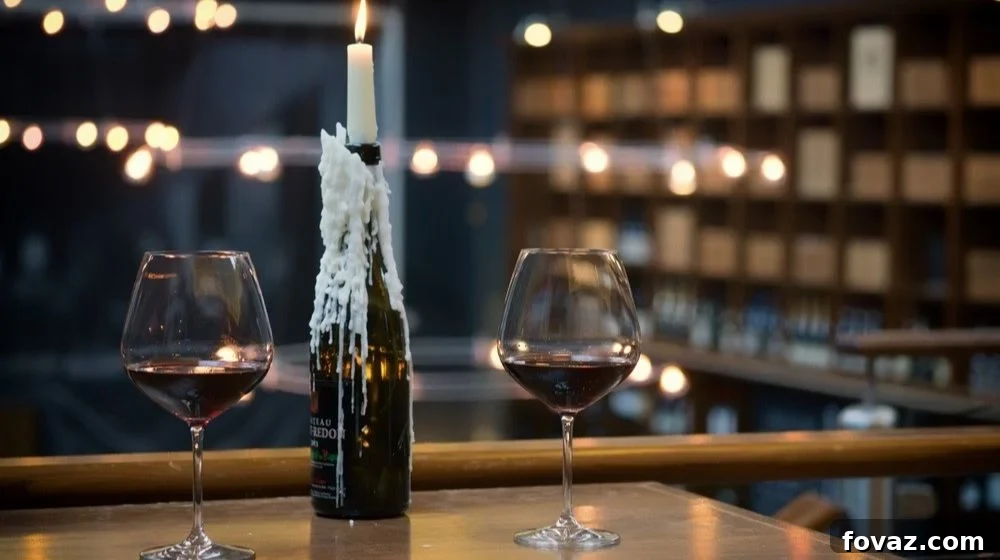
Give every corner of your room a dreamy and sophisticated element by transforming an empty glass bottle into an elegant wine bottle candle holder. This comprehensive guide will show you how to save and craft those seemingly useless empty bottles, breathing new life into them and making them a focal point in your home decor.
Upcycling wine bottles is not only an eco-friendly practice, reducing waste and promoting sustainability, but it also allows you to create unique, personalized decorative pieces that reflect your style. From rustic charm to modern chic, the possibilities are endless for these versatile glass vessels. Let’s dive into the world of DIY crafting and turn your discarded bottles into captivating candle displays.
RELATED: Wine Bottle Crafts | How To Make Wine Bottle Planters
Craft Stunning Wine Bottle Candle Holders: A Step-by-Step DIY Guide
Creating your own wine bottle candle holders is a rewarding project that combines creativity with sustainability. Whether you’re aiming for a dramatic centerpiece for a special occasion or a subtle accent for everyday ambiance, this guide will walk you through everything you need to know. Get ready to impress your guests and illuminate your space with these unique handmade treasures!
What You’ll Need for Your Wine Bottle Candle Holder Project:
- Empty wine bottle (clean and label-free)
- Spray paint (glass-compatible, in your preferred color)
- Match or lighter
- Spray adhesive (optional, for decoupage)
- Tissue paper or other decorative elements
- Craft glue (PVA or Mod Podge recommended)
- Paintbrush (for applying glue or detailed painting)
- Candlestick (taper or pillar, depending on bottle opening)
- Craft knife or utility knife
- Newspaper, drop cloth, or cardboard (for protecting your workspace)
- Soap and water (for cleaning)
- Rubbing alcohol (for final surface prep)
- Gloves and safety glasses (for spray painting)
Step 1: Thorough Preparation for Your DIY Wine Bottle Project
Before diving into the creative fun, proper preparation is key to a successful and mess-free project. This initial stage sets the foundation for a beautifully finished wine bottle candle holder.
Protect Your Workspace
Since you’ll be working with spray paint, adhesives, and potentially dripping wax, it’s crucial to protect your surroundings. Lay down newspaper, a drop cloth, or a large piece of cardboard on your work surface. If you’re painting outdoors, ensure you’re in a well-ventilated area away from anything that might catch overspray. Indoors, open windows and ensure good airflow.
Clean Your Empty Wine Bottles
The first step for the bottles themselves is to ensure they are spotlessly clean. Start by rinsing them thoroughly with warm water to remove any residual wine. The most common challenge is removing the labels. Here are a few effective methods:
- Soak and Scrub: Fill a sink with hot, soapy water and submerge your bottles for at least 30 minutes, or even overnight. This will loosen most labels, allowing you to peel them off. Use a sponge, scrubber, or even a plastic scraper to remove any stubborn remnants.
- Baking Soda Paste: For particularly persistent labels, mix baking soda with a small amount of cooking oil to create a paste. Apply it to the label residue, let it sit for 15-30 minutes, then scrub off.
- Rubbing Alcohol/Goo Gone: After removing the main label, if sticky residue remains, a dab of rubbing alcohol or a commercial adhesive remover like Goo Gone on a paper towel can work wonders.
Once the labels are completely gone, wash the bottles again with soap and water, then rinse well. Allow them to dry completely, preferably upside down, to ensure no moisture remains inside. A final wipe with rubbing alcohol can help remove any oils or fingerprints, ensuring optimal paint adhesion.
Step 2: Unleash Your Creativity and Decorate Your Wine Bottle
This is where your wine bottle truly transforms from a discarded item into a piece of art. Don’t be afraid to experiment with different design techniques. Crafting a wine bottle candle holder isn’t rocket science, but it certainly benefits from a bit of practice and patience. Exert your full effort and let your creativity shine!
Option A: The Classic Painted Look
For a sleek and elegant finish, spray painting is an excellent choice. This method offers a wide array of colors and finishes to match any decor style.
- Choose Your Paint: Ensure your spray paint is specifically formulated for glass or is an all-surface paint that adheres well to non-porous surfaces. You can opt for matte, glossy, metallic, or even frosted finishes.
- Application Technique: In a well-ventilated area and wearing gloves and safety glasses, hold the can approximately 6-8 inches away from the bottle. Apply paint in light, even coats, moving in a continuous sweeping motion. Avoid spraying too heavily in one spot to prevent drips and runs.
- Drying and Layers: Allow each coat to dry according to the manufacturer’s instructions (usually 15-30 minutes) before applying the next. Two to three thin coats are often better than one thick coat for a smooth, professional finish. Rotate the bottle to ensure even coverage on all sides.
- Curing Time: Once all coats are applied, let the bottle cure completely for at least 24-48 hours before handling extensively or fitting the candle. This ensures the paint is fully hardened and less prone to scratching.
Option B: The Dramatic Wax Drip Effect
If you prefer a more rustic, vintage, or gothic aesthetic, incorporating a natural wax drip effect can be incredibly striking. This creates an organic, lived-in look.
- Initial Setup: Place a burning candlestick directly into the neck of your clean, unpainted (or already painted and cured) wine bottle. You might want to do this over a protected surface that can catch excess drips, like a plate or tray.
- Allowing Natural Drips: Simply let your candlestick burn. As it melts, the wax will naturally drip down the sides of the bottle, creating beautiful, unique patterns. The longer the candle burns, the more dramatic the drips will become.
- Directing the Wax: To achieve a more controlled or fuller drip coverage, you can gently tilt the bottle or use a lit match or lighter to carefully heat areas of the candle, directing the molten wax where you want it to drip down. Exercise extreme caution when working with open flames.
- Layering Colors: For an even more dynamic look, consider using candlesticks of different colors sequentially. The layers of wax will create a captivating, multi-hued effect as they build up.
Option C: Colorful Decoupage with Tissue Paper
For a vibrant, textured, and artistic look, decoupage with tissue paper (or other thin papers) is a fantastic option. This method allows for incredible customization and detail.
- Prepare Materials: Tear or cut pieces of tissue paper into various shapes and sizes. You can use a single color for a monochromatic look or mix multiple colors for a mosaic effect.
- Apply Glue: Using a paintbrush, apply a thin, even layer of craft glue (such as PVA glue or Mod Podge, which is excellent for decoupage) directly onto a section of your wine bottle.
- Attach Tissue Paper: Carefully place a piece of tissue paper onto the glued section. Gently smooth it out with your fingers or the paintbrush to remove any air bubbles or wrinkles.
- Layering: Continue applying glue and overlapping pieces of tissue paper until the entire bottle is covered or you achieve your desired design. Don’t worry if the tissue paper looks translucent or wrinkled initially; it often smooths out as it dries.
- Seal It: Once all the tissue paper is applied and the glue is dry, apply one or two thin topcoats of the same craft glue or a clear sealant over the entire decoupaged surface. This protects the paper and gives it a unified, often slightly glossy finish.
RELATED: 19 Super Cool Wine Bottle Crafts and Ideas To DIY
Step 3: Ensuring a Perfect Fit for Your Candlestick
The stability of your candlestick is paramount, both for aesthetic appeal and, more importantly, for safety. You want your candle to sit perfectly snug in the neck of your wine bottle without wobbling. An improperly fitted candle can be a fire hazard and lead to wax spills.
- Assess the Fit: Gently try to insert your chosen candlestick into the neck of the wine bottle.
- If it’s too loose: Don’t force it. There are several ways to secure a loose candle. You can wrap a small piece of aluminum foil around the base of the candlestick until it fits snugly. Alternatively, you can melt a little wax into the bottle neck and then quickly insert the candle, holding it straight until the wax hardens and secures it. A rubber band or a small piece of fabric can also be used as a temporary shim.
- If it’s too tight: This is the most common scenario for standard taper candles. You’ll need to trim the base of the candlestick.
- Trimming for a Snug Fit: Use a sharp craft knife or utility knife to carefully shave off small amounts of wax from the base of the candlestick. Work slowly and evenly around the circumference. Continuously test the fit as you trim, aiming for a firm, secure placement without having to force it. The goal is a perfect friction fit.
- Adjusting Height (Optional): If you find your candlestick extends too high from the top of your wine bottle, making it look top-heavy or disproportionate, you can carefully break or cut a section off the bottom. Remember to still ensure a snug fit after any height adjustments. A shorter candle can sometimes create a more balanced look, especially for smaller bottles or certain aesthetic preferences.
Once you’re satisfied with the fit, gently press the candlestick into place. It should stand upright and feel stable, even if the bottle is lightly nudged.
Step 4: Lighting Your Candle Holder and Display Tips
With your wine bottle candle holder beautifully decorated and the candlestick securely in place, it’s time to bring your creation to life with a warm, inviting glow. This final step involves lighting your candle and setting up your display to maximize both beauty and safety.
- The First Light: Using your match or lighter, carefully ignite the wick of your candlestick. Watch as the flame dances, casting soft shadows and highlighting the unique design of your repurposed bottle.
- Anticipate Wax Drips: Remember that as the candle burns, wax will inevitably drip down the sides of your wine bottle. This is often part of the charm, especially if you chose the dramatic wax drip design. However, it’s crucial to protect the surface where your bottle is sitting.
- Protect Your Surfaces: Place a decorative plate, a coaster, a small tray, or any base of your choice underneath your wine bottle to catch the dripping wax. Not only does this prevent damage to your furniture, but a well-chosen base can also enhance the overall aesthetic of your display. Consider materials like slate, wood, ceramic, or metal to complement your bottle’s design.
- Safe Placement: Always place your wine bottle candle holder on a stable, flat, and heat-resistant surface. Keep it away from flammable materials such as curtains, paper, or dry foliage. Ensure it’s out of reach of children and pets, and never leave a burning candle unattended.
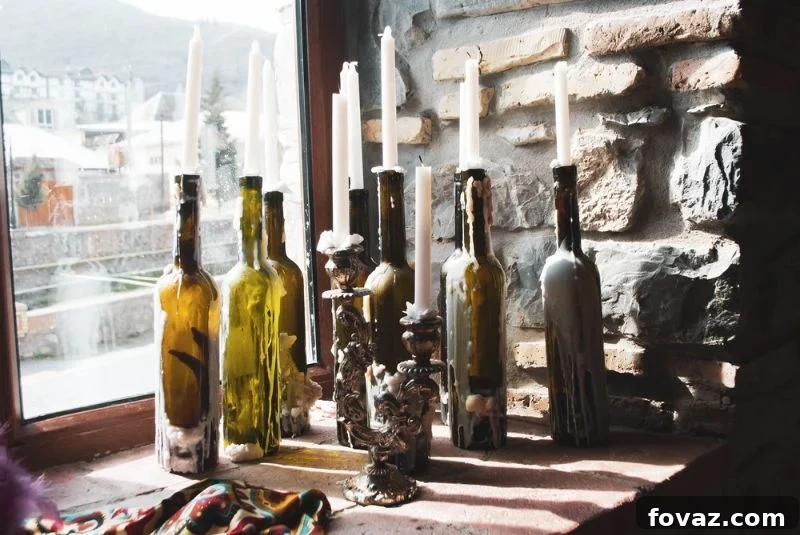
- Creating a Centerpiece: Wine bottle candle holders make stunning centerpieces. Consider grouping several bottles of varying heights or designs together on a dining table or mantelpiece. You can also incorporate other decorative elements like greenery, fairy lights, or seasonal accents to create a captivating arrangement.
- Outdoor Ambiance: These candle holders are also perfect for outdoor entertaining. Place them on patio tables, along pathways (ensuring stability), or on outdoor shelving to create a magical atmosphere for evening gatherings. Just be mindful of wind, which can blow out the flame or cause uneven burning.
Final product:
Beyond Candle Holders: More Upcycling Ideas for Wine Bottles
While an elegant candle holder is a fantastic use for empty wine bottles, their versatility extends much further. Embracing the spirit of upcycling allows you to transform these common items into a myriad of useful and decorative objects for your home. Explore these alternative ideas:
- Countertop Storage: Clean wine bottles make excellent, stylish storage solutions for kitchen ingredients. Use them for olive oil, vinegar, homemade salad dressings, or even dried pasta and grains. Adding a pour spout or a decorative label can elevate their function and aesthetics.
- Decorative Vases: With their graceful necks, wine bottles are naturally perfect as vases for single-stem flowers, small bouquets, or dried botanicals. Decorate them with paint, twine, or glitter to match your home’s aesthetic.
- Holiday Lighting: Insert a string of battery-operated fairy lights into a clean wine bottle to create enchanting decorative lamps. These are perfect for ambient lighting, holiday decorations, or adding a festive touch to any corner.
- Planters: By carefully cutting the bottle (a more advanced technique, often requiring specialized tools) you can create unique planters for small succulents or herbs.
- Watering Globes: Invert a water-filled wine bottle into a potted plant to create a self-watering system for your indoor or outdoor greenery.
Check out this video by Birchbox Grooming to learn about different ways on how you can upcycle old wine bottles:
This wine bottle candle holder, with its sophisticated look and your personal touch, would make a stunning centerpiece for any table or a beautiful accent in any room. By repurposing those empty glass bottles, you’re not just creating decor; you’re contributing to a more sustainable lifestyle and showcasing your unique crafting skills. So gather those bottles now, and let your imagination transform them into exquisite pieces for your home.
Do you have other creative ideas on how to make a wine bottle candle holder or other ways to repurpose empty glass bottles? We’d love to hear them! Share your thoughts and tips with us in the comments section below!
Up Next:
- 43 More DIY Wine Cork Crafts Ideas
- Uses For Beer Bottles | 24 Creative Projects And Cool DIY Ideas
- DIY Wood Cutting Board You Can Make From Scrap Wood
Calling all crafting DIYhards, DIY Projects needs YOU! Click here if you want to write for us.
Don’t forget to stay connected with us on Facebook, Twitter, Pinterest, and Instagram for more inspiring DIY ideas and projects!