
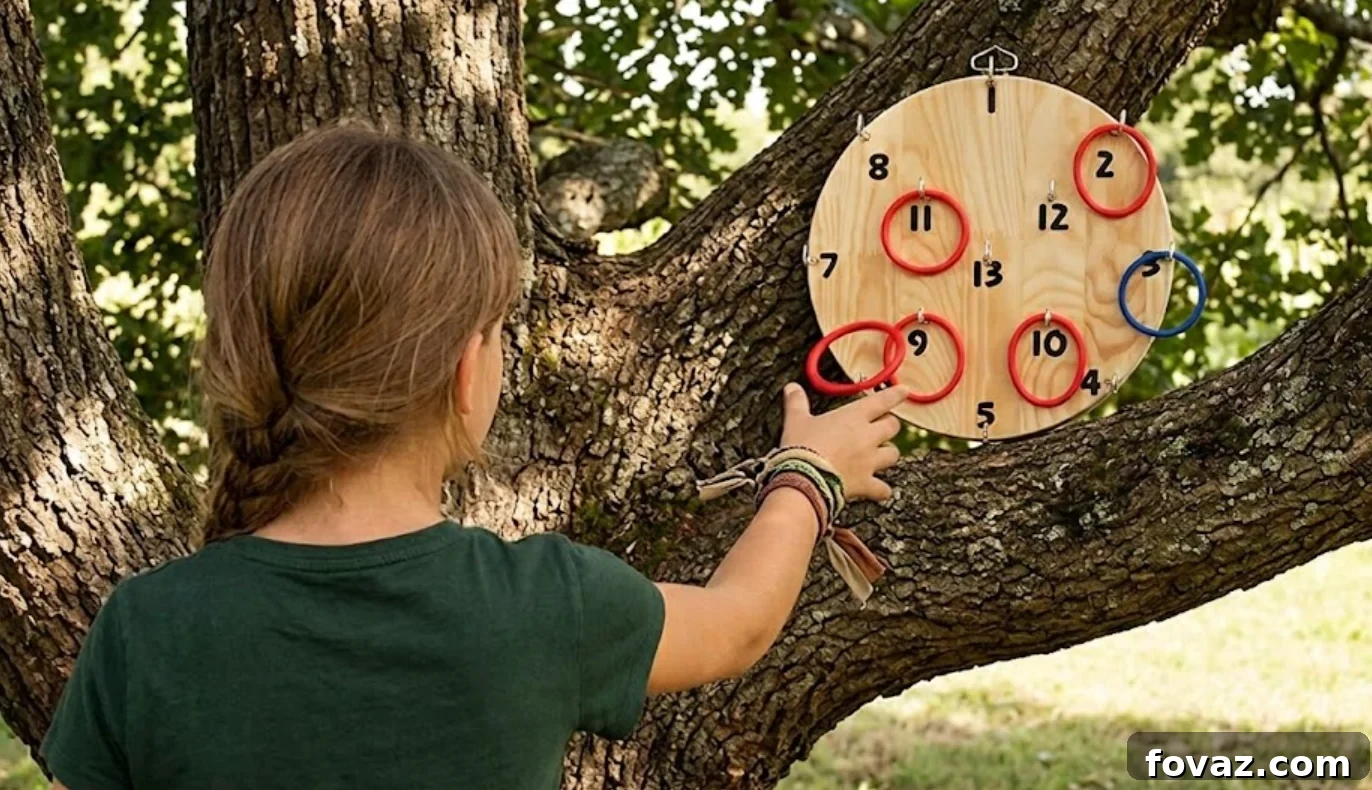
At a Glance: DIY Ring Toss Game
- Skill Level: Easy / Family-Friendly (Great for kids!)
- Time Commitment: 1 to 2 Hours
- What This Guide Features: Exact geometric layout measurements, split tasks for adults and kids, and a presentation-ready finishing plan.
Summer is here, the sun is out, and if your family is anything like mine, it’s the perfect time to get everyone outside and playing together. This DIY Ring Toss Game—also called Hookey—is a timeless backyard and parlor favorite. The objective is simple: toss soft rings onto the hooks to score points, and the first player to reach exactly 101 points wins.
This project is ideal for families because it requires minimal cutting and mostly light assembly. Children can participate in measuring, marking, and placing stickers while adults handle drilling and hardware. The result is a handsome, durable game you’ll enjoy all season.
⚠️ Safety Reminder
Wear PPE: gloves, safety goggles, ear protection, and a dust mask when appropriate. Use sharp tools responsibly. For any load-bearing construction, consult local building codes and professionals. Work in a well-ventilated area and control dust with eco-friendly practices.
Project Overview & Specifications
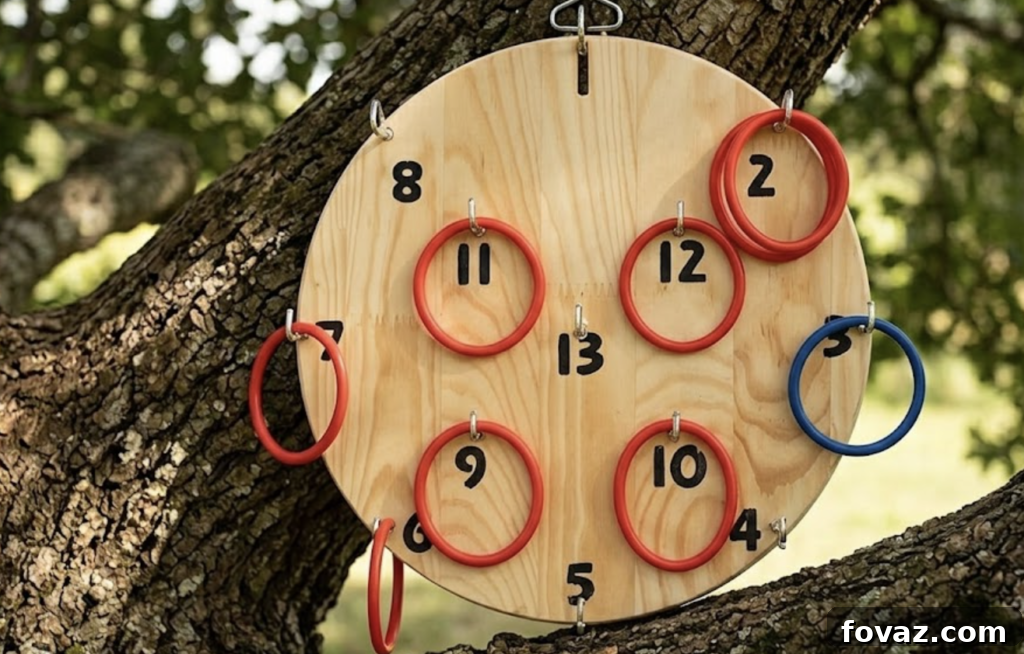
- Finished Size: 12″ diameter, 0.8″ thickness
- Estimated Cost: $20–$35 (materials and hardware vary by location)
- Aesthetic: Rustic-modern with brass accents
Materials & Tools List
🪵 Materials
- Main board: 1 circular wood plaque, 12″ diameter and about 0.8″ (13/16″) thick. Buying a pre-cut 12″ pine or paulownia circle from a craft store or home center saves time.
- Hooks: 13 brass L-hooks (square bend screw hooks), roughly 1-1/4″ to 1-1/2″ total length.
- Rings: 6 to 12 flexible silicone or rubber rings, about 2-1/2″ to 3″ outer diameter. Colorful canning jar rings or silicone O-rings work well.
- Numbers: 1″ tall black vinyl stickers, stencils, or use a wood-burning tool or paint pen for a hand-crafted look.
- Hanger: 1 heavy-duty sawtooth hanger or D-ring hanger with small screws.
🛠️ Tools Needed
- Power drill
- Tiny pilot drill bit (1/16″ or 3/32″)
- Painter’s tape (to use as a drill depth stop)
- Ruler or tape measure
- Protractor or speed square for layout
- Pencil and eraser
- Sanding block (220-grit)
Complete Cut List
| Part | Component | Qty | Material | Dimensions |
| A | Game Board | 1 | Pine/Paulownia Round | 12″ Diameter x 0.8″ Thickness |
Precision Layout Map
A balanced, accurate layout ensures rings will fit and the finished board looks professional. Start by finding the center of the board and draw two concentric circles to place the hooks.
- Center Hook (13): Located exactly at the board center point.
- Inner Ring (Radius = 2.5″): Holds hooks 9, 10, 11, and 12.
- Outer Ring (Radius = 5.0″): Holds hooks 1 through 8.
Step-by-Step DIY Ring Toss
Phase 1: Prepping & Marking the Board
Step 1.1: Finding the Center
- Kids / Collab: Lay the wooden circle flat and measure the widest spans in a few directions to estimate the center. Mark the center lightly with pencil and label it “13.”
- Adult Task: Verify the center by confirming it measures exactly 6″ from the outer edge in all directions.
Step 1.2: Drawing the Layout Rings
- Kids / Collab: Use a compass set to 2.5″ to draw the inner circle, then set it to 5.0″ and draw the outer circle.
- Adult Task: Draw a vertical and horizontal crosshair through the center with a straightedge or speed square to establish 12, 3, 6, and 9 o’clock.
Step 1.3: Marking the 13 Hook Locations
- Kids / Collab: Mark the crosshair intersections with the circles for hooks at 12, 3, 6, and 9 o’clock on the outer circle.
- Adult Task: Use a protractor to mark diagonal lines at 45° increments. Where these diagonals intersect the circles, mark the remaining outer and inner positions for hooks 2–8 and 9–12 respectively.
Phase 2: Drilling & Hardware Installation
Step 2.1: Setting the Drill Depth
- Adult Task: Wrap painter’s tape around the drill bit about 1/2″ from the tip. Stop drilling when the tape meets the wood surface to avoid drilling through the board.
Step 2.2: Drilling Pilot Holes
- Adult Task: Drill a 1/2″ deep pilot hole at each of the 13 marked points, keeping the bit perpendicular to the surface.
Step 2.3: Screwing in the Hooks
- Kids / Collab: Hand-thread the brass L-hooks into the pilot holes until the shoulder sits flush with the wood.
- Crucial Check: Make sure every hook’s L-shape points straight up toward the 12 o’clock position so rings hang securely.
Phase 3: Applying Numbers & Finishes
Step 3.1: Applying the Numbers
- Kids / Collab: Erase pencil layout lines, then place the number stickers (1–13) next to their corresponding hooks. Press firmly to adhere.
Step 3.2: Adding the Back Hanger
- Adult Task: Attach a sawtooth or D-ring hanger near the top edge on the back, aligned with the 12 o’clock hook so the board hangs level.
Step 3.3: Protecting the Game
- Kids / Collab: Rub a thin coat of natural beeswax or carnauba wax over the face to protect the wood and stickers and give a satin finish.
For a sustainable option, look for a 12″ off-cut hardwood piece at local wood suppliers or reclaimed lumber bins. Instead of vinyl numbers, practice hand-lettering with a non-toxic paint pen or try a wood-burning tool for a personalized touch.
DIY Ring Toss Game FAQs
1. What is the official height to hang a DIY ring toss board?
For standard play, hang the center hook (hook 13) at 4 feet 6 inches (54 inches) from the floor.
2. How far away should players stand when throwing?
A standard throwing distance is 4 feet 6 inches (54 inches) from the face of the wall where the board is hung. Reduce the distance for younger children for easier play.
3. What wood species is best for an outdoor board?
If you plan to keep the board outdoors, choose weather-resistant woods like cedar or redwood and finish with a clear exterior polyurethane to protect against moisture.
4. What can I use if I can’t find silicone or rubber rings?
If silicone rings are unavailable, use rubber canning jar rings, heavy-duty plumbing O-rings, or fashion rings from colorful 1/4″ rope spliced and taped securely.
5. My hooks are loose in the wood. How do I tighten them?
If a pilot hole is too large, remove the hook, add a small drop of wood glue into the hole, insert a toothpick, snap it off flush, and reinstall the hook. The packed wood will provide a much firmer hold.