
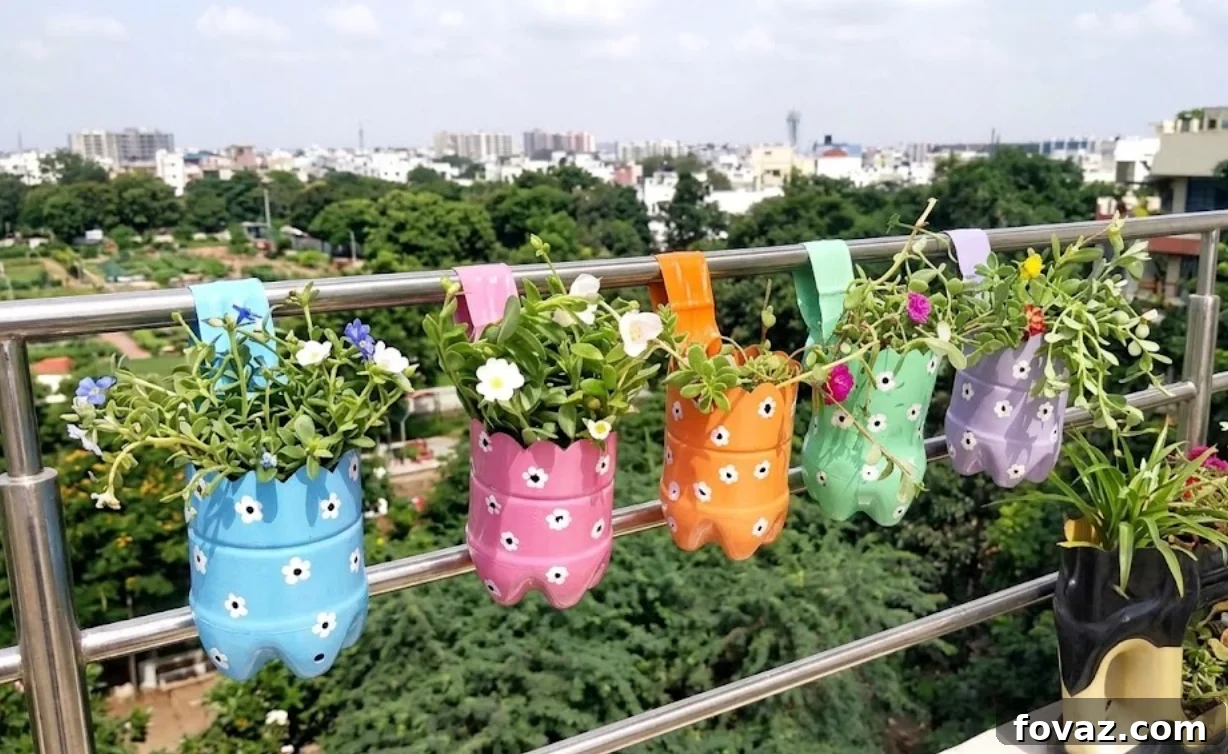
At a Glance: Plastic Bottle Planters
- Time: 1 to 2 hours per project (plus drying time for paint)
- Skill Level: Beginner-friendly (basic measuring, cutting, and painting)
- The Gist: Turn ordinary plastic bottles into eye-catching hanging lanterns, painted blossom drops, and horizontal living walls with simple tools and bold color
DIY Plastic Bottle Planters
Empty plastic bottles are everywhere, and rather than seeing them as trash, we can see potential. Upcycling bottles into planters saves waste and creates inexpensive decorative containers. Below are three creative, beginner-friendly designs that combine utility with color and style: a hanging lantern-style planter, a painted blossom drop, and a horizontal living wall. Each project uses common household tools and offers customization with paint and plants so your finished pieces match your space.
Design 1: The Lantern Hanger
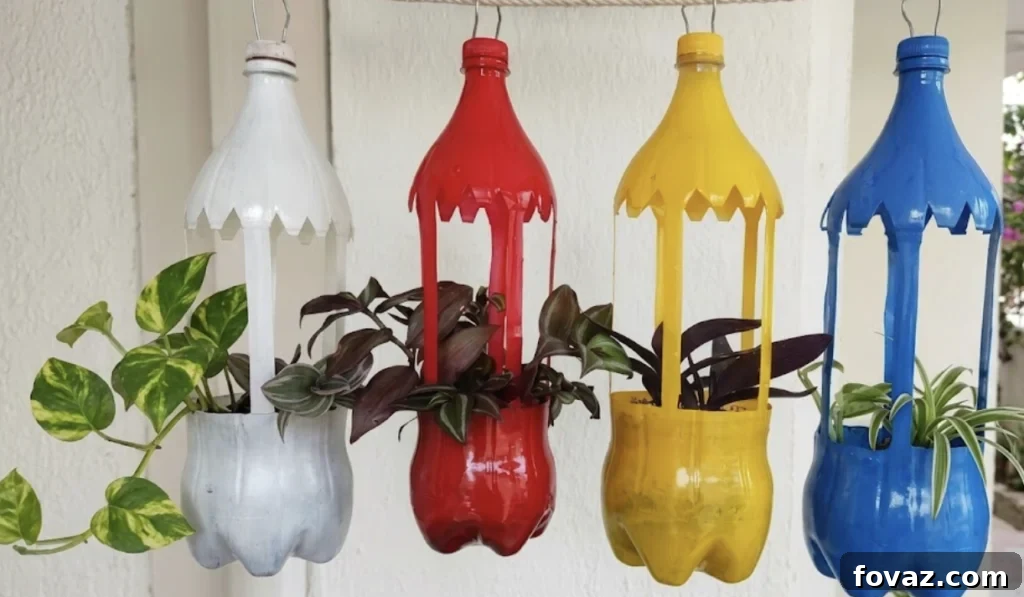
This version converts a bottle into an airy, architectural lantern planter that lets light and breeze through while cradling a small plant.
Materials Needed:
- Clean 1- or 2-liter plastic bottles with labels removed
- Utility knife or X-Acto and sturdy craft scissors
- Spray paint formulated to bond to plastic (choose your colors)
- Heavy-gauge galvanized wire for hanging
- Pliers
- Fine-grit sandpaper (220 grit)
- Potting soil and a trailing or small upright plant
Step-by-Step Instructions:
- Map the cuts: Mark a line about 4 inches from the base for the soil bowl. Mark a decorative scalloped canopy about 2 inches below the neck.
- Draw the pillars: Mark four vertical strips between the canopy and the bowl, each about 1/2 to 3/4 inch wide and evenly spaced.
- Cut the negative space: Carefully cut out the windows between the vertical strips to form the lantern. Sand the cut edges smooth.
- Paint: In a well-ventilated area, spray two light coats on both outside and inside. Allow to dry completely between coats.
- Rig the hanger: Drill a small hole through the center of the bottle cap. Bend an 8-inch length of heavy wire into a U, push the ends through the cap, twist and secure inside so it cannot pull out, then screw the cap on.
- Plant: Add a layer of pebbles for drainage, fill with potting mix and insert a small trailing plant.
Design 2: The Painted Blossom Drop
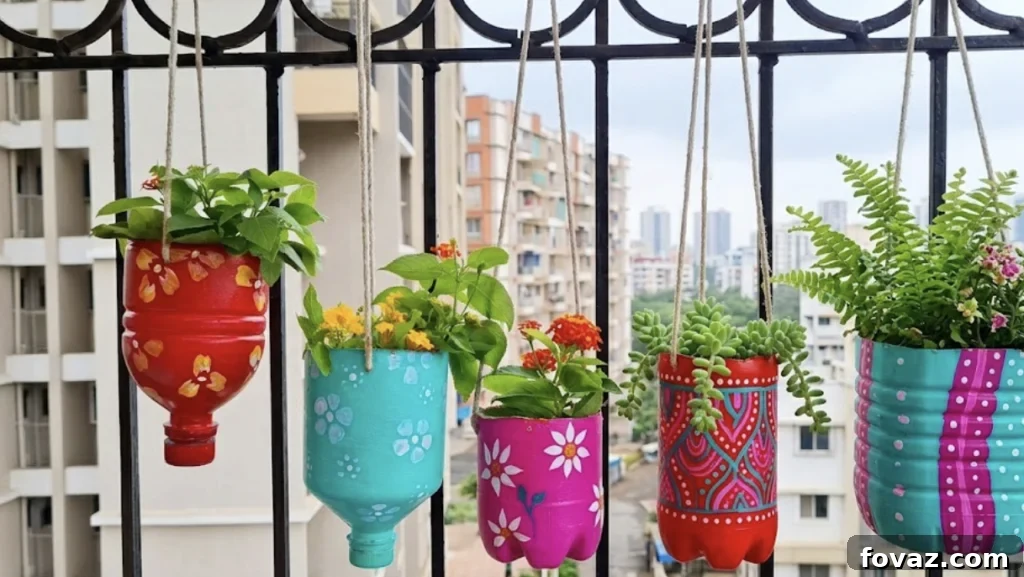
This design flips the bottle top-down to create a bell-shaped hanging planter you can paint with floral motifs. It’s ideal for colorful displays on porches or balconies.
Materials Needed:
- Assorted plastic bottles
- Utility knife or sharp scissors
- Acrylic craft paints (vibrant base colors plus white and green for flowers/leaves)
- Paintbrushes (one broad, one fine-tip)
- Clear UV-resistant waterproof spray sealer
- Natural jute twine
- Standard hole punch or small drill
- Drill with 1/8-inch bit for drainage (optional)
Step-by-Step Instructions:
- Divide the bottle: Mark halfway and cut cleanly. Keep the top funnel half with the cap for the hanging bell shape.
- Prep for hanging: Punch three evenly spaced holes around the wide cut rim, leaving about 1/2 inch of plastic above each hole.
- Base coat: Apply a solid acrylic base color to the outside. Two coats may be needed for full coverage; allow drying time.
- Paint the blossoms: Use the fine brush to hand-paint simple flowers and leaves. Let the paint cure fully.
- Seal and drain: Spray the outside with a clear waterproof sealer. Drill two small drainage holes in the cap if desired, and secure the cap.
- Hang: Tie three equal lengths of twine to the punched holes, gather them and form a loop. Fill with soil and bedding flowers or small herbs.
Design 3: The Living Wall Horizon
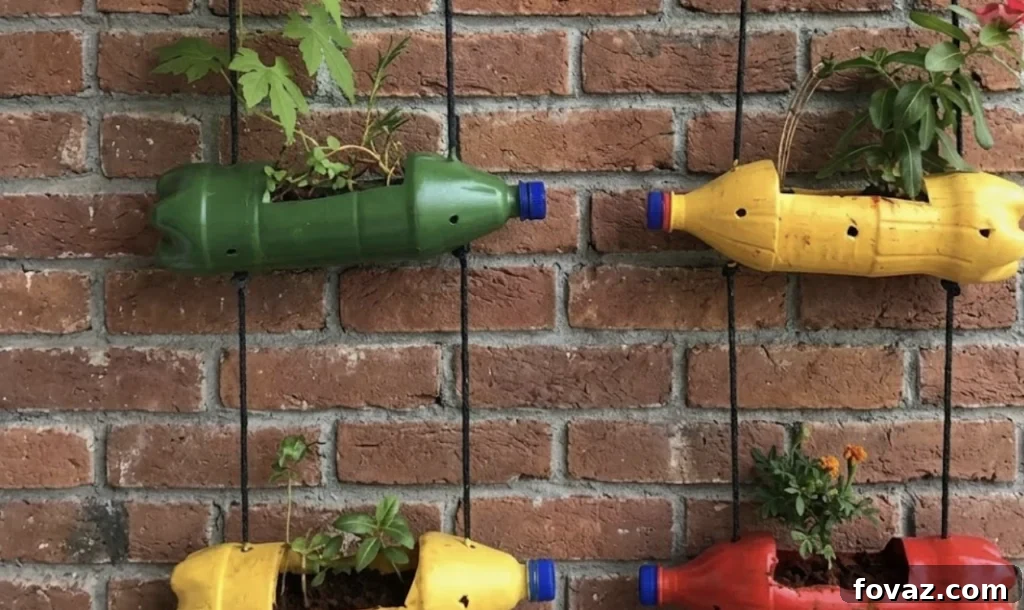
When floor space is limited, build up. This horizontal bottle system mounts bottles to a wall to create a tidy, space-saving herb or flower wall.
Materials Needed:
- Large plastic bottles (use identical shapes for a neat grid)
- Utility knife
- Spray paint in earthy tones
- Drill and drill bits
- Screws and wall anchors for masonry or wood
- Washers to protect plastic from screw heads
- Potting soil and herbs or small flowers
Step-by-Step Instructions:
- The main cut: Trace a large rectangle on the side that will face up, leaving about 1.5 inches of plastic near the neck and base for strength. Cut out that panel to create a trough.
- Drainage: Drill several small holes on the underside for water to escape.
- Mounting holes: On the back side that will sit against the wall, drill two holes about 4 inches apart for mounting.
- Color: Spray the outside in alternating earthy colors. Keep caps on while painting to seal the ends and allow to dry thoroughly.
- Mount to the wall: Hold the bottle in place, mark the wall through the mounting holes, drill, insert anchors if needed, then secure the bottle with screws placed through the bottle into the wall. Use washers between the screw head and plastic to prevent tearing.
- Planting: Fill with soil and plant herbs, small vegetables, or bedding plants suited to shallow containers.
Wrapping Up
Repurposing plastic bottles into planters is an affordable way to reduce waste and bring greenery into unconventional spaces. With a little cutting, painting, and simple hardware, you can create hanging lanterns, decorative bloomers, or a productive living wall. Choose paints that bond to plastic and add a UV-resistant sealer if the planters will sit in sun, and always provide drainage so plant roots stay healthy. These projects are highly customizable—change colors, patterns, or plant choices to suit your style and microclimate.
FAQs
- Do these plastic bottle planters need drainage? Yes. Always add drainage holes at the lowest point of each design to prevent root rot. For hanging designs, drill small holes in caps; for horizontal planters, add several small holes along the bottom side.
- What kind of paint actually sticks to plastic? Use spray paints labeled to bond to plastic for base coats. If hand-painting with acrylics, finish with a clear outdoor topcoat to protect the surface and help adhesion.
- What plants grow best in these? Shallow-rooted trailing plants like pothos, creeping jenny, and small succulents work well in hanging designs. Horizontal wall planters suit herbs (basil, thyme) and small bedding plants such as pansies or marigolds.
- Will sun degrade the plastic over time? Prolonged UV exposure can make plastic brittle. Painting the exterior and using a UV-resistant sealer will slow degradation and extend the life of your planters.
- Can I use these indoors? Yes. Be mindful of drainage—either use saucers or create a gravel layer at the bottom to protect indoor surfaces. Place them where spills won’t cause damage.
Quick Poll
What kind of garden project gets you excited?
Share your preference in the comments: growing food (herbs and veggies), decorating with colorful planters, or building larger structures like raised beds and trellises. If you have another favorite project, tell us about it below.