
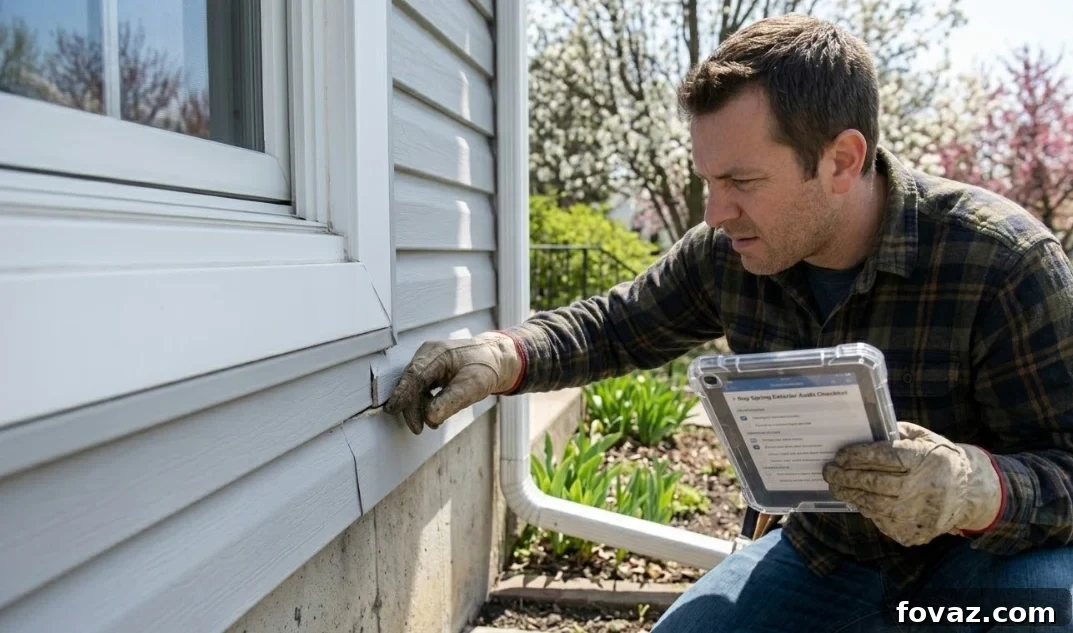
The Ultimate Spring Home Exterior Checklist: Safeguard Your Home & Save Big
Spring is a season of rejuvenation, and this sentiment extends beyond blooming gardens to your home itself. As winter’s chill recedes and the promise of warmer, longer days emerges, it’s the opportune moment to devote crucial attention to your home’s exterior. Many homeowners, myself included, often underestimate the significant impact of proactive maintenance. I learned this the hard way last year when a seemingly minor, unaddressed crack in my window caulking quickly escalated into a costly drywall repair, consuming my entire summer DIY budget. This experience underscored the critical importance of a thorough and timely spring home exterior checklist.
Embracing preventative exterior maintenance is more than just a chore; it’s a strategic investment in your property. It can save homeowners thousands in potential emergency repairs. To help you stay ahead of unforeseen issues and protect your most valuable asset, we’ve compiled a comprehensive Spring Home Exterior Checklist. This guide covers six essential audits you can comfortably complete in an afternoon, ensuring your home is resilient against the elements and allowing you to allocate your hard-earned money towards exciting personal projects, rather than unexpected fixes. Let’s dive into securing your home for the seasons ahead!
At a Glance: Key Spring Home Exterior Maintenance Focus Areas
- Performing six critical exterior audits during March or early April is paramount for preventing costly water damage and safeguarding your home renovation budgets.
- This essential spring home exterior checklist includes vital tasks such as thoroughly cleaning gutters to guarantee proper drainage and meticulously removing old, failing caulk before resealing windows and doors for optimal insulation.
- Other crucial maintenance tasks encompass washing window screens, patching minor tears, inspecting your roof for winter wear, and conducting a simple water absorption test to assess your deck’s sealant integrity.
- A diligent and proactive approach to these specific areas will not only significantly boost your home’s curb appeal but also substantially extend the lifespan of its exterior components, providing long-term protection and value.
RELATED: 7 Easy and Affordable Spring Home Decor Ideas to Refresh Your Living Space
Jump to a specific section:
- Gutter System Check & Flush
- Exterior Caulking Inspection & Reseal
- Window & Door Screen Repair
- Roof Condition Scouting from the Ground
- Deck Sealant & Safety Test
- Siding Cleaning & Foundation Check
- FREE Spring Home Exterior Checklist Printable
Your Essential Spring Home Exterior Checklist: 6 Critical Spots to Inspect
The winter months can inflict considerable stress on your home’s exterior, often leaving behind hidden damage that only becomes glaringly obvious with the onset of spring rains or significant temperature fluctuations. The following six areas are particularly susceptible to developing minor problems that, if left unattended, can rapidly escalate into expensive and extensive repair bills. Investing a small amount of time now in these targeted inspections can save you a substantial amount of money, effort, and stress in the long run.
1. Gutter System Check: How to Perform a Spring Gutter Flush and Flow Test
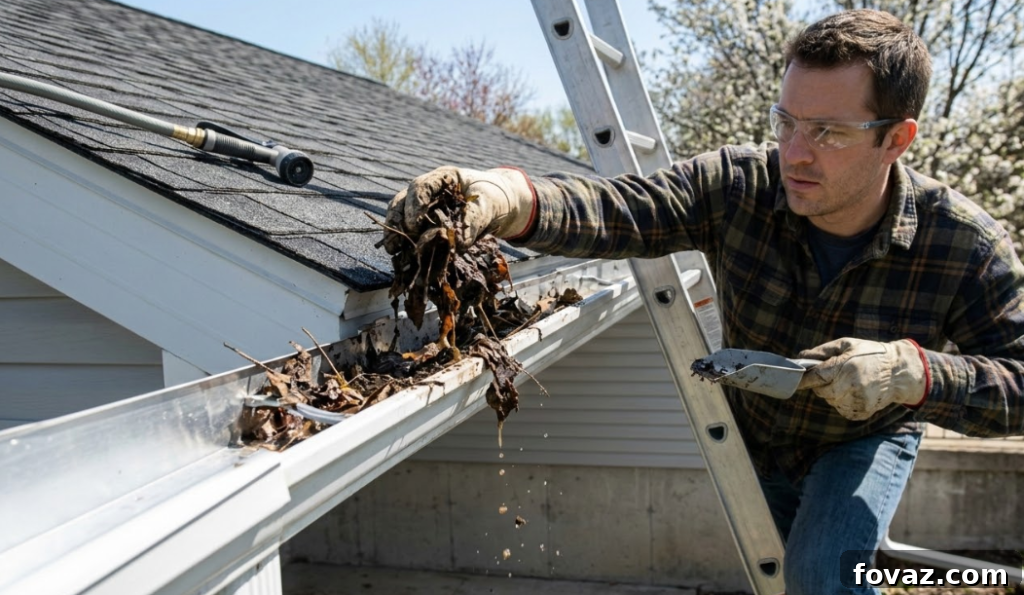
The importance of maintaining clean, free-flowing gutters cannot be overemphasized in your spring home exterior maintenance routine. I once underestimated the impact of a single clogged downspout; the resulting overflow led to severe wood rot in my fascia and soffit, completely derailing my budget for personal projects for months. Now, ensuring my gutters are perfectly functional every March is a critical, non-negotiable step. This meticulous attention protects my home’s foundation from destructive water damage, averts basement flooding, safeguards landscape integrity, and ultimately helps me avoid expensive gutter repairs in the future.
The Weekend Toolbox for Gutter Maintenance: For this essential task, you’ll need a sturdy ladder (always ensure it’s securely placed on level ground), durable work gloves to protect your hands from debris and sharp edges, a powerful garden hose, and a specialized gutter scoop or a dedicated gutter cleaning tool for efficient debris removal. For homeowners who are uncomfortable with ladder work, excellent alternatives exist, such as telescopic gutter cleaning poles or leaf blower attachments specifically designed for gutters, allowing you to perform the task safely from the ground.
The Audit & Fix Steps for Your Gutter System:
- Thoroughly Clear Debris: Begin by manually removing all accumulated winter muck, leaves, pine needles, twigs, and shingle granules from your gutters. Wear heavy-duty gloves for protection. Pay meticulous attention to gutter corners and the openings of downspouts, as these are the most common locations for stubborn clogs. This initial step is absolutely crucial for establishing an unobstructed flow path for rainwater.
- Perform the Vital Flush Test: Once your gutters appear visibly clear of large debris, position your garden hose at the highest point of your gutter system and allow water to run at full blast. Carefully observe the water flow. It should move swiftly and freely through the entire length of the gutters and exit smoothly from each downspout without any signs of backup, pooling, or overflow.
- Inspect the Downspout “Elbow” & Entire System: If water fails to gush out of a downspout, or if it overflows from any section of the gutter, it strongly indicates a clog deeper within the downspout or its elbow bend. You can often dislodge these obstructions by increasing the water pressure from your hose, or by carefully utilizing a plumber’s snake or a specialized downspout auger to break apart and clear the blockage.
- Ensure Effective Water Diversion: Verify that all downspout extensions are securely attached and are directing rainwater a minimum of 3 to 5 feet away from your home’s foundation. Improper or insufficient drainage can lead to soil saturation around your foundation, which can result in significant structural problems like cracks, uneven settling, or basement leaks. Furthermore, confirm that the ground immediately surrounding your foundation gently slopes away from the house to facilitate natural water runoff.
The Pro Secret to Gutter Longevity: Beyond merely directing water away, consider the installation of high-quality gutter guards or screens. While these solutions do require occasional maintenance themselves, they dramatically reduce the frequency and intensity of full gutter cleanouts. They represent a smart, long-term investment in your spring home exterior maintenance strategy, significantly enhancing the overall efficiency and protective capabilities of your gutter system. Remember, superior water management is fundamental to safeguarding your home’s long-term structural integrity.
2. Exterior Caulking Audit: The Best Way to Inspect & Reseal Windows and Doors
Caulking serves as your home’s indispensable protective “skin,” forming a critical barrier that seals vulnerable joints against the relentless assault of the elements. My own experience taught me the hard lesson of dismissing tiny cracks around windows and doors as merely superficial cosmetic flaws. That oversight led to a persistently drafty window that not only caused my utility bills to skyrocket but, more distressingly, allowed moisture to penetrate, ultimately saturating my drywall. This essential spring exterior maintenance audit is now a cornerstone of keeping my home perfectly sealed, ensuring that my budget remains dedicated to creative projects like fabric and woodworking, rather than unexpected and expensive contractor bills for water damage or energy loss.
The Weekend Toolbox for Caulking Maintenance: For this detailed inspection and repair, you’ll need a robust putty knife or a specialized caulk removal tool, a sharp utility knife for precise cuts, and several tubes of high-quality exterior-grade caulk. For superior performance and longevity, silicone or elastomeric caulks are generally recommended for exterior applications due to their exceptional flexibility, adhesion, and resistance to extreme weather conditions.
The Audit & Fix Steps for Exterior Caulking:
- The Comprehensive Perimeter Walk-Through: Systematically and meticulously inspect every single area on your home’s exterior where two different building materials meet. This includes, but is not limited to, window frames against siding, door frames against brick or various siding types, exterior corners, all utility penetrations (such as pipes, electrical conduits, or wires), and around outdoor light fixtures or hose bibs. Actively search for any visible cracks, gaps, shrinking, or areas where old caulk has clearly pulled away from either surface.
- The Knife Test for Structural Integrity: Gently probe the existing caulk with the tip of your putty knife or a similar tool. If the caulk feels brittle, appears extensively cracked, shows missing sections, or easily pulls away from the underlying surface, it has unequivocally failed and requires complete replacement. A healthy, functional caulk bead should be noticeably flexible, resilient, and firmly adhered to both adjoining surfaces.
- Completely Clear the Gap: This step is arguably the most critical for ensuring a lasting repair. You must thoroughly scrape out all traces of the old, failing caulk. Resist the temptation to simply apply new caulk directly over the old, as this creates a weak bond that is almost guaranteed to fail prematurely. Utilize your putty knife and utility knife to achieve a clean, smooth, and completely dry surface before applying any new material.
- Apply a Fresh, Water-Tight Seal: Carefully load your caulk gun and apply a fresh, smooth, and continuous bead of exterior caulk along the prepared gap. Maintain a consistent angle and steady pressure to ensure a uniform and complete seal. For a truly professional finish, immediately after application, smooth the caulk bead with a specialized caulking tool, a wet finger (always wear a glove), or a damp cloth. This critical step creates an impenetrable, water-tight bond, safeguarding your home from moisture intrusion, drafts, and potential pest entry.
The Pro Secret to Lasting Caulk: For any gaps that are wider than 1/4 inch, it is imperative to insert a foam “backer rod” into the gap before applying caulk. This essential rod provides a stable, shallow surface for the caulk to adhere to, significantly reducing the amount of caulk required and, most importantly, preventing the seal from sagging, cracking, or prematurely failing as it cures. Remember, meticulous preparation is the ultimate differentiator in the longevity and effectiveness of your caulk seal.
I’ve personally upgraded from my old, inefficient putty knife to a highly versatile 3-in-1 scraper tool. This invaluable device not only streamlines the laborious process of cleaning out failing caulk in mere seconds but also helps me achieve a consistently professional-level, smooth bead with ease. It has also become my indispensable secret for flawlessly finishing the concrete repair tasks that we’ll address later in Step 6, cementing its status as a true workhorse for comprehensive spring home exterior maintenance.
- 🛠️【Caulking Tool Kit】include Multifunction caulking scrapers, silicone pads, different…
- 🛠️【 4 IN 1 Caulking Finishing Tool】This caulking tool can help you repair the gap and clean…
Buy on Amazon
3. Window & Door Screen Repair: Quick Fixes for Spring Fresh Air & Pest Control
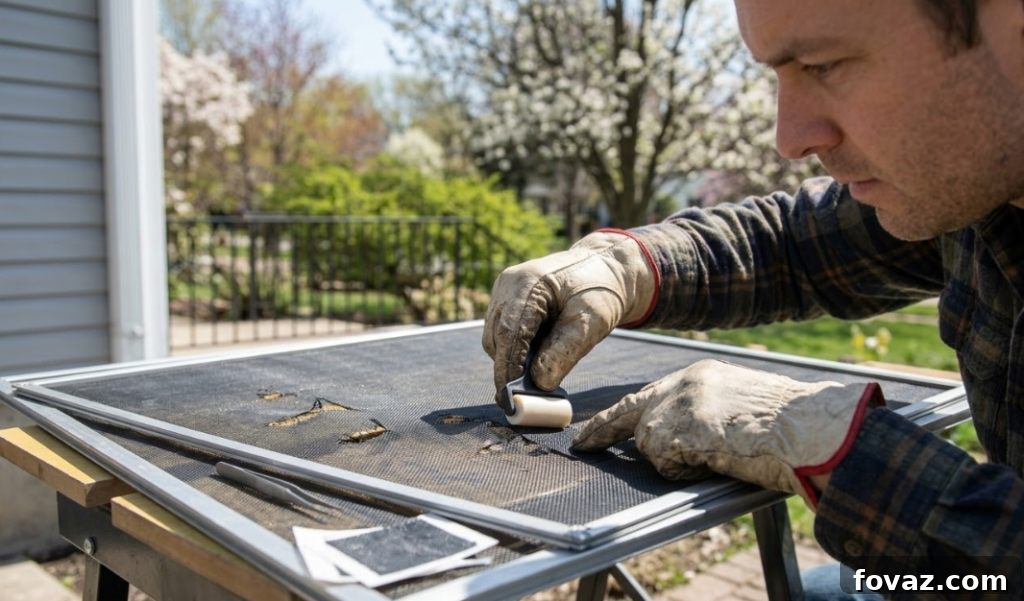
Intact and clean window and door screens are absolutely vital for fully enjoying the refreshing spring breezes without inadvertently inviting a parade of insects into your peaceful living space. A torn screen once transformed my otherwise serene workspace into a persistent, bug-filled nightmare, constantly diverting my attention from my beloved DIY projects. Now, a quick, annual screen bath combined with a thorough inspection is an indispensable step in my spring home exterior checklist. This ensures that allergenic pollen stays outside where it belongs, and my focus remains firmly on creativity rather than the annoying task of swatting flies.
The Weekend Toolbox for Screen Care: To effectively tackle screen maintenance, you’ll need a large bucket, a gentle mild dish soap, a soft-bristled brush (avoid anything abrasive that could damage the mesh), a reliable garden hose for thorough rinsing, and a roll of adhesive screen repair tape or a small, dedicated screen patching kit to address any minor tears or punctures.
The Audit & Fix Steps for Window Screens:
- The Refreshing Screen Bath: Begin by carefully removing your window and door screens from their frames. Lay them flat on a clean, hard surface, such as a patio or driveway. In your bucket, mix a solution of mild dish soap and water. Use your soft brush to gently scrub both sides of each screen. This process effectively removes accumulated dust, stubborn dirt, pollen, and any other grime, significantly improving both airflow and visual clarity. Rinse each screen thoroughly with a garden hose until all soap residue is gone, then allow them to air dry completely before carefully reinstalling them.
- Inspect for “Ghosting” or Thinning Mesh: Hold each meticulously cleaned screen up to a strong light source. Carefully look for any areas that appear unusually thin, stretched, or “ghost-like,” where the mesh seems to vanish or exhibits a silvery sheen. These visual cues are strong indicators of failing or degraded mesh, which may allow tiny insects to penetrate or could easily tear in the near future. If the mesh shows extensive degradation, a complete rescreening might be necessary, but smaller, isolated areas can often be successfully patched.
- Patch Small Holes & Tears: For minor tears, small punctures, or tiny holes, an adhesive mesh patch offers a remarkably quick, simple, and effective repair solution. Merely cut the patch to the appropriate size, carefully peel off its backing, and firmly press it over the damaged area. For larger tears or situations demanding a more secure and durable fix, consider utilizing a fiberglass screen repair kit that allows you to meticulously weave new mesh into the existing screen, or opt for a dedicated, clip-on screen patch.
- Perform a Thorough Frame Check: Carefully examine the entire screen frame itself. Ensure that the rubber “spline” (the flexible cord responsible for holding the mesh securely within the frame channel) is tight, fully seated, and not protruding. If the spline appears loose or is popping out, it indicates that the mesh may be sagging or improperly secured. You can often push the spline back into its groove using a specialized spline roller tool or a blunt object. Any screen frames that are cracked, bent, or otherwise damaged should be replaced, as they compromise the overall integrity and effectiveness of the screen.
I frequently rely on this specific adhesive mesh tape to mend small tears in seconds. It’s an incredibly efficient and cost-effective solution that saves me the significant effort, time, and expense associated with having to rescreen an entire frame, making it an indispensable staple in my spring home exterior maintenance arsenal.
- Easy and Fast: Cut a suitable size or shape of the screen repair tape, then cover the tear or hole…
- Ultra Strong Adhesive: This screen door repair kit was made of fiberglass and specialized glue, it…
Buy on Amazon
4. Roof Scouting: How to Inspect Your Roof for Damage Without Using a Ladder
Your roof stands as your home’s primary line of defense against the relentless assault of the elements, yet its elevated position often causes it to be the most overlooked component of exterior maintenance. I vividly recall the major anxiety I used to feel about climbing high ladders, which regrettably led me to neglect my roof inspection until a significant leak caused irreparable damage to a cherished handmade project inside my home. Fortunately, I discovered a remarkably safe and equally effective ground-level inspection method. This ingenious “driveway method” provides a surprisingly thorough, professional-level assessment of your roof’s condition, making it an indispensable part of your spring home exterior checklist without the inherent risks associated with ladder work.
The Weekend Toolbox for Roof Inspection: For this critical, yet safe, roof assessment, all you truly need is a high-quality pair of binoculars and a clear, safe vantage point on your driveway or in your yard that offers an unobstructed view of various sections of your roof.
The Audit & Fix Steps for Your Roof:
- The Detailed Shingle Scan with Binoculars: From your secure ground position, meticulously use your binoculars to systematically scan every section of your roof. Pay exceptionally close attention to the condition of the shingles. Look for any that are “cupping” (where the edges are curling upwards), “clawing” (where the centers are popping up, causing the edges to curl downwards), or appear cracked, broken, or entirely missing. These are unequivocal indicators of wear, age, and potential vulnerability to water intrusion. Also, note any excessively shiny spots, which could signify that the crucial protective granules have eroded away, leaving the asphalt exposed.
- Search for Gaps & Damaged Flashing: Expand your detailed inspection to encompass critical areas around chimneys, skylights, roof vents, and any other penetrations in your roof. These are notorious locations where flashing (the specialized metal strips designed to create water-tight seals at joints) can become damaged, pulled away, corroded, or improperly installed. Actively search for visible gaps, signs of rust, or missing shingles in the vicinity of these features, as they are very common entry points for water.
- Check for “Sand” (Granule Loss) in Gutters: After completing your gutter cleaning (as outlined in Step 1), take another careful look at the accumulated debris. If you discover an excessive amount of granular material resembling coarse sand or tiny pebbles at the bottom of your gutters, it is a significant and urgent warning sign. These granules constitute the vital protective layer of your asphalt shingles, shielding them from damaging UV rays and harsh weather. Heavy granule loss unequivocally indicates that your shingles are rapidly aging and losing their essential protective capabilities, strongly signaling that they might be nearing the end of their functional lifespan.
- Look for Moss, Algae, or Discoloration: Noticeable dark streaks, expansive patches of moss, or significant algae growth on your roof surface can be indicative of persistent moisture retention. While not always immediately detrimental, excessive organic growth can trap moisture, accelerate shingle degradation, and should be addressed. Green or black streaks are typically aesthetic concerns but can sometimes contribute to the deterioration of shingle materials over time.
The Pro Secret to Roof Planning: Significant granule loss, widespread shingle cupping or clawing, or multiple missing shingles are often the earliest and most undeniable signs that you need to begin financial planning for a roof replacement in the near future. Identifying these critical issues early through your spring home exterior checklist empowers you to plan ahead financially and schedule the necessary work well before a catastrophic and expensive leak occurs, thereby making intelligent use of your checklist for long-term home maintenance and financial stability.
5. Deck Sealant & Safety Test: Protecting Your Outdoor Living Space
Your deck represents a cherished extension of your indoor living space, serving as a vibrant hub for relaxation, entertaining guests, and enjoying the outdoors. I vividly remember the pride I felt showcasing my freshly stained deck, only to discover months later that the sealant had failed, leading to noticeably warped planks and an increased risk of painful splinters. A simple, annual water absorption test is now a crucial ritual that ensures my outdoor oasis remains safe, aesthetically pleasing, and delightfully barefoot-friendly for many years to come. This quick yet vital test is an indispensable step in your spring home exterior checklist to proactively preserve your deck’s structural integrity and beauty.
The Weekend Toolbox for Deck Maintenance: For this straightforward yet essential deck assessment, you’ll simply need a glass of tap water, a sturdy hammer or a rubber mallet, and a pair of keen, observant eyes.
The Audit & Fix Steps for Your Deck:
- The Essential Water Absorption Test: Select several representative spots across different sections of your deck surface, including areas with high and low sun exposure. Sprinkle a small amount of water from a glass onto the wood in each chosen spot. Observe what transpires over the next few minutes.
- The Absorption Check & Resealing Indicator: If the water beads up on the wood surface, forming distinct small droplets that remain separate, it’s excellent news: your sealant is still effectively protecting the wood from moisture. However, if the water rapidly soaks into the wood, causing the wood to visibly darken, it is a clear and unequivocal indication that your deck’s protective sealant has failed, and it is critically time to thoroughly clean and reseal the entire deck surface. Neglecting this crucial step can lead to accelerated wood rot, severe warping, widespread splintering, and premature aging of your valuable deck boards.
- The Nail Pop & Fastener Search: Meticulously walk over every single inch of your deck’s walking surface, paying very close attention to any areas where fasteners are located. Actively look for “nail pops” (where nails or screws have risen above the surface due to the natural expansion and contraction of the wood) or any other loose, protruding fasteners. These not only pose significant tripping hazards but can also cause painful splinters.
- Reset & Secure: Use your hammer or rubber mallet to firmly tap down any loose nails that have popped up, or use a screwdriver to tighten any loose screws. For nails that repeatedly pop up, consider replacing them with longer, more robust deck screws for superior holding power. Additionally, thoroughly inspect all railings, balusters, and support posts for any signs of wobbling, instability, or loose connections. Tighten any bolts or fasteners as needed to ensure the entire deck structure, particularly safety features like railings, is absolutely safe and secure.
- Inspect for Wood Rot and Splinters: While conducting your walk-through, gently prod any suspicious-looking soft spots on the wood with a screwdriver or awl. If the wood feels soft, spongy, or crumbles easily, it strongly indicates the presence of wood rot, which may necessitate replacement of the affected boards. Smooth down any rough spots or emerging splinters on the deck surface with sandpaper to maintain a safe and comfortable environment for bare feet.
6. Siding Cleaning & Foundation Check: Boost Curb Appeal & Spot Issues Early
The unsightly “green stuff” often observed on siding—a combination of algae, mildew, and general grime—is a common visual blight after the winter months. Many homeowners mistakenly believe that addressing this requires expensive and powerful pressure washing equipment. However, a simple yet highly effective scrub-down not only dramatically enhances your home’s curb appeal but also provides an invaluable opportunity to meticulously inspect your foundation for early signs of potential trouble. This dual-purpose task is a highly practical, surprisingly rewarding, and absolutely essential component of your spring home exterior checklist.
The Weekend Toolbox for Siding & Foundation Care: To undertake this cleaning and inspection, you’ll need a long-handled scrub brush (or alternatively, a soft-bristled broom), a large bucket, and a safe, effective oxygen bleach solution (or a specialized, commercially available siding cleaner). Always prioritize safety by wearing appropriate protective gear, including sturdy gloves and essential eye protection.
The Audit & Fix Steps for Siding & Foundation:
- The Algae & Mildew Scrub: Prepare your oxygen bleach solution strictly according to the manufacturer’s specific instructions in your bucket. Apply this solution to the affected areas of your siding, paying particular attention to shaded spots where mildew and algae characteristically thrive due to persistent dampness. Allow the solution to dwell on the surface for a few minutes (always verify the recommended dwell time in your product instructions), then use your long-handled scrub brush to gently but thoroughly scrub away the accumulated grime. Rinse the area completely with a garden hose. Oxygen bleach is generally considered safer for surrounding plants and various siding materials compared to harsh chlorine bleach, but always perform a small spot test in an inconspicuous area first.
- The Low-Level Foundation Lap: While you are diligently working at ground level cleaning the lower sections of your siding, seize this invaluable opportunity to meticulously inspect your concrete foundation. Actively look for any new cracks, signs of crumbling concrete, or any indications of water penetration. Dedicate special attention to corners, the base of chimneys, and areas directly beneath downspouts where water runoff is concentrated. While hairline cracks are common and often superficial, wider cracks (measuring 1/4 inch or more), horizontal cracks, or any cracks that appear to be growing should be promptly assessed by a qualified professional.
- The Hairline Crack Patch: For small, non-structural hairline cracks in your foundation, utilizing a high-quality concrete patching compound can serve as a fantastic and cost-effective preventative measure. Applying an affordable concrete patch today can effectively prevent water from seeping into the crack, freezing, expanding, and transforming a minor cosmetic issue into a massive, expensive water intrusion problem that could potentially cost thousands to remediate. Ensure the crack is thoroughly cleaned before application, apply the patch strictly according to the product’s instructions, and then smooth it expertly with your caulk tool (like the versatile 3-in-1 tool mentioned in Step 2!) for a seamless finish.
Implementing these crucial steps will not only significantly enhance your home’s immediate appearance and curb appeal but also function as an invaluable early warning system for potential structural concerns. Don’t forget to download our comprehensive FREE Spring Home Exterior Checklist here to easily keep track of all your essential tasks and ensure nothing is overlooked!
Download the FREE Spring Home Exterior Checklist here
FAQs: Your Spring Home Exterior Checklist Questions Answered
When is the ideal time to start my spring home exterior maintenance?
The optimal time to begin your spring home exterior maintenance is typically during March or early April. This “sweet spot” usually occurs after the last significant threat of a hard freeze has passed, but crucially, before the heavy, consistent spring rains truly begin. This strategic timing allows you to effectively identify and address any winter damage, ensuring your home is fully prepared and protected from the intense moisture and fluctuating temperatures characteristic of spring, thereby ensuring optimal protection and readiness for the warmer months ahead.
Can I safely clean my own gutters, or should I hire a professional?
Absolutely, you can clean your own gutters safely and effectively! The paramount consideration here is to always prioritize safety. Always use a stable ladder, ensuring it is placed firmly on level ground. For enhanced safety, consider having someone spot you. Even better, invest in specialized tools such as a telescopic gutter vacuum, a gutter cleaning pole equipped with a brush, or a leaf blower attachment specifically designed for gutters; these allow you to clean most gutter systems safely from the ground. If your home features multiple stories, has a very steep or challenging roof pitch, or if you simply feel uncomfortable or unsafe working on a ladder, hiring a professional is a prudent and highly recommended choice. Professionals possess the appropriate equipment, insurance, and expertise to handle even the most challenging situations safely and efficiently.
How often should I reseal my wooden deck to maintain its condition and extend its lifespan?
Most wooden decks typically require a fresh coat of sealant every 1 to 3 years. The precise frequency is heavily influenced by several critical factors: the specific type of wood used for your deck, the brand and quality of the sealant product applied, the amount of direct sun exposure your deck receives daily, and the local weather conditions (e.g., harsh winters, intense summer heat, or heavy rainfall). The most reliable and definitive way to determine if your deck needs resealing is to perform the “water absorption test” exactly as described in step 5 of our comprehensive checklist. If water rapidly soaks into the wood rather than beading on the surface, it’s a clear indication that it’s time to reseal.
What are the biggest dangers and potential consequences of neglecting exterior home maintenance?
Neglecting your home’s exterior can unfortunately lead to a cascade of expensive, extensive, and potentially catastrophic problems. The primary risks include:
- Severe Water Damage: Clogged gutters, compromised caulking, and damaged roofing materials are prime culprits for leading to leaks, widespread wood rot, significant foundation cracks, and even basement flooding. This category of repair is often the most financially burdensome and structurally extensive.
- Pest Infestations: Even minor cracks in caulk, damaged window or door screens, or unsealed openings can become inviting entry points for various insects, rodents, and other unwelcome pests. These infestations can lead to not only structural damage but also potential health hazards within your home.
- Significant Energy Loss: Compromised seals around your windows and doors inevitably result in persistent drafts. This forces your heating and cooling systems to work considerably harder and less efficiently to maintain a comfortable indoor temperature, leading directly to noticeably higher utility bills year-round.
- Structural Deterioration: Untreated wood rot, unaddressed foundation issues, and prolonged exposure to moisture can progressively weaken your home’s fundamental structural integrity over an extended period, potentially requiring extremely costly structural repairs.
- Reduced Curb Appeal & Property Value: A poorly maintained exterior, characterized by peeling paint, dirty siding, a damaged roof, or overgrown landscaping, significantly detracts from your home’s aesthetic appeal. This neglect can substantially decrease its market value and make it far less attractive to potential buyers.
Adhering to a proactive spring home exterior checklist is your absolute best defense against these costly and damaging issues, preserving both your home’s condition and your financial well-being.
Are there specific safety precautions I should take during exterior home maintenance tasks?
Absolutely. Safety must always be your paramount priority when performing any exterior home maintenance tasks.
- Ladder Safety: Always position ladders on a firm, completely level surface. If possible, have another person spot you to stabilize the ladder. Never overreach; instead, descend and reposition the ladder. Ensure your ladder is rated for your body weight plus the weight of any tools or materials you are carrying.
- Eye & Hand Protection: It is imperative to wear safety glasses or goggles whenever you are cleaning, scraping, or working with any chemicals. Always wear sturdy, cut-resistant work gloves to protect your hands from debris, harsh chemicals, or potential splinters.
- Chemical Handling: If using cleaning solutions such as oxygen bleach or specialized siding cleaners, meticulously follow the manufacturer’s instructions for mixing and application. Always wear appropriate gloves and eye protection. Ensure adequate ventilation in the area and, under no circumstances, mix different cleaning chemicals together.
- Appropriate Footwear: Always wear closed-toe shoes with excellent grip and slip resistance, especially when working on ladders or potentially slippery surfaces like wet siding or a freshly cleaned deck.
- Roof Inspection: If you must physically go onto the roof (which should only be for very minor, safe tasks and only if you are experienced and comfortable), ensure the roof surface is completely dry. Wear non-slip, soft-soled shoes and seriously consider using a safety harness tied off to a secure anchor point. For anything more complex than a basic ground-level visual inspection, it is always safest to call a professional roofing contractor.
- Weather Awareness: Always check the weather forecast before starting any outdoor projects. Avoid working in adverse weather conditions such as strong winds, heavy rain, thunderstorms, or icy temperatures, which can significantly increase the risk of accidents.
Following these crucial safety precautions will help ensure that your spring home exterior maintenance tasks are completed not only effectively but also without incident, keeping you and your home safe.