

Palm Sander vs. Random Orbital Sander: The Ultimate Guide to Flawless Furniture Refinishing
Embarking on a furniture refinishing project can transform a dated piece into a stunning focal point in your home. The secret to achieving that professional, “old money” look lies not just in your choice of stain or paint, but critically, in the sanding process. A $40 thrift store find can rival a $1,200 heirloom with the right tools and techniques. Get it wrong, and you’re left with frustrating swirl marks and uneven patches. Get it right, and your guests will be asking where you unearthed such a magnificent piece.
This comprehensive guide dives deep into the world of power sanders, specifically comparing the palm sander (also known as a finish sander or quarter-sheet sander) against the random orbital sander. We’ll explore their unique mechanics, applications, advantages, and limitations to help you confidently choose the best sander for every stage of your furniture refinishing journey, ensuring a timeless, flawless finish every time.
Why Refinish Your Furniture? Unlock Hidden Value and Personal Style
Refinishing furniture isn’t just a hobby; it’s a rewarding investment in your home and your skills. Here’s why more and more DIY enthusiasts are embracing furniture restoration:
- Create Custom Pieces: Tired of mass-produced furniture? Refinishing allows you to customize pieces to perfectly match your interior design aesthetic, whether you’re aiming for a shabby chic, modern farmhouse, minimalist, or classic look. You control the color, finish, and overall vibe.
- Significant Savings: The cost of new, quality furniture can be exorbitant. With a keen eye, you can find solid wood pieces at thrift stores, garage sales, or online marketplaces for a fraction of the cost. A $30 dresser, once revitalized, can easily look like a $300 (or more!) designer piece.
- Experience the Pride of Craftsmanship: There’s an unparalleled sense of accomplishment that comes with transforming a worn-out item into something beautiful with your own hands. Imagine the satisfaction when guests admire your furniture and you proudly say, “I made it myself.”
- Sustainability and Eco-Friendliness: In an era of disposable goods, refinishing furniture is a sustainable practice. It keeps perfectly functional items out of landfills and reduces the demand for new manufacturing, contributing to a greener planet.
- Preserve History and Character: Many older pieces of furniture boast superior construction and unique design elements that are hard to find today. Refinishing allows you to honor their history while giving them a new lease on life, often preserving charming imperfections that tell a story.
Beyond the practical benefits, there’s something truly therapeutic about the process of sanding away years of wear and tear, and bringing a neglected piece back to its former glory. It’s a creative outlet that yields tangible, beautiful results.
- COMPACT DESIGN – Allows access to cramped corners and tight spaces.
- POWERFUL MOTOR – 1.2 Amp motor supplies 14,000 orbits per minute for fast and thorough material removal.
Check Prime Eligibility
Buy on Amazon
(As an Amazon Associate, we earn from qualifying purchases.)
Palm Sander vs. Random Orbital Sander: A Detailed Comparison for Furniture Refinishing
Understanding the fundamental differences between these two indispensable tools is crucial for achieving professional-grade results. While both remove material, their motion, power, and ideal applications vary significantly. Let’s break down the key features of the palm sander and the random orbital sander to help you make informed decisions.
| Feature | Palm Sander (Detail Specialist) | Random Orbital Sander (Versatile Workhorse) |
| Sanding Motion | Vibrates in small, fixed circles, sometimes elliptically. | Spins and simultaneously oscillates randomly, preventing repetitive patterns. |
| Sanding Pad Shape & Size | Typically rectangular or square (quarter-sheet), about 3×5 inches. Detail sanders have triangular pads. | Circular disc, usually 5-inch or 6-inch diameter. |
| Sandpaper Type & Cost | Standard sandpaper sheets cut into quarters (for rectangular pads) or specific triangular sheets for detail sanders. Generally cheaper. | Specialized hook-and-loop (Velcro-style) discs. More expensive per disc, but often more durable and faster changing. |
| Ideal Applications | Tight corners, edges, chair spindles, intricate trim work, small surfaces, final light sanding. | Large, flat surfaces like tabletops, cabinet doors, dresser tops, significant material removal, general purpose sanding. |
| Speed & Material Removal | Fixed speed (typically 12,000-14,000 OPM – Orbits Per Minute). Slower material removal compared to orbital. | Often variable speed (7,000-12,000 OPM). Aggressive and fast material removal. |
| Finish Quality | Can leave swirl marks (pigtails) if not used correctly (e.g., stopping in one spot, pressing too hard). Requires careful technique. | Virtually impossible to leave swirl marks due to random motion. Provides a smooth, uniform finish. Beginner-friendly. |
| Dust Collection | Basic dust bags or small ports, often less effective than orbital sanders. | More advanced dust collection systems, often with larger bags or better vacuum attachment ports, leading to a cleaner workspace. |
| Comfort & Ergonomics | Compact and lightweight, easy to maneuver in tight spaces. Can transmit more vibration to the hand. | Generally heavier and larger, but often designed with better vibration dampening for extended use. Good grip for broad surfaces. |
The Palm Sander: Your Precision Detail Specialist
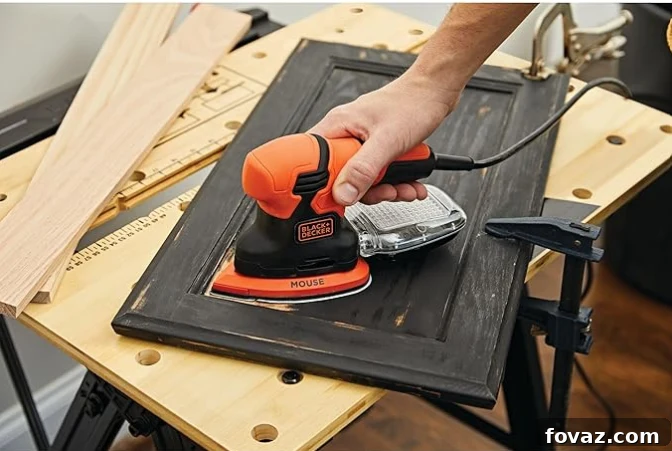
The palm sander, often referred to as a finish sander or quarter-sheet sander, is characterized by its compact, usually rectangular sanding pad. It operates by vibrating in small, fixed circular or elliptical patterns. This tool is an absolute essential for any serious furniture refinisher, especially when tackling pieces with intricate designs.
Why You’ll Love It: Its small size and lightweight design make it incredibly easy to control and maneuver. This agility allows it to access cramped corners, intricate trim, chair spindles, and other detailed areas where larger sanders simply cannot reach. Another significant advantage is its use of standard sandpaper sheets. You can buy large sheets and cut them into quarters, making it a very budget-friendly option for consumables.
The Catch (and How to Avoid It): The primary drawback of a palm sander is its tendency to leave visible swirl marks, sometimes called “pigtails,” if not used correctly. This happens if you press too hard, let the sander sit in one spot for too long, or move it against the wood grain with too much pressure. The key to avoiding these marks is to keep the sander moving constantly and smoothly across the surface, applying light, even pressure, and always working with the wood grain during the final stages.
Best Move: Think of the palm sander as your finishing tool and detail expert. While a random orbital sander handles the heavy lifting on broad, flat surfaces, the palm sander steps in for the precision work. It’s perfect for refining edges, cleaning up inside corners, smoothing carved details, and for lighter sanding between coats of finish. It shines when you need meticulous control and access to hard-to-reach areas, ensuring a uniform texture across the entire piece.
The Random Orbital Sander: Your High-Performance Workhorse
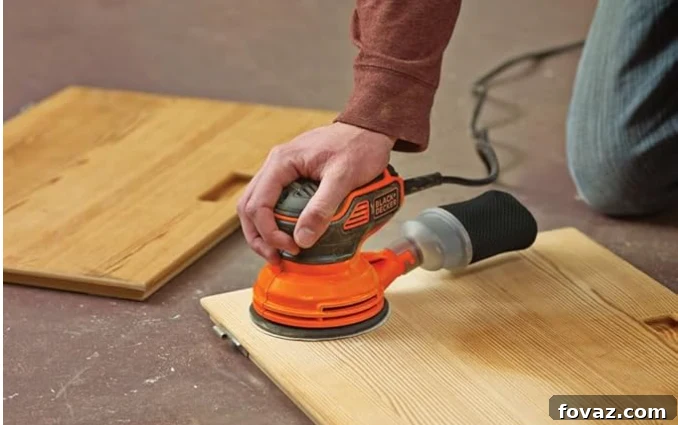
The random orbital sander is the powerhouse of furniture refinishing, distinguished by its circular pad that both spins and oscillates in a random pattern. This unique motion is its superpower, making it incredibly effective at material removal and virtually eliminating swirl marks.
Why You’ll Love It: The random orbit motion is a game-changer. It ensures that no single abrasive particle follows the same path twice, which is precisely why it’s almost impossible to create noticeable swirl marks – even for beginners. This makes it incredibly forgiving and easy to achieve a flawlessly smooth finish on flat surfaces. Furthermore, random orbital sanders are exceptionally efficient at removing old finishes, paint, and varnish, dramatically cutting down sanding time compared to hand-sanding or even a palm sander. You’ll save hours on larger projects.
The Catch: The main limitation of a random orbital sander is its circular pad. This design prevents it from reaching into tight, 90-degree corners or against adjacent surfaces without potentially marring them. Additionally, it uses specialized hook-and-loop (Velcro-style) sanding discs, which are generally more expensive than standard sandpaper sheets. However, the convenience of quick disc changes and the superior finish quality often justify the added cost, especially for significant projects.
Best Move: The random orbital sander should be your primary tool for any project involving large, flat surfaces. Use it to strip old finishes, level imperfections, and perform the initial and intermediate sanding steps on tabletops, dresser tops, cabinet doors, and broad side panels. Its speed and ability to deliver a pristine, swirl-free foundation make it indispensable for achieving that high-end, professional look on the majority of your furniture refinishing work.
- VERSATILE USE – For paint, varnish, and stain removal, surface preparation, shaping wood, and more.
- COMPACT, ERGONOMIC DESIGN – Handheld sander provides enhanced control when accessing cramped spaces.
Buy on Amazon
Which Sander for Which Furniture Project? Tailoring Your Tools for Success
The key to efficient and high-quality furniture refinishing is understanding which sander excels at specific tasks. Instead of trying to force one tool to do everything, combine their strengths to achieve optimal results on various furniture types.
Best Sander for Dining Tables and Large Tabletops
Random Orbital Sander. For expansive, flat surfaces like dining table tops, coffee tables, or large desk surfaces, the random orbital sander is undeniably the champion. Its powerful, random motion ensures rapid and even material removal without leaving any visible swirl marks. This is critical for tabletops, as they are often viewed from multiple angles and under direct light, making imperfections highly noticeable. Use it for stripping old varnish, leveling the surface, and all intermediate sanding stages. Its speed will significantly reduce your project time.
Best Sander for Cabinets and Dresser Panels
Both sanders. Cabinet doors, drawer fronts, and dresser side panels typically feature large, flat areas but also often have defined edges, trim, or inset panels.
- Random Orbital Sander: Use this first on all flat, open surfaces. It will quickly remove paint or varnish and prepare the main panels.
- Palm Sander: Switch to the palm sander for the edges of the doors, the inside corners of routed panels, and any decorative trim or molding. Its smaller pad and precise control allow it to reach these areas without damaging adjacent surfaces.
Best Sander for Dressers (Legs, Trim, Drawers)
Both sanders. Dressers are often a blend of flat surfaces and intricate details, making them ideal candidates for a dual-sander approach.
- Random Orbital Sander: Perfect for the large flat surfaces of drawer fronts and the top surface of the dresser. It will make quick work of stripping and smoothing these main areas.
- Palm Sander: Essential for sanding the legs, decorative trim, around hardware openings, and inside the corners of the dresser frame. Its ability to get into tight spots ensures a consistently smooth finish across the entire piece, even in hard-to-reach areas.
Best Sander for Chairs and Spindled Furniture
Palm Sander (and Detail Sander). Chairs, with their numerous spindles, curved backs, and often intricate legs, are where the palm sander (especially a detail sander variant with a triangular pad) truly shines.
- Palm Sander: Its compact size and maneuverability are indispensable for navigating the tight curves and narrow surfaces of chair components. While it may require more time and patience than using an orbital on flat surfaces, it’s the only power tool that can effectively reach these areas.
- Random Orbital Sander: Only use the random orbital sander if your chair has genuinely flat seat surfaces or very broad, flat backrests. Even then, be mindful of its circular pad not bumping into adjacent spindles or edges. For the vast majority of chair components, rely on your palm sander and even hand-sanding for the most delicate parts.
Best Sander for Bookshelves and Shelving Units
Both sanders. Bookshelves typically feature large, flat shelves and side panels, often with fixed vertical supports.
- Random Orbital Sander: Ideal for the main surfaces of the shelves and the exterior side panels. Its speed and swirl-free finish are a huge advantage here.
- Palm Sander: Crucial for sanding the inside corners where shelves meet the side panels, and for the edges of each shelf. It ensures no spot is missed, providing a uniform texture throughout the unit.
Mastering the Sanding Process: How to Transform Furniture Using a Sander
Achieving that coveted professional finish requires more than just owning the right tools; it demands a systematic approach to sanding. Follow these steps for flawless results every time, minimizing effort and maximizing impact.
Preparation: Safety and Workspace Setup
Before you even plug in a sander, ensure your workspace is well-ventilated. Always wear safety glasses and a dust mask (or respirator) to protect your eyes and lungs from fine wood dust. Cover surrounding areas with drop cloths if working indoors. Clean the furniture piece thoroughly with a degreaser or mild soap and water to remove dirt, grime, and oils. Make any necessary repairs like tightening loose joints or filling gouges with wood filler before sanding.
Step 1: Strip the Old Finish (80-Grit)
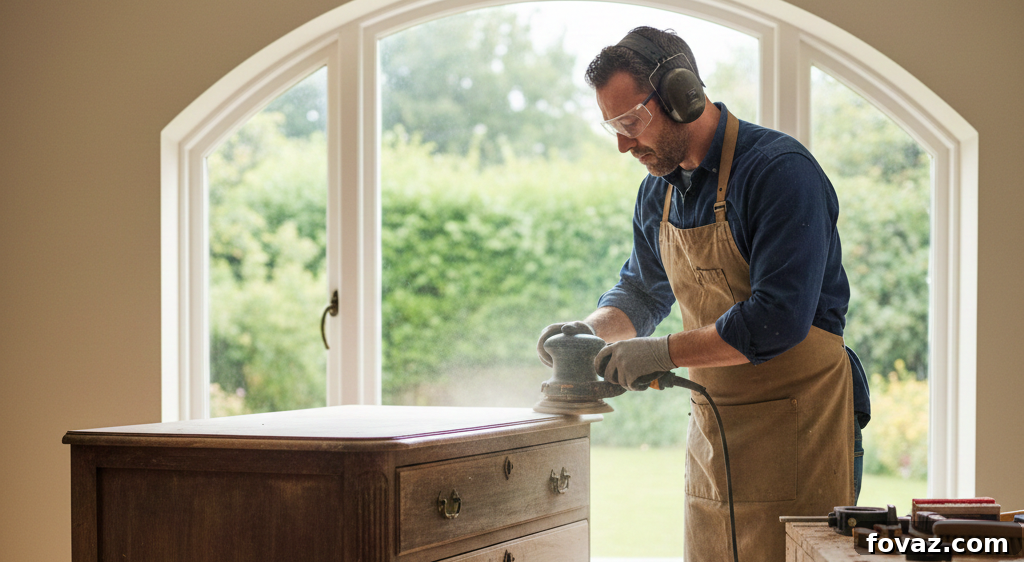
This is where your random orbital sander truly shines. Attach an 80-grit sandpaper disc. This coarse grit is designed for aggressive material removal, perfect for stripping away old layers of paint, varnish, or stain down to the bare wood. Hold the sander flat against the surface and keep it moving continuously in overlapping passes. Let the tool do the work; avoid pressing down hard, as this can create divots or uneven spots. You’ll feel the sander “cutting” through the finish. Work in manageable sections, ensuring all the old finish is removed and you’ve exposed clean, raw wood. If the finish is exceptionally thick or stubborn, you might even start with 60-grit, but proceed cautiously to avoid excessive wood removal.
Step 2: Level the Surface and Remove Scratches (120-Grit)
Once the old finish is stripped, switch to 120-grit sandpaper on your random orbital sander. The goal of this stage is to smooth out any remaining imperfections from the 80-grit sanding and to begin leveling the wood surface. For large, flat areas, continue with the random orbital sander, working in the same overlapping pattern. Here’s a pro trick: lightly scribble pencil marks across the sanded wood surface. Sand with the 120-grit until all these pencil marks disappear. If any marks remain, it indicates a low spot or an area you’ve missed, ensuring your surface is perfectly level and uniformly sanded. This meticulous step prevents that “homemade” or uneven appearance and lays the foundation for a truly professional finish.
Step 3: Get Into Details and Corners (120-Grit, Palm Sander)
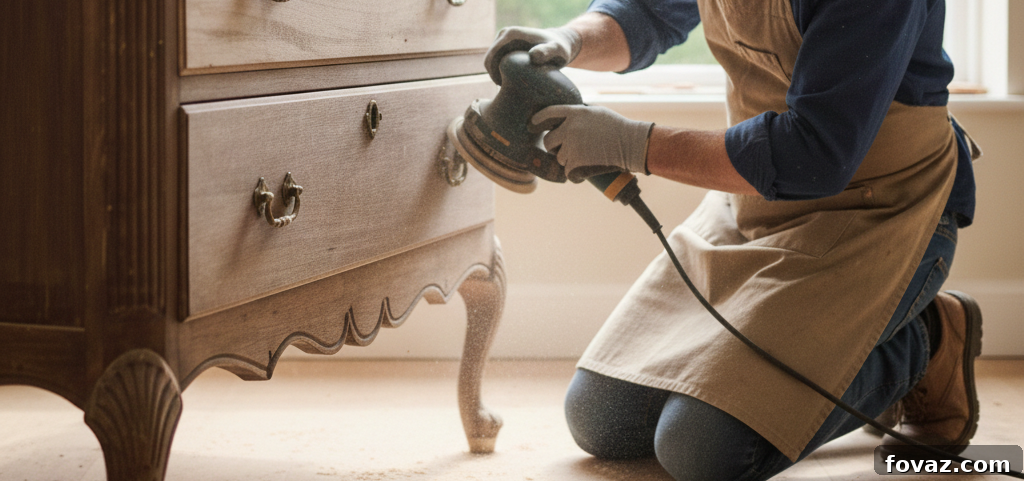
Now it’s time for your palm sander to take center stage. With 120-grit sandpaper attached, meticulously work on all the areas the random orbital sander couldn’t reach. This includes corners, edges, trim work, carved details, and any contoured surfaces. Maintain light, even pressure and keep the sander moving to prevent swirl marks. The goal here is to ensure the entire piece has a consistent texture and all areas have been smoothed from the previous coarser grits. This attention to detail is what truly elevates a DIY project to a professionally refinished piece.
Step 4: Final Smoothness for a Silky Finish (220-Grit)
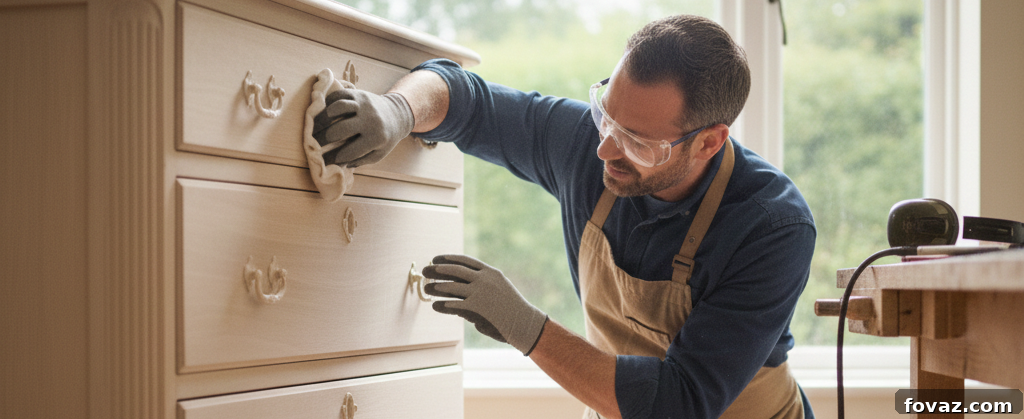
This is the final, crucial step to achieve that incredibly smooth, silky surface that people can’t resist touching. Switch to 220-grit sandpaper on both your random orbital sander (for flat surfaces) and your palm sander (for details). Use the same careful, even pressure and continuous motion. The 220-grit will refine the wood pores, remove any lingering fine scratches, and prepare the surface for optimal stain absorption or paint adhesion. Once you’re finished sanding, thoroughly inspect the entire piece for any missed spots or remaining imperfections. Before applying any finish, wipe down the furniture thoroughly with a tack cloth or a damp (not wet) cloth to remove all sanding dust. This prevents dust particles from getting trapped in your finish, ensuring a pristine result.
You Absolutely Got This: Empowering Your Refinishing Journey!
We understand that power tools can seem a bit daunting, and the thought of potentially “messing up” that fantastic thrift store find can be intimidating. However, please remember that both palm sanders and random orbital sanders are designed with user-friendliness in mind. The random orbital sander, with its unique motion, actively prevents swirl marks, making it incredibly beginner-proof for large areas. The palm sander, while requiring a bit more finesse, is lightweight and easy to control, making detail work accessible.
Don’t let hesitation hold you back from unleashing your creativity. Start with a smaller, less intimidating project—perhaps a simple wooden tray, a picture frame, or a single nightstand. You’ll quickly get the hang of the techniques, build your confidence, and soon wonder why you didn’t embark on this satisfying journey sooner. The transformation of a forgotten piece of furniture into a cherished heirloom is an incredibly rewarding experience.
Quick Confidence Boosters and Essential Tips:
- Organize Your Sandpaper: Keep your sandpaper grits clearly labeled and organized. A simple system (e.g., separate bins or a labeled stack) will prevent you from accidentally grabbing the wrong grit and having to re-sand.
- Magnetic Strip Magic: Install a magnetic strip on your workbench. It’s perfect for keeping small metal tools like scrapers, utility knives, and drill bits easily accessible and preventing them from getting lost in sawdust.
- Embrace Dust Collection: Whenever possible, connect your sander to a shop vac or use a sander with an efficient dust collection bag. This significantly reduces airborne dust, making your workspace cleaner and safer, and improving visibility of your sanding progress.
- Take Before & After Photos: Always capture “before” photos of your project. The transformation can be so dramatic that you’ll want to document your hard work. These photos are fantastic for sharing your accomplishments and seeing how far you’ve come!
- Listen to Your Tools: Pay attention to the sound of your sander. A strained sound might indicate you’re pressing too hard, while a smooth, consistent hum means it’s working efficiently.
- Practice Patience: Sanding is a process that cannot be rushed. Take your time, move through the grits systematically, and inspect your work frequently. Patience will always pay off with a superior finish.
- PRACTICAL DESIGN: 50PCS Sanding Pads with Extra Tips for replacement, 5-1/4″ x 3-3/4″ (13.5cm x 9.5cm) pre-punched 12 holes for dust collection.
- GOOD SANDING EFFECT: High Quality Aluminum Oxide Sanding Sheets with good property: durable, anti-clogging and sharp.
Check Prime Eligibility
Buy on Amazon
Show Us Your Transformed Masterpiece!
We are genuinely excited to witness the incredible transformations you’ll achieve. That battered dresser rescued from the curb? The dining table brought back to life? Don’t keep your stunning creations to yourself! Share your “before” and “after” photos with our community and tag us on social media. There’s nothing more inspiring than celebrating the journey and the finished pieces with fellow DIY enthusiasts. Your success stories motivate others to pick up a sander and start their own projects.
Now, armed with knowledge and the right tools, go forth and turn that old furniture into something truly beautiful and unique!
FAQs: Palm Sander vs. Random Orbital Sander for Refinishing Furniture
What is the primary difference between a palm sander and a random orbital sander for furniture refinishing?
The primary difference lies in their sanding motion and ideal application. A palm sander (or finish sander) uses a fixed, small orbital vibration, making it excellent for detail work, tight corners, and intricate trim. A random orbital sander, conversely, combines spinning with a random oscillation, which prevents swirl marks and makes it ideal for fast, aggressive material removal and achieving a flawlessly smooth finish on large, flat surfaces like tabletops and cabinet doors.
Can I complete all my furniture refinishing projects with just one type of sander?
While technically possible to do *some* projects with just one, most comprehensive furniture refinishing projects benefit greatly from using both sanders. Random orbital sanders efficiently tackle large, flat areas, speeding up the initial stripping and smoothing. Palm sanders are indispensable for the detailed work, reaching into corners, along edges, and on intricate parts that the larger, round orbital sander cannot access without causing damage. For truly professional results, having both tools is recommended.
Which sander is better for refinishing large dining tables or expansive desk surfaces?
A random orbital sander is hands-down the best choice for refinishing large, flat surfaces such as dining tables, coffee tables, and desks. Its random motion guarantees a swirl-free finish, which is crucial for surfaces highly visible from all angles. It also removes old varnish, paint, or stain significantly faster than a palm sander, saving you considerable time and effort on large projects while delivering superior results.
Do palm sanders or random orbital sanders leave a superior finish on furniture?
For large, flat surfaces, random orbital sanders generally leave a superior, swirl-free finish due to their unique, non-repetitive sanding pattern. Palm sanders, if not used carefully (i.e., moved constantly with light, even pressure), can leave visible circular “pigtail” marks. However, a palm sander is critical for achieving a uniform finish across the entire piece by meticulously smoothing details and corners that an orbital sander cannot reach.
What types of sandpaper are used with palm sanders and random orbital sanders, and is there a cost difference?
Palm sanders typically use standard sandpaper sheets that are cut into quarters (for quarter-sheet models) or specific pre-cut triangular sheets for detail sanders. These are generally very budget-friendly. Random orbital sanders, on the other hand, require specialized hook-and-loop (Velcro-style) discs, which are more expensive per disc. However, these discs offer faster changes and often faster material removal, which can offset the cost difference in terms of time saved on furniture projects.
What safety precautions should I take when using power sanders for furniture refinishing?
Safety is paramount. Always wear appropriate personal protective equipment (PPE), including safety glasses to protect your eyes from flying debris, and a dust mask or respirator to prevent inhaling fine wood dust particles. Work in a well-ventilated area, preferably outdoors or near an open window with a fan. Keep your workspace clean and free of clutter. Unplug sanders when changing sandpaper or performing maintenance. Always read and follow the manufacturer’s instructions for your specific tool.