
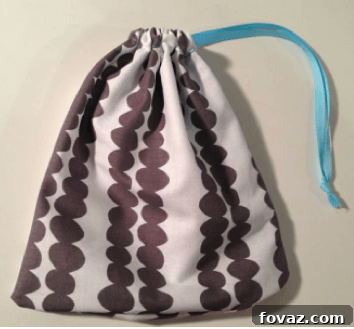
How to Sew a Drawstring Bag: Your Ultimate Beginner-Friendly DIY Guide
Have you ever wanted a simple yet incredibly versatile sewing project that’s perfect for beginners but equally satisfying for experienced crafters? Look no further than the humble drawstring bag! This beloved DIY project offers endless possibilities, making it one of our absolute favorites. Whether you’re new to the world of sewing or just looking for a quick and rewarding craft, learning how to make a drawstring bag is an excellent place to start.
Drawstring bags are astonishingly adaptable for everyday use. They serve as a fantastic solution for organizing the myriad contents of a handbag or backpack, keeping small items neatly contained and easily accessible. Beyond personal organization, they present an eco-friendly and reusable alternative to traditional wrapping paper, adding a personal touch to any gift. Moreover, they are an ingenious way to utilize those precious scrap fabric pieces you’ve been collecting, transforming them into functional and beautiful creations. From a modest pouch to a spacious tote, a drawstring bag can hold it all with charm and efficiency.
Why Make Your Own Drawstring Bag? The Benefits Are Endless!
The appeal of the drawstring bag extends far beyond its simplicity. Crafting your own comes with a wealth of advantages:
- Unbeatable Versatility: Use them for gift bags, laundry bags, shoe bags, toy storage, travel organization, produce bags, or even as stylish clutches.
- Eco-Friendly Choice: Reduce waste by opting for reusable fabric bags instead of single-use plastic or paper.
- Perfect for Beginners: The straight lines and basic stitches involved make it an ideal project for those just starting their sewing journey. It’s a great way to practice fundamental techniques.
- Scrap Fabric Buster: Got a stash of beautiful fabric remnants? Drawstring bags are excellent for using up those smaller pieces, ensuring no fabric goes to waste.
- Customization Galore: Choose any fabric, color, pattern, and size to perfectly match your style or specific needs. Add embellishments like embroidery, appliqué, or decorative stitches.
- Thoughtful Handmade Gifts: A handmade drawstring bag filled with goodies makes a personal and cherished gift for friends and family.
- Quick and Rewarding: Most drawstring bags can be completed in under an hour, providing immediate gratification and a boost of creative confidence.
Ready to Create Your Own Custom Drawstring Bag?
Despite their numerous qualities, perhaps the best aspect of drawstring bags is how incredibly simple they are to make from scratch. You don’t need complex patterns or advanced skills. We’ve put together a comprehensive guide, complete with detailed instructions, to walk you through every step of the process. Soon, you’ll be making these practical and charming bags for all your needs!
Time Required:
- Approximately 10 to 20 minutes, depending on the size of your bag and your sewing experience.
Materials You’ll Need to Make Your Drawstring Bag:
- Fabric: One rectangular piece of woven cotton fabric. The beauty of this project is that you can use virtually ANY size! While woven cotton is recommended for ease of use, you can certainly opt for other fabrics like linen, canvas, or even knit fabrics (though knits might require a bit more care due to their stretchiness). Consider fun prints, solids, or even upcycled materials like old sheets or tablecloths.
- Thread: Coordinating or contrasting thread to match or highlight your chosen fabric. Polyester all-purpose thread is usually ideal.
- Ribbon or Cord: A ½” to ¾” width ribbon, drawstring cord, or even a shoelace. Choose a color that coordinates or contrasts beautifully with your fabric. You’ll need a length approximately twice the width of your fabric plus an extra 10-12 inches for tying.
Essential Tools:
- Fabric Marking Pen or Chalk: For precisely marking your seam lines.
- Ruler or Measuring Tape: To ensure accurate measurements for cuts and seams.
- Safety Pin: An invaluable tool for threading your ribbon through the casing.
- Iron and Ironing Board: Crucial for pressing seams flat and creating crisp folds, which greatly improves the professional finish of your bag.
- Pinking Shears (Optional): Specialized scissors that cut a zigzag edge, helping to prevent fabric fraying. While optional, they add a neat finish to raw edges.
- Sewing Machine: The primary tool for stitching your bag together efficiently. Ensure it’s threaded and in good working order.
- Fabric Scissors: Sharp scissors specifically for cutting fabric to avoid snagging and ensure clean cuts.
- Pins or Clips: To hold fabric layers together before sewing.
Step-by-Step Guide: How to Sew Your DIY Drawstring Bag
Follow these simple steps to construct your very own functional and stylish drawstring bag:
Step 1: Prepare Your Fabric – Fold and Align
Begin by taking your rectangular piece of fabric. Fold it in half, ensuring the right sides are together. The “right side” refers to the printed or “good” side of your fabric that you want to be visible on the finished bag. Folding right sides together means that these decorative sides will be facing each other, hidden inside, ready to be turned out later. Align the edges carefully to prevent any fabric distortion or unevenness. This initial fold establishes the bottom edge of your bag.
Step 2: Mark Your Seam Lines with Precision
With your fabric still folded right sides together, use your fabric marking pen (or chalk) and ruler to mark your sewing lines. Precision here is key for a neat finish:
- Seam Allowance: Measure ½” (approximately 1.25 cm) in from the unfolded raw edge. This will be your side seam allowance. Draw a vertical line along this measurement, starting 1” down from the very top raw edge of the fabric.
- Drawstring Opening: Leave a 1” (approximately 2.5 cm) section completely unmarked. This gap is critically important as it will form the opening through which you will thread your drawstring ribbon. This opening should be positioned about 1 inch from the top and will be part of the side seam.
- Continue the Seam: Continue drawing the vertical seam line from below the 1-inch opening all the way down to the folded edge at the bottom of the bag. You will have two vertical lines: one starting 1″ from the top and ending at the opening, and another starting below the opening and extending to the bottom fold. Ensure your lines are straight and consistent.
Tip: Use pins to hold your fabric layers securely along the marked lines before you start sewing.
Step 3: Stitch Your Side and Bottom Seams
Now, it’s time to sew! Using your sewing machine, carefully stitch along the marked lines, being sure to backstitch at the beginning and end of each seam for added security. Remember to skip over the 1-inch unmarked opening – this area should remain unstitched. Stitch down one side, pivot at the bottom corner (if your fabric isn’t folded at the bottom, you’d stitch across the bottom as well), and then stitch up the other side, leaving the corresponding 1-inch opening on that side.
- Optional – Prevent Fraying: After sewing, you can trim the raw edges of your sewn seams with pinking shears. Pinking shears create a zigzag cut that helps prevent the fabric from fraying over time, giving your bag a cleaner, more durable finish on the inside. Alternatively, you can use a zigzag stitch on your sewing machine along the raw edges.
Step 4: Create the Drawstring Casing – First Fold and Iron
Open up your bag and lay it flat. We are now going to create the casing for your drawstring ribbon. Take the very top raw edge of the bag and fold it down towards the wrong side of the fabric by 1 inch. Press this fold firmly with a hot iron. Ironing is not just about making things flat; it “sets” the fabric, making subsequent folds and stitches much easier and more precise. This initial fold creates a clean edge for your casing.
Step 5: Complete the Casing – Second Fold and Iron
Next, fold the top edge down another 1 inch. This second fold will completely encase the raw edge you just folded in Step 4, creating a neat channel for your drawstring. Press this fold again with your iron to make it crisp and hold its shape. The 1-inch openings that you intentionally left unstitched in Step 2 should now be perfectly positioned at the very top corners of this folded casing, allowing access to the channel.
Step 6: Secure the Drawstring Casing with Edge Stitching
With your casing folds securely ironed, it’s time to sew them down. Open the bag up again and position it under your sewing machine needle. Edge stitch all the way around the opening, sewing close to the folded-down edge (the one you folded in Step 5). This stitch will create a secure channel for your ribbon.
- Helpful Tip: If your sewing machine has a free arm attachment, now is an excellent time to utilize it! The free arm allows you to slide the cylindrical bag opening around the needle more easily, making it simpler to sew in a continuous circle.
- Critical Reminder: As you sew, be extremely careful NOT to sew the opening of the casing together! You must ensure that your stitching remains only on the fabric of the casing itself, leaving the channel clear. It’s a common mistake, especially when working late, but it’s easily avoidable with a little extra attention. Double-check that your needle is only catching the two layers of the casing and not the main body of the bag below the opening.
Step 7: Final Touches – Turn Right Side Out and Thread Your Drawstring
You’re almost done! Turn your newly sewn bag right side out. Now, for the drawstring:
- Thread the Ribbon: Take your ribbon or cord. Attach a safety pin to one end of the ribbon. This little trick makes threading significantly easier. Gently feed the safety pin (and the ribbon trailing behind it) through one of the 1-inch openings in the casing you created. Push it all the way around the channel until it emerges from the same opening you started from.
- Secure the Ends: Once both ends of the ribbon are coming out of the same opening, tie them together in a knot. This creates a single drawstring that cinches the bag closed from both sides.
- Alternative (Two Drawstrings): For a double drawstring effect, cut your ribbon into two equal halves. Thread one piece through one opening, all the way around, and out the other opening. Tie the ends of that ribbon together. Repeat with the second piece of ribbon, starting from the second opening and threading it in the opposite direction, emerging from the first opening. This allows you to pull both sides independently.
Voila! That’s all there is to it! You’ve successfully created your very own handmade drawstring bag. Take a moment to admire your craftsmanship.
Tips for Success and Customization
General Sewing Tips:
- Press, Press, Press: Ironing at each stage isn’t just for neatness; it makes sewing easier and your finished product look professional.
- Use Good Quality Thread: It prevents breakage and ensures durable seams.
- Test Stitches: Always test your stitch length and tension on a scrap piece of your fabric before starting your project.
- Slow and Steady: Especially for beginners, take your time. There’s no rush to create perfect stitches.
- Backstitch: Always backstitch at the beginning and end of seams to secure them.
Ideas for Customizing Your Drawstring Bag:
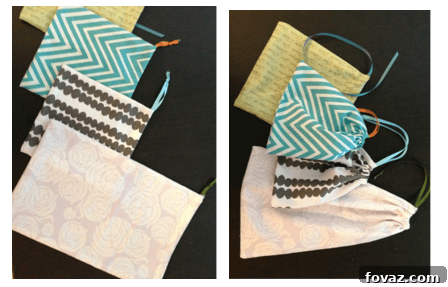
- Size it Up or Down: Easily adjust the dimensions of your fabric rectangle to make tiny jewelry pouches, medium-sized gift bags, or large laundry sacks.
- Fabric Play: Experiment with different fabric combinations. Use a contrasting fabric for the casing, or piece together several smaller scraps for a patchwork effect.
- Embellishments: Add appliqué designs, embroidery, fabric paint, patches, or even beads and tassels to the drawstring ends for a unique touch.
- Lining: For a more structured and polished bag, consider adding a lining. This involves creating two identical bags (one main fabric, one lining fabric) and nesting them before finishing the casing.
- Double Drawstring: As mentioned in Step 7, using two separate ribbons threaded in opposite directions gives a different look and function.
- Handles: Attach fabric loops or D-rings to the top seams before creating the casing, allowing you to add a shoulder strap.
Caring for Your Handmade Drawstring Bag
To ensure your drawstring bag lasts for years, follow these general care instructions:
- Washing: Most cotton bags can be machine washed on a gentle cycle with cold water. Avoid harsh detergents.
- Drying: Tumble dry on low or air dry to prevent shrinking and preserve fabric colors.
- Ironing: If desired, iron on a medium setting to smooth out wrinkles.
- Fabric Specifics: Always consider the care instructions for the specific fabric you used.
Share Your Creations & Stay Connected!
We love seeing what you make! Share your finished drawstring bags with us in the comments below or on social media. Your feedback and creations inspire our community and help us provide more of the content you love. The more interest we receive in our posts, the more likely we are to create similar tutorials and projects.
Looking for more sewing inspiration? Check out our other guide: How to Make a Dress | Sew a Drawstring Bag