
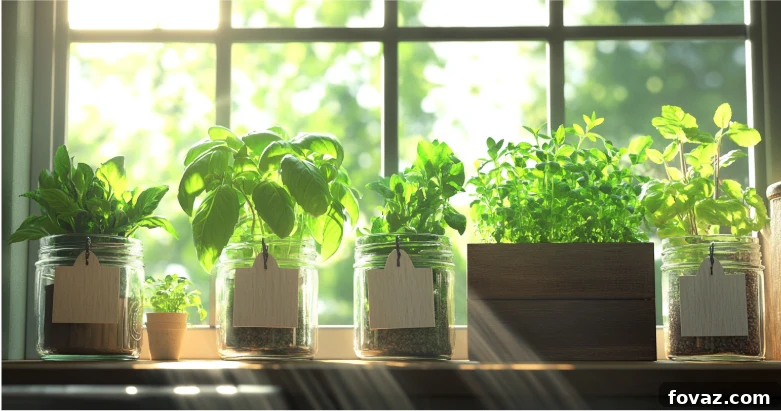
As the chill of winter envelops the outdoors, the vibrant life of your garden might seem a distant memory. Yet, your passion for cultivating lush greenery doesn’t have to hibernate! Instead of enduring the cold to tend your outdoor space, why not cultivate a flourishing oasis right within your home? DIY indoor herb planters offer a delightful solution, keeping your gardening spirit alive and thriving year-round. These charming additions do more than just grow food; they infuse your living spaces with natural beauty, invigorating fragrances, and a daily dose of joy. Best of all, they provide a continuous supply of fresh, aromatic herbs, ready to elevate your culinary creations throughout the entire season.
Are you ready to embrace your inner gardener and bring the magic of growing indoors? Let’s delve into the simple yet rewarding steps to get your indoor herb garden flourishing.
Why Cultivate a Winter Indoor Herb Garden?
Gardening is much more than just a hobby; it’s a therapeutic and deeply rewarding activity that connects us to nature. The beauty of indoor herb planters is that they allow you to immerse yourself in this fulfilling pursuit no matter the weather outside. Even when frost coats the ground and snow blankets your landscape, you can continue to nurture living plants and reap an abundance of benefits.
- Uninterrupted Fresh Ingredients: Imagine walking into your kitchen and snipping fresh basil for your pasta, bright mint for your tea, or fragrant rosemary for your roasted vegetables. Having a ready supply of garden-fresh herbs at your fingertips instantly elevates everyday dishes, adding unparalleled flavor and aroma that store-bought alternatives simply can’t match. This convenience inspires more home cooking and experimentation.
- Remarkable Budget-Friendly Choice: Consistently purchasing fresh herbs from the grocery store can quickly become an expensive endeavor, especially during winter months when prices often spike. By growing your own, you make a significant long-term saving. A small initial investment in seeds or starter plants and soil can provide you with months, or even years, of delicious herbs for a fraction of the cost. It’s a sustainable choice for your wallet and the planet.
- Enchanting Decorative Touch: Beyond their practical uses, indoor herb gardens are incredibly aesthetic. Lush, vibrant greenery instantly transforms any room, breathing life, color, and texture into your home decor. Whether artfully arranged on a windowsill, clustered on a shelf, or integrated into a centerpiece, these living displays add charm, character, and a touch of natural elegance to any space, enhancing your home’s ambiance.
- Holistic Wellness Boost: The presence of plants indoors has scientifically proven benefits for our well-being. They naturally help reduce stress and anxiety, create a more calming and serene environment, and even improve focus and concentration. Furthermore, many herbs act as natural air purifiers, gently filtering out common indoor toxins and releasing fresh oxygen, contributing to a healthier and more invigorating living space.
- A Continuous Connection to Nature: In the depths of winter, it’s easy to feel disconnected from the natural world. An indoor herb garden serves as a vibrant, living reminder of nature’s resilience and beauty, fostering a profound sense of connection and bringing the outdoors in. It’s a wonderful way to combat winter blues and maintain a sense of growth and vitality within your home.
Growing herbs indoors provides a powerful way to stay engaged with the cycles of nature, offering comfort, beauty, and utility even when the world outside is dormant.
Top Herbs for Your Indoor Planters
While some herbs are more particular, many varieties are surprisingly adaptable and thrive beautifully indoors. The key is choosing the right ones for your home environment. Here are some beginner-friendly and highly rewarding options perfect for cultivating a vibrant winter herb garden:
- Basil: A true Italian kitchen staple, basil craves ample sunlight, ideally 6-8 hours daily. Keep its soil consistently moist but not waterlogged. Pinching off the top leaves regularly encourages bushier growth and prevents it from flowering too early, which can diminish flavor. Use it in pesto, Caprese salads, or fresh pasta dishes.
- Parsley: Both curly and flat-leaf parsley varieties are robust, adaptable, and remarkably easy to grow indoors. They prefer bright, indirect light but can tolerate slightly less than basil. Keep the soil moist and snip outer leaves as needed. Parsley is a versatile garnish and a core ingredient in many European and Middle Eastern cuisines.
- Mint: Known for its hardiness and refreshing aroma, mint is surprisingly forgiving and can grow well even with moderate light exposure (4-6 hours). Be aware that mint is a vigorous grower and can quickly take over a shared planter, so it’s often best grown in its own container. Varieties like spearmint and peppermint are excellent for teas, cocktails, and desserts.
- Thyme: With its compact growth habit and earthy, fragrant leaves, thyme is perfectly suited for smaller pots and windowsills. It prefers plenty of sunlight and well-draining soil, thriving when allowed to dry out slightly between waterings. Thyme is wonderful with roasted meats, vegetables, and in various Mediterranean dishes.
- Rosemary: This woody, resilient herb loves warmth and abundant sunlight. It prefers a slightly drier soil and good air circulation. Rosemary can grow quite large, so start with a small plant and be prepared to prune it to maintain its size. Its piney aroma is fantastic in stews, roasts, and even infused olive oils.
- Chives: A member of the onion family, chives are quick-growing, elegant, and provide a mild, oniony flavor. They prefer bright light and consistent moisture. Snip the hollow, grass-like leaves from the base for garnishing eggs, soups, salads, and baked potatoes. They’ll quickly regrow, offering a continuous harvest.
- Oregano: Similar to thyme, oregano is a sun-loving herb that thrives in well-draining soil. It’s relatively low maintenance and adds a robust, savory flavor to pizzas, pasta sauces, and grilled dishes. Pinch back regularly to keep it bushy.
- Sage: With its soft, velvety leaves and earthy flavor, sage is a wonderful addition to poultry, pork, and rich sauces. It prefers bright light and soil that dries out between waterings. Ensure good air circulation to prevent fungal issues.
When selecting your herbs, prioritize those you love to use most in your cooking. Then, ensure you can provide each chosen variety with its specific light, water, and soil requirements for optimal growth.
A Step-by-Step Guide to Crafting Beautiful DIY Indoor Herb Planters
Creating your own indoor herb planters is an incredibly satisfying and creative project. With a few simple steps, you can design and build the perfect, thriving homes for your culinary herbs.
Step 1: Thoughtfully Select Your Planters
Your choice of planter is crucial for both the health of your herbs and the aesthetic appeal of your home. Think beyond conventional terracotta pots and let your creativity flourish:
- Classic Terracotta Pots: Excellent for herbs that prefer drier soil, as they are porous and allow for good air circulation and evaporation.
- Ceramic Pots: Often more decorative, these pots retain moisture longer than terracotta. Choose glazed options for a sleeker look.
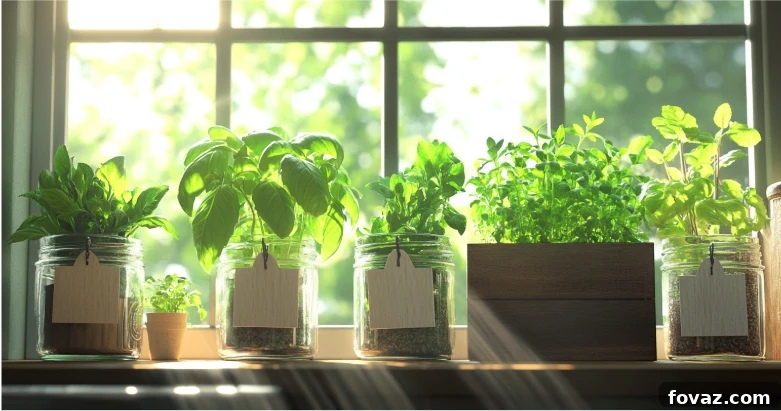
- Mason Jars: These transparent jars offer a clean, modern, and minimalist look. While visually appealing, they lack drainage holes, requiring extra attention to the drainage layer.
- Repurposed Tins: Old coffee tins, cookie tins, or even colorful food cans can bring a delightful rustic, vintage, or industrial charm to your kitchen. Just ensure they are thoroughly cleaned and have drainage holes added.
- Vintage Teacups or Mugs: Whimsical and cozy, teacups add a unique, personal, and often charming touch to your herb display, perfect for smaller herbs like chives or thyme.
- Wooden Boxes or Crates: Ideal for creating a cohesive grouping of several herbs, a wooden box can provide a rustic or farmhouse feel. Ensure the wood is treated or lined to prevent water damage.
- Self-Watering Planters: A convenient option that features a reservoir to provide consistent moisture to your plants, reducing the frequency of watering.
Regardless of your choice, the most critical factor is ensuring your chosen planters either come with proper drainage holes or can be easily adapted to include them. Good drainage is non-negotiable for healthy herb roots.
Step 2: Ensure Impeccable Drainage
Poor drainage is the number one killer of indoor plants, often leading to root rot. Even if your chosen container has drainage holes, adding a foundational layer can be highly beneficial for root health. Here’s how to prepare your planters for optimal drainage:
- Layer of Stones or Pebbles: Begin by adding a 1-2 inch layer of small stones, pebbles, or gravel to the bottom of your chosen container. This creates a reservoir for excess water to collect, preventing your herb roots from sitting in saturated soil.
- Activated Charcoal (Optional but Recommended): On top of the pebble layer, sprinkle a thin layer of activated charcoal. This natural material helps to filter impurities, absorb excess moisture, prevent odors, and keep the soil fresher over time, which is particularly useful for containers without drainage holes.
- Drainage Screen (Highly Recommended): If your container has drainage holes, consider placing a small piece of mesh screen or coffee filter over the holes before adding pebbles. This prevents soil from washing out while still allowing water to escape.
Step 3: Select Quality Potting Soil
Herbs thrive in nutrient-rich, well-draining soil that provides both support and essential nourishment. Do not use garden soil, as it can compact too much in a pot and introduce pests or diseases. Instead, always opt for a high-quality potting mix:
- Indoor Potting Mix: Look for a potting soil specifically labeled for indoor plants or herbs. These mixes are typically lighter, sterilized, and formulated to prevent compaction and promote good aeration.
- Enhance Drainage: To further improve drainage and aeration, consider blending your potting soil with perlite or vermiculite. A good ratio is typically 3 parts potting soil to 1 part perlite/vermiculite. Perlite helps lighten the soil and provides air pockets, while vermiculite also aids in aeration and retains some moisture and nutrients.
- Organic Options: If you prefer organic gardening, choose an organic potting mix that contains natural fertilizers like compost or worm castings.
Step 4: Expertly Plant Your Herbs
Once your containers are prepped with drainage and soil, it’s time for the exciting part – planting your herbs! Handle your herb seedlings with care to minimize transplant shock:
- Prepare the Soil: Fill your prepared planters with potting soil, leaving about an inch or two of space from the rim. Create a small well in the center for your plant.
- Gently Remove Seedling: Carefully remove your herb seedling from its nursery pot. If the roots are tightly bound, gently loosen them with your fingers to encourage outward growth.
- Position the Plant: Place the herb seedling into the well, ensuring the top of the root ball is level with the surrounding soil. Avoid burying the stem too deeply, as this can lead to rot.
- Fill and Firm: Add more potting soil around the root ball, gently firming it down to remove any large air pockets. Don’t compact it too tightly, as roots need air to breathe.
- Initial Watering: Water your newly planted herbs thoroughly until water begins to drain from the bottom (if your pot has holes). This helps settle the soil around the roots.
- Spacing: If planting multiple herbs in a larger container, ensure there is adequate space between each plant for mature growth. Overcrowding can lead to competition for nutrients and light.
Step 5: Discover the Perfect Spot for Growth
Light is paramount for most herbs, especially indoors. Choosing the right location in your home can make all the difference:
- South-Facing Windows: For most sun-loving herbs like basil, rosemary, and thyme, a south-facing window is ideal, providing the most intense and consistent light throughout the day.
- East or West-Facing Windows: These locations offer moderate light for several hours. East-facing windows provide gentle morning sun, while west-facing windows offer stronger afternoon sun. These are suitable for herbs like mint, parsley, or chives.
- North-Facing Windows: Generally too dim for most herbs to thrive, unless supplemented with artificial light.
- Signs of Insufficient Light: If your herbs are stretching towards the light, appearing leggy, or producing pale, sparse leaves, they are likely not getting enough light.
- Utilize Grow Lights: If natural sunlight is limited or inconsistent, investing in a good quality grow light is highly recommended. Full-spectrum LED grow lights are energy-efficient and provide the specific wavelengths of light necessary for healthy plant growth. Position the light 6-12 inches above your herbs for 12-16 hours a day, using a timer for consistency.
Step 6: Consistent Maintenance and Dedicated Care
Once your herbs are planted and settled, consistent care will ensure their long-term health and productivity:
- Watering Wisdom: The most common mistake is overwatering. Always check the soil moisture before watering. Stick your finger an inch or two into the soil; if it feels dry, it’s time to water. Water thoroughly until water drains from the bottom, then allow the top inch or two of soil to dry out before the next watering. Different herbs have different water needs; rosemary prefers drier conditions, while basil likes consistent moisture.
- Pruning for Prosperity: Regular pruning is essential for encouraging bushy, robust growth and a continuous supply of fresh leaves. Instead of just snipping off individual leaves, pinch back the top growth of stems just above a leaf node. For flowering herbs like basil, snip off flower buds as soon as they appear to redirect the plant’s energy into leaf production.
- Pest Vigilance: Indoor plants can still attract pests. Inspect your herbs weekly for any signs of common culprits like aphids, spider mites, or whiteflies. Look under leaves and along stems. Early detection is key. If you find pests, treat them promptly with organic solutions like neem oil spray or a gentle insecticidal soap. A damp cloth can also be used to wipe away pests from leaves.
- Air Circulation: Ensure your herbs have good air circulation to prevent fungal diseases. Avoid placing them in overly damp or stagnant areas.
Infuse Style into Your Indoor Herb Garden
Your indoor herb planters aren’t just functional; they are an extension of your home’s decor. With a little extra creative flair, they can become stunning focal points. Try these styling ideas to elevate your green space:
- Creative Labeling: Go beyond simple plastic markers. Use charming wooden tags, small chalkboard labels, hand-painted ceramic pieces, or even stamped metal tags to identify your herbs. This adds a personalized, artisan touch.
- Grouped Displays & Layering: Arrange your planters in artful clusters rather than single, isolated pots. Vary heights using small stands, books, or decorative boxes to create visual interest and a lush, cohesive look. Consider a tiered plant stand or a vertical planter for a space-saving and impactful display.
- Seasonal Accents: Integrate your herb garden into your seasonal home decor. During festive periods, adorn planters with decorative ribbons, small ornaments, or natural elements like pinecones. For spring, tie on pastel bows or add small bird figurines.
- Complementary Decor: Place your herb garden near other natural elements in your home, such as woven baskets, wooden trays, or ceramic pottery, to create a harmonious aesthetic. Consider a decorative watering can as a functional and stylish accessory.
- Lighting Accents: Small fairy lights or LED strips can be draped around your herb display, especially in the evenings, to create a warm, inviting glow that highlights the greenery.
For even more inspiring ideas on integrating plants into your home design, visit Gardening Know How.
Expert Tips for Exceptionally Thriving Herbs
To ensure your indoor herbs don’t just survive but truly flourish, incorporate these advanced care tips into your routine:
- Judicious Fertilization: While potting soil provides initial nutrients, herbs will benefit from supplemental feeding, especially during active growth periods. Use a gentle, balanced liquid fertilizer formulated for indoor plants or herbs, diluted to half strength, and apply it monthly during spring and summer. During winter, when growth slows, reduce fertilization to every 6-8 weeks, or stop altogether if plants are dormant. Always water before fertilizing to prevent root burn.
- Strategic Pruning for Peak Performance: Beyond basic snipping, consider the specific growth habits of your herbs. For basil and mint, frequent pinching of new growth promotes a bushy habit and prevents flowering. For woody herbs like rosemary and thyme, light pruning encourages new shoots and prevents them from becoming leggy. Regular harvesting is a form of pruning, signaling the plant to produce more foliage.
- Proactive Pest Management & Prevention: Prevention is always better than cure. Isolate any new plants for a few weeks before introducing them to your established indoor garden to prevent pest transfer. Maintain good air circulation and avoid overwatering, as these conditions can attract pests. If pests do appear, consider using sticky traps, introducing beneficial insects (if practical indoors), or wiping leaves with a mild soap and water solution (ensure it’s not a harsh detergent). Persistent infestations may require organic neem oil application.
- Consider Humidity: Many herbs, especially those originating from Mediterranean climates, prefer slightly humid environments. If your home air is very dry, especially in winter with heating systems, consider misting your plants occasionally or placing their pots on a pebble tray filled with water to increase localized humidity.
For additional detailed insights and comprehensive care guides, check out resources like The Spruce.
Transform Your Winter with a Living Garden
Embarking on the journey of creating DIY indoor herb planters is an incredibly rewarding and enjoyable way to sustain your gardening passion throughout the colder months. These vibrant, fragrant planters do more than just provide fresh flavors for your culinary endeavors; they actively purify your indoor air, enhance the aesthetic appeal of your home, and offer a comforting connection to nature.
With just a modest investment of time and effort, you have the power to transform any corner of your living space into a warm, inviting, and deliciously fragrant retreat, brimming with thriving herbs. Gather your chosen supplies, select your favorite herbs, and begin cultivating your indoor garden today! You’ll soon discover the immense joy, beauty, and therapeutic benefits they bring, brightening even the greyest of winter days.
Share Your Indoor Gardening Story!
Have you embarked on the delightful adventure of growing herbs indoors? Which varieties have become your steadfast favorites, and what ingenious tips or successful strategies have you discovered along the way? We’d be absolutely thrilled to hear your experiences and grow together as a community of indoor gardeners! Please leave a comment below—let’s keep the conversation blooming!
Frequently Asked Questions (FAQs) About Indoor Herb Gardening
Q: How much light do indoor herbs typically require to flourish?
A: Most culinary herbs, particularly sun-loving varieties like basil, rosemary, and thyme, need a minimum of 6 to 8 hours of direct sunlight each day. If natural light is insufficient, perhaps due to short winter days or window orientation, supplementing with a full-spectrum LED grow light for 12-16 hours daily is highly recommended to ensure robust growth.
Q: Is it possible to cultivate herbs from seeds indoors, or should I always buy starter plants?
A: Absolutely! Starting herbs from seeds indoors is a rewarding and cost-effective approach, though it does require a bit more patience and consistent care. Ensure you use a seed-starting mix, keep the soil consistently moist (but not waterlogged), and provide stable temperatures and plenty of light from germination onwards. Some herbs like basil and cilantro sprout quickly, while others, like rosemary, can take longer.
Q: What are the best strategies to prevent common pests on my indoor herbs?
A: Prevention is paramount! Regularly inspect your plants (especially the undersides of leaves) for any early signs of pests. Ensure good air circulation, avoid overwatering, and wipe down leaves occasionally to remove dust and potential hitchhikers. If pests are detected, treat them promptly with organic solutions such as neem oil spray, insecticidal soap, or by gently wiping them off with a damp cloth.
Q: Can I transition my indoor herbs to an outdoor garden once spring arrives?
A: Yes, many indoor herbs can be successfully moved outdoors, but it’s crucial to acclimate them gradually. This process, known as “hardening off,” involves slowly exposing them to outdoor conditions (sun, wind, varying temperatures) over a period of 7-10 days. Start with a few hours in a shaded, sheltered spot, gradually increasing exposure to sunlight and outdoor elements before finally planting them in your outdoor garden.
Q: Beyond light and water, what are key factors for maintaining healthy indoor herbs?
A: Consistent watering and adequate light are foundational. Additionally, ensure your herbs are in well-draining potting soil, fertilize them monthly (at half strength) during their active growing season, and prune them regularly to encourage bushier growth and prevent them from becoming leggy. Good air circulation also helps prevent fungal diseases, and repotting when they outgrow their containers will keep them thriving.
Q: My herbs are looking leggy and pale. What could be the issue?
A: Leggy growth (long, stretched stems with sparse leaves) and pale foliage are classic signs of insufficient light. Try moving your herbs to a brighter, south-facing window, or supplement with a full-spectrum grow light. Lack of nutrients can also contribute to paleness, so ensure you’re fertilizing monthly during active growth.
Have more questions bubbling up? Share them below, and let’s keep the conversation about growing healthy, happy indoor herbs flourishing! 🌿