
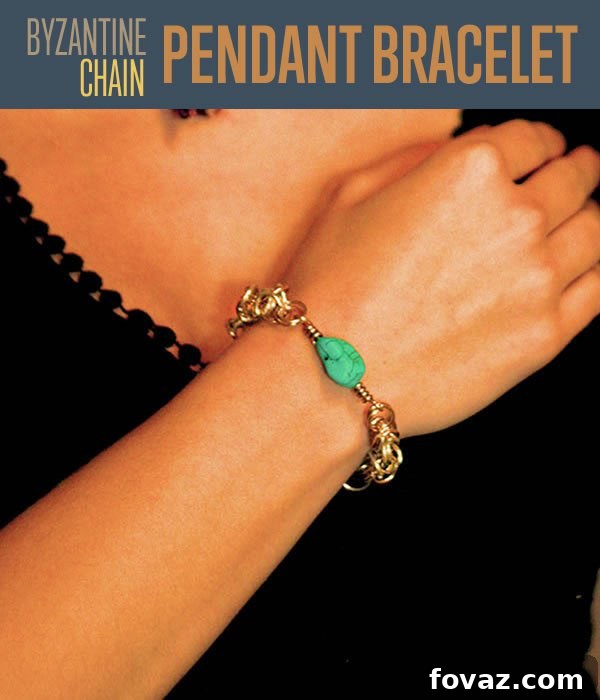
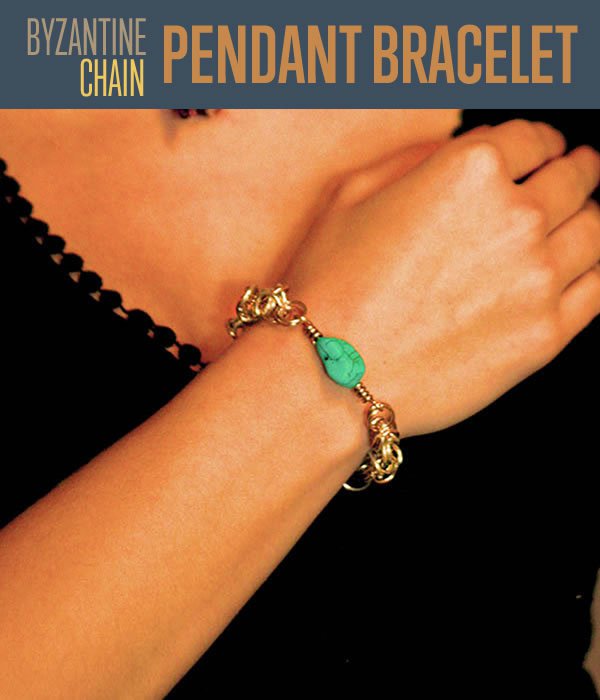
DIY Jewelry Making: Craft Your Own Byzantine Chain Pendant Bracelet
Welcome to an exciting continuation of our Byzantine chain series! If you’re looking to create exquisite, handcrafted jewelry that truly stands out, learning the art of chainmaille is an incredibly rewarding journey. The Byzantine weave, known for its intricate beauty and impressive durability, is a fantastic starting point for aspiring jewelry makers. This comprehensive tutorial will guide you through crafting a stunning Byzantine Chain Pendant Bracelet, allowing you to add a unique, personalized piece to your collection or create a thoughtful gift for someone special.
Byzantine chains are not only beautiful but also surprisingly approachable for DIY enthusiasts. Mastering this elegant weave will equip you with a versatile foundational skill, applicable to a myriad of lovely accessories. Imagine crafting matching necklaces, elegant chokers, distinctive earrings, and even robust decorative elements for other crafts. The possibilities are endless when you understand the mechanics of this ancient art form. Get ready to transform simple wire and beads into a wearable work of art that reflects your personal style and craftsmanship.
Why Choose the Byzantine Chain Weave for Your Jewelry Projects?
The Byzantine chain, sometimes referred to as ‘Birdcage’ or ‘Fool’s Dilemma,’ is a captivating chainmaille pattern that traces its origins back centuries. Its distinctive, rope-like texture and flexible drape make it a popular choice for statement jewelry. Unlike simpler weaves, the Byzantine offers a rich, substantial feel that elevates any piece. Learning this weave is not just about making a bracelet; it’s about developing precision, patience, and an eye for detail – skills that are invaluable in all forms of craft and art.
Furthermore, the inherent strength of the Byzantine weave ensures that your handmade bracelet will be durable enough for everyday wear, making it a lasting treasure. The ability to customize the materials – from vibrant copper to lustrous silver or gold-colored wire – means each piece can be a true reflection of your unique aesthetic. This project also serves as an excellent stepping stone for more complex chainmaille patterns, building your confidence and expanding your creative horizons. Ready to embark on this creative adventure and weave your own piece of history?
Before You Begin: Essential Foundations
To successfully complete this Byzantine Chain Pendant Bracelet project, you’ll first need to master the basic Byzantine chain weave. This tutorial focuses specifically on adding the pendant and clasp to pre-made chain sections. If you haven’t made a Byzantine chain before, or if you need a refresher on the weaving process, we highly recommend heading over to our dedicated Byzantine Chain Bracelet tutorial. That guide provides all the necessary information and step-by-step instructions for constructing the bracelet portion of this project from individual jump rings. Once your chain sections are woven and ready, return here to learn how to skillfully integrate a beautiful pendant, transforming your chain into a complete, eye-catching bracelet that will surely draw compliments.
Supplies You’ll Need for This Byzantine Chain Pendant Bracelet
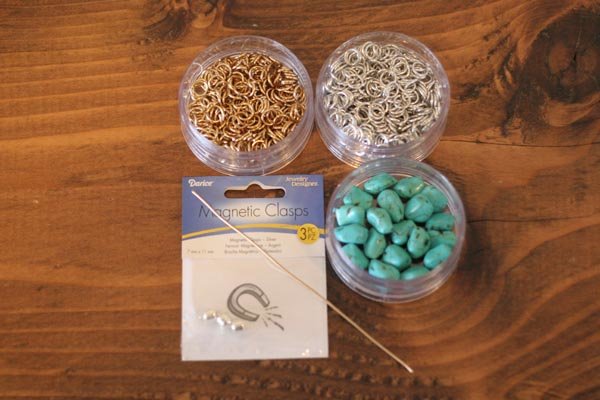
Gathering all your materials before you start ensures a smooth and enjoyable crafting experience. Here’s a detailed list of what you’ll need for your Byzantine Chain Pendant Bracelet, along with some considerations for selection:
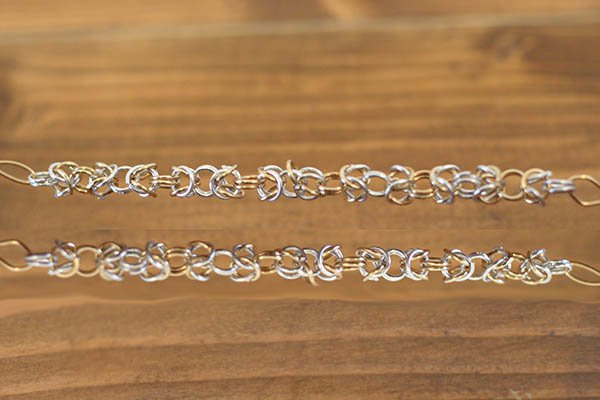
- Two Sections of Byzantine Chain: The length of these sections will depend on your desired wrist size. For a standard bracelet length of just over 7 inches, each section will typically be around 3.5 inches long. Ensure the jump rings used are of consistent gauge and material for a cohesive look. You can either pre-make these using individual jump rings or use pre-woven chain if available.
- 1 Magnetic Clasp: Choose a sturdy magnetic clasp for easy wear and secure fastening. Magnetic clasps are particularly convenient for bracelets. Ensure it comes with at least two attachment loops or jump rings, or acquire two additional jump rings separately that match your chain’s color and gauge. We opted for a classic gold color to complement our design.
- 5-inch Section of 16-Gauge Jewelry Wire: A thicker gauge wire (like 16-gauge) is ideal for the pendant as it offers structural integrity and holds its shape well. Gold-colored wire provides an elegant touch, but feel free to choose silver, copper, or colored wire to match your aesthetic or to create a striking contrast.
- 1 Turquoise Nugget Bead: Select a bead with a suitable hole size for your 16-gauge wire to pass through easily. Turquoise adds a natural, vibrant pop of color, but any stone, glass, or metal bead can be used to customize your pendant, allowing for endless creative expression.
- Jewelry Pliers Set: You’ll need three essential types for precise wire manipulation:
- Round-Nose Pliers: Crucial for creating perfect, consistent loops and bends in your wire for the pendant.
- Flat-Nose Pliers: Useful for gripping, straightening, and gently shaping wire components, as well as opening and closing jump rings.
- Wire Cutters: Essential for cleanly snipping excess wire and trimming to size, ensuring a neat finish.
Remember, the beauty of DIY is in customization. Feel free to experiment with different wire colors, bead types, and clasp styles to make your Byzantine Chain Pendant Bracelet uniquely yours!
Step-by-Step Guide: Crafting Your Byzantine Chain Pendant Bracelet
Step 1: Prepare Your Byzantine Chain Sections
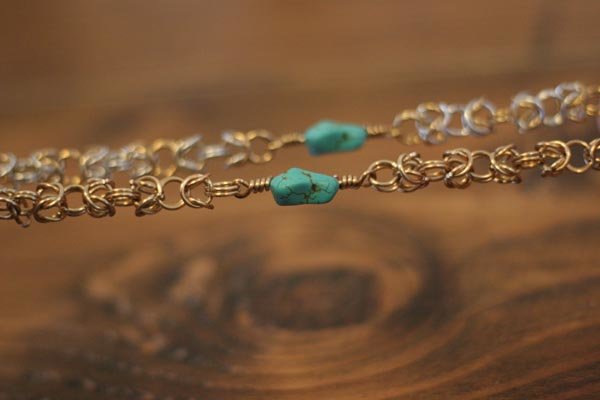
Once you have meticulously crafted your Byzantine chain sections, following our foundational bracelet tutorial, it’s time to prepare them for integration. The beauty of this project lies in personalization, so feel free to mix and match wire colors. For instance, you could create one section in pure gold and another with a captivating silver and gold pattern for a truly distinctive look. The length of each section is crucial and should be tailored to the wrist size of the wearer. For a standard fit that allows for comfortable movement and the addition of the clasp and pendant, we recommend two sections, each approximately 3.5 inches long. This will result in a bracelet just over 7 inches in total length. Ensure the ends of your chains are finished cleanly and securely, as these will be the attachment points for your pendant and clasp.
Step 2: Initiate the Pendant Loop with a “U” Bend
Take your 5-inch section of 16-gauge jewelry wire (we’re using gold-colored wire for this example, which offers excellent workability and aesthetic appeal). Hold the wire firmly with your round-nose pliers, positioning the pliers approximately 2 inches from one end of the wire. This shorter 2-inch segment will be the starting point for your pendant’s first loop. Carefully bend this shorter length of wire around the tip of your round-nose pliers, forming a distinct “U” shape. The key here is to create a smooth, even curve, ensuring the wire does not kink. After forming the “U,” gently reposition your pliers. One tip of the pliers should now sit inside the “U” bend, while the other tip should be placed just outside, against the longer length of your wire. This specific grip will provide the leverage needed for the next crucial step, allowing for precise control during the coiling process.
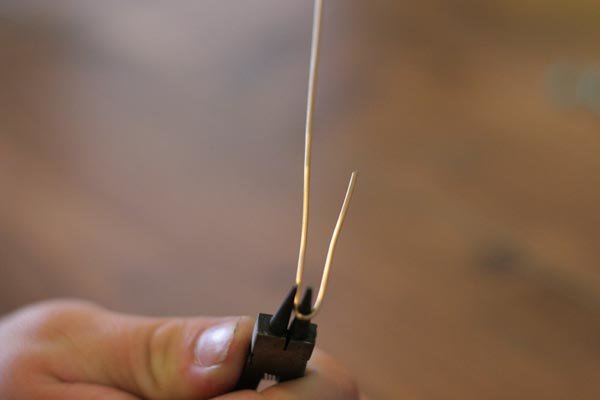
Step 3: Create a Secure Coiled Loop – The “P” Shape
With the “U” shape established and your pliers securely holding the wire, it’s time to form the first permanent loop of your pendant. Using your free hand, grasp the shorter end of the “U” shape and begin to bend it across and towards the longer length of the main wire. Continue bending until the wire forms a recognizable “P” shape, where the loop of the “P” is the “U” you just formed. Don’t stop there! This “P” shape is the foundation for a secure coil. Take the excess short wire that now hangs off the side of your “P” shape and meticulously wrap it around the main, longer wire three complete times. Aim for tight, even wraps to create what resembles a neat, sturdy fishing line loop or a wire-wrapped bail. This coiling technique ensures that your pendant loop is strong, durable, and aesthetically pleasing. Refer to the accompanying images to visualize this precise wrapping process, ensuring your loop is perfectly formed and securely coiled.
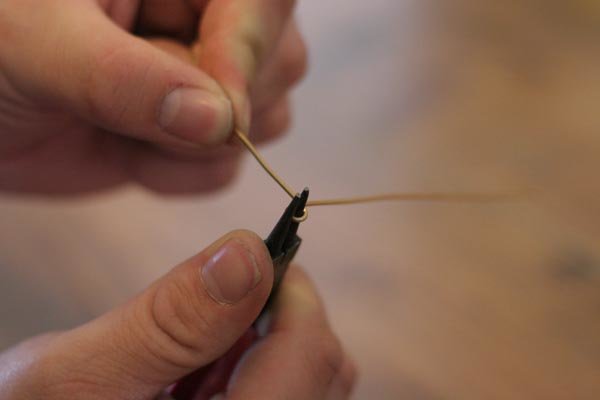
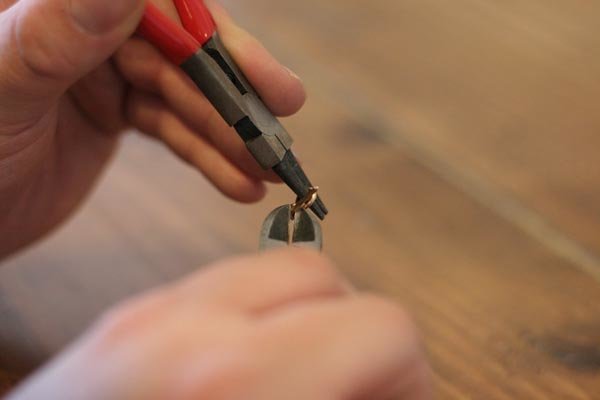
Step 4: Refine the Coil by Trimming Excess Wire
Now that your secure coiled loop is formed, the next step is to achieve a clean and professional finish. Using your wire cutters, carefully snip off any small section of excess wire that is still protruding from your coil. Make this cut as close to the wraps as possible without compromising the integrity of the coil. A clean, flush cut ensures that the pendant will look polished and prevents any sharp ends from snagging on clothing, scratching the skin, or causing discomfort. Precision in this step contributes significantly to the overall aesthetic and comfort of your finished piece. Once trimmed, your first pendant loop should appear perfectly symmetrical, neat, and ready for the next stage of assembly.
Step 5: Integrate Your Nugget Bead and Create the Second Loop
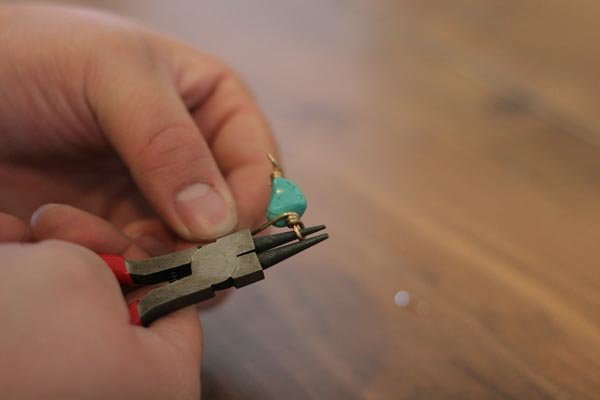
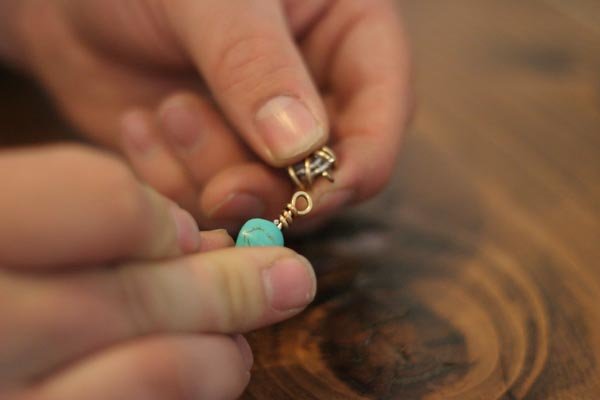
With one end of your pendant wire now featuring a perfectly formed and trimmed loop, it’s time to introduce your chosen bead. Carefully slide the remaining straight section of the wire through the hole of your turquoise nugget bead. Continue threading until the previously created wire loop rests snugly and flat against one end of the bead. Ensure the bead is centered and secure against the first loop. Now, you will repeat the exact same looping and coiling process that you performed in Steps 2 and 3, but this time on the end of the wire that is sticking out from the nugget. Begin by using your round-nose pliers to bend the wire into a “P” shape, making sure the new loop forms securely and snugly against the other side of the bead. Then, meticulously wrap the excess wire around the neck protruding from the nugget three times, creating a mirror image of your first coiled loop. This symmetrical design ensures balance and visual appeal for your pendant, holding the bead firmly in place.
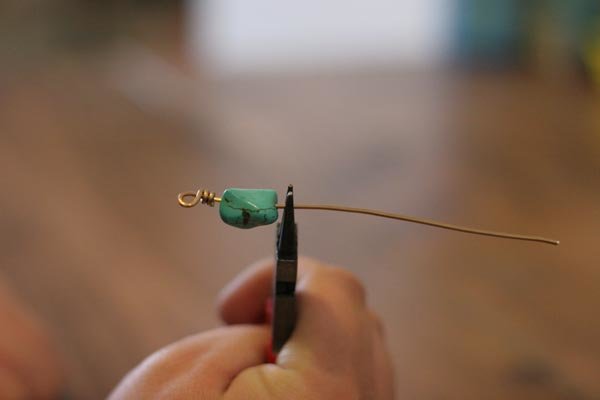
Then wrap it around the neck protruding from the nugget three times:
Step 6: Final Refinements and Smoothing Edges
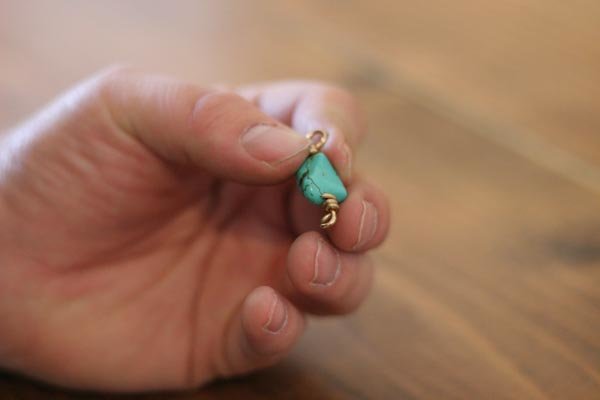
Just as you did with the first loop, the second loop also requires a clean and safe finish. After completing your three precise wraps around the wire protruding from the bead, use your wire cutters to snip off any excess wire. Aim for a flush cut, as close to the coil as possible, to maintain the neatness and professionalism of your pendant. Following this, take the tip of your flat-nose pliers (or needle-nose pliers, if you’re more familiar with that terminology in jewelry making) and use them to gently and softly bend down the very tip of where you cut the wire on both ends of the pendant. Roll the tiny cut end inwards and flat against the coil. This crucial step ensures that there are no sharp edges left exposed that could potentially catch on clothing, scratch the skin, or feel uncomfortable when worn. A smooth, snag-free finish is paramount for both comfort and durability, making your Byzantine Chain Pendant Bracelet truly wearable and safe.


Step 7: Securely Attach the Magnetic Clasp to Your Chain Sections
Now it’s time to integrate the clasp, which will unite your chain sections and make your bracelet wearable. Take your two Byzantine chain sections and your magnetic clasp. This step is incredibly straightforward! Begin by opening one of the jump rings that came with your magnetic clasp (or one of your additional jump rings if needed). Use your flat-nose pliers to gently twist the jump ring open, rather than pulling it apart, to maintain its circular shape. Thread this open jump ring through the last link of one of your Byzantine chain sections. Before closing it, thread the jump ring through one half of your magnetic clasp. Once both are securely on the jump ring, carefully close the jump ring with your pliers, ensuring there are no gaps for it to snag or slip through. Repeat this exact process for the other Byzantine chain section, connecting it to the remaining half of your magnetic clasp with another jump ring. This creates two distinct chain segments, each with one half of the clasp attached, ready to be joined by the pendant.
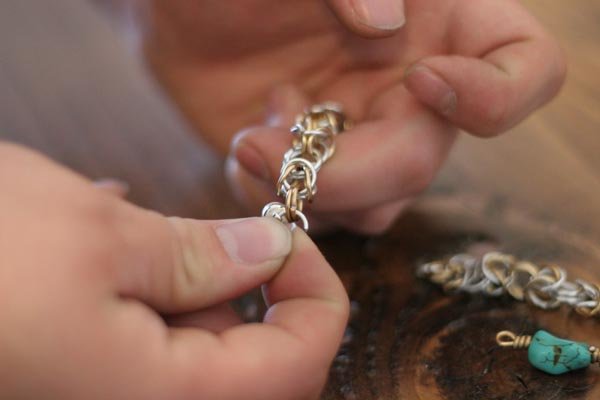
And do the exact same thing with another jump ring on the other end, threading that ring through the other half of your magnetic clasp.
Step 8: Connect the Pendant to the Remaining Chain Ends
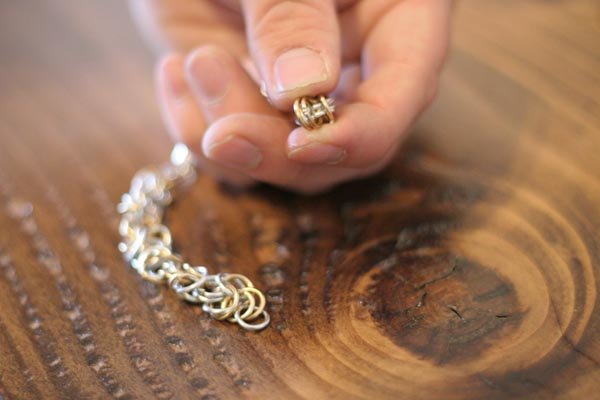
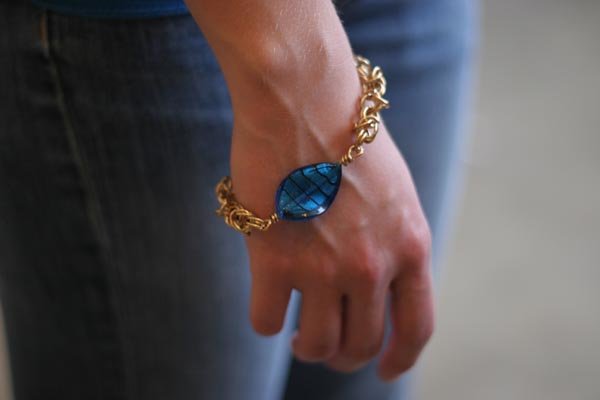
With your two chain sections now securely connected by the magnetic clasp, the final step is to integrate your beautifully crafted pendant. If you followed our initial Byzantine bracelet tutorial, each end of your chains should terminate with a pair of neatly closed jump rings. Take one of these ends and carefully thread both of its jump rings through the top loop of your pendant. These loops are generally spacious enough to accommodate two jump rings directly, eliminating the need for an additional single jump ring as was the case with the clasp. Next, take the other open end of your chain (which also has two jump rings) and thread both of its rings through the bottom loop of your pendant. This creates a balanced and visually appealing connection. Once both chain sections are securely connected to the pendant, your Byzantine Chain Pendant Bracelet is complete! You should now have a fully assembled bracelet, with the pendant elegantly centered between two sections of chain, ready to adorn a wrist.
Step 9: Elevate Your Style with Interchangeable Pendants (Optional but Recommended)
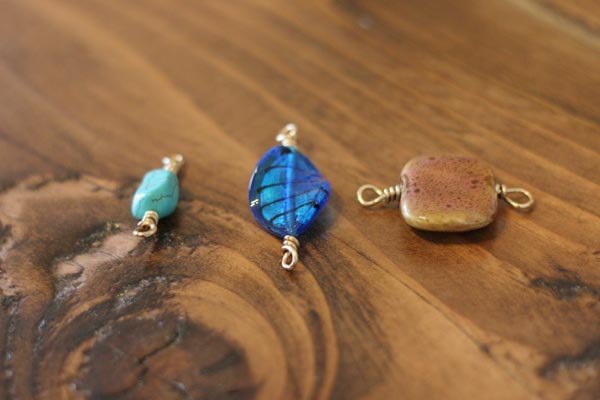
One of the most delightful aspects of Byzantine chain pendant bracelets is their incredible versatility. It’s remarkably easy to swap out pendants, allowing you to give your jewelry piece a fresh new look whenever you desire. Don’t let a beautiful bracelet languish in your drawer if you grow tired of its initial pendant! Embrace the concept of “jewelry upcycling” and continuously refresh your style with minimal effort and maximum impact.
Consider creating a small collection of different pendants using various beads, charms, or wire-wrapped stones. The attachment method is simple: just open the jump rings that connect the chain to the pendant, carefully remove the old pendant, and attach a new one. This quick change can completely transform the aesthetic of your bracelet, making it suitable for different outfits, occasions, or even seasons. Explore vibrant glass beads, rustic metal charms, polished gemstones, or intricate wire-wrapped designs. The possibilities for personalization are truly endless, empowering you to create a versatile and ever-evolving jewelry wardrobe that always feels fresh and exciting.
Tips for a Flawless Finish and Lasting Enjoyment
To ensure your Byzantine Chain Pendant Bracelet is not only beautiful but also durable and comfortable to wear, keep these expert tips in mind throughout your crafting process:
- Practice Makes Perfect: Don’t be discouraged if your first few loops or weaves aren’t absolutely perfect. Jewelry making, especially wire wrapping, takes practice. Use scrap wire to hone your bending and coiling techniques until you feel confident.
- Patience is a Virtue: Rushing can lead to errors, kinked wire, and an untidy finish. Take your time with each bend, wrap, and connection to ensure high quality and a professional appearance. Enjoy the meditative aspect of crafting!
- Check All Connections: Before considering your bracelet complete, meticulously check every jump ring and wire wrap. Ensure all connections are tightly closed with no gaps to prevent your jewelry from falling apart or snagging on clothing or hair.
- Tool Care: Keep your jewelry pliers clean and in good condition. A well-maintained tool set makes crafting easier, more precise, and helps prevent damage to your materials. Clean any residue off your pliers after use.
- Embrace Creativity: While this tutorial focuses on a turquoise nugget, feel free to experiment with different bead shapes, sizes, and colors, or even multiple small beads for a clustered pendant effect. Let your imagination guide your designs!
Caring for Your Handmade Byzantine Chain Pendant Bracelet
To ensure your beautiful handmade bracelet remains sparkling and lasts for years, follow these simple care tips. Proper maintenance will help preserve its shine and prevent damage:
- Avoid Harsh Chemicals: Always remove your bracelet before swimming (especially in chlorinated water), showering, or using household cleaning products. Chemicals can tarnish metal, dull gemstones, and damage the integrity of the wire.
- Store Properly: When not wearing, store your bracelet in a dry, airtight bag or jewelry box. This helps prevent oxidation (tarnishing) and keeps it from tangling with other jewelry pieces, which can cause damage to delicate weaves.
- Gentle Cleaning: For general cleaning, gently wipe your bracelet with a soft, dry jewelry polishing cloth. For deeper cleaning, use a mild soap and water solution (e.g., a few drops of dish soap in warm water), rinse thoroughly, and dry immediately with a soft cloth to prevent water spots and tarnishing. Avoid abrasive cleaners or harsh brushes.
- Handle with Care: While the Byzantine weave is inherently durable, excessive pulling, snagging, or bending can damage the delicate wire wraps and jump rings. Treat your handmade piece with the care it deserves.
Unleash Your Inner Jeweler: The Joy of DIY Chainmaille!
Congratulations on crafting your very own Byzantine Chain Pendant Bracelet! You’ve not only created a stunning piece of jewelry but also mastered valuable skills in wire wrapping and chainmaille. This project is a testament to the fact that beautiful, intricate accessories are well within reach of any DIY enthusiast. The satisfaction of wearing or gifting a piece you’ve made with your own hands is truly unparalleled, offering a sense of accomplishment and personal connection to your style.
We encourage you to continue exploring the fascinating world of jewelry making. The techniques learned here are highly transferable, opening doors to endless creative possibilities for necklaces, earrings, and other unique adornments. Why stop at a bracelet when you can adorn yourself and your loved ones with an entire collection of handmade treasures? Keep experimenting, keep creating, and most importantly, keep enjoying the process!
Expand Your Chainmaille Collection!
Explore More DIY Jewelry Projects:
Ready for your next crafting challenge? Delve deeper into the elegant world of chainmaille with our other engaging tutorials and expand your handmade jewelry repertoire:
DIY Jewelry Making | Byzantine Choker Necklace | Chainmaille Rose Pendant