
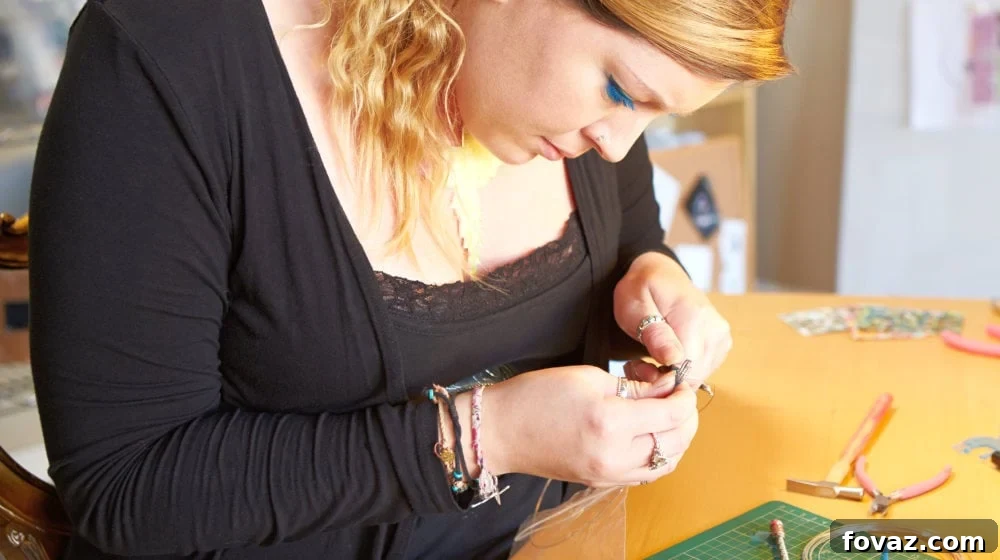
Mastering Wire Jewelry: Crafting Beautiful DIY Friendship Bracelets
Unleash your creativity and forge lasting bonds by crafting exquisite wire jewelry. This comprehensive guide will walk you through four unique DIY wire jewelry techniques, enabling you to create charming friendship bracelets that serve as timeless keepsakes for your dearest friends. Dive into the art of wire wrapping and discover the joy of handmade gifts!
RELATED: Wire Jewelry Techniques | How To Make An Anklet
Embrace the Art of Handmade Wire Jewelry: Designs You’ll Love to Create
Add Wire Jewelry Making to Your List of DIY Hobbies
The tradition of making, gifting, and wearing friendship bracelets is a cherished experience for many. These homemade treasures evoke a powerful sense of nostalgia and personal connection, making them more meaningful than any store-bought item. While classic woven bracelets hold a special place in our hearts, venturing into wire jewelry making opens up a whole new world of sophisticated and durable designs.
Wire jewelry offers a unique blend of elegance and personal touch. It allows for intricate designs, customization, and a professional finish that can elevate your handmade gifts. For this DIY journey, we’re going to explore various wire wrapping techniques and materials to craft one-of-a-kind friendship bracelets that truly stand out.
Essential Tips for Aspiring Wire Jewelers
Before we delve into specific projects, here are a few general tips to ensure a smooth and enjoyable wire jewelry-making experience:
- Choose the Right Wire: Wire comes in various gauges (thicknesses) and materials (copper, brass, sterling silver, craft wire). Lower gauge numbers indicate thicker wire. Thicker wire (e.g., 16 gauge) is great for structural components, while thinner wire (e.g., 22-26 gauge) is perfect for intricate wrapping and delicate details. Craft wire is a good starting point as it’s inexpensive and easy to manipulate.
- Invest in Quality Tools: Good quality pliers (round nose, flat nose, chain nose) and wire cutters are indispensable. They make the job easier, prevent hand fatigue, and ensure cleaner bends and cuts.
- Practice Patience: Wire jewelry making requires a steady hand and patience. Don’t be discouraged if your first attempts aren’t perfect. Practice makes perfect, and each piece you create will improve your skill.
- Work in Good Lighting: Proper lighting helps you see intricate details and prevents eye strain.
- Protect Your Workspace: Use a mat or cloth to protect your table from scratches, especially if working with harder metals.
1. Crafting a Wire Heart Bracelet: A Symbol of Affection
This wire heart bracelet project is arguably the simplest in terms of the number of steps, yet it demands a keen eye for symmetry and a gentle touch to achieve a perfectly sculpted heart. The delicate heart shape is a timeless symbol of love and friendship, making this bracelet an ideal heartfelt gift. While the technique is straightforward, mastering the consistent curvature and flawless shape shown in this video tutorial requires a bit of practice and, most importantly, patience.
Wire Jewelry Tools and Supplies for the Heart Bracelet
- 16 Gauge Wire: A good sturdy gauge for the main structure of the heart and bracelet band.
- Round Nose Pliers: Essential for creating smooth curves and loops.
- Flat Nose Pliers: Useful for gripping, straightening wire, and securing wraps.
- Wire Cutters: For precise cuts, ensuring clean finishes.
Detailed Instructions for the Wire Heart Bracelet
- Forming the Initial U-Shape: Begin by taking your 16 gauge wire. Grasp the wire with your round nose pliers about an inch or two from one end. Gently bend the wire around one jaw of the pliers to create a smooth, elongated U-shape. The longer this U-shape, the larger your finished heart will be. Aim for a symmetrical curve.
- Creating the Top Arc of the Heart: Next, to form one of the two top curves of the heart, reposition your round nose pliers near the curved base of your U-shape, slightly off-center. Press down gently on the wire, bending it upwards and outwards to start shaping the distinct curve of the heart’s upper half.
- Bending for the First Half: Take the longer end of the wire and carefully bend it back towards the opposite direction, creating a graceful, mirrored curve that meets the initial bend. At this point, you should see one clear half of your heart shape forming, complete with an upper arc and a side.
- Mirroring for the Second Half: To complete the heart, apply the same wire wrapping technique from Step 2, but mirror the action. Position your round nose pliers on the remaining straight section of the wire and create an identical upward and outward bend to form the second top arc of the heart.
- Crossing to Form the Point: Take the shorter end of the wire (the one coming from the bottom of your U-shape) and carefully cross it over the longer, still-straight section of wire. This crossing point will define the bottom tip of your heart shape. Adjust the wires until you achieve a pleasing and symmetrical heart.
- Securing the Heart Shape: To close and secure your newly formed heart, take the excess wire from the shorter end and tightly wrap it once or twice around the longer wire using your flat nose pliers or even your fingers for a gentler touch. Ensure the wrap is snug and clean. Use your wire cutters to trim any excess wire very closely, tucking in any sharp ends for a smooth finish.
- Shaping the Bracelet Band: Now, using a cylindrical object like a bottle, a glass, or a rolling pin, wrap the longer, remaining section of the wire once around it. This action will give your bracelet its foundational curved shape. Measure this against your wrist or desired length, then cut the wire to your preferred bracelet size, leaving enough length for a clasp mechanism.
- Creating the Clasp Hook: Finally, use your round nose pliers to create a simple hook at one end of the bracelet wire. This hook will act as your clasp, allowing the bracelet to be fastened securely. Ensure the hook is strong enough to hold but easy enough to open and close.
2. Crafting a Wire-Wrapped Word Bracelet: Messages of Friendship
Beyond simply writing names, imagine sending a positive and empowering message to your friends through a beautifully crafted wire-wrapped bracelet. This technique allows you to literally “write” words or phrases using various wire wrapping methods, transforming a simple piece of metal into a meaningful statement. This tutorial provides an excellent foundation for mastering the art of wire lettering.
The beauty of this method lies in its versatility. While perfect for bracelets, the same instructions and techniques can be effortlessly adapted to create custom necklaces, keychains, or even decorative elements for other crafts. Personalize your gifts with words like “love,” “hope,” “dream,” or your friend’s name, making each piece truly unique.
Wire Jewelry Tools and Supplies for the Word Bracelet
- Chain: You can upcycle an old or broken necklace chain, or purchase a new one.
- 16 Gauge Wire: Ideal for forming the letter shapes, providing good rigidity.
- 2 Jump Rings: Small metal loops used to connect different components.
- Clasp: A closure mechanism for the bracelet (e.g., lobster clasp, spring ring).
- Round Nose Pliers: For precise bending and looping of the wire.
- Computer and Printer: To create a printed template for your chosen word.
Detailed Instructions for the Wire-Wrapped Word Bracelet
- Choose and Print Your Word: Select a meaningful word or phrase you wish to incorporate into your DIY jewelry. For instance, the word “love” is a popular and heartfelt choice. Using a computer, type out this word in a clear, elegant cursive font. Print the word to your desired size, ensuring it’s proportional to a bracelet. This printout will serve as your essential guide.
- Wire Wrapping Guided by Template: Carefully place your wire directly over the printed word. Using your round nose pliers, meticulously bend and shape the wire to follow the exact contours of each letter. This technique is crucial as it eliminates guesswork and ensures consistent sizing and elegant curves for every character, resulting in a professional-looking word.
- Attaching Jump Rings to Chain: Take your chain and attach a jump ring to each end. These jump rings will act as the connectors between your wire-wrapped word and the bracelet chain. Ensure they are securely closed.
- Connecting Word to Chain: Once your wire-wrapped word is complete, carefully attach the ends of the word (where the first and last letters finish) to the jump rings you just added to the chain. Use your pliers to gently open and close the jump rings or create small loops on the word itself if needed, making sure the connections are secure.
- Optional Clasp Attachment: To make the bracelet easily wearable and secure, you have the option to attach a clasp to one end of the chain. This provides a reliable closure mechanism for the bracelet.
RELATED: Wire Jewelry | Guide to Jewelry Clasps & Finishes
3. Crafting Word Wire DIY Bracelets: Two Creative Versions
Here’s another fantastic approach to creating personalized wire-wrapped bracelets, expanding on your jewelry-making repertoire. This tutorial also leverages the elegance of wire to form meaningful words, but introduces slight modifications in the process, allowing you to craft two distinct styles of cute friendship bracelets: a classic chain-link version and a playful tassel-adorned one.
- The inspiration here comes from various creative ways to design wire jewelry, showcasing how simple changes can lead to entirely different aesthetics.
Wire Jewelry Tools and Supplies for Word Wire Bracelets (Version 1 & 2)
- Wire (22 – 26 Gauge): Thinner wire is preferred for more delicate script and intricate wrapping.
- Gold Chain: Provides the main structure for the bracelet.
- Endcap: (For Version 2 – Tassel) Used to finish off the suede strips securely.
- Ring Clasp: For securing the bracelet around the wrist.
- Suede Strips: (For Version 2 – Tassel) For creating a decorative tassel.
- Sewing Thread: (For Version 2 – Tassel) To bind suede strips.
- 5 Small Jump Rings: For connecting components.
- Round Nose Pliers: For shaping and looping wire.
- Flat Nose Pliers: For gripping, securing, and closing jump rings.
- Wire Cutters: For precise trimming.
- E6000 Craft Adhesive: (For Version 2 – Tassel) A strong glue for securing the tassel.
- Pen and Paper: For sketching out your word template.
Instructions for Word Wire DIY Bracelets [Version 1: Chain-Linked]
- Imagine a beautifully crafted wire word, elegantly connected to a delicate chain, creating a personal and chic statement piece.
- Design Your Cursive Word: On a piece of paper, carefully write down the word you intend to feature on your DIY bracelet. Ensure that all the letters are connected in a continuous cursive script. This will serve as your blueprint for shaping the wire.
- Wire Wrapping with Precision: Using your pen and paper template as a guide, meticulously bend and wrap the wire (22-26 gauge) with your round nose pliers. Follow the exact curves and lines of your written word. This method is incredibly effective for achieving uniform letter sizes and a polished, consistent look.
- Creating End Loops: Once your word is perfectly shaped, use your round nose pliers to create a small, neat loop at each end of the wire word. These loops are critical attachment points for the bracelet chain.
- Trimming Excess Wire: With your wire cutters, carefully trim any excess wire, ensuring clean finishes and no sharp edges near the newly formed loops.
- Measuring for Bracelet Length: Take your gold chain and gently wrap it around your arm to determine the ideal length for your bracelet. Consider whether you prefer a snug or loose fit, and remember to account for the additional length that the clasp will add at the end.
- Attaching Chain to Word: Open two of your small jump rings. Attach one to each of the loops on the ends of your wire word. Then, connect the ends of your chain to these jump rings, carefully closing them with your flat nose pliers to secure the connection.
- Securing with a Clasp: To complete the bracelet, attach a ring clasp to one end of the chain using a jump ring. On the other end of the chain, attach a single jump ring. This creates a secure and functional closure system for your elegant word bracelet.
How to Make Word Wire DIY Bracelets with Tassel [Version 2: Tassel Accent]
- Visualize the elegant wire word, now enhanced with a vibrant, flowing tassel for a touch of bohemian chic and playful flair.
DIY Bracelet Instructions (Tassel Version)
- Initial Steps (Word & Chain): Follow Steps 1-6 precisely from the “Word Wire DIY Bracelets [Version 1: Chain-Linked]” instructions above. You will have a wire word attached to a chain, ready for its tassel embellishment.
- Cutting Suede Strips for Tassel: Take your suede strips and cut several pieces, each approximately 1 inch long. The number of strips will determine the fullness of your tassel.
- Testing Endcap Fit: Gather the cut suede strips together. Insert one end of the bundled strips into your end cap to ensure they fit snugly and securely within. Adjust the quantity of strips if necessary.
- Binding Suede Strips: Using a sewing needle and thread, securely tie the gathered suede strips together near the end that will be inserted into the end cap. This step helps to keep them bundled neatly and makes insertion into the end cap much easier.
- Securing Tassel with Adhesive: Apply a small but sufficient amount of E6000 Craft adhesive inside the end cap. Immediately and carefully insert the bundled and tied suede strips into the end cap, pressing firmly to ensure a strong bond. Allow ample time for the glue to dry completely.
- Attaching Tassel to Bracelet: Once the adhesive is fully cured and the tassel is securely formed, use one of your jump rings to attach the tassel, via its end cap, to one of the jump rings on your DIY bracelet. This adds a charming, dynamic element to your wire word bracelet.
4. How to Make Wire Word DIY Bracelets with Leather Straps: Bohemian Charm
For those who gravitate towards a more bohemian or rustic aesthetic, consider swapping out traditional metal chains for soft, pastel-colored leather straps. This simple switch transforms the wire word DIY bracelet into a stylish and distinctive piece that exudes natural elegance. This particular tutorial also offers valuable additional tips and tricks specifically tailored to “writing” words using wire with enhanced precision and flow.
- Picture a delicate wire word contrasted beautifully against the texture and earthy tones of a thin leather strap, creating a unique, free-spirited accessory.
Wire Jewelry Tools and Supplies for the Leather Strap Bracelet
- Wire (16 Gauge): Provides a sturdy base for the word, ensuring it holds its shape against the leather.
- Thin Leather Strap: Choose pastel or natural tones for a bohemian feel.
- Clasp: A secure closure for your leather strap bracelet.
- Jump Ring: For connecting the clasp.
- Round Nose Pliers: For shaping the wire word and creating loops.
- Flat Nose Pliers: For gripping and securing connections.
- Wire Cutters: For clean and precise cuts of both wire and leather.
Detailed Instructions for the Wire Word DIY Bracelets with Leather Straps
- A visual representation of the intricate wire word, skillfully integrated with the smooth leather strap, showcases the fusion of metal and natural material.
- Cursive Word Design: Begin by writing your desired word in cursive on paper. Ensure that all the letters seamlessly connect to one another. This handwritten template is crucial for a fluid and natural-looking wire word.
- Wire Shaping the Word: Using your written template as a direct guide, carefully shape the 16 gauge wire with your round nose pliers. Take your time to accurately trace each curve and line of the word, replicating its form in metal. This precision will result in a beautifully legible and sturdy wire word.
- Trimming and Leaving Excess: Once the word is fully formed, use your wire cutters to trim the excess wire. Importantly, make sure to leave approximately an inch of straight wire extending from both the beginning and end of your wire word. These extensions will be used for attachment.
- Creating Attachment Loops: With the extra 1-inch wire segments, use your round nose pliers to create a small, secure loop at each end of the wire word. These loops will serve as the connection points for your leather strap.
- Inserting Leather Straps: Carefully thread one end of your thin leather strap through one of the loops you just created on the wire word. Repeat this for the other end of the leather strap through the second loop.
- Securing the Strap with Wire: To firmly attach the leather strap to the wire word, wrap a small piece of matching wire around the leather strap, just beyond the loop, 1-3 times. This not only secures the leather but also adds a decorative element. After wrapping, trim any excess leather strap to your desired length for the bracelet.
- Sizing and Attaching Clasp (Single Wrap): For a standard single-wrap bracelet, measure the leather strap precisely to the circumference of your wrist, allowing for comfort. Then, attach your chosen clasp to the ends of the leather strap using jump rings, ensuring a secure closure.
- Creating a Wrap Bracelet (Multiple Wraps): Alternatively, to create a fashionable wrap bracelet, significantly increase the length of your leather strap. This allows the bracelet to coil once or twice (or even more) around your wrist, providing a layered and stylish look. You would then attach the clasp to the ends of the extended strap, positioning it for comfortable wear.
Check out this video from DIY Cocoa Beads English, because you will love this cute wire cat-ring:
Your Journey into Wire Jewelry Making
Now armed with these four fun and fancy DIY bracelet techniques, plus the added variation for the word bracelets, you have a wealth of creative possibilities at your fingertips when it comes to wire jewelry. From the sentimental heart bracelet to the personalized word designs, each project offers a chance to express your unique style and create truly unforgettable gifts for your best friends or even yourself.
The beauty of wire jewelry lies in its versatility and the endless potential for personalization. Experiment with different wire gauges, colors, and embellishments like beads or charms to make each piece truly your own. Don’t be afraid to adapt these techniques, mix and match elements, and let your imagination guide you. The satisfaction of crafting a beautiful, handmade piece of jewelry is immense, and the joy it brings to the recipient is priceless.
Which of these wire jewelry bracelet designs will you try first? Share your thoughts and creative plans in the comments section below! We’d love to hear about your handmade creations.
Up Next for Your DIY Inspiration:
- Handmade Jewelry | Basic Wire Wrapping Techniques
- How to Make Friendship Bracelets | DIY Hemp Macrame Bracelet
- DIY Wind Chimes | A Dazzling Silverware Wind Chime Tutorial
Sign up for more DIY inspiration!
Stay connected with us for more crafting ideas and tutorials on Facebook, Twitter, and Instagram!
Editor’s Note: This post was originally published on September 1, 2014, and has been updated for quality, relevancy, and to provide more comprehensive DIY instructions.