
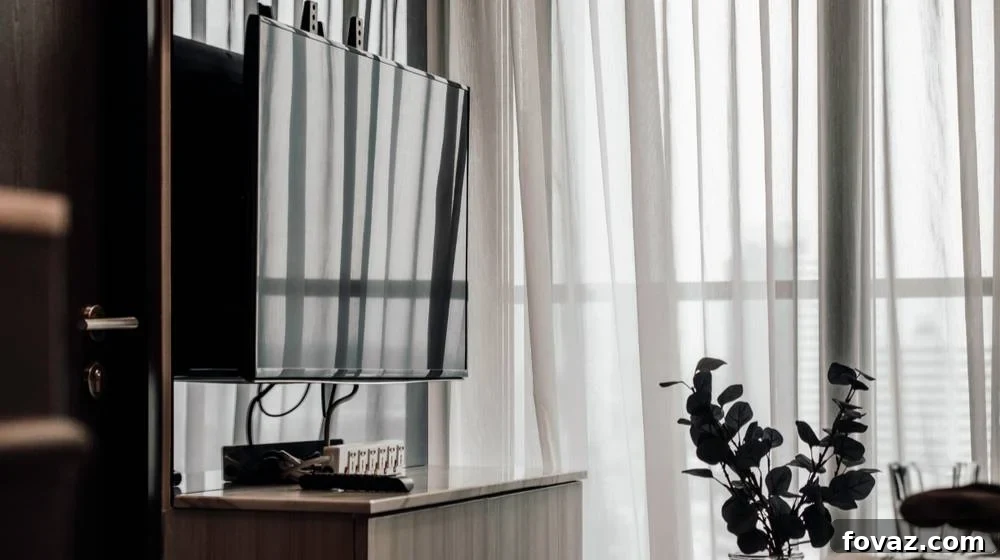
Are you ready to elevate your home entertainment setup and reclaim valuable floor space? Mounting your TV to the wall is a popular and effective way to achieve a sleek, modern aesthetic while enhancing your viewing experience. However, the prospect of drilling into walls and handling expensive electronics can seem daunting. Incorrect installation can indeed lead to permanent damage to your television or, worse, a significant safety hazard. But don’t worry, this comprehensive, easy-to-follow guide will walk you through every step of the process, ensuring a secure and professional-looking TV wall mount.
From choosing the right mount to accurately locating wall studs and meticulously securing your display, we’ll cover everything you need to know for a successful DIY TV installation. Get ready to transform your living room and enjoy your favorite shows and movies like never before!
RELATED: DIY TV Wall Frame To Dress Up Your TV
The Ultimate DIY Guide to Safely Mounting Your TV to the Wall
Why Wall Mount Your TV? Benefits Beyond Aesthetics
Before diving into the “how-to,” let’s explore the compelling reasons why wall mounting your television is an excellent choice for almost any home, offering both practical advantages and aesthetic upgrades:
- Maximize Space: One of the most immediate benefits is freeing up floor space that a traditional TV stand would typically occupy. This is particularly valuable in smaller rooms or apartments, making the area feel more open, larger, and less cluttered. It also simplifies cleaning.
- Enhanced Aesthetics: Achieve a minimalist, clean, and modern look. A wall-mounted TV creates a striking focal point that seamlessly integrates with your existing decor, eliminating bulky furniture and the visual mess of cables. It gives your room a high-end, sophisticated finish.
- Optimal Viewing Angles: Position your TV at the perfect eye-level for comfortable and ergonomic viewing from your favorite seating. Many advanced mounts offer tilt and swivel features, allowing you to easily adjust the screen to reduce glare from windows or lights and improve visibility from various spots in the room.
- Improved Safety: Secure your television out of reach of curious children and playful pets, preventing accidental knocks, tip-overs, and potential damage or injury. This is a crucial safety consideration, especially for families with young ones or active animals.
- Reduced Clutter: With proper cable management techniques, all power cords, HDMI cables, and other connections can be neatly hidden within the wall or disguised with sleek cable covers. This contributes significantly to a cleaner, more organized, and visually appealing entertainment area.
- Modern Home Integration: A properly wall-mounted TV often feels like a built-in feature, elevating the overall perceived value and modernity of your living space. It complements contemporary interior designs beautifully.
Choosing the Right TV Wall Mount: Fixed, Tilting, or Full-Motion?
Selecting the correct type of mount is the first critical decision you’ll make, as different mounts offer varying functionalities to suit your specific needs, viewing habits, and room layout:
- Fixed Mounts: These are the most basic, slim-profile mounts, designed to hold your TV flush and securely against the wall. They are ideal if you have a dedicated viewing area directly in front of the TV and don’t anticipate needing to adjust the screen angle. They offer the cleanest, lowest-profile look, mimicking a framed picture.
- Tilting Mounts: Providing more flexibility than fixed mounts, tilting mounts allow you to adjust your TV’s vertical angle (up or down). This feature is perfect for reducing glare from overhead lights or windows, or if your TV is mounted slightly higher than eye-level (e.g., above a fireplace) to improve viewing comfort.
- Full-Motion (Articulating) Mounts: These are the most versatile option, featuring an arm that allows you to extend the TV away from the wall, swivel it left or right, and tilt it up or down. Full-motion mounts are excellent for rooms with multiple viewing areas, corner installations, or if you frequently need to access the back of the TV for cable management or connecting new devices. They offer unparalleled flexibility for achieving the perfect viewing angle from anywhere in the room.
Regardless of the type, always ensure the mount you choose is compatible with your TV’s VESA pattern (the standard spacing of the four screw holes on the back) and is rated to safely support your TV’s weight and size. These crucial specifications are always listed on the mount’s packaging and in its product description.
Essential Tools You’ll Need for a Seamless Installation
Having the right tools on hand is absolutely crucial for a smooth, efficient, and safe TV mounting process. Gather these items before you begin to avoid interruptions:
- TV Wall Mount Kit: Ensure it’s compatible with your TV’s specific size and weight, and that it includes all necessary hardware like screws and spacers.
- Power Drill: An essential tool for pre-drilling pilot holes into your wall studs. A cordless drill offers greater maneuverability and convenience.
- Drill Bits: You’ll need an assortment, including a wood-specific bit for drilling into studs. The size must be slightly smaller than the diameter of the lag bolts provided with your mount to ensure a snug fit.
- Tape Measure: Indispensable for accurately measuring placement, desired height, and distances between mounting points.
- Stud Finder: This is arguably the most critical tool for safety. A reliable electronic stud finder helps pinpoint the exact location of wooden or metal studs behind your drywall, which are absolutely necessary for securely anchoring the heavy TV mount.
- Level: To guarantee your TV mount is perfectly horizontal. Even a slight tilt can be very noticeable, so a long level (24-inch or more) is highly recommended for accuracy.
- Impact Driver or Socket Wrench: Used for securely tightening the large lag bolts into the wall studs. An impact driver provides superior torque, but a sturdy socket wrench can also accomplish the task effectively.
- Pencil: For marking stud locations, drill points, and overall mount placement on the wall.
- Phillips Head Screwdriver: For attaching the smaller mounting brackets to the back of the TV itself.
- Helper: While not a tool, a second person is invaluable for lifting the TV safely, especially larger models, and ensuring proper alignment during the final mounting steps. Never attempt to lift a large TV alone.
Step-by-Step Installation Guide: How to Mount Your TV to the Wall
1. Prepare Your TV: Attaching the Mounting Brackets
Begin by carefully unboxing your TV wall mount kit and laying out all the components. Before you start, always refer to your specific mount’s instruction manual as well as your TV’s manual for any model-specific details. Locate the four standard screw holes on the back of your television; these conform to the VESA mounting standard and are where the vertical or horizontal brackets from your wall mount kit will attach.
Carefully select the correct size screws and washers provided in your mount kit that precisely fit your TV’s mounting holes. Mount kits often include a variety of sizes to accommodate different TV models, so choose wisely. Gently thread the screws through the washers and into the TV’s mounting holes, attaching the brackets securely. Be extremely cautious not to overtighten the screws, as this can easily strip the threads within the TV or damage its casing. Tighten them until they are snug and the brackets are firmly attached without any wobble, but avoid applying excessive force beyond that point.
2. Determine Optimal TV Placement and Height
This is a crucial preliminary step for achieving the best possible viewing experience and comfort. Before making any marks on the wall, spend some time determining the ideal location and height for your TV. A general rule of thumb is that the center of the TV screen should be at eye-level when you are comfortably seated on your main viewing couch or chair. For most setups, this means the bottom edge of the TV will be approximately 24-30 inches above the floor, depending on the size of your TV and the height of your seating.
Once you’ve decided on the ideal eye-level, measure the distance from the very top edge of your TV down to the top edge of the mounting brackets you just installed on its back. This specific measurement is absolutely essential because it will help you accurately mark where the wall mount itself needs to be placed on the wall to achieve your desired TV height. Use a pencil to lightly mark your desired top edge of the TV on the wall for an initial reference.
Note: To achieve the best viewing angle and minimize neck or eye strain, carefully consider the precise spot where you’ll place your TV. A common mistake is mounting the TV too high, especially when positioning it above a fireplace, which can lead to uncomfortable upward viewing angles. Always prioritize comfort and direct line of sight from your primary seating.
3. Locate and Mark Wall Studs for Secure Mounting
The safety and long-term stability of your wall-mounted TV depend entirely on anchoring the mount into robust structural elements: your wall studs. Drywall alone, even with anchors, cannot reliably support the significant weight of a television, especially larger models. Use a reliable electronic stud finder by sliding it slowly horizontally across the wall in the exact area where you intend to mount the TV. When the stud finder indicates the presence of a stud (usually with visual indicators like lights or an audible beep), mark its edges with your pencil. Then, verify the center of the stud by scanning again. Clearly mark the center of each stud you locate.
Most TV wall mounts are designed to span and attach to at least two wall studs, which are typically spaced either 16 or 24 inches apart on center in residential construction. It’s paramount to hit the absolute center of these studs for maximum stability and security. If your desired TV placement doesn’t align perfectly with two adjacent studs, you might need to slightly adjust your TV’s horizontal position, or consider using a larger mount designed to span more studs. For very light TVs, heavy-duty toggle bolts or specialized drywall anchors can be an option for mounting points that don’t hit a stud, but securing into at least two studs is always the safest and most highly recommended method for any substantial television.
4. Align the Wall Mount and Mark Drill Points
With your stud locations clearly marked on the wall, hold the main wall mount bracket against the wall. Carefully align the mounting holes on the bracket with the center marks of your studs. This is also where your second critical measurement from Step 2 comes into play: remember the distance from the top of your TV to the top of its attached brackets? Subtract this precise distance from your desired overall top-of-TV height to accurately find where the top edge of the wall mount should sit on the wall.
Once the mount is roughly positioned, use your long level to ensure the wall mount is perfectly horizontal. Even a slight misalignment will result in a noticeably crooked TV, which can be frustrating to correct later. Once the mount is perfectly aligned and level, use your pencil to mark the exact spots for drilling through the mount’s designated screw holes onto the wall. Double-check all your measurements and confirm levelness once more before proceeding to the drilling step.
Tip: If, after careful measurement, you find it genuinely challenging to align your mount directly with two studs due to unique wall construction or desired TV position, and you’re dealing with a relatively lighter TV, some heavy-duty toggle bolts or specialized drywall anchors can offer adequate support for mounting points that don’t hit a stud. However, always prioritize hitting at least two studs with the mount’s primary lag bolts, especially for larger and heavier televisions, as this provides the most robust and secure installation.
5. Drill Pilot Holes and Secure the Wall Mount
Before driving any screws or lag bolts, you must first pre-drill pilot holes into the wall studs. Select a drill bit that is slightly smaller in diameter than the lag bolts provided with your TV mount. Drilling pilot holes serves several critical purposes: it prevents the wood of the stud from splitting, makes it significantly easier to drive the lag bolts in straight and securely, and ensures a tighter, more reliable grip.
Carefully drill at each marked point, ensuring you drill deep enough to accommodate the full length of the lag bolt that will be inserted. Once all the pilot holes are ready, position the wall mount bracket against the wall, aligning its holes precisely with your newly drilled pilot holes. Insert the lag bolts through the mount and into the wall studs. Use an impact driver or a sturdy socket wrench to tighten each bolt firmly. It’s good practice to alternate between bolts, gradually tightening them to ensure even pressure and a snug, flush fit. Do not overtighten to avoid stripping the wood of the stud, but ensure the mount is completely flush and absolutely immovable against the wall.
Note: After securing the mount firmly to the wall, use your level one last time to confirm it’s still perfectly straight. Any minor adjustments or re-tightening should be made now, before the TV is hung, as it will be much more difficult later.
6. Plan and Route Your Cables for a Clean Finish
Now is an excellent and opportune time to think about and implement your cable management strategy. Before hanging the actual TV, consider how you will route all the necessary cables: power cords, HDMI cables, optical audio cables, internet cables, and any other connections. You have a few options: you can run them through the wall (this often requires specialized in-wall rated power extension kits and adherence to local building codes), or use external cable covers that can be painted to seamlessly match your wall color. Effectively hiding and organizing cables contributes significantly to the clean, professional, and clutter-free look of a wall-mounted TV. Plan your cable runs carefully to ensure they are long enough, easily accessible, and neatly tucked away.
7. Safely Mount Your TV Onto the Wall Bracket
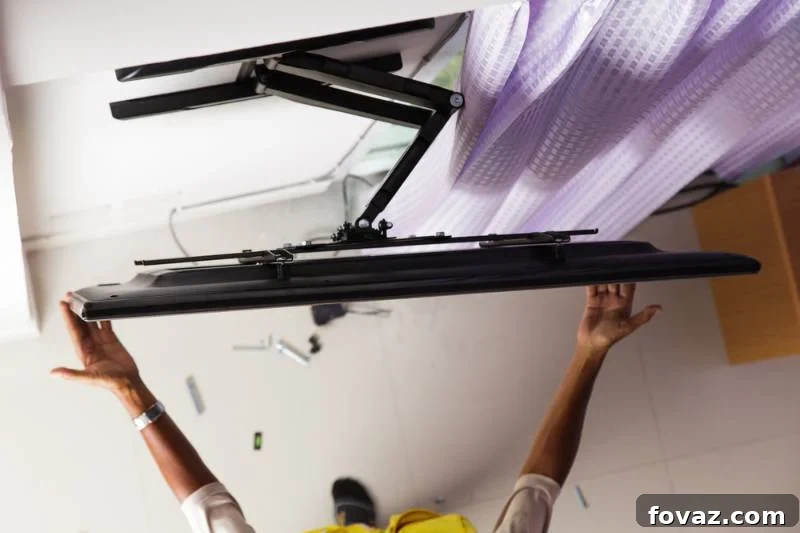
This step, more than any other, often requires the assistance of two people, especially for larger or heavier televisions, to ensure both safety and proper alignment. Carefully lift your TV, aligning the brackets previously attached to the back of your TV with the corresponding components on the wall-mounted frame. Slowly and deliberately lower the TV onto the wall mount, ensuring that the brackets engage properly. Many wall mounts feature a “hook-and-hang” design, where the TV’s brackets securely hook over a bar or rail on the wall mount.
Once the TV is resting safely and engaged on the mount, you’ll typically need to secure it further with locking mechanisms. The specific method for locking the TV to the mount varies significantly between different mount models, so it is absolutely critical to consult your mount’s instruction manual for precise instructions. This often involves tightening small security screws from the bottom of the TV brackets into the wall mount, or engaging release clips or pull strings. These locking mechanisms are designed to prevent the TV from accidentally being lifted off or dislodged from the mount.
It should look like this:
8. Final Adjustments and Aesthetic Cable Management
With your TV now securely mounted to the wall, take a final moment to make any necessary adjustments. If you have a tilting or full-motion mount, adjust the screen to achieve your absolute preferred viewing angle. Finally, connect all your necessary cables (power, HDMI, soundbar, gaming consoles, etc.) to the TV. Carefully route and manage these cables to achieve the clean, clutter-free look you envisioned during your planning phase. Utilize zip ties, Velcro straps, or dedicated cable management sleeves and raceways to keep them tidy, hidden, and prevent them from dangling unsightly or posing a tripping hazard. Double-check all connections to ensure everything is working perfectly.
Common Mistakes to Avoid When Mounting Your TV
To ensure a completely successful, safe, and frustration-free installation, be acutely aware of these common pitfalls and errors:
- Skipping the Stud Finder: This is the most dangerous mistake. Never, under any circumstances, attempt to mount a TV without accurately locating and drilling into robust wall studs. Drywall alone simply cannot hold the weight of a television, leading to an inevitable and dangerous fall.
- Incorrect Height Placement: Mounting the TV either too high or too low will result in an uncomfortable viewing experience, leading to neck strain and a less immersive feel. Always aim for eye-level when seated.
- Not Checking VESA Compatibility: Always verify that your chosen mount’s VESA pattern (the screw hole spacing) matches your TV’s specifications and that the mount is rated to safely support your TV’s specific weight.
- Overtightening Screws: Applying too much force when tightening screws can strip the threads on your TV’s back panel or, critically, damage the wall studs, compromising the entire integrity of the mount.
- Using the Wrong Drill Bit Size: A drill bit that is too large will result in loose screws and a less secure mount; one that is too small risks splitting the wood stud or breaking the drill bit itself. Always match the bit size to the lag bolt’s diameter.
- Ignoring the Level: A crooked TV is an undeniable eyesore that will constantly bother you. Always use a reliable level multiple times during the installation process to ensure perfect horizontal alignment.
- Inadequate Cable Management: Neglecting cable management detracts significantly from the clean, aesthetic appeal of a wall-mounted TV and can create unsightly clutter or even a tripping hazard.
- Trying to Do It Alone (for heavier TVs): For larger or heavier televisions, always enlist the help of a second person when lifting and placing the TV onto the mount. This prevents personal injury and potential damage to your expensive display.
Don’t turn the whole process of mounting your TV into a complete disaster. Avoid the common mistakes when mounting a TV by watching this insightful video from Jonah Matthes:
Conclusion: Enjoy Your Enhanced Home Entertainment
Mounting your TV to the wall is a remarkably rewarding DIY project that can significantly upgrade your home entertainment experience and the overall aesthetic of your living space. By diligently following these detailed, step-by-step instructions, paying close attention to critical measurements, accurate stud locations, and paramount safety protocols, you can confidently achieve a professional-looking installation that is both incredibly secure and visually appealing. Whether building a TV stand is not a viable option for your space, or you simply desire a more streamlined, modern, and spacious look, wall mounting your television is an accessible and highly recommended solution for nearly any home.
Now, with your TV proudly displayed, sit back, relax, and fully immerse yourself in the sleek, modern aesthetic and optimal viewing comfort that your newly mounted TV provides. Happy viewing, fellow DIYers!
Do you have other brilliant ideas, expert tips, or unique insights on how to mount a TV on the wall? We’d love to hear them! Share your experiences with us in the comments section below!
Up Next: More Inspiring DIY Home Improvement Projects
- How To Make A Gallery Wall In Your Home [INFOGRAPHIC]
- DIY Acoustic Panels For Better Sound Absorption For Your Entertainment Room
- A Beginner’s Guide To Ceiling Repair
Calling all crafting DIYhards, DIY Projects needs YOU! Click here if you want to write for us.
Don’t forget to stay connected with us on Facebook, Twitter, and Instagram!