
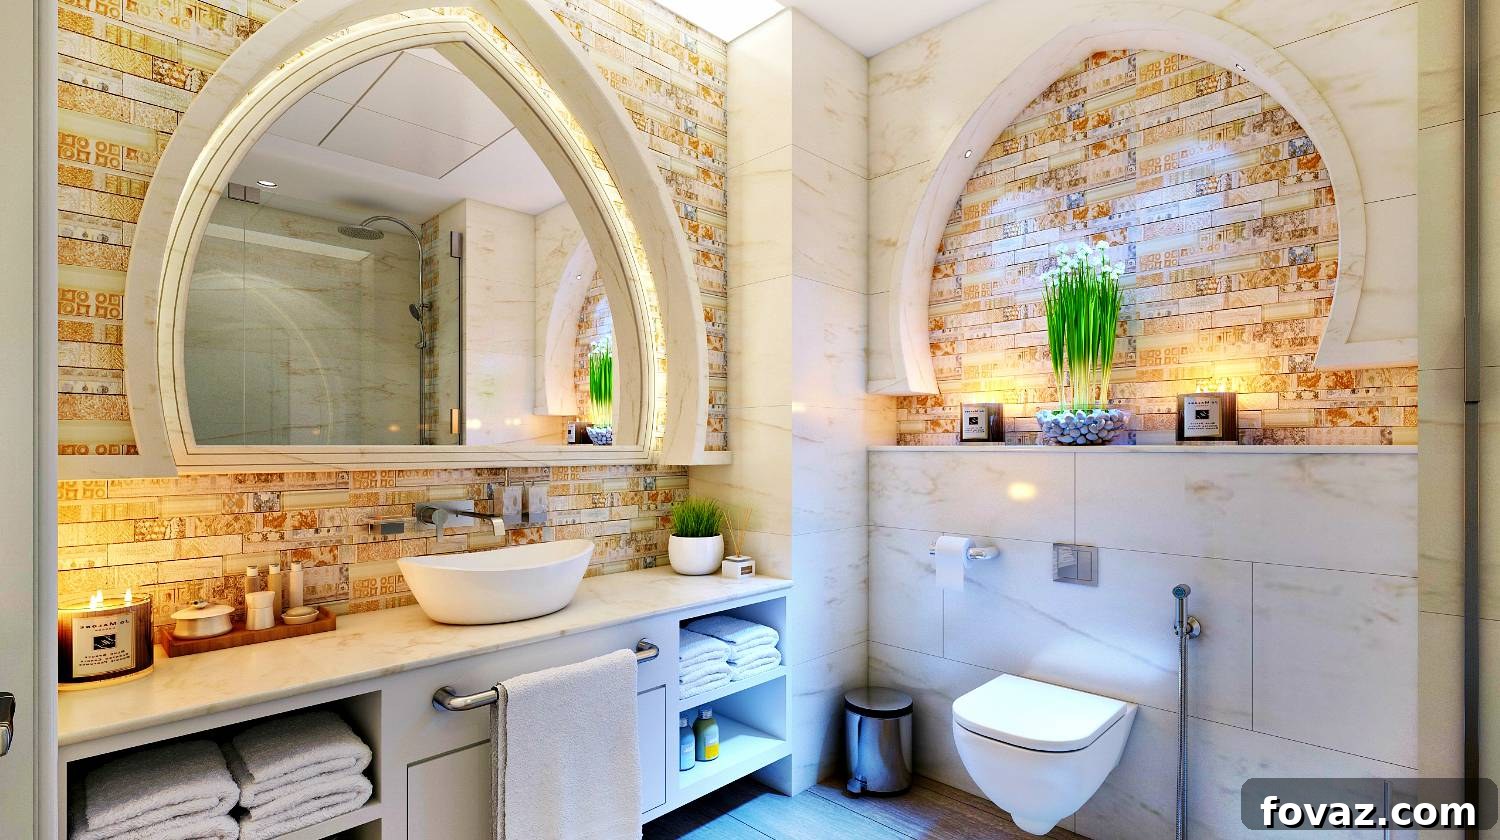
Transforming your bathroom doesn’t have to break the bank. With a little creativity and some strategic planning, you can give your small bathroom a stunning new look and feel. These budget-friendly bathroom makeover ideas are designed to revitalize your space, enhance functionality, and add significant style without punching a huge hole in your pocket. Get ready to embark on an exciting DIY journey to create the dream bathroom you’ve always wanted.
RELATED: Bathroom Decorating Ideas On A Budget
Elevate Your Small Bathroom: 21 Budget-Friendly Makeover Ideas
Your bathroom is more than just a functional space; it’s a sanctuary where you start and end your day. Even a small bathroom can be transformed into a luxurious and efficient haven with the right approach. This comprehensive guide offers 21 innovative, cost-effective, and easy-to-implement DIY ideas that will breathe new life into your compact washroom. From clever storage solutions to stylish decorative touches, discover how to maximize your space and express your personal style on a budget.
In this article, you’ll discover how to create your dream bathroom without extensive renovations:
- Horizon Mirror
- Rag Rug
- Medicine Cabinet Makeover
- Pallet Wood Bathroom Shaving Shelf
- Statement Shower Curtain
- DIY Patterned Bathroom Tiles
- Spray Painted Door Knob
- Bathtub Shelf
- Towel Storage
- Tile And Grout A Bathroom
- Concrete Countertop With Sink
- Mirrored Vanity Tray
- Grommet Topped Shower Curtain
- Stain Oak Cabinets
- Herringbone Frosted Glass Cabinet Door
- Bathtub Makeover
- Spray Paint Bathroom Cabinets
- Towel Rack and Shelf
- Pebble Shower Floor
- Mason Jar Organizer
- Tiled Mirror Frame
1. Horizon Mirror: Create an Illusion of Space
This ingenious horizon mirror design gives the captivating illusion of floating effortlessly against your wall. The secret lies in cleverly concealed dowels that support the mirror, making it appear as if it defies gravity. This visual trick is particularly effective in small bathrooms, as it adds depth and makes the space feel more open and expansive. Before assembly, remember to apply a durable coat of polyurethane finish to all wooden components to protect them from moisture and ensure longevity. The size of the cutout for the mirror dictates how low it will sit, allowing for customization to suit your vanity height.
2. Cozy Up with a DIY Rag Rug
Inject warmth and personality into your bathroom with a charming DIY rag rug. This project is not only simple but also a fantastic way to embrace sustainability. The core components are a sturdy towel for the base and an assortment of fabric strips. This is an excellent opportunity to upcycle old clothes, sheets, or fabric scraps, turning them into a unique and eco-friendly bath mat. Choose fabrics with varying textures and colors to create a visually interesting piece that complements your bathroom decor. A handmade rag rug adds a comforting, personalized touch underfoot.
3. Medicine Cabinet Makeover: A Hidden Gem
Give your utilitarian medicine cabinet an unexpected and stylish upgrade with a simple makeover. The standout feature here is the use of peel-and-stick wallpaper as a vibrant background. This ingenious hack allows for an instant transformation, adding a pop of color, pattern, or texture to an often-overlooked area. Peel-and-stick wallpaper is incredibly versatile, easy to apply, and can be removed without damage, making it perfect for renters or those who enjoy frequent decor changes. Before applying, ensure your cabinet’s interior is thoroughly wiped down and free of dirt or grime for optimal adhesion and a smooth finish.
4. Rustic Pallet Wood Bathroom Shaving Shelf
Introduce a touch of rustic charm and practical storage to your bathroom with a DIY pallet wood shaving shelf. This shelf not only provides valuable extra space for essentials like razors, shaving cream, and toiletries but also imbues your bathroom with a cozy, rustic appeal. You’ll need six wooden pieces of the same size to construct the main frame, ensuring a sturdy and balanced structure. Pallet wood is an affordable and accessible material, making this an ideal budget-friendly project. Finish the wood with a sealant suitable for bathroom environments to protect it from moisture and ensure its longevity.
5. Make a Splash with a Statement Shower Curtain
Your shower curtain is a significant visual element in any bathroom, especially smaller ones. Turn it into a focal point with a personalized statement design. Imagine starting your morning with a motivating quote or a bold artistic pattern that reflects your personality. This DIY project involves stenciling a design onto a plain shower curtain. When painting, secure your stencil with pins to prevent shifting and ensure crisp lines. Choosing a bold typeface for text or a striking pattern will ensure your curtain truly makes an impact. This is a simple yet highly effective way to add character and visual interest to your bathroom decor.
6. Artistic Flair: DIY Patterned Bathroom Tiles
Revitalize bland bathroom tiles by giving them a unique, DIY patterned spin. This remarkably simple yet impactful project uses a Sharpie pen to draw intricate designs directly onto your existing tiles. The beauty of this method lies in its endless creative possibilities – from geometric patterns to floral motifs or abstract art. Don’t worry if you make a mistake; rubbing alcohol is your best friend for correcting any errors, allowing for precision and perfection. Once satisfied, a clear tile sealer can protect your designs, making them durable and waterproof. This budget-friendly idea offers a custom look without the expense or effort of retiling.
7. Chic Upgrade: Spray Painted Door Knob
Often overlooked, your bathroom doorknob can be a subtle yet elegant detail in your overall design. Give it a sophisticated upgrade by spraying it with metallic paint. Choose a finish like brushed nickel, antique brass, or matte black to complement your existing fixtures. The key to a professional-looking finish is proper preparation: always remove the doorknob from the door before painting to prevent overspray onto the door surface. Clean and lightly sand the knob if necessary, then apply thin, even coats of paint for a smooth, durable finish. This small change can significantly elevate the perceived value and style of your bathroom.
8. Indulge with a DIY Bathtub Shelf
Elevate your bath time into a truly luxurious activity with a custom DIY bathtub shelf. This simple addition can hold your book, a glass of wine, candles, or bath salts, turning an ordinary soak into a spa-like experience. Begin by accurately measuring the width of your tub to ensure a perfect fit for your wooden shelf. Remember to cut two additional smaller pieces of wood to attach to the underside of the main shelf; these will sit against the inside edges of your tub, providing crucial support and preventing the shelf from sliding. Select a water-resistant wood and seal it thoroughly for durability in a moist environment.
9. Ingenious Towel Storage from Recycled Cans
Are you looking for a creative and budget-friendly towel storage solution? This brilliant hack utilizes recycled tin cans, transforming them into chic and functional organizers. The secret to their elegant appearance is simple: a fresh coat of paint. This tutorial suggests painting them white and adding a charming flower pattern, but you can customize them with any color or design that suits your decor. Arrange multiple cans on a shelf or wall-mounted board to create segmented storage for rolled hand towels, washcloths, or even small toiletries. This upcycling project is a testament to how humble materials can achieve stylish results.
10. Master the Art of Tiling and Grouting Your Bathroom
Replacing or refreshing your bathroom tiles can dramatically alter its aesthetic. Tiling a bathroom might seem daunting, but it’s a manageable DIY project with the right tools and technique. When cutting tiles, you have options: a handheld tile cutter is excellent for smaller ceramic tiles and straight cuts, while a wet saw offers more versatility for larger tiles or complex shapes. Precision in laying tiles and applying grout is key to a professional finish. Selecting the right tile color and size can also impact the perception of space in a small bathroom, with lighter, larger tiles often making a room feel bigger. Proper grouting seals the tiles and prevents moisture ingress.
RELATED: DIY Project: How To Make Rustic Iron Towel Rack and Shelf
11. Industrial Chic: DIY Concrete Countertop With Sink
For a modern, industrial aesthetic, consider crafting a concrete countertop with an integrated sink. This bold choice adds a contemporary edge, perfect for a bachelor’s pad or any bathroom aiming for a minimalist, urban feel. The natural gray hue of concrete pairs beautifully with dark-stained dressers or cabinetry, creating a sophisticated contrast. The key to a successful concrete countertop lies in proper sealing: apply at least two coats of concrete sealer to protect the surface from stains and moisture. This DIY project offers immense customization in terms of shape, size, and even color (by adding pigments), allowing you to create a truly unique vanity.
12. Luxurious Mirrored Vanity Tray
Instantly elevate the elegance of any vanity area with a sophisticated DIY mirrored vanity tray. This project is not only easy but also an excellent opportunity to upcycle an old picture frame. The reflective surface of the tray beautifully displays perfumes, cosmetics, or jewelry, adding a touch of glamour and making your everyday items feel more special. Mirrors also help bounce light around, contributing to a brighter feel in a compact space. Choose a frame with interesting detailing and perhaps add decorative handles or feet for an even more luxurious finish. This simple addition makes a significant impact on your bathroom’s style.
13. Professional Finish with a Grommet Topped Shower Curtain
Upgrade the look of your shower curtain from standard hooks to a sleek, professional grommet-topped design. Creating a grommet-topped shower curtain is surprisingly straightforward with a grommet kit, which typically includes the setter, anvil, grommets, and washers. This style not only provides a cleaner, more tailored appearance but also allows the curtain to slide more smoothly along the rod. You can choose any fabric you desire, from sturdy canvas to a lighter linen, to match your bathroom’s theme. For a cohesive look, consider adding Roman shades to your bathroom windows as well.
14. Revitalize Your Cabinets: Stain Oak Cabinets
If your oak cabinets are looking dated or worn, staining them can give your bathroom a fresh, updated appearance. This process allows you to transform their color to a rich espresso or a modern gray, completely changing the ambiance of the room. Proper preparation is paramount: begin by sanding your cabinets to remove any existing varnish or finish. However, be mindful not to over-sand; the goal is to create a clean, even surface for the new stain to adhere to, not to strip the wood bare. After staining, apply a protective topcoat for durability and a lasting finish, ensuring your revitalized cabinets withstand the humid bathroom environment.
15. Chic Herringbone Frosted Glass Cabinet Door
Add a unique touch of sophistication and privacy to your bathroom cabinetry with a herringbone frosted glass cabinet door. This design elevates a simple cabinet into a stylish focal point. The secret to achieving the precise herringbone pattern lies in strategically laying strips of masking tape on the glass before applying a frosting spray or film. This technique allows light to filter through while obscuring the contents of the cabinet, offering both aesthetics and practicality. It’s a fantastic way to update existing cabinets without a full replacement, giving your bathroom a high-end, custom look on a budget.
16. Bathtub Makeover with Airstones
Give your bathtub a dramatic and textural makeover by applying airstones along its sides. Airstones are an excellent choice for DIY projects due to their lightweight nature, environmental friendliness, and affordability. They provide a unique, natural stone look that can transform a plain tub into a striking feature. Installing airstones is relatively straightforward, and if cutting is needed, a simple hacksaw will suffice. Beyond aesthetics, always remember to prioritize safety by adding a non-slip mat inside the shower or tub, especially after adding new textures around the exterior. This makeover offers a custom, high-impact result without the heft and cost of real stone.
17. Modernize with Spray Painted Bathroom Cabinets
One of the quickest and most impactful ways to refresh your bathroom is by spray painting your cabinets. A new coat of paint can instantly modernize an outdated vanity or linen cabinet, making the entire room feel brighter and cleaner. To achieve a professional, durable finish, save yourself time and trouble by applying a quality primer to your cabinets before spraying the paint. This step ensures better adhesion, richer color, and a smoother final appearance. Consider updating cabinet hardware as well for a complete transformation; new knobs or pulls can complement your fresh paint job beautifully.
18. Functional Elegance: Towel Rack and Shelf
Maximize both storage and style in a minimalist bathroom with a clever towel rack and shelf combination. This dual-purpose unit provides a convenient place to hang towels while offering a shelf for storing extra linens, decorative items, or toiletries. For safety and a refined finish, consider angling and sanding the cornered edges of the shelf to prevent accidental bumps. If you wish to customize the color of the supporting braces, a simple spray paint application can easily match them to your decor or create a striking contrast. This project enhances organization and contributes to a clutter-free, serene bathroom environment, ideal for small spaces.
19. Spa-Like Retreat: DIY Pebble Shower Floor
Transform your shower into a luxurious, spa-like retreat with a pebble shower floor. This fantastic bathroom remodel idea not only adds a unique aesthetic texture but also provides a natural non-slip surface, enhancing safety. The gentle massage underfoot is an added bonus. Finding pebble stones is easy; often, dollar stores or garden supply centers carry bags of them. The installation involves carefully arranging the pebbles and then applying grout. Remember a crucial tip: allow the grout to cure for at least two days before applying the sealant. This ensures proper setting and a long-lasting, water-resistant finish that will bring an element of nature indoors.
20. Versatile Mason Jar Organizer
For charming and practical storage in your bathroom, look no further than these versatile mason jar organizers. Perfect for decluttering countertops, they can neatly hold anything from cotton swabs and Q-tips to makeup brushes, toothbrushes, or even small soaps. Mason jars offer a rustic yet clean aesthetic that blends well with various decor styles. When mounting them, especially if using wall-mounted clamps, ensure you tighten the clamps securely to prevent the mason jars from accidentally falling. You can also paint or label the jars for added personalization and easier organization.
21. Elegant Tiled Mirror Frame
Upgrade a plain or drab bathroom mirror into a stunning focal point by framing it with tiles. This DIY project allows for immense creativity in choosing tiles that match or contrast with your bathroom’s existing decor, adding texture and visual interest. Start by preparing the mirror’s edges: lightly sand only the parts where you intend to lay the tiles. This creates a slightly textured surface, providing better grip and resistance for the tile adhesive, preventing the tiles from sliding off during application. For glass tiles, it’s essential to use unsanded grout, as sanded grout can scratch delicate surfaces, ensuring a pristine finish.
Check out this small bathroom makeover ideas from Living to DIY with Rachel Metz:
With a minimal budget, your passion for DIY, and these creative ideas for a DIY bathroom makeover on a budget, your dream bathroom is now an achievable reality. Each project offers a unique way to enhance functionality, add personal style, and maximize the appeal of even the smallest spaces. These bathroom makeover ideas truly bring that dream bathroom closer to home, proving that a stunning transformation doesn’t require a hefty investment, just a bit of imagination and effort.
Which DIY bathroom makeover ideas are you keen on doing? Tell us in the comments section below!
Up Next:
- 7 Chic DIY Bathroom Vanity Ideas For Her
- 17 Awesome DIY Bathroom Organization Ideas
- Sew a Ruffle Shower Curtain | How to Make Curtains
Calling all crafting DIYhards, DIY Projects needs YOU! Click here if you want to write for us.
Stay connected with us on Facebook, Twitter, Pinterest, and Instagram!
Editor’s Note: This post was originally published on July 17, 2018, and has been updated for quality and relevancy.