
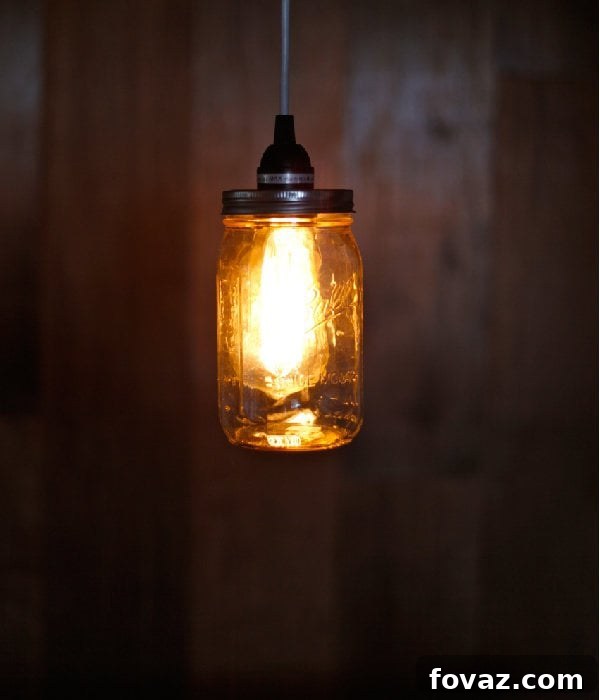
Welcome to a captivating DIY project that blends rustic charm with modern functionality: creating your very own mason jar pendant lights! These timeless fixtures add a unique touch of warmth and personality to any space, from cozy bedrooms to bustling kitchen islands. Forget generic store-bought lighting – with a few simple tools and a touch of creativity, you can craft beautiful, custom lights that reflect your individual style and illuminate your home with a gentle, inviting glow.
This project is not only incredibly satisfying but also highly customizable and budget-friendly. Whether you’re aiming for a farmhouse aesthetic, a vintage industrial vibe, or just a charming accent, mason jar pendant lights are a perfect fit. We’re particularly fond of pairing them with classic Edison bulbs, which cast a warm, ambient light and evoke a nostalgic charm that’s hard to resist. But the beauty of DIY lies in choice; feel free to experiment with any style of light bulb that speaks to you.
Beyond single pendants perfect for bedside lighting, imagine a captivating cluster of these jars forming a bespoke mason jar chandelier over your dining table or kitchen island. The possibilities are truly endless! This guide will walk you through each step, ensuring you have all the knowledge and confidence to bring this enchanting lighting solution to life.
Crafting Your Own Mason Jar Pendant Lights: A Step-by-Step Guide
Before diving into the construction, let’s gather all the necessary components. Having everything ready will streamline your workflow and ensure a smooth, enjoyable crafting experience.
Essential Supplies for Your DIY Pendant Light
- Mason Jar: We recommend a wide-mouth quart-sized jar for ample space and easier bulb insertion, but feel free to choose any size or style that suits your vision. Wider mouths are generally easier to work with.
- Pendant Light Kit: This typically includes a light socket, wiring, and a canopy for ceiling installation. Ensure it’s rated for indoor use and compatible with your chosen light bulb wattage. Many kits are specifically designed for DIY projects and come with a securing ring.
- Nail: A medium-sized nail will be perfect for punching starter holes.
- Pen or Marker: For tracing the circumference of your light socket onto the jar lid.
- Hammer: To assist with punching holes.
- Tin Snips: Essential for cutting the metal lid. Standard scissors will likely struggle and may get damaged.
- Pliers: Invaluable for bending and smoothing sharp edges on the cut lid, ensuring safety and a snug fit.
- Safety Glasses (Recommended): Always protect your eyes when working with tools and metal.
- Work Gloves (Recommended): To protect your hands from sharp edges.
Detailed Instructions for Assembly
Safety should always be your top priority when undertaking any DIY project, especially one involving electricity and metal. Always wear appropriate safety gear, such as safety glasses and work gloves, to prevent injury. If you’re unsure about any electrical wiring, consult a qualified electrician.
Step 1: Precisely Mark the Lid for Your Light Socket
The first crucial step is to accurately mark the exact spot where your light socket will pass through the jar lid. Take your pendant light socket and center it on the flat, top surface of your mason jar lid. Using your pen or marker, carefully trace a perfect circle around the base of the socket. This traced line will serve as your guide for cutting, ensuring that the hole you create is neither too large nor too small for a secure fit. Accuracy here will save you frustration later on. Double-check that your circle is centered and proportional to the lid.
Step 2: Prepare the Lid for Cutting by Punching Holes
With your circle traced, it’s time to prepare the lid for cutting. Grab your nail and hammer. Position the tip of the nail just inside the edge of your traced circle. Begin punching a series of small, closely spaced holes all along the inside perimeter of the circle. These initial holes will act as a perforation line, significantly weakening the metal and making it much easier to cut out the center section. Don’t be shy with the number of holes; the more you punch, the less effort will be required during the cutting phase, and the cleaner your final cut will be. This technique prevents the tin snips from tearing the metal unevenly and gives you better control.
Step 3: Ensure Proper Ventilation for Heat Dissipation
This step is critically important for the safety and longevity of your pendant light. Without adequate airflow, the enclosed space of the mason jar will trap heat generated by the light bulb, potentially causing the jar to become excessively hot and even posing a fire risk over time. To solve this problem, you need to add ventilation holes to the lid. Using your nail and hammer, gently tap a series of small holes into the top of the jar lid, outside the main center opening.
We found that a cluster of many small holes not only provides excellent ventilation but also creates an attractive, subtle pattern, rather than a few large, potentially unsightly ones. The size and number of these ventilation holes are ultimately up to your aesthetic preference, but prioritize functionality. Aim for enough openings to allow heat to escape freely. This simple addition ensures your light fixture operates safely and efficiently for years to come.
Step 4: Carefully Cut Out the Center and Smooth Edges
Now that your lid is perforated, it’s time to remove the center section. Don your safety gloves and glasses. Take your tin snips and carefully begin cutting along the line of punched holes. The perforations should make this process relatively straightforward. Work slowly and deliberately to achieve a clean cut. Avoid using regular scissors, as they are not designed for cutting metal and can be damaged or cause injury.
After cutting, you might find that the edges of the newly created hole are sharp and poke upwards. This is a common occurrence. To remedy this and ensure both safety and a proper fit for your light socket, grab your pliers. Carefully bend these sharp edges downwards and inwards. Not only does this make the lid safe to handle, but it also creates a slightly wider, smoother opening, providing more clearance for the light socket to pass through without resistance. A secure and smooth opening is essential for the next step.
STEP 5: Secure the Light Socket to the Lid
With the lid now prepared, it’s time to integrate the light socket. Take the light socket component of your pendant light kit and carefully push it through the hole you’ve created in the lid from the top. Ensure that the socket passes through smoothly. Most pendant light kits designed for DIY projects come with a separate ring or collar that screws onto the base of the socket from the underside of the lid. This ring is crucial for securely fastening the lid to the socket assembly.
Once the socket is through, screw this securing ring onto the socket threads from the bottom, tightening it firmly but gently. This action will sandwich the metal lid (along with its rim, which connects to the jar) between the socket and the securing ring, creating a robust and stable connection. Double-check that the lid is snugly attached to the socket and does not wobble.
Step 6: Final Assembly: Add the Lightbulb and Secure to Jar
You are now in the home stretch! With the light socket firmly attached to the lid, it’s time to screw in your chosen lightbulb. Carefully twist the bulb into the socket until it’s secure. Handle the bulb gently to avoid damaging the filament or glass. As mentioned earlier, we love the vintage appeal of an Edison bulb for this project, but any compatible bulb will work beautifully.
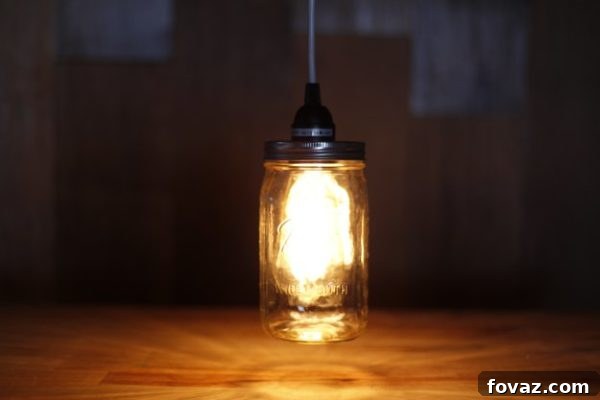
Once the bulb is in place, carefully lower the lid assembly (with the bulb attached) onto the mason jar. Align the lid with the jar’s threads and gently twist the lid ring until it is securely fastened to the jar. Ensure that the bulb doesn’t touch the sides of the jar, especially if it’s a larger bulb, to allow for air circulation and prevent overheating. Your beautiful, custom mason jar pendant light is now complete and ready to be hung!
Personalization and Creative Variations
The beauty of DIY lies in its infinite possibilities for customization. Don’t stop at the basic pendant! Here are a few ideas to make your mason jar lights truly unique:
- Color and Finish: Paint your mason jars with glass paint, frost them for a softer glow, or tint them with stained glass paint for vibrant effects. You can also distress the metal lid for a rustic, aged look.
- Decorative Elements: Wrap the jar with twine, burlap, lace, or even fairy lights for added texture and charm. Attach small charms, beads, or artificial flowers for a whimsical touch.
- Cluster Chandeliers: Group several mason jar pendants together at varying heights to create a stunning, multi-light chandelier for a dining area or entryway. You might need a specialized chandelier canopy kit for this.
- Outdoor Lighting: With appropriate weatherproof pendant light kits and sealed jars, these can even be adapted for charming outdoor patio or porch lighting. Ensure all electrical components are rated for outdoor use and properly sealed against moisture.
- Swag Lights: Instead of hardwiring, consider a plug-in pendant light kit with a longer cord that can be “swagged” across a ceiling and plugged into a wall outlet, offering flexible placement without electrical work.
Maintenance and Care for Your Mason Jar Lights
Maintaining your mason jar pendant lights is straightforward. Periodically dust the jars and bulbs with a soft, dry cloth. If the jars get smudged, you can carefully unscrew them, clean with glass cleaner, and then reattach. Always ensure the power is off at the switch before cleaning or changing a lightbulb. Regularly check the electrical connections and the security of the lid to the jar to ensure ongoing safety. With proper care, your handmade lights will continue to bring joy and ambiance to your home for many years.
Conclusion: Illuminate Your Space with Handmade Charm
We sincerely hope you enjoyed learning how to make this delightful mason jar pendant light! This project is a fantastic way to add a personalized, warm, and inviting glow to any room. It’s an accessible craft that yields impressive results, proving that beautiful home decor doesn’t have to come with a hefty price tag. The satisfaction of creating something functional and aesthetically pleasing with your own hands is truly rewarding.
So, gather your supplies, embrace your creativity, and light up your living space with these charming, custom-made fixtures. Don’t forget to share your unique mason jar pendant light creations with us – we’d love to see how you’ve brought this project to life in your home! Happy crafting!