

Transforming your living space with a touch of rustic elegance has never been easier or more rewarding. If you’re seeking the perfect autumn project or simply wish to infuse your home with cozy charm, these DIY mason jar candle sconces offer a beautiful and straightforward solution. They blend the timeless appeal of mason jars with the warm glow of candlelight, creating an inviting ambiance that complements any decor style, from farmhouse to modern rustic.
RELATED: DIY Soy Candles | 15 Addictive Scents You Will Love
Craft Your Own Rustic Mason Jar Candle Sconces: A Step-by-Step Guide
Embrace the joy of handmade decor with a project that’s not only simple to execute but also yields stunning results. Our comprehensive guide will walk you through creating beautiful wall-mounted candle sconces that are perfect for adding character to hallways, bedrooms, living rooms, or even outdoor covered patios. Get ready to elevate your home’s aesthetic with these charming, handcrafted pieces.
Gather Your Supplies: What You’ll Need for Your Rustic Sconces
Before diving into the creative process, ensure you have all your materials organized. Most of these items are easily sourced from craft stores, hardware stores, or even around your home, especially if you enjoy repurposing. The beauty of this project lies in its flexibility, allowing for personal touches and variations in materials.
- 2 pieces of Reclaimed Wood: Aim for pieces roughly 12-18 inches long and 4-6 inches wide. Reclaimed wood adds authentic rustic character, showcasing natural imperfections and a weathered look. If reclaimed wood isn’t available, new wood can be distressed or stained for a similar effect.
- Half Gallon (64 oz.) Mason Jar: The larger size provides ample space for candles and decorative fillers, ensuring stability and a prominent display.
- 1 roll of Natural Twine: Choose a sturdy, natural fiber twine that complements the rustic aesthetic. This will be used to secure the jar and add decorative texture.
- 1 ½ cups Brown Short Grain Rice (Dry): Rice serves as a stable base for the votive holder and adds a nice visual filler. Alternatives like sand, small pebbles, or even coffee beans can be used for different looks and aromas.
- Votive Candle: Select unscented or lightly scented candles depending on your preference. Battery-operated LED votives are an excellent, safer alternative, especially if the sconces will be in high-traffic areas or left unattended.
- 1 Glass Votive Candle Holder: This is essential for safety, containing the wax and preventing the flame from coming into direct contact with the rice or the jar.
- 2 Screw Hooks: These will be securely fastened into the wood to hang the mason jars. Ensure they are strong enough to support the weight of the jar, rice, and candle.
- 2 Hanging Chains (22-inch each): The chains provide the mechanism for suspending the jar from the hook. Choose a style and finish that matches your desired aesthetic.
- Electrical Tape: This is a temporary tool used to initially hold the chains in place while you wrap the twine, making the process much easier.
Step 1: Preparing Your Mason Jar for Hanging
Begin by taking one of your 22-inch hanging chains. Carefully position one end of the chain against the neck of your mason jar, just below the lip. Securely tape this end in place using electrical tape. Now, bring the chain around the jar, ensuring it sits evenly, and tape the other end about 4 inches from the first taped end. This creates a loop with about 4 inches of chain hanging freely from each side, which will form the handle for hanging. The electrical tape provides a temporary hold, making the next step significantly simpler.
Step 2: Crafting the Twine Wrap for a Rustic Touch
With the chain temporarily secured by tape, it’s time to add the rustic element. Take your natural twine and begin wrapping it tightly around the lip of the mason jar, directly over the taped chain sections. Start by knotting the twine at one end of the chain, then meticulously wind it around the jar’s neck. Continue wrapping, ensuring each coil of twine is snug against the last, effectively covering all visible electrical tape and firmly embedding the chain within the twine. The tighter you wind the twine, the more secure your chain will be, preventing any slippage or movement once the sconce is complete. This step not only adds a beautiful texture but also provides the structural integrity for hanging.
Step 3: Trimming and Securing the Twine
Once you’ve completely covered the electrical tape and achieved your desired thickness of twine wrap, carefully cut the excess twine, leaving a small tail. To ensure a clean and durable finish, tuck the end of the twine securely under the previous wraps. You can use a dab of strong craft glue if needed for extra security, though a tight wrap usually suffices. The goal is a seamless, professional look that ensures the twine doesn’t unravel over time.
Step 4: Ensuring Durability: The Pull Test
Safety and stability are paramount for any hanging decor, especially one involving candles. Before proceeding, gently but firmly pull on the chain that is now secured by the twine. This “pull test” will confirm that the twine is wrapped tightly enough and the chain is completely secure within its rustic casing. If you notice any give or looseness, go back and re-wrap the twine more tightly. This step ensures your mason jar will hang safely and reliably from the wooden base.
Step 5: Selecting and Preparing Your Reclaimed Wood Base
Lay down one piece of your chosen reclaimed wood on a flat, stable surface. Reclaimed wood is fantastic for this project as its natural imperfections, knots, and weathered appearance inherently lend a rustic charm. If you’re using new wood, consider sanding the edges slightly for a softer look or applying a wood stain to achieve an aged appearance. Ensure your wood pieces are clean and free of splinters. We opted for a piece of deck wood cut into two, demonstrating how even repurposed materials can be transformed into beautiful home accents.
RELATED: DIY Wooden Candle Holder | Easy DIY Projects
Step 6: Installing the Hanging Hooks
With your wood piece laid flat, determine where you want the mason jar to hang. For aesthetic balance and optimal support, screw one of your hooks into the wood. Position the hook approximately 1-2 inches from one edge of the wood, centered horizontally. For softer woods, you might be able to screw the hook in by hand. For harder woods, it’s advisable to drill a small pilot hole first to prevent splitting the wood and make the screwing process easier. Ensure the hook is screwed in deeply and securely, as it will bear the weight of the entire sconce.
Step 7: Creating the Candle Base within the Jar
Now, let’s prepare the mason jar for its luminous centerpiece. Pour about 1 ½ cups of dry brown short-grain rice into the mason jar. The rice serves multiple purposes: it adds visual texture, helps stabilize the votive holder, and creates a barrier between the candle flame and the glass jar itself. Once the rice is in, gently nestle your glass votive candle holder into the center of the rice, pressing it down slightly to create a stable indentation. Finally, place your votive candle inside the glass holder. This arrangement ensures the candle burns safely and steadily.
Step 8: Mounting Your Rustic Sconce to the Wall
Before hanging your beautiful mason jar, you need to securely attach the wooden base to your chosen wall. Decide on the perfect spot – perhaps flanking a mirror, above a bedside table, or in a cozy reading nook. Using appropriate wall anchors and screws (depending on your wall type), firmly mount the wooden piece to the wall. Once the wood is securely fastened, carefully hang the prepared mason jar, with its chain-and-twine handle, onto the screw hook. Take a step back to admire its placement and ensure it hangs evenly.
Step 9: Do the Second Wall Sconce
To create a symmetrical and balanced display, you’ll want a pair of these charming sconces. Simply repeat steps 1 through 8 with your remaining supplies: the second piece of reclaimed wood, the other mason jar, twine, rice, votive candle, votive holder, screw hook, and hanging chain. When mounting the second sconce, ensure it’s positioned at an equivalent height and distance from its counterpart, creating a harmonious and aesthetically pleasing arrangement in your room.
Step 10: Light it Up!
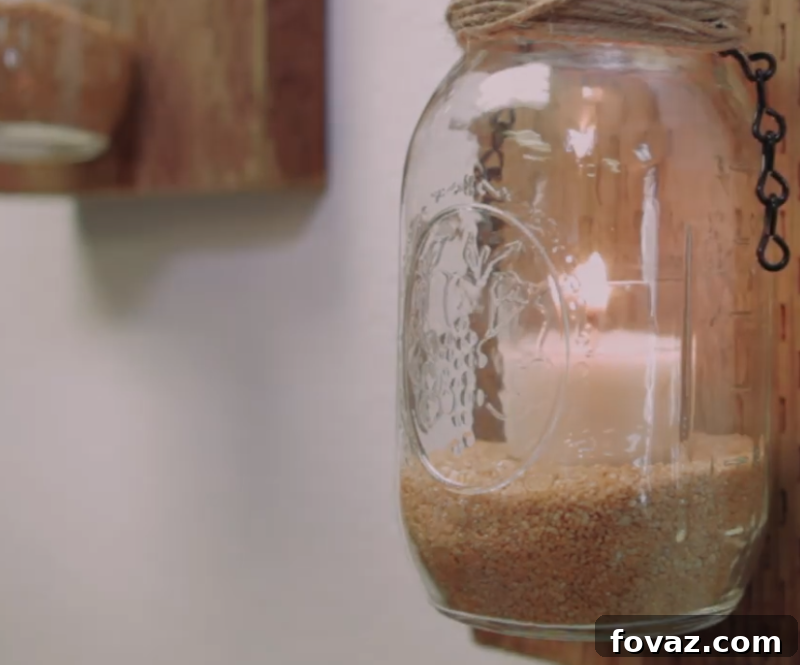
With both sconces securely mounted and candles in place, it’s time for the grand reveal! Light the candles and bask in the warm, inviting glow that instantly transforms your space. These rustic wall sconces are more than just a source of soft illumination; they are statement pieces that add unique visual texture and a cozy, handcrafted touch to any room. Candle sconces are a fantastic way to add light to a room, creating mood lighting without harsh overhead fixtures.
Personalizing Your Mason Jar Sconces
While the basic design is enchanting, don’t hesitate to personalize your mason jar candle sconces. Instead of brown rice, consider using small polished river stones for a more natural, Zen-like feel, or coffee beans for a subtle, aromatic addition. You could also paint the mason jars with frosted paint for a softer light diffusion or use stencils to add intricate designs. For the wooden base, experiment with different stains, chalk paint for a farmhouse look, or even add small metal embellishments. For those concerned about open flames, battery-operated LED votives are a safe and convenient alternative, offering the same flickering ambiance without the fire risk.
Safety First: Enjoying Your Candle Sconces Responsibly
When incorporating open flames into your home decor, safety should always be a top priority. Ensure that your sconces are mounted securely to the wall and are not placed in areas where curtains, drapes, or other flammable materials could come into contact with the flame. Never leave burning candles unattended, and always place them in a stable votive holder within the mason jar to contain wax and prevent tipping. If you have children or pets, or simply prefer a worry-free option, consider using LED flameless candles which provide a beautiful glow without any fire hazard.
Embrace the Rustic Charm in Your Home
Isn’t this rustic wall decor project super easy to create and incredibly beautiful? Mason jar sconces are truly great projects to illuminate the house with a gentle, inviting glow. We never get tired of beautiful rustic decor – not only is it cozy and charming, but its timeless appeal ensures it remains a beloved aesthetic for years to come. These sconces allow you to effortlessly set the mood, whether it’s for a quiet evening, a festive gathering, or simply to add a warm welcome to your entryway.
Feeling a bit adventurous? As mentioned, replace the brown short-grain rice with pebbles or small decorative stones for a different textural element. Make a couple (or more!) and begin your fall decorating with these handcrafted beauties. They also make thoughtful, personalized gifts for friends and family.
Do you have any unique candle sconce ideas of your own? Perhaps a different material choice or a special decorative touch? We’d love to hear about them! Let us know in the comments section below and inspire fellow DIY enthusiasts!
UP NEXT:
- Fun & Festive DIY! Make Your Own Funfetti Candle
- Create A Prism Candle Light | DIY Mason Jar Crafts
- How to Make a DIY Mason Jar Chandelier
Calling all crafting DIYhards, DIY Projects needs YOU! Click here if you want to write for us.
Don’t forget to stay connected with us on Facebook, Twitter, and Instagram.
Editor’s Note: This post was originally published on November 1, 2017, and has been updated for quality and relevancy.