
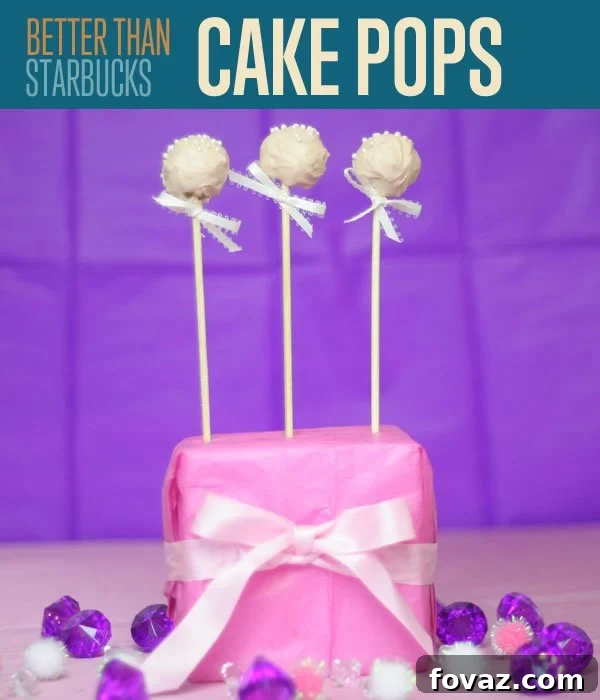
Master the Art of Homemade Birthday Cake Pops: A Starbucks-Inspired Recipe
Who can resist the enchanting allure of a perfectly crafted cake pop? Especially those delightful, sprinkle-studded pink ones that have captivated dessert lovers everywhere, famously popularized by Starbucks. If you’ve ever found yourself longing for that magical combination of moist cake and sweet, candy coating, but wished you could whip them up in your own kitchen, you’re in the right place. We’ve meticulously developed a copycat recipe for those iconic birthday cake pops that promises to deliver all the joy and deliciousness right to your home. Say goodbye to long lines and hello to endless batches of your favorite bite-sized treats!
Why Craft Your Own Starbucks-Style Cake Pops?
Making your own cake pops isn’t just a fun baking project; it’s a rewarding experience that offers numerous benefits. Beyond the immense satisfaction of creating something so delectable from scratch, homemade cake pops give you complete control over ingredients, ensuring freshness and allowing for dietary adjustments if needed. They are surprisingly versatile, perfect for any occasion – from sophisticated parties and festive celebrations to a simple, sweet indulgence on a quiet afternoon. Imagine the delight of presenting these adorable confections, knowing they were made with your own hands. Plus, it’s a fantastic way to engage kids in the kitchen, turning baking into a memorable activity. Skip the drive, save some money, and most importantly, savor the unbeatable taste of a freshly made treat that rivals any coffee shop offering.
The Ultimate Starbucks Birthday Cake Pop Copycat Recipe
Prepare to embark on a delightful culinary adventure. This recipe is designed to be straightforward, ensuring even novice bakers can achieve spectacular results. We’ll guide you through each step, from baking the perfect cake to achieving that signature smooth, pink coating.
Gather Your Essential Ingredients and Tools
Before you begin, ensure you have all your components ready. This mise en place approach will make the baking process much smoother and more enjoyable. Quality ingredients are key to a truly outstanding cake pop.
Ingredients:
- 1 stick (½ cup) unsalted butter, softened to room temperature
- 3 cups granulated sugar
- 2 large eggs, at room temperature
- 1 teaspoon pure vanilla extract
- 4 cups all-purpose flour
- 1 cup whole milk, at room temperature
- Food coloring gel, pink (gel offers richer color without thinning the mixture)
- 16 ounces (approx. 2 cups) vanilla frosting or white icing (store-bought or homemade)
- Assorted sprinkles, preferably white or rainbow confetti style
- 1 bag (12 oz) white chocolate chips or white candy melts
Equipment:
- Sturdy Styrofoam block (for displaying and drying cake pops)
- 9×13 inch baking pan or similar size
- Electric mixer (stand or hand-held) or a robust wooden spoon
- Large mixing bowl
- Several microwave-safe bowls
- Measuring cups and spoons
- Rubber spatula or spoon for mixing and coating
- Caramel apple sticks or lollipop sticks
- Toothpicks (for testing cake doneness)
Step-by-Step Guide: Crafting Your Perfect Cake Pops
Step 1: Preparing Your Cake Batter Foundation
Begin by preheating your oven to 350°F (175°C). This ensures the oven is at the correct temperature when your batter is ready, allowing for even baking. Lightly grease and flour your 9×13 inch baking pan, or line it with parchment paper for easier cake removal. In your large mixing bowl, combine the 3 cups of granulated sugar and 4 cups of all-purpose flour. Use your electric mixer on low speed, or a wooden spoon, to gently stir these dry ingredients together. This initial mixing helps to aerate the flour and ensures the sugar is evenly distributed, laying a smooth foundation for your cake.
Step 2: Incorporating Wet Ingredients for Rich Flavor
Now it’s time to introduce the enriching wet ingredients. Add each egg one at a time, mixing well after each addition until just combined. This ensures the eggs are fully incorporated without overmixing the batter. Next, add your softened stick of butter. If your butter isn’t perfectly soft (it should yield easily to a finger press), you can microwave it in a safe container for 20-30 seconds, but be careful not to melt it completely. Mix all ingredients together gently on low speed to avoid splashing and to prevent gluten development, which can lead to a tough cake. The goal is a smooth, homogenous batter.
Step 3: Mixing in Vanilla Extract and Milk
The addition of milk and vanilla extract is crucial for both the cake’s flavor and its texture. The milk provides necessary moisture, creating a tender crumb, while vanilla infuses a classic, sweet aroma that complements any dessert. Slowly pour in the 1 cup of milk and 1 teaspoon of vanilla extract. Continue mixing on low speed until all ingredients are just incorporated. Be mindful not to overmix, as this can develop the gluten in the flour too much, resulting in a dense, chewy cake rather than the light, airy base we desire for our cake pops. Mix until the batter is smooth and free of large lumps.
Step 4: Baking Your Golden Cake Base
Pour the prepared cake batter evenly into your greased and floured (or parchment-lined) baking dish. Place the pan in the preheated oven and bake for 25-35 minutes. Baking time can vary based on your oven, so keep an eye on it. The cake is fully cooked when the top is golden brown and a toothpick inserted into the center comes out clean or with just a few moist crumbs attached. Avoid overbaking, as this can dry out the cake. Once baked, remove the cake from the oven and let it cool completely in the pan on a wire rack. This is a critical step; attempting to crumble a warm cake will result in a sticky, unmanageable mess.
Step 5: Crushing and Combining for Cake Pop Perfection
Once the cake has cooled completely, it’s time for the fun (and slightly messy) part! Break the cooled cake into small, manageable pieces. You can do this with your hands, crumbling it directly into a large mixing bowl. Aim for fine crumbs, similar to sand. Next, add a small amount of your chosen vanilla frosting (either store-bought or homemade works wonderfully). Start with about half a cup and mix it into the cake crumbs using your hands. The goal is to achieve a consistency that can be rolled into a ball and holds its shape without being overly sticky or dry. Add more frosting, a tablespoon at a time, until the mixture is pliable. Once the desired consistency is reached, roll the cake mixture into uniform, bite-sized balls, typically about 1.5 inches in diameter. Place these cake balls on a parchment-lined baking sheet. For best results and to help them maintain their shape during coating, pop the cake balls into the refrigerator for about 10-15 minutes.
Step 6: Crafting the Iconic Pink Coating
Now for the signature pink coating! Pour your white chocolate chips or candy melts into a microwave-safe bowl. Microwave in 30-second intervals, stirring thoroughly after each interval, until the chocolate is smooth and fully melted. Be careful not to overheat, as white chocolate can seize. Once melted, add a tiny amount of pink food coloring gel. Stir continuously until you achieve a beautiful, light pastel pink. Remember, a little gel goes a long way, and adding too much liquid coloring can cause the chocolate to thicken and become pasty. If your mixture does become too thick, you can try adding a teaspoon of vegetable shortening or coconut oil to thin it out, stirring until smooth. Keep the chocolate warm enough to remain liquid, but not hot, for easy dipping.
Step 7: Dipping and Decorating Your Cake Pops
Remove your chilled cake balls from the refrigerator. Take a lollipop stick, dip the tip into the melted pink chocolate, and then insert it about halfway into a cake ball. This dab of chocolate acts as a “glue” to secure the cake pop to the stick. Let it set for a few seconds. Next, fully immerse the cake pop into the melted pink chocolate, tilting the bowl and using a spoon or spatula to ensure an even coat. Gently tap off any excess chocolate by lightly tapping the stick against the edge of the bowl. Immediately after dipping, while the chocolate is still wet, liberally apply your desired sprinkles. Work quickly as the chocolate will set fast. Once sprinkled, insert the stick into your Styrofoam block to allow the chocolate to fully set and dry. Repeat this process for all your cake pops.
Step 8: Final Chilling and Display
Once all your cake pops are coated and decorated, and the chocolate has begun to set, transfer the Styrofoam block (with the cake pops) into the refrigerator for a final chill. Allow them to set for at least 15-20 minutes, or until the coating is firm to the touch. This crucial step ensures the chocolate hardens completely, providing a sturdy and beautiful finish. Once thoroughly chilled, your homemade Starbucks-style birthday cake pops are ready to be admired, shared, and most importantly, devoured! Display them proudly in your Styrofoam block or arrange them on a festive platter. Get ready to impress everyone with your baking prowess!
Pro Tips for Cake Pop Success
- Don’t Overmix the Cake Batter: Overmixing develops gluten, leading to a tough cake, which isn’t ideal for soft, crumbly cake pops.
- Cool Cake Completely: Warm cake crumbles unevenly and can make the frosting mixture too soft. Patience is key here.
- Chill Cake Balls: This step makes the cake balls firm, preventing them from falling apart during dipping and ensuring a smooth coating.
- Work Quickly with Chocolate: Have all your sprinkles ready. Once the cake pop is dipped, the chocolate sets fast, especially if the cake ball is cold.
- Thinning Chocolate: If your candy melts or white chocolate are too thick, add a teaspoon of vegetable shortening or coconut oil (not water or milk, which will seize the chocolate) and stir until smooth.
- Storage: Store finished cake pops in an airtight container in the refrigerator for up to a week, or at room temperature for 1-2 days, though refrigeration is preferred for freshness and structure.
FAQs About Homemade Cake Pops
How long do homemade cake pops last?
When stored properly in an airtight container, homemade cake pops can last for about 5-7 days in the refrigerator. If stored at room temperature, they are best enjoyed within 1-2 days to maintain optimal freshness and texture.
Can I use a box cake mix for cake pops?
Absolutely! Using a box cake mix is a fantastic shortcut and perfectly acceptable for cake pops. Simply prepare the cake according to the box directions, let it cool, and then proceed with crumbling and mixing with frosting as described in our Step 5.
What if my chocolate coating is too thick?
If your white chocolate or candy melt coating becomes too thick for smooth dipping, you can thin it out. Add a teaspoon of vegetable shortening or coconut oil (do not use water or milk, as this will cause the chocolate to seize and become unusable) and stir until the desired consistency is achieved. Reheat gently if necessary in 10-second intervals.
Conclusion: Indulge in Your Homemade Masterpiece!
There you have it – a comprehensive guide to crafting your very own batch of irresistible Starbucks-inspired birthday cake pops. This recipe offers not just a treat for your taste buds, but also a wonderful opportunity for creative expression in the kitchen. Whether you’re making them for a special occasion, a thoughtful gift, or simply to satisfy a sweet craving, these homemade cake pops are sure to bring smiles and delight. So go ahead, don your apron, gather your ingredients, and get ready to experience the joy of baking these charming, delicious confections. We hope you enjoy every single bite of your better-than-Starbucks creations!