
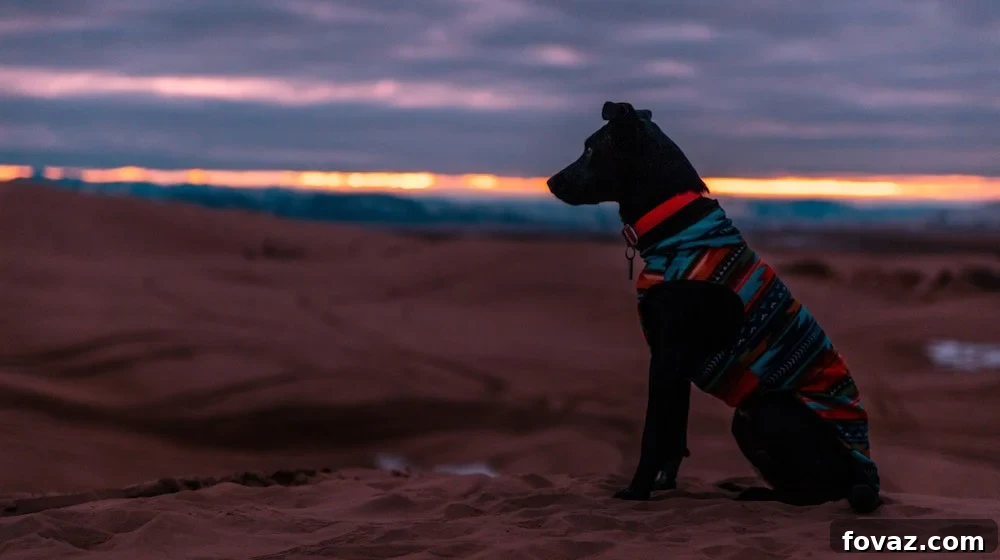
Sew a Custom Dog Coat: Keep Your Furry Friend Warm & Stylish This Winter
— This post is courtesy of sewing.com and shared with permission —
As the chill of winter sets in, we bundle ourselves in cozy layers, but what about our four-legged family members? While many dogs are blessed with fur, it doesn’t always provide sufficient protection against biting winds and plummeting temperatures. Ensuring your beloved companion stays warm and comfortable during cold weather walks is essential for their health and happiness. This comprehensive guide will show you how to sew an adorable, warm, and perfectly fitted dog coat, transforming a necessary winter accessory into a true fashion statement for your pooch. Say goodbye to ill-fitting, store-bought options and create a unique piece that reflects your dog’s personality while providing ultimate warmth!
Why Sew Your Own Dog Coat? The Benefits of a Custom Fit
Many pet owners opt for ready-to-wear dog coats, only to find them lacking in crucial aspects. They often don’t provide the optimal warmth, restrict movement, or simply don’t fit well for your unique dog’s build. Every dog is different, with varying neck sizes, chest depths, and back lengths, making a “one-size-fits-all” approach impractical. This is where the magic of a DIY dog coat comes in! By crafting a coat specifically for your canine companion, you gain full control over the fit, fabric choices, and overall design, ensuring maximum comfort and functionality.
Beyond the perfect fit, sewing your dog’s coat offers several compelling advantages. You can select durable, high-quality fabrics that offer superior insulation and weather protection. Imagine choosing a waterproof outer layer combined with a plush fleece lining – a combination often hard to find in commercial products. Moreover, a handmade coat allows for personalization. You can incorporate unique colors, patterns, or even add reflective strips for enhanced safety during evening strolls. This project isn’t just about utility; it’s a wonderful way to express your love and care for your best buddy, creating a truly special item that will stand the test of time and countless winter adventures. If you’re getting your own winter coats ready, then your beloved pooch will certainly appreciate having a bespoke one, too. If you are handy with a sewing machine, this tutorial will certainly inspire you to create a dog coat that is as unique as your pet. Let’s get started on this rewarding journey!
Gathering Your Supplies: Essential Tools for Your Dog Coat Project
Before diving into the exciting world of pattern drafting and sewing, it’s crucial to gather all the necessary tools and materials. Having everything at hand will make the process smoother and more enjoyable. We’ll break down the supplies into two categories: those needed for creating your pattern and those for assembling the coat. This detailed list, inspired by our friends over at Professor Pincushion, ensures you’re fully prepared for every step.
For the Pattern Drafting: Precision is Key
- Pattern paper: Essential for drafting your custom pattern. Look for dotted or gridded paper for easier measurement and straight lines.
- Tape: To secure multiple sheets of pattern paper together if needed for a larger dog, ensuring a continuous surface for your draft.
- Scissors: A sharp pair for cutting your pattern paper accurately.
- Flexible tape measure: Crucial for taking accurate measurements of your dog’s unique dimensions. This is perhaps the most important tool for achieving a perfect fit.
- Dog measurement chart: A helpful guide to ensure you capture all necessary dimensions. You’ll use this to record your dog’s specific measurements.
- Straight ruler: For drawing straight lines and ensuring precision in your pattern drafting.
- French curve ruler (optional): While not strictly necessary, this tool greatly assists in creating smooth, aesthetically pleasing curves, especially for the neckline and strap shapes.
- Pencil: For marking and drawing your pattern lines. An eraser will also be useful for adjustments.
For the Assembly: Bringing Your Vision to Life
- Sewing machine: A reliable machine will make the sewing process efficient and enjoyable. Ensure it’s in good working order and you have the correct needles for your chosen fabric.
- Straight pins: To hold fabric pieces together securely before and during sewing, preventing shifting and ensuring accurate seams.
- All purpose thread: Choose a strong, durable thread that matches or complements your chosen fabric colors. Polyester thread is a good all-around choice.
- Fabric scissors: Dedicate a pair of sharp scissors solely for fabric to ensure clean, precise cuts. Avoid using them on paper, as it dulls the blades.
- 1-2 packages of extra wide bias folded tape: This is essential for finishing the edges of your dog coat, providing a neat, durable, and professional look while preventing fraying.
- Fabric marker: For transferring pattern markings onto your fabric. Choose one that disappears with heat or water, or a tailor’s chalk.
- Hook-and-loop fastener (Velcro): For securing the coat around your dog’s neck and belly. Ensure you have enough length for adjustable straps.
- Fleece (size will depend on how big your pattern is): An excellent choice for the main body of the coat due to its warmth, softness, and ease of sewing. Consider a waterproof outer fabric if your dog frequently goes out in wet conditions.
Step-by-Step Guide: Drafting Your Custom Dog Coat Pattern
Now that you have all your supplies ready, let’s embark on the most critical phase: drafting a custom pattern for your dog. Accuracy here ensures a perfect fit, so take your time and measure carefully.
Step 1. Take Precise Measurements of Your Dog
Using the dog measurement chart and your flexible tape measure, carefully record your dog’s dimensions. It’s helpful to have a second person assist you to keep your dog still and ensure accurate readings. Remember, these measurements are the foundation of your custom coat! Download the dog measurement worksheet here!
- a. Neck circumference – Position the tape measure at the widest part of your dog’s neck, typically the base where the neck meets the shoulders. Measure all the way around, ensuring two fingers can comfortably fit underneath the tape to allow for breathing room and comfort.
- b. Back length – Measure from the base of the neck (where you took the neck circumference) straight along the dog’s spine, to the base of the tail. Ensure your dog is standing straight, not hunched or stretched.
- c. Chest circumference – Similar to the neck, measure around the fullest part of your dog’s chest, just behind their front legs. Again, allow for two fingers’ worth of room for comfort and ease of movement. This measurement is crucial for preventing the coat from being too tight or restrictive.
- d. Chest depth – This smaller measurement determines the width of the front strap that goes across your dog’s chest. Measure from the base of the neck downwards to where you want the bottom edge of this front strap to sit on your dog’s chest. This helps ensure the strap is wide enough for security but not so wide as to hinder movement.
- e. Side depth – Measuring from the center of your dog’s back, along their side, stop where you want the edge of the coat to fall. This determines how much of your dog’s side will be covered, ensuring adequate warmth without interfering with their legs.
- f. Neck to strap edge – This measurement is a bit nuanced but vital for correct strap placement. Imagine a line from the base of the neck that extends just past your dog’s front leg (refer to the dashed line on the worksheet for visual aid). Then, imagine a straight line going upwards from the back of the leg to the dog’s back. Measure horizontally (left to right from the dog’s perspective) from the center of the dog’s back to this imaginary vertical line. This distance will indicate where the belly strap, which goes across the stomach, should begin on your pattern, ensuring it sits correctly and comfortably.
Step 2. Prepare Your Pattern Paper and Draft the Base Rectangle
Tape down several sheets of your pattern paper together if necessary to create a large enough surface for your dog’s measurements. The first element you will draw on your pattern paper is a rectangle. This rectangle will form the main body of the dog coat and should have dimensions equal to your dog’s back length measurement by their side depth measurement. This establishes the fundamental shape of your coat.
Step 3. Halve the Neck Circumference Measurement
Take your dog’s total neck circumference measurement and divide it in half. This half measurement will be used in the next step to extend the pattern for the neck strap, as the pattern will be drafted as a half-pattern (to be cut on a fold or mirrored later).
Step 4. Extend a Line for the Neck Strap Foundation
From one side of the back length measurement of your main rectangle (e.g., if your back length was 22 inches in the example), extend a line outwards. The length of this new line should be equal to the half-neck circumference measurement you calculated in Step 3 (e.g., 8 inches in the example). This extension will form the starting point for your dog’s neck strap.
Step 5. Construct the Small Rectangle for the Neck Strap
At the end of the line you extended in Step 4, draw a line straight downwards. The length of this new vertical line should be the same as your dog’s chest depth measurement. Now, draw a horizontal line connecting the bottom of this new vertical line back to the original large rectangle. You have now created a smaller rectangle connected to the larger one. This smaller rectangle is the initial draft of the neck strap, which will eventually wrap comfortably around your dog’s neck.
Step 6. Begin Plotting the Neckline Curve
Focus on the lower right corner of the large rectangle, which is the area where the small rectangle (neck strap) is attached. From the very bottom corner of the large rectangle in this area, measure and mark a point approximately one inch upwards. For very small dogs, marking only about half an inch might be more appropriate. This mark is the starting point for the gentle curve of your dog’s neckline, ensuring it doesn’t chafe or sit too high.
Step 7. Determine the Midpoint of the Neck Strap Base
Measure the entire length of the bottom edge of the small rectangle (your neck strap). Divide this measurement in half and mark the exact center point. This midpoint will serve as a crucial guide for creating a smooth, symmetrical curve for the neckline in the subsequent step.
Step 8. Draw a Smooth Neckline Curve
Now, using your french curve ruler (or freehand if you’re confident), draw a smooth, continuous curve. This curve should connect the mark you made in Step 6 (on the large rectangle) to the center mark you made in Step 7 (on the small rectangle). This creates the natural, comfortable shape of the dog coat’s neckline, ensuring a snug yet non-restrictive fit around your dog’s throat.
Step 9. Verify and Adjust the Neckline Length
With your flexible tape measure, carefully measure the entire length of the newly drawn coat neckline. This includes the bottom corner of the big rectangle, along the curve you just drew, and then across the bottom of the small rectangle. Your goal is for this measured line to be approximately one inch longer than half of your dog’s total neck circumference. For instance, if half the neck circumference is 8 inches, aim for a neckline length of 9 inches. This additional inch allows for overlap when fastening the neck strap, providing adjustability. If your current neckline length is too long or too short, you can slightly shorten or lengthen the small rectangle by bringing its edge in or out until you achieve the desired length. Precision here will ensure the neck strap fastens perfectly.
Step 10. Shape the End of the Neck Strap for Comfort and Aesthetics
To give the end of the neck strap a finished and comfortable shape, first, mark the middle of the chest depth line (the vertical line of the small rectangle that extends downwards). On each side of the strap, measure and mark one inch from the very end of the strap. Now, use your french curve ruler to draw a smooth curve connecting these two one-inch marks to the central midpoint you just established. Once this graceful curve is drawn, you can erase the sharp corners of the small rectangle, leaving a beautifully rounded and comfortable neck strap. This final shaping step enhances both the look and wearability of your custom dog coat.
Beyond the Pattern: Assembling Your Handcrafted Dog Coat
Now that your custom pattern is complete, the exciting part begins: bringing your dog coat to life with fabric and stitches! The detailed pattern you’ve just created will ensure a perfect fit, and now we focus on the careful construction.
Cutting Your Fabric Pieces
Lay your chosen fabric flat, making sure it’s smooth and without wrinkles. If your fabric has a nap (like fleece) or a distinct pattern, pay attention to the direction. Pin your drafted paper pattern securely to the fabric. If your pattern represents half of the coat, place the straight edge of the main rectangle along the fabric fold. Carefully cut out the fabric pieces using your sharp fabric scissors. Remember to add a seam allowance (typically 1/2 inch) around all edges unless your pattern explicitly includes it. If you’re using a lining fabric for extra warmth or comfort, cut out identical pieces from your lining material.
Sewing the Main Body and Straps
Begin by sewing the main body pieces together if your design requires more than one panel. With a fleece or similar fabric, you might have just one main body piece. Next, focus on the neck strap. Fold the neck strap fabric right sides together (if you have two strap pieces or are adding a lining) and stitch along the edges, leaving one end open for turning. If you have a single piece of fabric for the strap, you might hem the edges or prepare it for bias tape application directly.
Attaching the Bias Tape for a Professional Finish
Bias tape is a fantastic tool for creating clean, finished edges and preventing your fabric from fraying. It also adds a nice decorative touch. Open up one side of your extra-wide bias tape and align its raw edge with the raw edge of your dog coat, right sides together. Pin it securely all around the perimeter of the coat, including the edges of the neck and belly straps. Stitch along the fold line of the bias tape. Then, fold the bias tape over the raw edge to the wrong side of the fabric and topstitch it down. This encloses the raw edge neatly, giving your dog coat a durable and polished look.
Adding the Hook-and-Loop Fasteners (Velcro)
The hook-and-loop fasteners are crucial for making your dog coat adjustable and easy to put on and take off. Determine the best placement for the fasteners on both the neck strap and the belly strap. Typically, the “hook” side (the rougher side) is placed on the underside of one strap end, and the “loop” side (the softer side) is placed on the top side of the other strap end, allowing them to overlap and secure. Pin the Velcro pieces firmly in place. Stitch around all four sides of each Velcro piece, making sure to reinforce the stitching for durability, as these areas will experience frequent use and stress.
Optional Enhancements for Ultimate Comfort and Safety
- Add a Lining: For extra warmth, especially in colder climates, consider adding a soft lining (like a second layer of fleece or flannel) to the inside of the coat. You can sew the lining and outer fabric together, right sides facing, leaving an opening to turn it inside out before closing the opening with a slip stitch.
- Reflective Strips: For nighttime safety, sew reflective strips onto the outer fabric, particularly along the back or sides of the coat.
- Harness Opening: If your dog wears a harness under their coat, consider creating a small, reinforced opening in the back of the coat to allow the harness D-ring to poke through.
- Personalized Touches: Embellish your coat with embroidered initials, decorative patches, or even a small pocket for treats or waste bags.
Tips for a Successful Sewing Project
- Measure Twice, Cut Once: This old adage is especially true for custom projects. Double-check all your dog’s measurements before you start drafting.
- Use Quality Materials: Investing in good fabric and thread will result in a more durable and comfortable coat.
- Test Fit the Pattern: Before cutting your final fabric, consider making a “muslin” or test version out of inexpensive fabric (like an old sheet) to ensure the pattern fits your dog perfectly.
- Press Your Seams: Ironing seams flat as you go creates a much more professional and tidy finish.
- Don’t Rush: Take your time with each step. Sewing is a rewarding hobby, and the process should be enjoyable.
Want to see the full article?
Keep Reading Here On Our Sister Site Sewing!
Providing additional warmth and comfort for your pooch will surely help their body adjust to the cold weather, allowing them to enjoy all their outdoor activities. You and your dog can now enjoy going out for walks, runs, or even just playing in the snow, knowing they are snug and protected. This handmade dog coat isn’t just a practical item; it’s a testament to your dedication and love for your furry family member. Share this tutorial with your friends and fellow pet lovers so they can also make a custom, stylish, and warm coat for their beloved pets. Happy sewing, and enjoy the winter adventures!
What do you think of these custom dog coats? We’d love to hear your thoughts! Let us know by leaving a comment below, and make sure to share some pictures if you tried making one for your furry friend! And while you’re at it, give some extra love to your pooch with these delicious homemade dog treats!
Stay connected with us on Facebook, Twitter, Pinterest and Instagram for more inspiring DIY projects!
Featured image via Professor Pincushion