
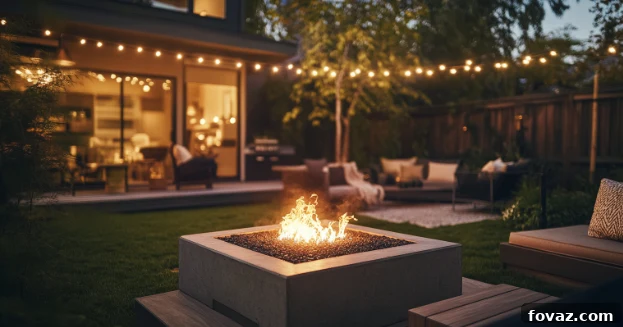
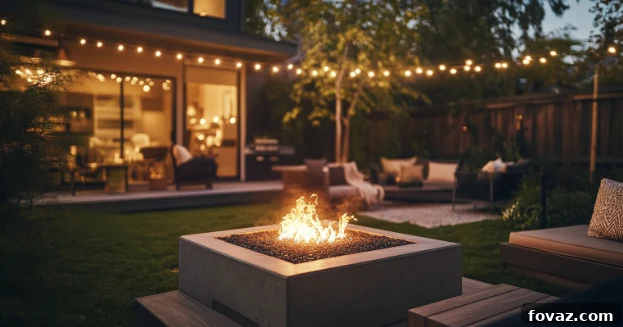
Transforming your backyard into an inviting oasis often begins with a focal point—and a custom-built fire pit is precisely that. More than just a place to burn wood, a well-designed fire pit area becomes the vibrant heart of outdoor living, creating cherished memories under the open sky. Imagine crisp evenings spent toasting marshmallows, sharing stories with loved ones, or simply unwinding by the mesmerizing glow of dancing flames. This comprehensive guide will walk you through every essential step to constructing a safe, stylish, and durable backyard fire pit that will undoubtedly become the highlight of your outdoor space. From selecting the perfect spot to designing comfortable seating and ensuring proper maintenance, we’ll help you create an enchanting gathering place where unforgettable moments are made.
1. Choosing the Ideal Spot for Your Backyard Fire Pit
The foundation of any successful fire pit project begins with thoughtful planning, and selecting the right location is paramount. Safety should always be your highest priority. Before you even think about digging, identify a clear, open area that is a minimum of 10 to 20 feet away from your house, garage, fences, trees, shrubs, pergolas, and any other combustible structures or overhanging foliage. This critical buffer zone helps prevent accidental fires and ensures everyone’s safety.
Beyond safety, consider the prevailing wind direction in your yard. Position your fire pit so that smoke is consistently carried away from your primary seating area, preventing discomfort for your guests. A flat, level surface is ideal for construction and stability. If your chosen spot has a slight slope, you’ll need to prepare the ground by leveling it thoroughly before laying any materials. Also, take a moment to assess the aesthetics: how will the fire pit integrate with your existing landscaping? Will it offer a pleasant view from your home? Finally, always check your local fire codes and municipal regulations. Some areas have strict rules regarding open flames, permissible fire pit types, or require specific permits, especially during dry seasons. Ignoring these regulations can lead to fines or safety hazards.
🔥 Pro Tip: Many city and county websites provide online resources detailing specific fire pit regulations, burning bans, and permit requirements for outdoor fire features. Consulting the National Fire Protection Association (NFPA) website can also offer invaluable guidelines on safe outdoor fire practices and best design principles for residential fire pits.
2. Essential Materials and Tools for Your Fire Pit Project
Once your ideal location is identified and local regulations are confirmed, it’s time to gather the necessary supplies and equipment. Having everything on hand before you start will make the construction process much smoother and more efficient. Here’s a detailed list of what you’ll need:
- Fire Pit Bricks or Heat-Resistant Retaining Wall Blocks: These are the core structural components of your fire pit. It’s crucial to use materials specifically designed to withstand extreme heat, such as fire bricks, natural stone, or engineered retaining wall blocks. Avoid standard concrete blocks, river rocks, or limestone, as they can crack or even explode when exposed to high temperatures due to trapped moisture.
- Fire-Resistant Adhesive or Mortar: This specialized material is used to secure your bricks or blocks together, ensuring a stable and long-lasting structure. Choose an adhesive or mortar that is rated for high temperatures to prevent deterioration and maintain structural integrity.
- Steel Fire Ring (Optional, but Highly Recommended): A steel fire ring, also known as a fire pit insert, is placed inside the brick structure. It provides an additional layer of protection for your masonry from direct flame contact, extends the life of your fire pit, and makes ash clean-up easier.
- Gravel or Sand for the Base: These materials are used to create a stable, level, and well-draining foundation beneath your fire pit. Gravel is particularly effective at preventing water accumulation, which can cause damage to the structure over time.
- Shovel and Rake: Essential tools for digging the pit, removing debris, spreading base materials, and leveling the ground. A sturdy garden shovel and a heavy-duty rake will serve you well.
- Tape Measure and Level: Accuracy is key in construction. A tape measure will ensure your fire pit is the correct diameter, while a spirit level is indispensable for ensuring each brick layer is perfectly horizontal, preventing a crooked or unstable structure.
- Tamper or Hand Compactor: Used to compact the soil and the gravel/sand base, creating a dense, stable, and unyielding foundation that prevents settling and shifting over time. A plate compactor can be rented for larger areas, but a hand tamper works well for fire pits.
- Work Gloves and Safety Glasses: Always prioritize personal safety. Gloves protect your hands from abrasions and blisters, while safety glasses shield your eyes from dust and debris.
For a more polished and functional fire pit area, consider extending your project to include a surrounding patio. Materials like interlocking pavers, natural flagstone, or decorative gravel can create a clean, defined, and mud-free surface for your seating, enhancing both aesthetics and usability. This defined zone also helps keep sparks contained and makes the area feel more cohesive.
3. Preparing the Site: Marking and Excavation
With your location chosen and materials gathered, the next phase is preparing the ground. This step is crucial for the stability and longevity of your fire pit. Start by clearly marking the outline of your fire pit. A typical fire pit ranges from 36 to 44 inches in diameter, which provides ample space for a good fire while maintaining a safe distance from seating. You can use spray paint, a length of string tied to a central stake, or even a garden hose to visualize and mark the circular shape on the ground.
Once the outline is marked, begin digging the hole. The ideal depth for your fire pit base is 6–8 inches. This depth provides a robust foundation and allows for the necessary drainage layers. As you dig, remove any rocks, roots, or other debris that could compromise the stability of your base. Use a rake to smooth out the bottom of the excavated area, ensuring it’s as level as possible. Next, and this step is vital, compact the exposed soil using your tamper. A solid, compacted sub-base will prevent your fire pit from settling unevenly over time. For superior drainage and an even more stable foundation, spread a 2-inch layer of crushed gravel or sand evenly across the compacted soil and compact it again.
🔥 Did You Know? Incorporating a layer of gravel or sand into your fire pit’s base is a game-changer for drainage. It prevents water from pooling inside your fire pit, which is essential for protecting your bricks or blocks from freeze-thaw cycles that can cause cracking and damage. Good drainage extends the lifespan of your fire pit and keeps it looking great.
4. Building the Core: Constructing Your Fire Pit Wall
Now comes the exciting part: constructing the physical walls of your fire pit. This is where your vision truly begins to take shape. Begin by laying the first course of bricks or blocks directly onto your compacted gravel or sand base, following the circular outline you’ve prepared. Ensure each brick is placed snugly against its neighbor, minimizing gaps. Use your spirit level constantly to check that each brick is perfectly level, both individually and in relation to the others in the row. This first course sets the tone for the entire structure, so take your time to get it right.
If you’ve opted to use a steel fire ring insert, it’s advisable to place it inside the first course of bricks to ensure a proper fit before you begin securing the bricks. Once the first course is perfectly positioned and leveled, apply your fire-resistant adhesive or mortar to the top surface of these bricks. Then, begin stacking the second course. For maximum strength and stability, always stagger the joints in each subsequent row, much like bricklaying on a house. This means that the vertical joints of one row should not align with the vertical joints of the row below it. Continue stacking bricks, applying adhesive between each course, until you achieve your desired height, typically two or three layers (approximately 12-18 inches high) for a comfortable and safe fire pit.
After all courses are laid and secured, allow the fire-resistant adhesive or mortar to cure fully. This usually takes at least 24 to 48 hours, depending on the product and weather conditions. Resist the urge to light your first fire immediately, as proper curing is essential for the structural integrity and longevity of your new fire pit.
🔥 Want expert tips? For advanced techniques on laying masonry and ensuring a rock-solid foundation, consider consulting resources from trusted home improvement experts. This Old House offers a wealth of detailed guides and videos on building various outdoor structures, including robust fire pit foundations.
5. Crafting the Perfect Ambiance: Designing a Comfortable Seating Area
A beautifully built fire pit deserves an equally inviting and functional seating area. This is where you can infuse personality and maximize comfort for countless hours of enjoyment. Thoughtful design of the surrounding space will transform your fire pit from a mere structure into a true outdoor living room. Consider these ideas to enhance both comfort and functionality:
- Built-in Stone Benches: For a permanent, low-maintenance, and stylish option, consider constructing built-in benches using the same or complementary stone as your fire pit. These offer a cohesive look and define the perimeter of your gathering space.
- Adirondack Chairs: A classic choice, Adirondack chairs provide a relaxed, laid-back, and incredibly cozy feel. Their sloped backs and wide armrests are perfect for unwinding by the fire. Choose weather-resistant materials like cedar, recycled plastic, or treated hardwood.
- Modern Outdoor Sofas and Sectionals: For a more luxurious and social setting, modular outdoor sofas or sectionals can create a plush and comfortable lounging area, perfect for larger gatherings. Ensure they are made from outdoor-grade, weather-resistant fabrics and frames.
- Gravel, Paver, or Flagstone Patio: Creating a defined patio surface around your fire pit using gravel, interlocking pavers, or natural flagstone ensures a clean, level, and mud-free surface. This also acts as an important fire break, separating the immediate fire pit area from grass or other flammable elements.
- Outdoor Cushions and Rugs: Add a touch of color, texture, and additional comfort with weather-resistant outdoor cushions for your seating and a durable outdoor rug. These elements soften the space and make it feel more like an extension of your indoor living area.
- Accent Tables and Storage: Include small side tables for drinks and snacks, or consider ottomans that double as extra seating or storage for blankets and fire pit tools.
Don’t forget the magic of lighting! String lights draped overhead, strategically placed solar lanterns, or even integrated LED lighting in benches can dramatically enhance the ambiance of your fire pit area after dark. This not only creates a welcoming, enchanting atmosphere but also significantly improves visibility, making the space safer and more enjoyable for evening use.
6. Fire Pit Safety and Long-Term Maintenance
While a backyard fire pit offers immense enjoyment, responsible usage and consistent maintenance are non-negotiable for ensuring safety and preserving your investment. Adhering to strict safety protocols is paramount to prevent accidents and protect your property. Keep these crucial tips in mind every time you use your fire pit:
- Always Have Safety Gear Nearby: Before lighting any fire, ensure you have a bucket of water, a shovel full of sand, or a readily accessible fire extinguisher within arm’s reach. These tools are your first line of defense in case of an unexpected flare-up.
- Burn Only Seasoned Hardwood: For a cleaner burn with less smoke and fewer sparks, always use seasoned hardwood like oak, hickory, maple, or ash. Seasoned wood has been dried for at least 6-12 months, reducing its moisture content. Never burn construction waste, treated lumber, painted wood, or softwoods like pine or cedar, as they can release harmful chemicals, create excessive smoke, or produce dangerous sparks.
- Avoid Flammable Accelerants: Never use gasoline, lighter fluid, or other petroleum-based accelerants to start or rekindle a fire. Opt for natural fire starters such as kindling, newspaper, or commercial fire starter blocks, which ignite safely and predictably.
- Supervise Constantly: A burning fire pit should never be left unattended, even for a moment. This is especially critical when children or pets are present. Establish clear safety zones and educate everyone on how to behave safely around fire.
- Ensure Proper Extinguishment: Before leaving your fire pit for the night, make absolutely certain the flames are fully extinguished and the embers are cool to the touch. Douse the embers with water, stirring them with a shovel, until there is no steam or sizzle, indicating the fire is completely out.
- Regular Ash Removal: To maintain proper airflow and prevent excessive build-up, regularly remove ashes from your fire pit. Allow the ashes to cool completely for at least 24 hours before scooping them into a metal container with a lid. Never dispose of ashes in plastic or combustible containers.
- Cover When Not in Use: Protect your fire pit from the elements (rain, snow, debris) by using a durable, weather-resistant cover when it’s not in use. This prevents water damage, keeps the interior clean, and extends the lifespan of your materials.
- Inspect for Damage: Periodically inspect the bricks or blocks of your fire pit for any cracks or signs of wear. Address minor damage promptly to prevent it from worsening.
🔥 Bonus Tip: For comprehensive fire safety education and resources, the Smokey Bear Website is an excellent national resource. It offers valuable information on preventing outdoor fires and practicing fire safety in various environments.
Enjoying Your Backyard Fire Pit: A New Centerpiece for Outdoor Living
By diligently following these detailed steps, you can successfully build a functional, safe, and incredibly inviting backyard fire pit. This outdoor feature will quickly transform your yard into a favorite gathering spot, offering endless opportunities for relaxation and connection. Whether you’re roasting classic s’mores with the kids, catching up with friends over a crackling blaze, or simply unwinding under a blanket of stars, your new fire pit will become the heart of your outdoor living space, creating a lifetime of cherished memories.
Are you feeling inspired and ready to get started on your own backyard transformation? We’d love to hear about your plans and see your creations! Leave a comment below and tell us how your backyard fire pit project turned out! 🔥
Frequently Asked Questions (FAQs) About Backyard Fire Pits
1. Do I need a permit to build a backyard fire pit?
The requirement for a permit to build a backyard fire pit depends entirely on your specific local regulations, which vary widely by city, county, and homeowner’s association. Some areas strictly require permits for any permanent outdoor fire structure, while others have specific fire safety rules regarding size, distance from structures, and materials without requiring a full permit. It is absolutely essential to check with your local municipal planning or fire department before you begin your project to avoid potential fines or having to dismantle your work.
2. What materials should I avoid using for my fire pit?
It is critical to avoid certain materials when constructing your fire pit due to safety concerns. Steer clear of regular concrete blocks, river rocks, and limestone. These materials are generally porous and can contain trapped moisture. When exposed to the extreme heat of a fire, this moisture rapidly expands, potentially causing the material to crack, chip, or even explode, posing a significant safety risk. Instead, always opt for materials specifically designed to withstand high temperatures, such as fire bricks, engineered heat-resistant retaining wall blocks, or natural hard stones like granite or slate.
3. How deep should I dig for a fire pit base?
For a stable and durable fire pit, an excavation depth of 6–8 inches for the base is ideal. This depth provides sufficient space to create a solid foundation layer, typically consisting of 2-4 inches of compacted soil followed by 2-4 inches of compacted gravel or sand. This multi-layered approach ensures excellent stability, proper water drainage, and helps prevent the fire pit from settling or shifting over time due to weather or use.
4. Can I place my fire pit on grass or a wooden deck?
It is generally not recommended to place a permanent fire pit directly on grass or a wooden deck due to significant fire hazards. Grass is combustible, and wood decks can easily catch fire from sparks or radiant heat. Fire pits should always sit on non-flammable, heat-resistant surfaces such as a prepared gravel bed, stone patio, concrete slab, or dirt. If you must place a portable fire pit on a wooden deck, it is imperative to use a large, certified fire-resistant mat or pad underneath it to protect the surface from heat and embers, and always ensure adequate clearance.
5. What’s the best type of wood to burn in a fire pit?
The best type of wood to burn in a fire pit is seasoned hardwood, such as oak, hickory, maple, ash, or birch. Hardwoods burn longer, produce more consistent heat, and create less smoke and fewer sparks compared to softwoods. “Seasoned” means the wood has been dried for at least 6-12 months, reducing its moisture content, which also contributes to a cleaner, more efficient burn. Avoid burning treated lumber, painted wood, or green (unseasoned) wood, as they can release harmful chemicals and produce excessive smoke.
6. How do I reduce smoke from my fire pit?
To significantly reduce smoke from your fire pit, always use dry, well-seasoned hardwood. Unseasoned wood with high moisture content is a primary cause of excessive smoke. Arrange your logs in a teepee or log cabin style, which promotes better airflow and a more complete burn. Avoid overfilling the fire pit. Additionally, ensure your fire pit has proper ventilation at its base. For those seeking the absolute minimum amount of smoke, investing in a specialized smokeless fire pit design, which utilizes unique airflow systems to re-burn smoke particles, is an excellent option.
7. How do I safely put out a fire in my fire pit?
To safely extinguish a fire in your fire pit, allow the flames to burn down naturally to embers. Once only embers remain, carefully pour water over them while stirring with a shovel or poker. Continue adding water and stirring until there is no longer any steam rising and the embers are completely cool to the touch. Never leave a fire unattended until it is fully extinguished. Alternatively, you can cover the fire pit with a metal lid to smother the flames, but still confirm embers are cool before leaving.
8. What’s the ideal size for a backyard fire pit?
Most backyard fire pits typically range from 36 to 44 inches in diameter (outer dimensions). This size is generally considered ideal because it provides enough space for a robust fire that can comfortably warm a small group, while also maintaining a safe distance from seating areas to prevent excessive heat or stray sparks. A fire pit that is too small might not provide enough warmth or space for logs, while one that is too large can become overwhelming for a typical backyard setting.
9. How do I keep my fire pit in good condition?
Maintaining your fire pit ensures its longevity and aesthetic appeal. Regularly remove ashes after each use (once completely cooled) to maintain proper airflow and prevent corrosive build-up. Keep the area dry, especially the interior, to prevent moisture damage to masonry. The most effective way to protect your fire pit from weather and debris is to cover it with a durable, weather-resistant cover when not in use. Periodically inspect the bricks or stone for any cracks, loose mortar, or wear, and address these issues promptly to prevent further deterioration.
10. Can I cook over my backyard fire pit?
Yes, absolutely! Backyard fire pits are fantastic for cooking, providing a rustic and enjoyable culinary experience. For best results and safety, use a dedicated grill grate that can be placed over the flames, keeping food elevated from the direct fire. Stick to burning seasoned hardwoods, as they impart a pleasant flavor and produce less sap and fewer unwanted chemicals compared to softwoods. Avoid burning any treated or painted wood if you plan to cook over the fire, as these can release harmful substances into your food.