
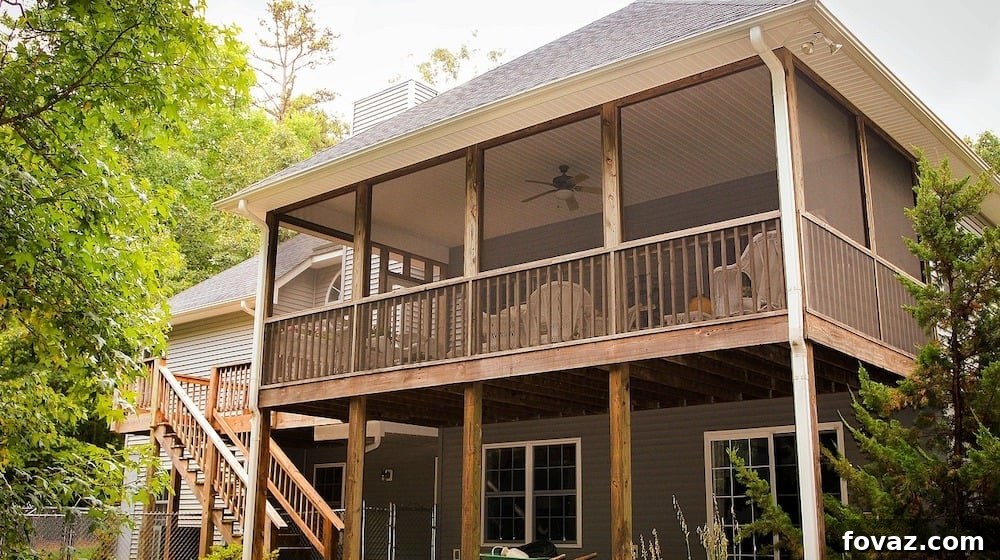
There’s nothing quite like the tranquility of a cool evening spent outdoors, perhaps with a glass of wine, free from the annoyance of insects. If you’ve been dreaming of transforming your outdoor space into a comfortable, bug-free haven, building a screened-in porch yourself is an achievable and rewarding project. This comprehensive guide will walk you through everything you need to know to construct an amazing and affordable screened-in porch, turning your patio into a beloved extension of your home.
Transform Your Patio: A Complete Guide to Building an Affordable Screened-In Porch
Many homeowners are looking for ways to enhance their outdoor living experience without breaking the bank. Converting an existing concrete patio into a screened-in porch is an excellent DIY solution that offers significant benefits. Not only does it provide a comfortable space to relax and entertain, but it also adds considerable value to your home. With some careful planning, the right tools, and a willingness to get hands-on, most do-it-yourselfers can successfully tackle this project.
Why a Screened-In Porch is a Must-Have for Your Home
A screened-in porch is more than just an addition; it’s an investment in your lifestyle and property. Here’s why it’s such a popular home improvement:
- Enhanced Outdoor Comfort: Say goodbye to pesky mosquitoes, flies, and other insects that often cut short outdoor gatherings. A screened porch allows you to enjoy the fresh air and natural surroundings without any unwanted guests.
- Increased Home Value: A well-built screened porch is a highly desirable feature for prospective homebuyers. It effectively expands your usable living space, often offering a return on investment that exceeds its material costs.
- Versatility and Future Adaptability: While initially designed for screens, many homeowners choose to build their porches with future upgrades in mind. With minimal modifications, your screened porch can often be converted into a three-season room by adding removable window panels, allowing for enjoyment even in cooler weather. Options range from simple clear acrylic plastic sheets to more permanent glass window installations.
- Affordable Entertainment Space: Compared to building an entirely new room or a full sunroom, a DIY screened porch is a much more budget-friendly way to create a dedicated space for relaxation, dining, and entertaining.
Strategic Planning for Your Screened Porch Project
Successful construction begins with meticulous planning. Taking the time to consider these factors will ensure a smoother build and a porch that perfectly suits your needs.
Assessing Your Existing Patio and Space
Your current patio serves as the foundation for your screened porch. Evaluate its condition for any cracks or unevenness that might need addressing. Consider its size, shape, and location relative to your house. How much sun does it get? Where are the best access points? These details will influence your design choices.
Key Design Considerations
- Optimal Size: While you might envision a “small” porch, don’t undersize it. For comfortable seating for four people with chairs and a couple of small tables for drinks or newspapers, an 8×10 foot area is generally considered a minimum. An 8×12 foot porch would offer even more spaciousness and flexibility for furniture arrangement. Think about how you plan to use the space and what furniture you’ll want to include.
- Roof Style: For DIY projects, a simple shed roof is often the easiest and most cost-effective. This design involves one side of the roof being higher than the other, creating a slope for water runoff. More complex gable or hip roofs require advanced carpentry skills.
- Material Choices: Pressure-treated lumber is essential for any wood components that will be exposed to the elements or in contact with concrete. It resists rot and insect infestation. Consider the type of screening material (fiberglass, aluminum, pet-resistant) and roofing materials (shingles, metal panels) based on your budget and desired durability.
- Door Placement: Plan for a hinged screen door positioned conveniently, ideally close to your back door or main house entry.
Understanding Local Building Codes and Permits
Before you lift a hammer, it is crucial to check with your local municipality or county building department. Most significant structural additions, even screened porches, require building permits to ensure they meet safety and structural standards. Failing to obtain necessary permits can lead to fines, forced demolition, or difficulties when selling your home. Be prepared for inspections at various stages of construction.
Budgeting for an Inexpensive Build
To keep costs down, focus on sourcing materials wisely. Consider:
- Reclaimed Materials: Check with local window contractors for inexpensive “scrap” windows. Sometimes, custom-sized windows are made incorrectly or cancelled by a client, and contractors often sell them at a steep discount just to clear inventory. The same can apply to screen doors.
- Sales and Discounts: Keep an eye out for sales on lumber, roofing, and screening materials at home improvement stores.
- DIY Labor: Your labor is your biggest cost-saver. The more you do yourself, the less you’ll spend on professional contractors.
Essential Tools and Materials for Your DIY Screened Porch
Having the right tools and materials on hand will make the construction process much smoother and more efficient. Here’s a list to help you prepare:
Key Tools You’ll Need
- Measuring Tape and Pencil
- Level (long and short)
- Circular Saw and Miter Saw (for precise cuts)
- Cordless Drill/Driver with various bits
- Hammer
- Staple Gun (heavy-duty for screens)
- Safety Glasses and Work Gloves (always prioritize safety!)
- Concrete Drill Bit and Masonry Anchors
- Post Hole Digger (if new footings are needed)
- Caulking Gun
Primary Materials List
- Lumber: Pressure-treated 4x4s for posts, 2x4s or 2x6s for beams and rafters.
- Screening Material: Fiberglass (most common, affordable), aluminum (more durable), or pet-resistant screen.
- Screen Framing: Either wood for custom frames or pre-made screen framing kits (channels and splines).
- Hardware: Wood screws (exterior grade), lag bolts, concrete anchors/fasteners, metal post bases/sockets, hinges for the screen door.
- Roofing: Plywood sheathing (typically 1/2 inch), roofing felt, asphalt shingles or metal roofing panels.
- Sealants: Adhesive-backed foam weatherstripping, exterior caulk.
- Optional: Scrap windows, pre-hung screen door, exterior paint or stain.
Step-by-Step Guide to Building Your Screened-In Porch
Now that your planning is complete and you have your materials, it’s time to start building!
Step 1: Preparing Your Patio Foundation
Start by thoroughly cleaning your existing concrete patio. If there are minor cracks, repair them with a concrete patching compound. Use chalk lines to accurately mark the footprint of your new screened porch on the patio surface, ensuring it is square and aligned with your house.
Step 2: Erecting the Main Support Structure
This is arguably the most critical and challenging part of the job.
- Attaching Vertical Posts to Concrete: You will need to install vertical post supports, which are short metal sockets designed to hold the corner wood beams. Drill into the concrete patio at your marked post locations using a masonry drill bit. Secure the metal sockets in place using appropriate concrete anchors or pop rivets, ensuring they are perfectly plumb and aligned.
- Addressing Patio Movement: Most patios are not built on deep footings and can shift slightly with seasonal changes, especially in colder climates where ground freezing and thawing occur. For this reason, it’s crucial not to rigidly attach the porch’s house-side beam directly to the house. The house foundation is stable, and rigid attachment could lead to stress and damage. Instead, use flexible flashing or a sealant strip to create a weather-tight but slightly flexible connection.
- Framing the Perimeter: Once your posts are anchored, install horizontal beams to connect them, forming the perimeter of your porch frame. Use a level extensively to ensure all beams are perfectly horizontal and the structure is square.
Step 3: Building the Roof Frame
A properly sloped roof is essential for effective water drainage and the longevity of your porch.
- Creating the Slope: Make the corner posts on the house side longer than the outer posts. This difference in height will create a gentle slope, directing rainwater away from your house and screens. A minimum slope of 1/4 inch per foot is generally recommended.
- Installing Rafters: Securely attach rafters between the higher house-side beam and the lower outer beam. Ensure consistent spacing for even weight distribution.
- Applying Roofing: Cover the rafters with plywood sheathing (typically 1/2 inch thick), screwing it firmly into place. Extend the plywood roof at least two feet past the end of the porch frame. This overhang will allow water to run off clear of the screens, preventing splash-back and keeping the porch drier. Apply roofing felt over the plywood, followed by your chosen roofing material like asphalt shingles or metal panels.
Step 4: Framing for Screens and Doors
With the main structure and roof complete, you’ll now create the openings for your screens and doors.
- Interior Framing: Install additional 2×4 framing between your main support posts to create rectangular openings for your screen panels. This provides attachment points for either custom-built screen frames or screen framing kits.
- Screen Door Opening: Build a robust, heavy-duty frame for your screen door. Children often swing on screen doors, so sturdy construction here is vital. If you sourced a scrap screen door, build the opening to fit its exact dimensions.
Step 5: Installing the Screens
This step brings your “screened” porch to life.
- DIY Screen Frames: This is the most economical method. Cut simple wood frames to fit snugly into each framed opening. Stretch your screening material tautly over these frames and secure it with a heavy-duty staple gun. To seal out insects and create a clean appearance, apply thin, adhesive-backed foam weatherstripping to the back of the frames before screwing them into the porch framing. Position the stapled side against the porch frame for a neater finish.
- Screen Framing Kits: A slightly more expensive but often easier option involves purchasing specialized screen framing kits. These kits typically consist of channels and splines that snap together, holding the screening taut without the need for staples or wood frames. You can find these at most home improvement stores or from specialized manufacturers.
- Screen Material Choice: Fiberglass is the most common and cost-effective, offering good visibility and durability. Aluminum screen is more rigid and resistant to sagging. Pet-resistant screen is a heavier-duty option designed to withstand pet claws.
Step 6: Installing the Screen Door
Hang your hinged screen door within the heavy-duty frame you constructed. Ensure it swings freely, closes securely, and latches properly. Adjust hinges as needed for perfect alignment.
Step 7: Finishing Touches
Once the basic structure is complete, you can add personal touches.
- Painting or Staining: Protect your wood structure with an exterior-grade paint or stain that complements your home’s aesthetic.
- Trim Work: Add decorative trim around screen panels and the door for a polished look.
- Lighting: Install outdoor-rated lighting fixtures to extend the usability of your porch into the evenings.
- Furnishing: Arrange your comfortable outdoor furniture, small tables, and décor to create your inviting new sanctuary.
Tips for Maximizing Affordability and Longevity
To ensure your screened porch remains inexpensive and durable:
- Scrap & Reclaimed Materials: As mentioned, check with contractors for discounted windows or doors. Consider reclaimed lumber if available and in good condition.
- Simple Design: Stick to straightforward designs for the roof and framing. Intricate details add cost and complexity.
- Regular Maintenance: Periodically inspect your porch for any signs of wear, especially on the wood and screens. Clean screens regularly to maintain visibility and airflow. Promptly repair any tears in the screening or damage to the wood to prevent small issues from becoming larger, more costly problems.
Enjoy Your New Outdoor Oasis
Building your own screened-in porch is a significant undertaking, but the satisfaction of creating a beautiful, functional space with your own hands is immense. You’ll soon be enjoying countless cool evenings, bug-free relaxation, and cherished moments with family and friends in your new outdoor sanctuary. Your DIY spirit will not only save you money but also provide a custom space perfectly tailored to your home.