
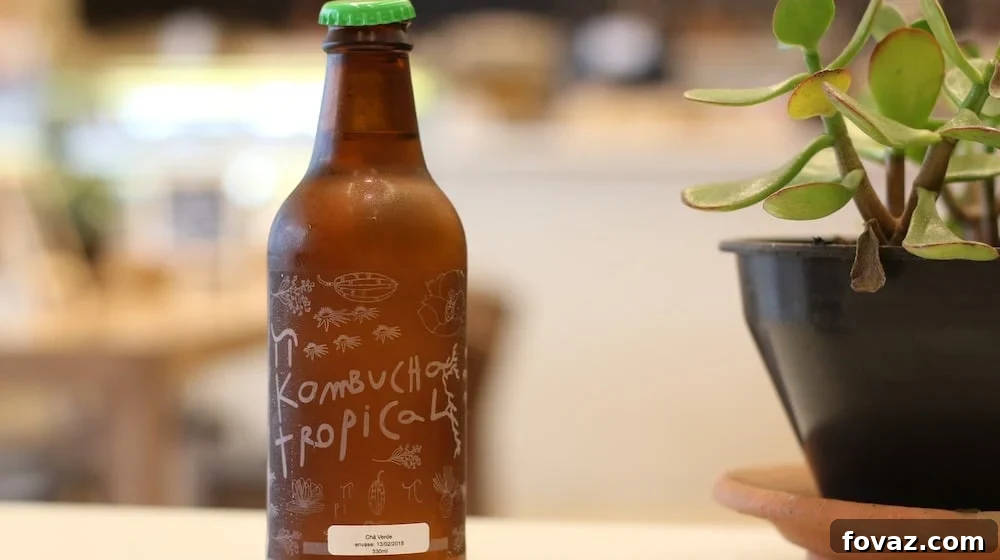
Have you been curious about the booming popularity of Kombucha? This ancient, effervescent tea has captured the hearts of health enthusiasts worldwide, and for good reason. Kombucha is a raw, naturally carbonated, and probiotic-rich fermented tea, celebrated for its unique tangy flavor and purported health benefits. Its journey began over two millennia ago, with origins traced back to Northeast China or Manchuria around 220 BCE. From there, this healthful elixir spread across Asia and into Russia, eventually making its way to Western cultures.
The rise of Kombucha in the American 1970s marked a pivotal moment, as a generation focused on health and wellness embraced this fermented beverage. It quickly transcended its traditional roots, evolving from a local remedy to a symbol of counter-culture health consciousness. Today, brewing Kombucha at home has become a beloved practice for many, offering a rewarding way to enjoy this vibrant drink and connect with a time-honored tradition. If you’re ready to embark on your own brewing adventure, you’ve come to the right place.
Unlock the Secrets of Homemade Kombucha Tea
While scientific research into the health benefits of kombucha is ongoing and specific claims require further validation, many dedicated drinkers enthusiastically report a range of positive effects. From improved digestion and gut health to increased energy and detoxification support, the anecdotal evidence is compelling. Regardless of the scientific consensus, the simple pleasure of brewing your own wholesome, naturally fizzy drink is a reward in itself. We’re thrilled to share a comprehensive homemade kombucha recipe, designed to guide you through every step of the process. This recipe, adapted with insights from various expert brewers including the brilliant minds at The Kitchn, will empower you to create your very own batch of this delightful fermented beverage.
This comprehensive recipe yields approximately 1 gallon of delicious kombucha, perfect for getting started with your brewing journey.
Why Choose to Brew Kombucha at Home?
Diving into homebrewing Kombucha offers several compelling advantages. Firstly, it gives you complete control over the ingredients, ensuring you use high-quality teas, organic sugar, and your preferred flavorings. This eliminates concerns about artificial additives, excessive sugar, or pasteurization often found in commercial varieties, which can diminish beneficial probiotics. Secondly, brewing your own kombucha is significantly more cost-effective in the long run. The initial investment in supplies quickly pays for itself, especially if you’re a regular kombucha drinker. Finally, there’s an immense satisfaction that comes from creating something so vibrant and healthy with your own hands. It’s a meditative process that connects you to ancient traditions and the living world of fermentation, allowing for endless experimentation with flavors and fermentation times to suit your palate perfectly.
Essential Supplies and Ingredients for Your Kombucha Brew
Embarking on your kombucha brewing adventure requires a few key ingredients and pieces of equipment. The heart of kombucha lies in the SCOBY – a Symbiotic Culture Of Bacteria and Yeast – which transforms sweet tea into the tangy, probiotic-rich drink we love. Gathering everything before you start will ensure a smooth and enjoyable brewing process.
Ingredients:
- 3 ½ quarts (approximately 3.3 liters) filtered water: The foundation of your tea. Using filtered water is crucial to avoid chlorine or other chemicals that could harm your SCOBY.
- 1 cup (200g) granulated white sugar: This is food for your SCOBY. While it may seem like a lot, the bacteria and yeast consume most of it during fermentation, leaving behind a much lower sugar content.
- 8 bags black tea (or 2 tablespoons loose leaf black tea): Black tea provides the ideal nutrients for a strong and healthy SCOBY. Avoid flavored teas or those with oils initially, as they can sometimes hinder SCOBY health.
- 2 cups starter tea (from a previous batch of homemade kombucha or unpasteurized, neutral-flavored store-bought kombucha): This acidic liquid jump-starts the fermentation and helps prevent mold. It’s vital for a successful brew.
- 1 healthy SCOBY (Symbiotic Culture Of Bacteria and Yeast) per fermentation jar: This is the living culture that performs the fermentation. It should look like a pale, rubbery disc.
- Optional flavoring extras for bottling (Second Fermentation): This is where you can get creative!
- 1 to 2 cups chopped fruit (e.g., berries, ginger, pineapple)
- 2 to 3 cups fruit juice (e.g., apple, grape, cherry)
- 1 to 2 tablespoons flavored tea (like hibiscus or Earl Grey – use sparingly and cautiously, especially with Earl Grey’s oils)
- ¼ cup honey (use with caution, as it introduces different microbes)
- 2 to 4 tablespoons fresh herbs or spices (e.g., mint, basil, cinnamon)
Equipment:
- Large stock pot (at least 4-quart capacity): For boiling water and steeping your tea base.
- 1-gallon (3.8-liter) glass jar or two 2-quart (1.9-liter) glass jars: Glass is preferred as it’s non-reactive and easy to clean. Avoid plastic for fermentation as it can scratch and harbor bacteria.
- Bottles for second fermentation: You’ll need about six 16-oz (500ml) glass bottles with plastic lids, swing-top bottles, or clean, sturdy soda bottles. These need to be pressure-resistant for carbonation.
- Small funnel: Essential for cleanly transferring your kombucha into bottles.
- Cheesecloth or tightly woven cloth: To cover your fermentation jar. It needs to be breathable to allow air circulation but tight enough to keep out fruit flies and dust.
- Rubber band: To secure the cheesecloth over the mouth of your jar.
A Quick but Important Note: Throughout the brewing process, especially during fermentation and bottling, try to avoid prolonged contact between your kombucha and metal. While brief contact with stainless steel utensils is generally fine, reactive metals like aluminum can impart an undesirable metallic flavor to your brew and potentially weaken your precious SCOBY over time. Stick to glass, wood, or food-grade plastic whenever possible.
Your Step-by-Step Guide: How to Make Kombucha Tea at Home
Crafting your own kombucha is a simple yet rewarding process. Follow these detailed steps to brew a perfect batch of this refreshing fermented tea. Patience is key, as nature does most of the work!
Step 1. Prepare Your Sweet Tea Base
This initial stage involves creating the nutrient-rich environment for your SCOBY. Begin by bringing your 3 ½ quarts of filtered water to a rolling boil in your large stock pot. Once boiling, remove the pot from the heat. Carefully stir in the 1 cup of white sugar until it is completely dissolved. It’s crucial that no sugar granules remain, as this ensures even distribution for the SCOBY to feed on. Next, drop in your 8 black tea bags (or add 2 tablespoons of loose black tea). Allow the tea to steep thoroughly until the water has completely cooled to room temperature. This cooling process can take several hours, depending on the size and material of your pot. Rushing this step is not recommended, as a hot liquid will kill your SCOBY. If you’re in a hurry, you can speed up the cooling by placing the pot in an ice bath, stirring occasionally, or chilling it in the refrigerator (once it’s warm, not hot).
Step 2. Introduce the Starter Tea
Once your sweet tea base has cooled entirely, remove the tea bags or strain out any loose tea leaves. Now, carefully pour in the 2 cups of starter tea. This starter tea is highly acidic, and it plays a vital role in creating the correct pH balance for your brew. A lower pH environment in the early stages of fermentation discourages the growth of undesirable bacteria and mold, providing a safe and friendly habitat for your SCOBY to thrive. Without sufficient starter tea, your kombucha is vulnerable to contamination.
Step 3. Transfer and Add Your SCOBY
With your tea base and starter tea combined, it’s time to prepare for fermentation. Pour the entire mixture into your clean 1-gallon glass jar. If you’re using two 2-quart jars, divide the liquid equally between them, ensuring each jar receives its own SCOBY. Before handling your SCOBY, ensure your hands are thoroughly clean to prevent introducing any unwanted bacteria. Gently slide your SCOBY into the jar. It may float, sink, or even hover sideways – all of these are perfectly normal. Cover the mouth of the jar with a few layers of cheesecloth or a tightly woven cotton cloth, securing it firmly with a rubber band. This allows for essential airflow while protecting your brew from dust, debris, and pesky fruit flies.
Step 4. The First Fermentation: 7 to 10 Days of Transformation
Place your covered fermentation jar in a spot that maintains a consistent room temperature (ideally between 68-78°F or 20-26°C), away from direct sunlight and any areas prone to jostling. The fermentation process will typically take between 7 to 10 days, but this can vary based on ambient temperature and your preferred taste. During this time, the SCOBY will work its magic, consuming the sugar and transforming the sweet tea into tangy kombucha.
It’s completely normal for the SCOBY to behave unpredictably – it might float at the top, sink to the bottom, or even position itself sideways. Don’t be alarmed! A key indicator of healthy fermentation is the formation of a new, cream-colored layer of SCOBY on the surface of the liquid within a few days. This “baby SCOBY” may attach to the original one or form a separate layer; both are perfectly fine. You might also observe brown, stringy bits hanging below the SCOBY, sediment collecting at the bottom of the jar, or tiny bubbles gathering around the SCOBY. These are all natural byproducts of the fermentation process and signs of a thriving culture.
After about seven days, it’s time to start tasting your kombucha daily. Gently pour a small amount from the jar (avoiding disturbance to the SCOBY) into a cup. Taste for a balance of sweetness and tartness that appeals to your palate. If it’s too sweet, continue fermenting for another day or two. If it’s too vinegary, it has likely over-fermented. Once it reaches your desired flavor profile, your kombucha is ready for bottling.
Step 5. Harvest Your SCOBY for the Next Batch
Before proceeding to bottling, it’s a good practice to prepare your next batch’s tea base. Brew another pot of strong, sugary tea and allow it to cool completely, just as you did in Step 1. With clean hands, gently lift the SCOBY (or SCOBYs, if you have multiple layers) out of the fermented kombucha and place it on a clean plate. This is also an opportune moment to inspect your SCOBY. If it has become excessively thick with many layers, you can carefully peel off the bottom (oldest) layer. This older layer can be discarded, composted, used to start a new batch for a friend, or even added to a “SCOBY hotel” for safekeeping.
Step 6. Bottle and Flavor Your Finished Kombucha (Second Fermentation)
Now, measure out 2 cups of the freshly fermented kombucha from your current batch to serve as the starter tea for your next brew. Set this aside with your SCOBY. Using your small funnel, carefully pour the remaining fermented kombucha into your clean bottles. You can strain the kombucha at this stage if you prefer a clearer drink without the stringy bits or sediment, though they are harmless. This is also the exciting moment to add your chosen flavorings! Incorporate any chopped fruit, fruit juice, herbs, or spices directly into the bottles. Leave about a half-inch of headspace in each bottle to allow for carbonation. Alternatively, for a cleaner, “stuff-free” kombucha, you can infuse the flavorings in a separate jar with the kombucha for a day or two (covered with cheesecloth), then strain and bottle the flavored liquid. Securely cap your bottles.
Step 7. Carbonate and Refrigerate for Enjoyment
Store your sealed bottles of flavored kombucha at room temperature, out of direct sunlight. Allow them to carbonate for 1 to 3 days. The exact time can vary depending on the amount of residual sugar, added fruit, and ambient temperature. To gauge carbonation safely, especially when you’re new to brewing, it’s helpful to use one plastic soda bottle alongside your glass bottles. When the plastic bottle feels firm and rock-solid when squeezed, your kombucha is likely well-carbonated. Once carbonated to your liking, transfer the bottles to the refrigerator. Chilling your kombucha will effectively halt the fermentation and carbonation process, preserving its flavor and fizz. Consume your homemade kombucha within a month for optimal taste and quality.
Step 8. Begin Your Next Batch
With your first batch bottled and chilling, it’s time to start anew! Clean your fermentation jar thoroughly. Combine the 2 cups of reserved starter tea from your previous batch with the fresh, cooled sugary tea base you prepared earlier. Pour this mixture into the clean fermentation jar. Gently slide your healthy SCOBY on top, cover with cheesecloth, and secure with a rubber band. Place it back in its fermentation spot, and let the magic unfold for another 7 to 10 days. Congratulations, you’re now a home kombucha brewer!
Advanced Tips and Troubleshooting for Kombucha Brewers
As you delve deeper into the world of kombucha brewing, you might encounter a few questions or minor hiccups. Here are some additional notes and troubleshooting tips to ensure your brewing journey is consistently successful and enjoyable.
Additional Notes for Successful Brewing:
- Batch Size Adaptations: The beauty of homebrewing is its flexibility. To adjust the amount of kombucha you produce, simply maintain the core ratio: for every gallon of kombucha, use 1 cup of sugar, 8 tea bags (or 2 tablespoons loose leaf), and 2 cups of starter tea. A single healthy SCOBY can ferment any size batch, though larger volumes might require a slightly longer fermentation period to achieve your desired tartness.
- Pausing Your Kombucha Production: Life happens, and sometimes you need a break from brewing.
- Short Breaks (3 weeks or less): If you’re going away for a short period, simply start a fresh batch as usual and leave it on your counter. By the time you return, the kombucha will likely be quite vinegary, perhaps too strong to drink, but your SCOBY will be perfectly healthy and robust, ready for a new, drinkable batch.
- Longer Breaks (more than 3 weeks): For extended absences, create a “SCOBY hotel.” Store your SCOBY in a fresh batch of the tea base combined with starter tea in the refrigerator. The cold temperature significantly slows down fermentation. Remember to “refresh” the hotel by changing out the tea base with a fresh batch every 4 to 6 weeks to keep your SCOBY nourished.
- Exploring Different Tea Options: While black tea is the gold standard for robust SCOBY health and consistent fermentation, you can experiment once your SCOBY is well-established. Green tea, white tea, oolong tea, or a blend of these can produce uniquely flavored kombucha. Many brewers enjoy the lighter, sometimes more floral notes these teas impart. If using herbal teas, always include at least a few bags of black tea in your mix to ensure the SCOBY receives adequate nutrients. Crucially, avoid teas that contain oils, such as Earl Grey or intensely flavored teas, as these oils can harm your SCOBY over time and introduce off-flavors.
- Avoiding Metal Contact: We’ve touched on this, but it bears repeating: limit prolonged contact between kombucha and metal. Brief use of stainless steel spoons is generally fine, but never ferment or store kombucha in metal containers. Reactive metals, particularly aluminum, can not only leach into your kombucha and give it an unpleasant metallic taste but also weaken the SCOBY’s health and vitality over time. Stick to glass, food-grade plastic, or ceramic.
Troubleshooting Common Kombucha Issues:
Don’t panic if your kombucha doesn’t look exactly like the pictures or if something seems off. Most issues are easily remedied!
- SCOBY Behavior and Appearance: It is entirely normal for your SCOBY to float at the top, sink to the bottom, or sit sideways in the jar. Don’t worry about its orientation. You may also observe brown, stringy bits forming below the SCOBY or collecting at the bottom of the jar; these are healthy yeast strands. If your SCOBY develops a hole, bumps, dried patches, darker brown patches, or clear jelly-like patches, it is still generally fine to use. These minor variations are often indicative of changes in your kitchen’s environment (temperature, humidity) and are not usually a sign of a problem with the SCOBY itself. The new SCOBY that forms on top often looks imperfect and can be translucent initially.
- Unpleasant Odors: Kombucha typically begins with a neutral, slightly sweet aroma and then progressively develops a more vinegary scent as fermentation advances. This is normal. However, if your brew starts to smell cheesy, rotten, overly yeasty like beer, or otherwise foul and unpleasant, this is a strong indicator that something has gone awry.
- No Visible Mold: If there are no visible signs of mold on the SCOBY or liquid, discard the liquid (the kombucha) and begin a new batch with fresh tea and your existing SCOBY. Ensure you used enough starter tea in the new batch.
- Visible Mold: If you see green, black, or fuzzy patches of mold on the SCOBY or on the surface of the liquid, immediately discard both the SCOBY and the liquid. Mold is a sign of contamination, and consuming moldy kombucha is unsafe. Start completely fresh with new ingredients and a new SCOBY.
- SCOBY Health and Lifespan: A healthy SCOBY can last a very long time, essentially indefinitely if cared for properly. However, it’s not indestructible.
- SCOBY Turns Black: If your SCOBY becomes uniformly black or very dark, this is generally a sign that it has reached the end of its lifespan. It’s time to replace it.
- Green or Black Mold: As mentioned above, if green or black fuzzy mold develops *on* the SCOBY itself, it has become infected. Discard it immediately and start over.
To prolong the life and maintain the health of your SCOBY, consistently stick to the recommended ratio of sugar, tea, starter tea, and water outlined in the recipe. Additionally, for vigorous SCOBY growth, consider peeling off the bottom (oldest) layer every few batches once it becomes noticeably thick. This old layer can be discarded, composted, used to start a new batch, or shared with a friend to kickstart their own brewing journey.
- When in Doubt: If you are ever uncertain whether there is a problem with your SCOBY or a batch, the safest approach is to continue brewing batches but discard the resulting kombucha. If there’s a genuine issue, it will typically worsen over time and become very apparent (e.g., persistent mold or consistently foul smells). If it’s just a natural, quirky aspect of your unique SCOBY, then its appearance and the kombucha’s flavor will remain consistent from batch to batch, and the kombucha will be perfectly safe and enjoyable for drinking. Trust your senses – sight, smell, and taste – but when in doubt, it’s always better to err on the side of caution.
There you have it – your comprehensive guide to brewing homemade kombucha! We hope this detailed recipe and extensive tips empower you to create delicious, healthy batches right in your own kitchen. The journey of homebrewing is a rewarding one, full of learning and delightful discoveries. Thanks for stopping by!
Do you have any unique tips, tricks, or favorite flavor combinations for homemade kombucha that we might have missed? We’d love to hear them! Please share your insights in the comments section below.
Don’t forget to sign up for our newsletter to receive all the latest updates on exciting DIY projects and creative ventures. You can also like us on Facebook to get fun craft projects and inspiration directly in your feed, and pin your favorite projects to Pinterest to share with friends!
Explore More DIY Projects:
Discover inspiring DIY garden and landscape ideas, including patio projects.
Learn how to make healthy and delicious homemade dog food.