Forget the long lines at convenience stores or waiting for special “Free Slurpee Days.” Imagine the thrill of transforming any ordinary bottle of soda into a delicious, icy slushie right before your eyes, instantly! This incredible DIY party drink not only delivers a refreshing treat but also doubles as a captivating science experiment that will amaze your friends and family. All it takes is a single bottle of your favorite soda, a little patience, and the fascinating magic of supercooling.
DIY Self-Freezing Slushie: The Ultimate Instant Party Drink Trick
Are you ready to elevate your next gathering, barbecue, or even a quiet afternoon with a truly unique and entertaining beverage? Look no further than the self-freezing slushie! This fast, fun, and surprisingly simple DIY project allows you to turn a plain bottle of soda into a frosty, delectable slushie in mere seconds. It’s the perfect way to add a “wow” factor to birthdays, summer celebrations, game nights, or any event where you want to impress your guests with a cool trick and an even cooler drink.
The beauty of this hack lies in its versatility and simplicity. You can prepare several bottles of different sodas a few hours before your party, then unveil them one by one, creating a personalized slushie bar for all your guests. From classic colas and fizzy lemon-lime drinks to vibrant orange sodas or even sparkling water with a hint of fruit, the possibilities are endless. Get ready to shake things up and cheer to a refreshing, homemade slushie experience that everyone will be talking about!
Understanding the Magic: What is a Self-Freezing Slushie?
While it might seem like magic, a self-freezing slushie is actually a fantastic demonstration of a scientific principle known as supercooling. Typically, water (and beverages like soda, which are primarily water) freezes at 0°C (32°F). However, under very specific conditions, a liquid can be cooled below its freezing point without actually solidifying into ice. This is the unstable supercooled state.
When the supercooled liquid is then introduced to a “trigger” – such as an ice cube, a sudden jolt, or even a tiny imperfection on a cold surface – it provides a nucleation point. This is where the first ice crystals can rapidly form. Once initiated, the freezing process propagates almost instantaneously throughout the entire liquid, transforming it into a delightful, icy slushie. The carbonation in soda plays an additional crucial role, as the dissolved gases create microscopic bubbles that act as excellent nucleation sites when pressure is released, further aiding the rapid crystallization process.
Why You Need to Try This Instant Slushie Hack
- Unbeatable “Wow” Factor: Watching a liquid defy its freezing point and instantly turn into slush is genuinely mesmerizing. It’s a fantastic conversation starter and a memorable party trick.
- Endless Customization Options: Unlike limited store-bought slushie flavors, you have the freedom to choose any carbonated beverage you desire. Experiment with different soda brands, flavors, or even sparkling water with homemade syrups.
- Incredibly Cost-Effective: Making your own slushies from standard soda bottles is significantly more economical than purchasing individual ready-made slushie drinks from a store.
- Fresh and Fun: Enjoy a freshly made slushie free from artificial colors or preservatives often found in commercial mixes (especially if you opt for naturally flavored sodas or sparkling water).
- No Special Equipment Required: Forget expensive slushie machines or blenders. All you need is a freezer, a bottle of soda, and a glass – making it accessible to everyone.
- Educational and Engaging: It’s a fantastic, hands-on way to introduce basic physics and chemistry concepts like supercooling and nucleation to kids and curious adults alike, turning science into a delicious treat.
Essential Materials for Your DIY Self-Freezing Slushie
Gathering your supplies for this fun experiment is wonderfully straightforward. The key to success lies in selecting the right soda and preparing it correctly.
- One 500mL (or 16.9 fl oz) bottle of soda, unopened: The size is important for optimal cooling time and consistency. While nearly any carbonated beverage can work, sodas with higher sugar content (like Coca-Cola, Pepsi, Fanta, Sprite, or Dr. Pepper) tend to produce the most reliable and satisfying results due to their slightly lower freezing points. Crucially, ensure the bottle is factory-sealed and has not been opened previously, as this maintains the critical internal pressure needed for supercooling.
- A clean drinking glass: Any standard drinking glass will suffice. For an even more dramatic and smoother slushie effect, consider chilling your glass in the freezer beforehand (we’ll cover this in the advanced steps).
- One or two ice cubes: These will serve as the crucial “trigger” to initiate the freezing process in your supercooled soda. Make sure your ice cubes are solid and not too small, as they need to withstand the initial pour and provide a stable nucleation point.
Step-by-Step Guide: How to Make Your Instant Self-Freezing Slushie
Follow these instructions meticulously to unlock the secret of supercooling and create your amazing, instant slushie!
Step 1. Select Your Soda of Choice
Begin by choosing a 500mL bottle of your favorite carbonated beverage. While classic colas like Coca-Cola are often used for their consistent results, feel absolutely free to experiment! Lemon-lime sodas (like Sprite or 7UP), orange sodas (like Fanta or Sunkist), root beer, or even sparkling water infused with fruit juice concentrates can all produce fantastic self-freezing slushies.
Step 2. Prepare for Supercooling in the Freezer
Hold the unopened bottle firmly and shake it vigorously for approximately 20 seconds. This vital step helps to evenly distribute the carbonation throughout the liquid and primes it for the supercooling process. Immediately after shaking, carefully place the bottle horizontally in your freezer. It needs to remain completely undisturbed for a precise duration: typically around 3 hours and 15 minutes. This specific timeframe is critical for achieving the supercooled state; too short, and it won’t get cold enough; too long, and it risks freezing solid inside the bottle. Keep in mind that freezer temperatures can vary, so you might need to adjust this time by 15-30 minutes based on your freezer’s efficiency (most freezers are set to around 0°F / -18°C).
Step 3. Gently Release Internal Pressure
Once the designated freezer time has elapsed, carefully remove the bottle. Hold it upright and slowly, very gently twist the cap just enough to hear a tiny, controlled hiss as the internal air pressure is released. It’s crucial not to fully open the cap or shake the bottle at this stage, as either action could prematurely trigger the freezing process inside the bottle. The objective here is simply to equalize the pressure without disturbing the delicate supercooled liquid.
Step 4. Re-tighten and Shake Briefly
Immediately after releasing the pressure, securely re-tighten the bottle cap. Then, give the bottle a quick, short, but firm shake for just a few seconds. As you do this, you’ll begin to notice bubbles building up rapidly inside the bottle. This brief agitation, combined with the initial pressure release, helps to further prepare the soda for its magical transformation.
Step 5. Observe the Bubble Buildup
Keep a close eye on the inside of the bottle as you shake. You should see a noticeable and rapid increase in the carbonation bubbles. This is an excellent indicator that your soda is indeed in its supercooled state and poised for action – it’s literally on the verge of freezing!
This DIY Chip Bag Hack is a must-have for outdoor summer gatherings! https://t.co/gQ23AKacbm pic.twitter.com/IB2l4QrZPA
— DIY Projects (@DIYProjectsCom) July 9, 2016
Step 6. The Grand Pour: Into the Glass
Now, carefully and completely remove the bottle cap, ensuring a smooth and steady pour. Slowly invert the bottle and pour the supercooled soda into your drinking glass. Watch closely as the liquid flows.
Step 7. The Magical Trigger: Add an Ice Cube
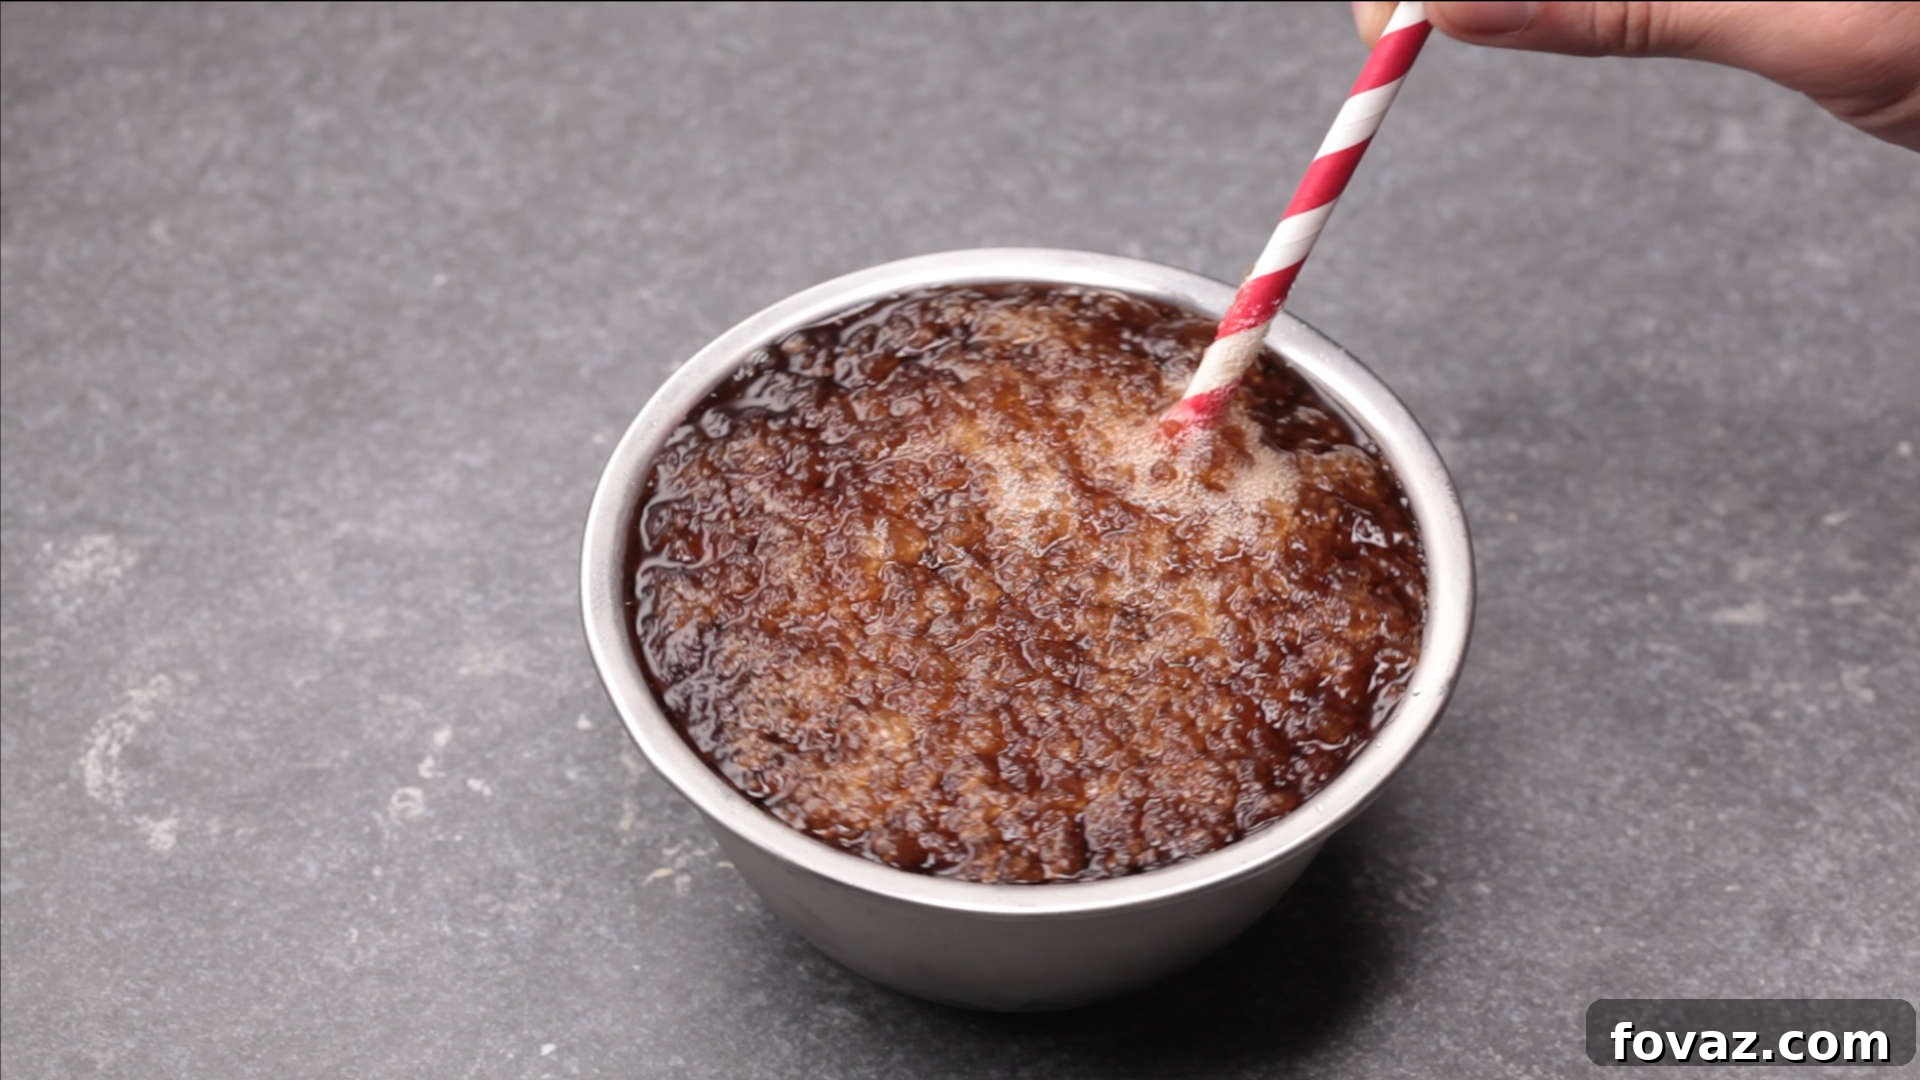
This is the moment of truth! As soon as the supercooled soda is in the glass, drop a single ice cube into it. Immediately, you will witness an astonishing sight: the soda will begin to freeze around the ice cube, rapidly transforming into a soft, icy slushie right before your very eyes. The ice cube provides the critical nucleation points needed to kickstart the crystallization process.
Step 8. Watch the Instant Transformation!
The freezing action is incredibly swift, mesmerizing, and undeniably captivating. The liquid soda will crystallize into a delicious, icy slushie within a matter of seconds. It’s a fantastic visual treat and the perfect moment for a party “ooh” and “aah” from your impressed guests.
Step 9. Advanced Technique: The Chilled Glass Method (Optional)
For an even more dramatic and seamless self-freezing experience that doesn’t require an additional ice cube, you can pre-chill your drinking glass. Simply place your empty glass in the freezer for about 30 minutes to an hour before you plan to make your slushie. The extremely cold surface of the glass will provide sufficient nucleation points to trigger the freezing process directly.
Step 10. Instant Freeze Without an Ice Cube!
When employing the chilled glass method, carefully remove the supercooled soda bottle from the freezer (after completing steps 1-5). Then, pour the soda directly and steadily into your pre-chilled glass. The very moment the supercooled liquid comes into contact with the icy cold glass, it will instantly begin to freeze and turn into a delicious slushie without the need for an external ice cube. This technique often results in an even smoother and more uniformly frozen slushie texture.
Expert Tips for the Perfect Self-Freezing Slushie Every Time
- Maintain Freezer Consistency: Ensure your freezer temperature is stable and consistent, ideally set around 0°F (-18°C). Fluctuating temperatures can negatively impact the delicate supercooling process.
- Handle with Extreme Care: After removing the bottle from the freezer, handle it with the utmost gentleness. Any strong bump, shake, or sudden movement can cause it to freeze prematurely inside the bottle, ruining the effect.
- Experiment with Timings: All freezers vary in power and efficiency. If 3 hours and 15 minutes doesn’t quite work perfectly for you, try adjusting the freezer time by 15-minute increments (e.g., 3 hours, or 3 hours 30 minutes) until you find your optimal window.
- Horizontal Placement is Key: Laying the bottle horizontally in the freezer helps ensure more even cooling of the liquid content, which is crucial for successful supercooling.
- Perform a Single Bottle Test: If you’re new to this trick, it’s wise to try it with just one bottle first. This allows you to fine-tune the timing for your specific freezer before attempting multiple bottles for a party.
- Pour with Confidence: A smooth, continuous pour of the soda into the glass is generally more effective than a hesitant or jerky pour, as it minimizes disruptive movements.
Troubleshooting Common DIY Slushie Issues
Even with careful planning, sometimes things don’t go exactly as expected. Here are solutions to common problems:
- My Soda Froze Solid in the Bottle: This usually means the bottle was left in the freezer for too long, or your freezer is exceptionally powerful. For your next attempt, reduce the freezer time by 15-30 minutes.
- My Soda Didn’t Freeze at All: This indicates that the soda wasn’t cold enough to reach the supercooled state. Increase the freezer time by 15-30 minutes for your next try. Also, ensure the bottle was shaken well initially and handled very gently after removal from the freezer.
- My Soda Exploded or Fizzed Excessively When Opening: This often happens if you open the cap too quickly without gently releasing the pressure in Step 3, or if the bottle was shaken too vigorously immediately before opening after chilling. Practice a slow, controlled pressure release.
- Only Part of My Soda Froze in the Glass: This can occur if the nucleation points weren’t sufficient or well-distributed. Ensure you use a good-sized ice cube (not too tiny) or that your chilled glass is very cold and has a slightly rough inner surface to aid crystal formation.
Creative Variations and Festive Serving Suggestions
Once you’ve mastered the basic self-freezing slushie, the fun truly begins! Get creative with these ideas:
- Exciting Flavor Combinations: Mix and match different soda flavors in the same glass for unique taste profiles. Try half lemon-lime soda and half blue raspberry for a vibrant, multi-layered “galaxy” slushie.
- Fresh Fruit Infusion: Elevate your slushie by adding fresh fruit slices (lemon, lime, orange, berries, or mint leaves) to your glass before pouring. This adds an extra burst of flavor and visual appeal.
- Fun Candy Toppings: For an extra playful touch, especially for kids’ parties, top your slushie with gummy bears, sour worms, popping candy, or even a sprinkle of colorful sprinkles.
- Decadent Whipped Cream: A generous dollop of whipped cream and a maraschino cherry can transform your simple slushie into a decadent dessert drink, perfect for special occasions.
- Responsible Adult Slushies: For adult gatherings, a splash of your favorite clear spirit (such as vodka, rum, or gin) can be added to the glass *after* the slushie has fully formed. Important: Do not attempt to supercool soda that has been pre-mixed with alcohol, as alcohol significantly lowers the freezing point and the experiment likely won’t work in a standard home freezer. Always enjoy responsibly.
- Beautiful Layered Slushies: Experiment with pouring different colored supercooled sodas into the same chilled glass in distinct layers for a stunning, multi-colored effect that will impress any guest.
This DIY self-freezing slushie isn’t just a drink; it’s an interactive experience! It’s a fantastic way to engage your guests, spark conversation, and provide a truly unique and refreshing treat that everyone will remember. Perfect for hot summer days, lively birthday parties, or simply a fun and educational afternoon project with the family.
Do you have any brilliant party drink ideas or other amazing DIY hacks of your own? We’d absolutely love to hear about them! Leave a comment below and let us know your creative concoctions and clever tricks!
For more exciting DIY and craft news, trends, and inspiration, make sure to follow us on Facebook, Twitter, Pinterest and Instagram!
You Might Also Love These Creative DIY Ideas:
- DIY Flower Ice Cubes: A Beautiful Kitchen Craft Idea for Drinks and Decor
- 15 Brilliant DIY Smoothie Freezer Kits for Quick & Healthy Drinks On-the-Go
- 14 Unexpected Ways to Use Cool Ice Cube Trays for Crafts, Food & More