
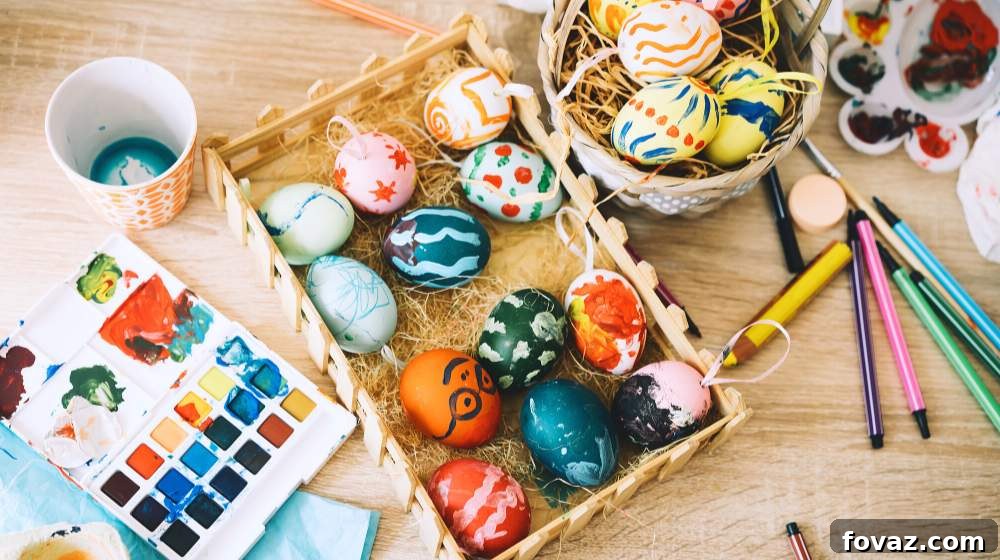
As the vibrant colors of spring emerge, Easter approaches, bringing with it a cherished tradition: decorating Easter eggs. This festive activity offers a wonderful opportunity for creativity, family fun, and personal expression. Whether you’re a seasoned crafter or just starting, there’s a myriad of ways to transform simple eggs into stunning works of art. From timeless patterns to innovative techniques, the possibilities are endless. This comprehensive guide will explore 53 unique and inspiring Easter egg decorating ideas, ensuring you’ll find the perfect projects to brighten your holiday celebration.
We’ve curated a diverse collection of ideas that cater to all tastes and skill levels. You’ll discover classic techniques like intricate dyeing and painting, alongside more contemporary approaches such as decoupaging, using temporary tattoos, and even crafting adorable character-themed eggs. Get ready to unleash your inner artist and make this Easter an unforgettable celebration filled with beautifully adorned eggs!
RELATED: 100+ Easter Crafts, Recipes, And Cool DIY Ideas For Your Celebration
53 Creative Easter Egg Decorating Ideas to Welcome Spring
Discover the Best Easter Egg Designs for a Memorable Celebration
Easter is truly a magical time of year, filled with the warmth of family, delightful pastel hues, and charming decorations. I fondly remember childhood Easters, participating in exciting egg hunts and having the freedom to decorate eggs in any imaginative way we desired. Those memories of shared laughter and creative expression are something I now eagerly share with my own children, ensuring they experience the same joy and wonder. From spirited Easter egg hunts to intricate decorating sessions, these traditions create lasting bonds and cherished moments.
To help you create your own joyful Easter traditions, I’ve compiled an extensive list of fresh, DIY Easter egg ideas. These projects are designed to be accessible and fun for everyone, from young children to adults, making your Easter celebrations even more vibrant and personal. Let’s dive into these delightful crafts and make this Easter truly special!
1. Shaving Cream Swirl Easter Eggs
Dive into a world of vibrant colors with these incredibly fun shaving cream Easter eggs. This technique is not only simple but also yields stunning, marble-like patterns on your eggs. To create these mesmerizing designs, start by filling a shallow tray with shaving cream. Next, drip various liquid food colors onto the shaving cream. Using a toothpick or skewer, gently swirl the colors together to create beautiful, unique patterns. Roll your hard-boiled eggs through the colorful cream, allowing the patterns to transfer. Let them sit for a few minutes before wiping off the excess cream to reveal your beautifully decorated eggs. It’s a fantastic sensory activity for kids and results in wonderfully artistic eggs without too much fuss!
2. Explosive Easter Egg Piñatas
Take your Easter egg fun to a whole new level with these exciting Easter egg piñatas! Instead of simply cracking open eggs, imagine the thrill of breaking open a beautifully crafted piñata to reveal a cascade of candies and treats. This project requires a bit more effort but is incredibly rewarding. You’ll need newspaper strips, a simple flour-and-water glue mixture, a small balloon (to form the egg shape), colorful paper, ribbons, and, of course, a generous stash of candies to fill them. Once the paper mache egg form is dry, pop the balloon, fill it with goodies, and decorate the exterior with festive papers and ribbons. These make for a delightful surprise during your Easter festivities and are a truly unique spin on traditional egg decorating.
3. Decoupage Paper Napkin Easter Eggs
If intricate painting isn’t your strong suit, or you simply want to achieve sophisticated designs with minimal effort, decoupage paper napkin Easter eggs are a fantastic solution. This ingenious method allows you to transfer beautiful patterns from decorative paper napkins directly onto your eggs. The secret ingredient? Egg white! Carefully separate the decorative top layer of a patterned napkin. Place the delicate design onto a hard-boiled egg and brush a thin layer of egg white over it. As it dries, the napkin adheres seamlessly, creating a stunning, high-end finish that looks professionally done. It’s an elegant way to incorporate elaborate floral, geometric, or whimsical patterns without needing advanced artistic skills.
4. Glittering Sparkle Easter Eggs
Add a touch of dazzling glam to your Easter celebration with sparkling Easter eggs. Who says Easter eggs have to be simple and understated? For this festive project, you’ll need craft glue and a variety of glitters in different colors and textures. Apply a thin, even layer of glue to your hard-boiled or craft eggs. While the glue is still wet, liberally sprinkle glitter over the entire surface, rotating the egg to ensure full coverage. You can create solid glitter eggs or experiment with patterns, stripes, or even ombre effects by using different colors. These bedazzled eggs will catch the light beautifully and add a magical shimmer to your Easter baskets and decorations.
5. Melted Crayon Art Easter Eggs
Transform your Easter eggs into vibrant, abstract masterpieces using melted crayons. This creative technique is surprisingly simple and produces stunning, colorful results. For best results, use freshly hard-boiled eggs that are still warm, as the residual heat will help melt the crayons. Carefully hold a warm egg and gently draw on its surface with crayons. As the crayon touches the warm shell, it will melt slightly, creating beautiful, unique streaks and patterns. You can doodle, create swirls, or layer colors to achieve a rich, textured appearance. This project is a fantastic way to use up old crayon bits and results in an egg that looks like an entire box of crayons exploded in a beautiful way!
6. Handcrafted Paper Mache Easter Eggs
If you’re looking for a durable, reusable alternative to real eggs, consider crafting your own paper mache Easter eggs. While traditional egg decorating involves adorning existing eggs, this project takes it a step further by creating the egg itself. Basic knowledge of paper mache techniques is all you need. You’ll use newspaper strips and a flour-and-water paste to form layers over a balloon, which provides the initial egg shape. Once dry, pop and remove the balloon, then smooth and decorate your paper mache egg. These handmade eggs can be painted, glittered, or decoupaged, offering endless creative possibilities for a personalized Easter display that lasts for years.
7. Striking Tie-Dyed Sharpie Easter Eggs
Unleash your artistic side with these eye-catching tie-dyed Easter eggs using Sharpie markers. This incredibly fun and simple technique yields surprisingly intricate and vibrant patterns. Start by drawing various designs, dots, or scribbles on your hard-boiled eggs using a range of colorful Sharpie markers. Don’t worry about perfection; the magic happens next! Once your designs are complete, use a medicine dropper or a small pipette to drizzle rubbing alcohol over the marked areas. Watch as the alcohol causes the Sharpie ink to bleed and spread, creating stunning, watercolor-like tie-dye effects. Each egg will be a unique work of art, bursting with color and creativity.
8. Effortless Temporary Tattoo Easter Eggs
Here’s an ingenious and incredibly simple Easter egg decorating idea that’s perfect for all ages, especially those who prefer a no-mess approach: temporary tattoo Easter eggs. Forget complicated painting or dyeing processes; simply apply your favorite temporary tattoos directly onto hard-boiled eggs. Just like applying them to skin, press the tattoo image firmly onto the eggshell, dab with a damp cloth, and peel back the paper to reveal a perfectly transferred design. With an endless variety of temporary tattoos available – from cute animals and floral patterns to superheroes and whimsical graphics – you can create a diverse collection of uniquely adorned eggs in minutes. It’s as easy as 1-2-3 and guarantees impressive results!
9. Mastering the Blow Out Easter Eggs Trick
For those who wish to create lasting Easter egg decorations without the worry of spoilage, mastering the art of blowing out an egg is an essential skill. This technique allows you to empty the contents of an egg, leaving a hollow shell that can be preserved and decorated year after year. The process is straightforward: gently use a hand drill or a sharp tool to create a small hole at both ends of the egg. Then, using a syringe or your mouth, carefully blow through one hole to force the contents out of the other. Once the egg is empty and rinsed, you’re free to decorate it in any way you desire, creating lightweight and durable keepsakes.
10. Enchanting Disney Character Easter Eggs
Bring the magic of your favorite Disney characters to your Easter celebration with these delightful Disney-themed eggs. This idea is a surefire hit with children and adults alike! Start by dyeing your hard-boiled eggs in colors that match your chosen characters – for example, a vibrant yellow for Winnie the Pooh or a deep blue for Cinderella. Once the base color is dry, use fine-tipped paint brushes and acrylic paints to carefully add the facial features, costumes, and iconic details of beloved characters like Mickey Mouse, Elsa, or Woody. Voila! You’ll have a collection of not just regular Easter eggs, but charming Disney Easter eggs that are perfect for display or a themed egg hunt.
11. Rustic DIY Speckled Easter Eggs
For a touch of rustic charm and natural elegance, these DIY speckled Easter eggs are a wonderful choice. This simple yet effective decorating technique creates a beautiful, organic look reminiscent of robin’s eggs. Start by dyeing your hard-boiled eggs in soft, natural colors like light blue, green, or beige. Once thoroughly dry, dip a toothbrush into a contrasting paint color (brown, black, or dark blue works well) that has been slightly thinned with water. Hold the toothbrush a few inches away from the egg and run your thumb across the bristles to create a fine spray of paint speckles. Repeat until you achieve your desired speckled effect. This easy method yields stunning, sophisticated eggs perfect for a farmhouse-style Easter display.
12. Adorable Bunny Face Easter Eggs
Embrace the spirit of Easter with these utterly adorable bunny Easter eggs! This charming idea transforms a simple egg into a cute little bunny character. Start by dyeing your eggs in soft pastel colors like pink, blue, or yellow. Once dry, use a fine-tipped black marker to draw two small dots for eyes, a tiny triangle for a nose, and a few whiskers. The key element, however, is the ears! You can cut out small bunny ear shapes from felt, construction paper, or even craft foam, and attach them to the top of the egg with a dab of glue. These sweet bunny eggs are sure to be a favorite, perhaps even the Easter Bunny’s most cherished egg decorating idea!
13. Trendy DIY Washi Tape Easter Eggs
Washi tape, with its endless array of patterns and colors, is a crafter’s best friend, and it’s perfect for decorating Easter eggs! These DIY washi tape Easter eggs offer a quick, clean, and customizable way to create stylish designs. Simply choose your favorite washi tape patterns and cut them into strips, shapes, or triangles. Adhere the tape directly to your hard-boiled or craft eggs, smoothing out any bubbles. You can create stripes, geometric patterns, cross-hatch designs, or even cut out small shapes like bunnies or flowers. The beauty of washi tape is that it’s repositionable, allowing you to experiment with different design combinations until you achieve your perfect look. It’s a fantastic project for a quick and impressive result.
14. Artistic Acrylic Paint Easter Eggs
For those who truly love to paint, these adorable acrylic paint Easter eggs are a delightful treat. This project allows for intricate detailing and vibrant color saturation, making each egg a miniature canvas. Acrylic paint is a versatile medium, but it requires a steady hand and a bit of artistic flair. You can paint intricate floral designs, charming animal motifs, whimsical landscapes, or abstract patterns. Start with a base coat if desired, then use fine brushes to add your details. While acrylic paint can be tricky, the rich colors and durable finish make the effort incredibly worthwhile. The result is a collection of unique, handcrafted eggs that showcase your artistic talents.
15. Playful Chalk Paint Easter Eggs
Give your Easter eggs a rustic, farmhouse-chic makeover with chalk paint. This creative idea is perfect if you have leftover chalk paint from other craft projects. Begin by painting your hard-boiled or craft eggs with a dark shade of chalk paint, such as black or deep gray, and allow them to dry completely. Once cured, these eggs become miniature chalkboards! Use regular chalk to draw delightful designs, messages, or simple doodles directly onto the chalk-painted surface. You can create charming bunny silhouettes, intricate floral patterns, or even write “Happy Easter.” The best part? If you make a mistake or want to try a new design, simply wipe it clean and start over. It’s a wonderfully imaginative and interactive decorating method.
16. Luxurious Golden Easter Eggs
Add a touch of opulent elegance to your Easter display with luxurious golden Easter eggs. These shimmering treasures are incredibly simple to make but create a truly striking visual impact. The process is as straightforward as it sounds: completely paint your hard-boiled or craft eggs with gold paint. You can use metallic gold spray paint for a smooth, even finish (done in a well-ventilated area), or brush-on acrylic gold paint for a handcrafted look. For an extra touch of glamour, consider adding fine glitter while the paint is still wet. Imagine the delight of stumbling upon these gleaming “natural treasures” during an Easter egg hunt! They transform a simple egg into a precious decorative item.
17. Whimsical Unicorn Easter Eggs
Bring a touch of magic and fantasy to your Easter celebration with whimsical unicorn Easter eggs! This adorable decorating idea is sure to impress both kids and adults with its enchanting charm. Start by dyeing your eggs in soft pastel shades, then add a touch of sparkle with glitter or iridescent paint. The key elements are the unicorn horn and ears. You can craft tiny horns from rolled-up paper or clay, and small ears from felt or cardstock, attaching them to the top of the egg. Don’t forget to draw cute sleepy eyes and rosy cheeks for an extra dose of cuteness. These unicorn eggs are not only super cute but also incredibly fun and exciting to create, promising a wonderfully magical Easter egg hunting experience.
18. Delightful Minion Character Easter Eggs
Easter wouldn’t be complete without a visit from these beloved, mischievous yellow creatures! Crafting Minion Easter eggs is a guaranteed way to bring smiles and laughter to your holiday. To recreate these loved characters, you’ll need clean, hard-boiled eggshells (or plastic craft eggs), yellow paint for their bodies, blue paint for their overalls, a black Sharpie for details, some craft glue, and a few googly eyes. Paint the eggs yellow, then add a blue band for their overalls. Use the Sharpie to draw on their iconic goggles, smiles, and hair. Finally, glue on the googly eyes to complete their endearing expressions. It’s a very simple and incredibly fun project that results in instantly recognizable and utterly charming Minion eggs.
19. Elegant Marbleized Easter Eggs
Remember the captivating technique we used to marbleize a bowl? You’ll be delighted to know that you can apply the very same method to create stunning, elegant marbleized Easter eggs! This project yields intricate, swirling patterns that resemble natural stone, making each egg a unique piece of art. The secret involves floating drops of nail polish on the surface of cold water. Swirl the colors gently with a toothpick, then carefully dip your hard-boiled eggs into the water, allowing the nail polish film to transfer onto the shell. The result is a sophisticated and highly decorative marble effect that looks far more complicated than it actually is. It’s a mesmerizing technique that guarantees beautiful, one-of-a-kind Easter eggs.
20. Fashionable Sequined Easter Eggs
For the ultimate in glamorous Easter egg decor, look no further than these fashionable sequined Easter eggs. These shimmering creations are arguably the most dazzling among all the decorating ideas, turning ordinary eggs into sparkling jewels. To achieve this look, you’ll need a collection of sequins (flat or cupped, in various colors) and small straight pins. Gently push a pin through the center of each sequin and then into the eggshell. You can cover the entire egg for a fully glittering effect, or arrange the sequins in patterns like stripes, spirals, or flowers. For plastic craft eggs, you can use craft glue to adhere the sequins. These bedazzled eggs will add an undeniable touch of sparkle and luxury to your Easter display.
21. Wholesome Naturally-Dyed Easter Eggs
Embrace an eco-friendly approach to Easter egg decorating by using wholesome, naturally-dyed eggs. Many of our Easter egg designs rely on vibrant colors, and you can become a master of natural dyeing using ingredients found right in your kitchen! This method is not only fun but also ensures that hard-boiled eggs remain perfectly edible. Experiment with a variety of natural sources: red cabbage for blues, onion skins for oranges, spinach for greens, beets for pinks/reds, and turmeric for brilliant yellows. Simply simmer these ingredients with water and a splash of vinegar to create your dye baths. Submerge the eggs for several hours or overnight to achieve beautiful, earthy, and completely food-safe colors, connecting you to ancient traditions of dyeing.
22. Lively Easter Egg Animal Parade
While bunnies are undoubtedly the stars of Easter, why not celebrate a whole menagerie of adorable creatures? Create a lively Easter egg animal parade to entertain and delight the kids with one of the most innovative egg decorating ideas. This project involves transforming hollowed-out eggs into charming animal figures. After carefully blowing out the egg contents, paint the shells to resemble different animals like a fluffy chick, a playful piggy, a proud rooster, or a gentle sheep. Add googly eyes, felt ears, paper beaks, or tiny pipe cleaner tails to bring each character to life. These whimsical animal eggs are perfect for display, storytelling, or creating a miniature farm scene as part of your Easter decor.
23. Durable Polymer Clay Easter Eggs
If you prefer a truly lasting and versatile Easter decoration that doesn’t involve real eggs, try making these durable polymer clay Easter eggs. This project allows for endless creativity in terms of color, texture, and design, and the finished eggs can be enjoyed year after year. Molding polymer clay requires a bit of patience and practice, but the results are incredibly rewarding. You can sculpt smooth, uniform eggs, or add textured details, patterns, and even incorporate different colors of clay to create marble effects. A fascinating aspect of this craft is learning how to remove the real eggshell (used as a temporary mold) from the baked polymer clay egg, leaving you with a perfectly formed, lightweight, and resilient decorative egg.
24. Delicate Pressed Flower Easter Eggs
Embrace the beauty of nature with delicate pressed flower Easter eggs. Pressed flower art lends itself beautifully to many craft projects, and it adds an exquisite, ethereal touch to Easter eggs. Before embarking on this idea, you might want to review our guide on pressing flowers to ensure you have a good collection of dried blooms and foliage. Once your flowers are ready, carefully arrange them onto the surface of hard-boiled or craft eggs. Use a thin layer of Mod Podge or clear craft glue to adhere the pressed flowers, gently pressing them down to ensure they lie flat. Once the glue dries, you can add another thin coat over the entire egg to seal and protect the delicate botanical designs. These eggs are perfect for a sophisticated and natural Easter display.
25. Classic Polka Dots Easter Eggs
For a timeless and undeniably charming look, you can’t go wrong with classic polka dot Easter eggs. This is an excellent starting point for first-time egg decorators, as it’s simple yet incredibly effective. All you need are your favorite pastel shades of paint and a contrasting color (traditional white works beautifully, or perhaps a darker shade for more pop). Use a round-tipped brush, the eraser end of a pencil, or even a cotton swab dipped in paint to create uniform dots across the egg’s surface. You can choose to create evenly spaced dots, varying sizes, or even a gradient effect. The result is a collection of soft, ethereal, and perfectly spring-ready eggs that exude classic Easter charm.
26. Luxurious Golden Marbled Eggs
Elevate the elegance of marbleized eggs by incorporating a touch of luxury with golden marbled eggs. This sophisticated decorating idea combines the fluid beauty of alcohol inks with shimmering gold accents, creating a truly opulent finish. Start by applying vibrant alcohol inks to your hard-boiled or craft eggs, allowing the colors to blend and swirl organically. Once the inks have dried, use a fine-tipped gold paint pen or a small brush with gold acrylic paint to add intricate details. You can trace along the natural marble patterns, add delicate veins, or simply create shimmering accents. While these golden marbled eggs look incredibly luxurious and complex, they are surprisingly fun and easy to make, offering a high-end aesthetic with a DIY approach.
27. Personalized Photo Print Easter Eggs
Imagine the delightful surprise of finding a personalized photo print Easter egg during the hunt! This unique and heartfelt decorating idea turns ordinary eggs into cherished keepsakes. To create these special eggs, you’ll need to print photos of your family, friends, or even beloved pets onto thin tissue paper. A clever trick is to tape a piece of tissue paper onto regular photo paper before printing to ensure it feeds smoothly through your printer. Once printed, carefully cut out your chosen images. Then, use Mod Podge or a similar decoupage medium to adhere the delicate tissue paper printouts onto your hard-boiled or craft eggs, smoothing out any wrinkles. The result is a truly personal and memorable collection of Easter eggs that will bring smiles to everyone’s faces. They’re perfect for hiding or displaying!
RELATED: 20 DIY Easter Basket Ideas That Will Have You Hoppin’
28. Magical Glowing Easter Eggs
Prepare for an Easter egg hunt that’s truly out of this world with magical glowing Easter eggs! This incredible decorating idea will add an element of wonder and excitement, especially if your hunt extends into the evening. The secret to these enchanting eggs lies in fluorescent paint (also known as glow-in-the-dark paint). Simply paint your hard-boiled or craft eggs with one or more coats of this special paint. For an even more vibrant glow, use a UV light source to charge them before hiding. Imagine the thrill of searching for eggs that softly illuminate the darkness! These glowing eggs are a fantastic way to add a unique, luminous twist to your traditional Easter activities, making the hunt an unforgettable experience.
29. Rustic Baker’s Twine Easter Eggs
For a charming, rustic, and texture-rich Easter decoration, consider crafting Baker’s Twine Easter eggs. This idea is particularly well-suited for wooden craft eggs, providing a durable base for your creative endeavors. Procure a variety of baker’s twine in different colors – traditional red and white, pastel shades, or even multi-colored strands. Apply a thin line of craft glue to the wooden egg and begin wrapping the twine tightly around it, ensuring each strand sits snugly next to the last. You can wrap the entire egg in a single color, create stripes, or alternate colors for a more dynamic pattern. These one-of-a-kind Easter eggs offer a lovely tactile element and a handmade aesthetic, perfect for a cozy, farmhouse-style Easter display.
30. Elegant Spring Flower Decorated Eggs
Some Easter egg decorations are simply too beautiful to be hidden! These elegant spring flower-decorated eggs are a prime example. This stunning project transforms an egg into a delicate piece of art, making it a beautiful home display piece any time of the year, not just for Easter. This idea involves carefully drawing or painting intricate floral motifs onto your eggs. You can use fine-tipped paint pens or acrylic paints to create blossoms, leaves, and vines. Alternatively, consider decoupaging tiny floral cutouts from patterned paper for a similar effect. The key is embracing the beauty of spring’s blooms, translating their grace onto the eggshell. These eggs are so exquisite, you’ll want them proudly showcased rather than hidden away!
31. Whimsical Easter Egg Acorns
Give your plastic Easter eggs a clever and charming second life by transforming them into whimsical Easter egg acorns. This creative repurposing project yields an inexpensive yet elegant decoration that can be enjoyed year-round, not just as Easter decor. To create these adorable acorns, you’ll need plastic eggs, real acorn caps (collected from nature or craft stores), and strong craft glue. Paint the plastic eggs in earthy tones like brown, green, or gold. Once dry, simply glue an acorn cap to the top of each egg, creating the perfect cap for your “acorn.” These charming little decorations are perfect for scattering on tables, adding to bowls, or incorporating into nature-inspired centerpieces, blending the joy of Easter with the beauty of the outdoors.
32. Adorable Cactus Easter Eggs
Add a touch of desert charm and quirky cuteness to your Easter decor with adorable cactus Easter eggs. These delightful creations are surprisingly simple to make and look fantastic when displayed in tiny terracotta pots. Start by dyeing your hard-boiled or craft eggs in various shades of green. Once dry, use a black fine-tipped marker to draw on small lines, dots, or ‘X’ marks, mimicking the texture of a cactus. For the blooming “flower” on top, scrunch up small pieces of pink or red tissue paper and glue them to the top of the egg. Finally, set these charming cactus eggs atop miniature terracotta pots filled with decorative gravel or small stones. They make for truly unique and positively adorable Easter decor pieces that will surely bring a smile to everyone’s face.
33. Expressive DIY Easter Emoji Eggs
In a world where emojis are everywhere, why not bring that expressive fun to your Easter eggs? These DIY Easter emoji eggs are a fantastic way to add modern, relatable humor and personality to your holiday decorations. Start by dyeing your eggs in bright, solid colors, particularly yellow for classic emojis. Once dry, use a fine-tipped black marker or acrylic paint pens to draw on various emoji faces – from happy smiles and winks to crying-laughing faces and hearts for eyes. You can also venture beyond standard emojis and create funny faces, silly expressions, or other entertaining designs and patterns. This project is incredibly straightforward and allows for endless creative expression, making your Easter eggs instantly recognizable and hilariously charming.
34. Enchanting Easter Bunny Eggs
Combine your painting skills with adorable embellishments to create enchanting Easter bunny eggs! This super cute project is a joy to make and results in delightful little characters perfect for display. Start by carefully painting cute bunny faces onto your eggs, including a nose, eyes, and mouth. The key to making these extra charming is the addition of bunny ears and a cute heart stand. Craft small bunny ears from felt or paper, and attach them to the top of the egg. For the stand, you can use a small piece of wood, clay, or even a folded piece of cardstock shaped into a heart. These bunny eggs offer another enjoyable Easter egg project that combines artistic flair with irresistible cuteness, making them a festive addition to any Easter setting.
35. Artistic Mosaic Easter Eggs
Transform ordinary eggs into stunning works of art with artistic mosaic Easter eggs. This creative project utilizes cracked egg pieces to form intricate patterns and designs, turning discarded shells into beautiful tessellations. With the natural curved contours of an egg, assembling these tiny pieces can be surprisingly easy and meditative. After carefully cracking and peeling dyed or painted eggshells into small fragments, use craft glue to adhere them onto a plain hard-boiled or craft egg, fitting them together like puzzle pieces. You can be incredibly creative with your mosaic Easter eggs, making them bright and colorful by using shells from various dyed eggs. The result is a lovely, textured, and unique piece of art that truly stands out in your Easter display.
36. Cute DIY Carrots Easter Eggs
Delight the Easter bunnies and your little egg hunters with these adorable DIY carrot-decorated eggs! This charming idea transforms eggs into miniature versions of the Easter Bunny’s favorite snack. Start by dyeing your hard-boiled or craft eggs in a vibrant orange color. Once dry, the key to making these DIY carrot Easter eggs prettier and more appealing is the addition of realistic “carrot tops.” You can use natural carrot tops (washed and dried), small sprigs of parsley, or cut out green paper leaves and attach them to the broader end of the egg with a dab of glue. These sweet, themed eggs are perfect for adding to Easter baskets, using as table decor, or hiding in a garden for a truly festive and imaginative egg hunt.
37. Mesmerizing Galaxy Easter Eggs
Embark on a cosmic crafting journey with mesmerizing galaxy Easter eggs. Achieving a stunning galaxy effect might seem tricky, but this easy DIY project uses simple household items, and the result is truly captivating. Begin by painting your eggs in dark, rich colors like deep blues, purples, and black to create a cosmic background. While the paint is still wet (or by dabbing with a sponge), add subtle swirls of lighter blues, pinks, and whites. The magic happens with a toothbrush: dip it into white paint and flick the bristles to create a fine spray of “stars” across the dark background. If you’re fascinated by the universe, astronomical phenomena, and everything in between, these unique Easter eggs are perfect for you, adding an otherworldly touch to your celebrations.
38. Sweet Ice Cream Cone Easter Eggs
Indulge in a sweet and whimsical Easter with these delightful ice cream cone Easter eggs! These adorable creations, complete with colorful sprinkles and a cherry on top, are sure to be a huge hit with your tiny hunters and make a charming addition to their Easter baskets. To make them, dye your hard-boiled or craft eggs in pastel shades resembling ice cream scoops. Once dry, place each egg into a mini ice cream cone (either real or craft cones). Decorate the “scoop” with painted sprinkles or small beads, and top with a red pom-pom or painted dot for the cherry. For an extra touch of cuteness, you can even draw tiny ice cream faces on the eggs. These sweet-looking treats are irresistibly adorable and bring a playful twist to traditional egg decorating.
39. Tropical Pineapple Easter Eggs
Infuse your Easter egg hunting spree with a vibrant, tropical touch by creating charming pineapple designs on your Easter eggs. This fun and unique idea brings a sunny, exotic vibe to your holiday decor. To craft these delightful pineapples, start by dyeing your hard-boiled or craft eggs a bright yellow. Once completely dry, use a fine-tipped black or dark brown marker to draw a crisscross pattern over the entire surface, mimicking the texture of a pineapple skin. For the leafy crown, cut out small spiky leaf shapes from green construction paper or felt, and glue them to the top of the egg. These cheerful pineapple Easter eggs are perfect for a spring celebration, adding a burst of unexpected color and a touch of island flair to your Easter festivities.
40. Glamorous Golden Confetti Eggs
Add instant sparkle and a touch of celebratory glamour to your Easter eggs by decorating them with golden confetti. This simple yet incredibly effective technique transforms plain eggs into dazzling treasures that are definitely worth hunting for! To create these shimmering beauties, you’ll need craft glue and a generous amount of golden confetti (small round or mixed shapes work best). Apply a thin, even layer of craft glue to your hard-boiled or plastic Easter eggs. While the glue is still wet, gently roll the egg in a shallow dish of golden confetti, ensuring good coverage. You can cover the entire egg, or create a dipped effect by covering only a portion. The result is a collection of shiny, festive DIY Easter eggs that will catch the light and add an exciting element of surprise to your egg hunt.
41. Modern DIY Gold Geometric Eggs
Take your plain dyed eggs up a notch with a sophisticated and contemporary look by drawing stylish gold geometric shapes. This modern decorating idea brings an elegant and artistic flair to your Easter collection. Start with eggs that have been dyed in solid, contrasting colors – perhaps matte black, deep navy, or even soft pastels. Once the base color is dry, use a fine-tipped gold paint pen or gold metallic marker to draw various geometric patterns onto the surface. Think clean lines, triangles, squares, or even intricate tessellations. The combination of gold and black, or gold against a muted pastel, works exceptionally well, instantly elevating the aesthetic of your Easter eggs. These chic, graphic eggs are perfect for a modern Easter display and demonstrate that elegance can be easily achieved with simple tools.
42. Delicious Rainbow Jello Easter Eggs
For a truly unique and edible Easter treat, consider making these delicious rainbow jello Easter eggs! These vibrant, wobbly delights are a fantastic addition to your Easter brunch menu and are sure to captivate both children and adults. To create them, you’ll need hollowed-out eggshells (cleaned thoroughly) and various flavors of Jello in rainbow colors. Carefully pour layers of different colored, cooled liquid Jello into the eggshells, allowing each layer to set in the refrigerator before adding the next. Once completely set, gently peel away the eggshells to reveal stunning, multi-colored Jello eggs. You might want to warn your hungry egg hunters, though, or they’ll dive straight for these colorful and tasty “eggs” before anyone else gets a chance!
43. Sparkling DIY Beaded Easter Eggs
Transform your Easter eggs into glistening treasures with these sparkling DIY beaded Easter eggs. Perfect for a treasure hunt, these eggs promise a radiant sparkle that will capture attention. This elegant decorating method involves carefully adhering tiny beads onto the surface of hard-boiled or craft eggs. You can use seed beads, small pearls, or even miniature sequins for varying textures and effects. Apply craft glue in small sections and then gently roll the egg in a shallow dish of beads, or painstakingly place individual beads for intricate patterns. Hide these beautifully crafted, sparkly, and shiny Easter eggs well, because their undeniable allure means they’ll likely be the first ones found during your festive hunt. They are truly little jewels for your Easter celebration.
44. Expressive Doodle Easter Eggs
Unleash your spontaneous creativity with expressive doodle Easter eggs. This wonderfully simple and personalized decorating idea allows anyone to create unique and artistic eggs using just a marker. Start by outlining different patterns, whimsical drawings, or abstract designs directly onto your hard-boiled eggs with a fine-tipped black marker. You can create intricate zentangle-inspired patterns, playful cartoon characters, geometric motifs, or free-flowing scribbles. For a colorful version, you can first dip the eggs in dye to create a vibrant background, then doodle on top. However, a plain white egg with black doodles also looks equally striking and modern. These trendy painted marker Easter eggs are incredibly accessible and a fantastic way for anyone, regardless of artistic skill, to personalize their Easter decor.
45. Charming Easter Eggs with Flower Crowns
As spring unfurls its beauty, these charming Easter eggs adorned with delicate flower crowns are an absolutely irresistible decorating idea. It’s spring after all, and what could be cuter than miniature floral garlands gracing your Easter eggs? To create these sweet little regal eggs, start by decorating your hard-boiled or craft eggs in soft pastels or natural tones. The key is to craft tiny flower crowns using small artificial flowers, sprigs of real baby’s breath, miniature silk leaves, or even delicate paper cutouts. Secure the floral elements with floral wire, a dab of hot glue, or by tying them with thin ribbon. These Easter eggs with flower crowns are not only incredibly cute but also perfectly encapsulate the fresh, blooming essence of the spring season, making them an enchanting addition to any Easter display.
46. Elegant Calligraphed Easter Eggs
For those with a knack for elegant penmanship, calligraphed Easter eggs offer a sophisticated and modern twist on traditional egg decorating. A crafty individual will undoubtedly want to include these for a refined Easter egg version. This idea involves using a black paint pen or a fine-tipped Sharpie to meticulously hand-letter words, phrases, or names onto your eggs. Similar to the doodle Easter eggs, the design here is often more synchronized and minimal, focusing on beautiful script. You can write “Happy Easter,” “Joy,” “Spring,” or personalize each egg with family names. Choose a simple, solid-colored egg as your canvas to allow the calligraphy to truly stand out. The result is a collection of elegant, understated, and beautifully personalized Easter eggs that exude a timeless charm.
47. Vibrant Color with Tissue Paper
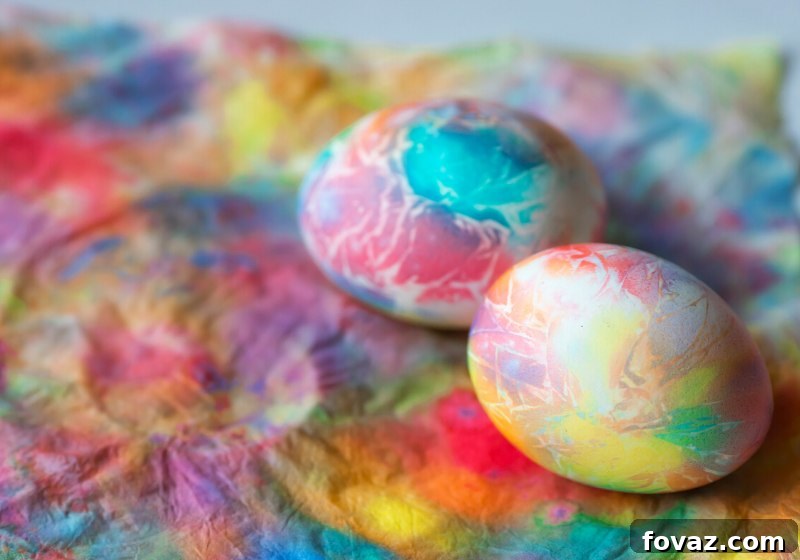
Achieve beautifully dyed eggs with a vibrant, watercolor-like effect using the simple “bleeding” technique with colored tissue paper. This method is incredibly easy and yields wonderfully artistic results, making it perfect for a quick and fun decorating session. Hard-boiled eggs work best for this, as their shells absorb the color more effectively. Here’s how to do it:
- Cut strips and various pieces of brightly colored tissue paper.
- Dampen your hard-boiled egg slightly.
- Paste the pieces of tissue paper all over the egg, overlapping them as you would with paper mache. Ensure the tissue paper is pressed firmly against the egg.
Allow the tissue paper to dry completely on the egg. As it dries, the colors will bleed and transfer onto the shell. Once thoroughly dry, carefully strip the tissue paper off to reveal neatly and beautifully dyed eggs in no time, showcasing unique color blends and patterns.
48. Unique Rubber Band Easter Eggs
Unlock a surprisingly intricate and captivating design with unique rubber band Easter eggs. What seems like a simple office supply can work magic on your Easter eggs, creating striking patterns that look far more complex than they are. This DIY project is so easy that even small children can assist. Simply wrap various rubber bands around your hard-boiled eggs in different directions and thicknesses, creating a resistant pattern. Then, dip the eggs into a dye bath. The areas covered by the rubber bands will remain undyed, creating crisp, linear patterns when the bands are removed. You can layer colors or use different sized rubber bands for varied effects. The result is a collection of geometrically fascinating eggs with a cool, modern aesthetic.
49. Delicious Cool Whip Dyed Eggs
Prepare for a remarkably fun and colorful experiment in egg decorating with delicious Cool Whip dyed eggs! This method is a fantastic alternative to shaving cream if you don’t have it on hand, and it yields similarly stunning, marbleized patterns. You’ll need a tub of Cool Whip, vibrant neon food coloring, and white vinegar. Spread a layer of Cool Whip in a shallow dish, then dot various colors of food coloring onto its surface. Swirl the colors gently with a toothpick. Add a splash of white vinegar to the Cool Whip (which helps the dye adhere better to the egg). Roll your hard-boiled eggs through the colorful mixture, letting them sit for a short period before wiping clean. You’ll have a blast decorating eggs with this remarkable, edible-ingredient-based technique, producing unique swirls and bright hues on each egg.
50. Awesome Marvel Superhero Easter Eggs
Summon your inner hero and transform your Easter eggs into awesome Marvel superhero-themed decorations! This incredibly creative idea is perfect for comic book enthusiasts and little ones who dream of saving the world. While you can paint details, a fantastic approach involves using edible fondant to sculpt and apply the iconic symbols and colors of characters like Iron Man, Captain America, Hulk, or Spider-Man onto plastic eggs. Imagine the joy on your children’s faces when they discover these powerful superhero Easter eggs, perhaps stuffed with a few coins or small treats. This project turns a regular plastic egg into a symbol of courage and excitement, making your little ones the happiest egg hunters around, ready for an epic Easter adventure.
51. Nostalgic Vintage Easter Eggs
Music lovers and those with an appreciation for timeless aesthetics will adore this nostalgic vintage Easter eggs idea! This charming project allows you to create beautifully classic eggs reminiscent of a bygone era. You’ll need either actual sheet music, old book pages, or scrapbook paper with music note patterns, along with decoupage glue. Carefully tear or cut small pieces of the chosen paper and apply them to your plastic eggs or hard-boiled eggs using a thin layer of glue. Smooth out any wrinkles as you go, ensuring the paper adheres seamlessly. Once covered and dried, you can add a protective topcoat of glue. The result is a collection of elegant, musical, and truly unique Easter eggs that evoke a sense of history and classic artistry, perfect for a vintage-inspired celebration.
52. Playful Pompom Easter Eggs
Infuse your Easter decorations with a burst of texture and playful charm by creating cheerful pompom Easter eggs! If you’re looking for an alternative to using actual eggs this year, or simply want to add a soft, fuzzy element to your display, this project is what you need. You can choose from a delightful array of pompom sizes and colors, allowing for endless creative combinations. Simply apply craft glue to plastic craft eggs or even foam eggs, and then carefully attach pompoms all over the surface, varying colors and sizes for a dynamic look. These tactile, colorful pompom eggs are incredibly fun to make and result in a wonderfully soft and whimsical Easter decoration that kids will adore and everyone will enjoy seeing.
53. Adorable Baby Yoda Easter Eggs
The cuteness overload is real with these adorable Baby Yoda Easter eggs! Everybody, it seems, is in love with The Child these days, and bringing this beloved character to your Easter celebration is sure to impress your guests and provide endless fun with your kids. To decorate your Easter egg Mandalorian style, you’ll need green paint for the base, brown felt or paper for his iconic robe, and a fine-tipped black marker for his large, expressive eyes and ears. Paint the egg green, then wrap a small strip of brown felt around the middle for his robe. Craft his large, distinctive ears from green felt or paper and attach them to the sides of the egg. Finally, draw on his sweet, curious eyes. “May the Force be with you” as you create these charming and trending Baby Yoda eggs for a truly epic Easter!
Celebrating Easter is fundamentally about embracing and celebrating life, rebirth, and new beginnings. Your DIY Easter egg decorating ideas should beautifully reflect this vibrant spirit. The more lively, colorful, and creative your Easter eggs are, the more spirited and exciting the hunt and overall celebration become. Each unique egg becomes a symbol of joy and a testament to the magic of the season.
With this extensive collection of Easter egg designs and ideas, I’m confident that everyone, regardless of age or crafting experience, will want to join in the fun. Why not? Celebrating life and rebirth is a universal joy that resonates beautifully and clearly with people of all backgrounds. So gather your supplies, invite your loved ones, and immerse yourselves in the delightful tradition of Easter egg decorating!
Which of these inspiring Easter egg designs and ideas are you planning to recreate first? Share your favorites and creative plans in the comments section below!
You Might Also Like These Festive Ideas:
- 20 DIY Easter Basket Ideas That Will Have You Hoppin’
- 19 Inventive Easter Egg Hunt Ideas Kids Will Love
- 20 Delightful Easter Crafts For Toddlers
Don’t forget to stay connected with us on Facebook, Twitter, Pinterest, and Instagram for more creative inspiration!