
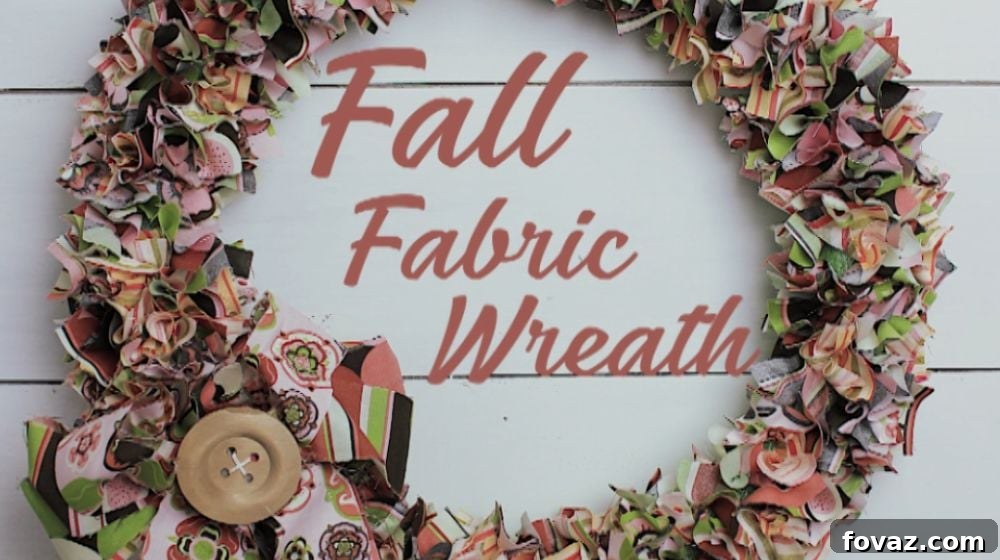
Craft Your Own Gorgeous Fall Fabric Wreath: A Step-by-Step DIY Guide
As the leaves begin to turn vibrant shades of red, orange, and gold, there’s no better way to welcome the crisp autumn air than by adorning your home with beautiful, handmade fall decorations. A DIY fall fabric wreath is the perfect project to infuse your living space with warmth and seasonal charm. Imagine a custom-made wreath, bursting with rich textures and colors, greeting guests at your front door – a true reflection of your personal style and creativity. And the best part? You can craft this stunning accent piece using an assortment of fabric scraps you might already have, combined with a few easily accessible supplies.
This comprehensive guide will walk you through every step of creating your very own fall fabric wreath. Not only is this a wonderfully rewarding project, but it’s also an excellent way to use up leftover fabric, making it both eco-friendly and budget-conscious. Get ready to transform simple materials into a magnificent display of autumn beauty that will be the envy of your neighborhood!
RELATED: Easy Pumpkin Crafts To Welcome Fall With
Why Craft a DIY Fall Fabric Wreath? Unveiling the Benefits
Before we dive into the creative process, let’s explore why making your own fall fabric wreath is such a fantastic idea. Beyond the obvious aesthetic appeal, there are numerous advantages to embarking on this delightful DIY journey:
- Personalized Home Decor: Unlike store-bought wreaths, a handmade fabric wreath allows for complete customization. You get to choose the exact colors, patterns, and textures that perfectly complement your home’s existing decor and your personal taste. Whether you prefer rustic, modern, or traditional autumn themes, your wreath will be uniquely yours.
- Budget-Friendly Creativity: This project is incredibly economical, especially if you have a stash of fabric scraps. Even if you need to purchase new fabric, you can often find affordable remnants or use old clothing, scarves, or pillowcases. This significantly cuts down on the cost compared to purchasing a high-quality seasonal wreath.
- Therapeutic and Relaxing: Crafting is known to be a fantastic stress-reliever. The repetitive motions of cutting fabric and attaching it to the wreath form can be meditative and calming, providing a wonderful escape from daily pressures. It’s a chance to engage your hands and mind in a fulfilling activity.
- Sustainable Crafting: Repurposing fabric scraps reduces waste, giving new life to materials that might otherwise end up in a landfill. It’s a small but meaningful step towards more sustainable living and crafting practices.
- Unique Gift Idea: A handmade fall fabric wreath makes a thoughtful and personal gift for friends, family, or neighbors. It shows you’ve put time and effort into creating something special just for them.
- Versatile Decoration: While perfect for the front door, your fabric wreath can also adorn an interior wall, a mantelpiece, or even serve as a charming centerpiece for a fall gathering. Its soft texture makes it suitable for indoor use without scratching surfaces.
Gather Your Autumn Crafting Essentials: Materials You’ll Need
The beauty of this project lies in its simplicity and the accessibility of its materials. Most items can be found at your local craft store, or you might even have them around your house. Here’s a detailed list of what you’ll need to create your stunning fall fabric wreath:
- Wreath Form: The foundation of your wreath. A standard foam or straw wreath form, typically 12-18 inches in diameter, works best. You could also use a wire wreath form for a different effect, though the technique for attaching fabric might vary slightly. The size you choose will impact the final look and the amount of fabric needed.
- Assorted Fabric: This is where your creativity truly shines! Gather a variety of fall-themed fabrics in different colors, patterns, and textures. Think rich oranges, deep reds, golden yellows, rustic browns, and forest greens. Flannel, cotton, burlap, and even old scarves work wonderfully. You’ll need a good amount to achieve a full, lush wreath.
- 1 Chopstick or Dowel Rod: A simple yet essential tool for pushing the fabric pieces into the wreath form. A knitting needle or even the blunt end of a pencil can serve as an alternative.
- Scissors or Rotary Cutter: Sharp scissors are crucial for clean cuts. If you have a rotary cutter and a cutting mat, it can make the fabric cutting process much faster and more precise, especially for cutting numerous strips and squares.
- Baker’s Twine: This decorative twine will be used for attaching your button accent and potentially for creating a hanger for your wreath. Its rustic charm perfectly complements fall decor.
- Wooden Button: A rustic wooden button adds a charming, natural touch to your wreath’s bow. Choose a size that will stand out without overpowering the bow.
- Dental Flosser (or Needle Threader): A clever tool for threading the baker’s twine through your wooden button easily. Its small hook or loop makes quick work of this task.
- Optional: Craft Glue (Hot Glue Gun or Fabric Glue): A dab of glue can help secure stubborn fabric pieces, especially if you’re using a wire wreath form, though it’s often not strictly necessary for foam or straw forms.
Your Step-by-Step Guide to a Stunning Fall Fabric Wreath
Now that you’ve gathered all your materials, let’s embark on the fun part – creating your beautiful fall fabric wreath. Follow these detailed steps to achieve a professional-looking result.
1. Preparing Your Fabric Strips: The Foundation of Your Wreath
The first crucial step is to prepare your fabric. This might seem tedious, but it’s essential for achieving that full, plush look for your wreath.
Begin by cutting your assorted fabric into strips. A good starting point is 2 inches wide, but feel free to adjust this based on the desired fullness and texture of your wreath. Thinner strips will create a denser, more intricate look, while wider strips will appear chunkier and more rustic. Once you have your long strips, proceed to cut them further into squares or rectangles. Aim for pieces that are roughly 2 inches by 2 inches, or slightly larger if your strips are wider. Don’t worry about perfect uniformity; the charm of a fabric wreath often comes from its slightly irregular, organic appearance.
You can use either sharp fabric scissors for this task or, for greater efficiency and precision, a rotary cutter with a self-healing mat. If using scissors, stack a few layers of fabric to speed up the process. The key is to have a plentiful supply of these fabric squares – you’ll need many to fully cover your wreath form and create a rich, dense texture. Don’t be afraid to mix and match patterns and solid colors; this variety will add depth and visual interest to your finished wreath.
2. Bringing Your Wreath to Life: Attaching Fabric to the Form
This is where your wreath really starts to take shape! The process involves punching holes into your wreath form and inserting the fabric pieces to create a vibrant, textured surface.
Using your chopstick or dowel rod, begin to punch small holes into the wreath form. The depth of the hole should be sufficient to hold the fabric securely. Take one of your fabric squares, fold it in half, then fold it in half again (or simply gather it at the center) to create a pointed end. Insert this gathered end into a pre-punched hole using your chopstick. Push it firmly until the fabric is snugly in place, with the “fluffy” ends of the fabric sticking out.
There are two main approaches to managing the holes: you can pre-punch all your holes across a section or the entire wreath form before you start inserting fabric, or you can punch holes as you go. Many crafters find it helpful to pre-punch at least a segment of holes to establish a rhythm and ensure even spacing. However, some prefer the flexibility of punching on the spot, allowing them to adjust density as needed. As you work, try to vary the fabric colors and patterns to ensure an even distribution of visual interest around the wreath. For an extra secure hold, especially if your fabric is slippery or your wreath form is less dense, you can add a tiny dab of craft glue or hot glue into the hole before inserting the fabric. This is particularly useful for wire wreath forms where fabric might otherwise slip through.
Tip for optimal fullness: Work in manageable sections. Instead of trying to complete an entire row or circle at once, focus on a small segment, ensuring each fabric piece is close enough to its neighbors to create a lush, full effect without gaps. Overlap the fabric slightly to hide the base of the wreath form and create a truly voluminous look. Continue this process, rotating your wreath form, until the entire visible surface is covered with your beautiful fabric squares. Ensure the sides and inner edge are also well-covered for a professional finish.
3. Crafting the Perfect Fabric Bow
A charming bow can add a focal point and an extra touch of elegance to your fall fabric wreath. This step uses longer strips of fabric to create a soft, flowing accent.
Select four different strips of fabric, perhaps choosing ones that complement or subtly contrast with the fabrics on your wreath. Each strip should be long enough to form a substantial bow. Lay them out on your work surface. To create a simple yet effective bow, you can use the “bunny ear” method. Take two strips and form two loops, resembling bunny ears. Cross one loop over the other and tuck it through the opening to create a single knot. Pull gently to tighten, but don’t pull too hard initially, as you may want to adjust the loops. Repeat this with the other two strips, or combine all four strips into a larger, more elaborate bow. Experiment with tying different knot styles until you achieve a bow that has a lovely drape and volume. The goal is to create a bow that feels organic and soft, rather than stiff. You can stack multiple bows or use a single, fuller bow made from all four strips. The beauty of fabric is its forgiving nature, allowing you to adjust and reshape until you’re happy with the result.
RELATED: 11 Cozy Cable Knit Sweater Patterns For The Fall Weather
4. Adding a Charming Button Accent
To further enhance your bow and add a rustic touch, we’ll incorporate a wooden button using baker’s twine. This small detail can make a big difference in the overall appeal of your wreath.
Take a length of baker’s twine and fold it in half. This creates a loop at one end and two loose ends at the other. Now, for the clever part: thread your dental flosser (or a fine needle threader if you don’t have a flosser) through the holes of your wooden button. Once the flosser is through, loop the folded end of your baker’s twine through the flosser’s hook or eye. Gently pull the flosser back through the button, bringing the twine loop along with it. This makes threading the button incredibly easy.
Once the twine is threaded through the button, pass the two loose ends of the twine through the loop you just created and pull tightly to secure the button. Tie a double knot firmly at the back of your button to ensure it won’t come undone. You should now have the wooden button securely attached to the baker’s twine, with two longer, loose ends extending from it. These loose ends are crucial, so do not trim them yet, as we will use them to attach the button-embellished bow to your fabric wreath.
5. The Grand Finale: Assembling Your Masterpiece
You’re almost there! This final step involves attaching your beautiful bow and button accent to the wreath, followed by some finishing touches.
With your button now secured to the baker’s twine, use the remaining loose ends of the twine to tie the button securely to the front of your fabric bow. Position the button centrally on the bow and tie another double knot at the back of the bow, ensuring the button is held firmly in place. Again, resist the urge to trim the loose ends of the twine from this knot, as these will be vital for attaching the entire bow assembly to your wreath.
Once the button is affixed to the bow, it’s time to attach this decorative element to your fall fabric wreath. Position the bow-and-button combination on your wreath where you want it to be the focal point – often at the bottom or slightly off-center. Use the remaining loose ends of the baker’s twine to tie the bow securely around the wreath form. Thread the twine ends around the wreath form to the back, and tie a tight double knot. Make sure the bow is facing forward and is firmly attached so it doesn’t sag or shift. Once the bow is securely in place, you can carefully trim any excess twine from the back, leaving just enough to ensure the knot remains secure.
Finally, inspect your bow and trim the ends of the fabric strips using your scissors to achieve a clean, polished look. You can cut them straight, at an angle, or even create a “V” shape, depending on the desired aesthetic. Fluff out your fabric wreath and bow to ensure all the pieces are arranged beautifully, creating a harmonious and inviting display. Step back and admire your handiwork!
Here’s the finished product:
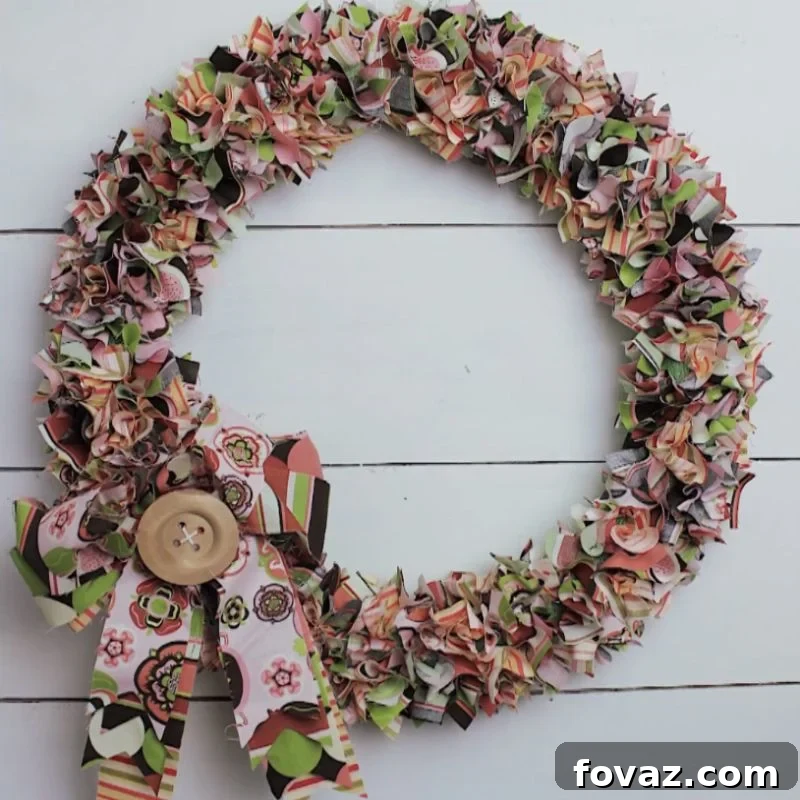
You have successfully created a gorgeous fall fabric wreath using just a few simple supplies and your own creative flair. This project is a testament to how accessible and rewarding DIY home decor can be. We hope you enjoyed this detailed tutorial and are thrilled with your new autumn decoration. Feel free to experiment with different fabric combinations and embellishments for future wreaths!
Customizing Your Fall Fabric Wreath: Make It Uniquely Yours
The beauty of a DIY project is the freedom to personalize it. While the basic steps remain the same, there are countless ways to customize your fall fabric wreath to truly reflect your style and the specific aesthetic of your home:
- Color Palette: Don’t feel limited to traditional fall colors. Explore muted pastels for a farmhouse chic look, vibrant jewel tones for a bolder statement, or even a monochromatic scheme for modern elegance.
- Fabric Variety: Mix and match fabric types! Incorporate burlap for a rustic touch, velvet for luxury, denim for an industrial feel, or sheer fabrics for delicate texture. The more variety, the richer the visual interest.
- Additional Embellishments: Beyond the button, consider adding other fall-themed accents. Small faux pumpkins, silk leaves, artificial berries, pinecones, cinnamon sticks, or even miniature gourds can be wired onto the wreath for extra dimension.
- Personalized Touches: Attach a small wooden initial, a custom-stamped tag, or a hand-painted sign to your wreath. This makes it truly unique and perfect for gifting.
- Scented Elements: For an inviting aroma, discreetly tuck in a few drops of fall-scented essential oil (cinnamon, pumpkin spice) onto a hidden fabric scrap or attach small sachets of dried potpourri.
- Wreath Shape: While round is classic, experiment with heart-shaped, square, or even oval wreath forms for a distinctive look.
Displaying and Caring for Your Handmade Wreath
Once your beautiful fall fabric wreath is complete, it’s time to find the perfect spot for it. Here are some ideas for displaying and caring for your new autumn decor:
- Front Door Welcome: The most popular spot! Ensure it’s hung securely with a sturdy wreath hanger. If your front door is exposed to harsh weather, consider spraying your fabric with a fabric protector spray or displaying it on an interior door instead.
- Indoor Accent: Hang your wreath above a mantel, on a gallery wall, or as a focal point in your entryway. Its soft texture makes it ideal for indoor display.
- Table Centerpiece: Lay the wreath flat on a dining table and place a large pillar candle (in a hurricane glass for safety) or a vase of fall flowers in the center for a stunning centerpiece.
- Window Decor: Hang smaller versions of these wreaths in windows to bring autumn cheer inside and out.
- Care and Storage: To keep your fabric wreath looking its best, gently dust it occasionally with a soft brush or a lint roller. If it gets slightly flattened, gently fluff the fabric pieces by hand. When the season is over, store your wreath in a sturdy box in a cool, dry place to protect it from dust and crushing. This will ensure it remains vibrant and ready for next fall!
You have just created a magnificent fall fabric wreath using a few simple supplies and your own dedication. This project not only adds a touch of personalized charm to your home but also serves as a wonderful outlet for your creativity. Embrace the beauty of the autumn season with this delightful, handmade accent. We genuinely hope you found this tutorial inspiring and easy to follow. Don’t hesitate to share your thoughts and experiences with us!
Have you tried making a fall fabric wreath? Share your work and tips in the comments section below! We’d love to see your creations!
Up Next:
- 21 Fall Door Decorations | DIY Wreaths, Door Hangers, And More
- Create A “No Broom Parking” Halloween Sign
- How To Mount A TV To The Wall
Calling all crafting DIYhards, DIY Projects needs YOU! Click here if you want to write for us.
Don’t forget to stay connected with us on Facebook, Twitter, Pinterest, and Instagram!