
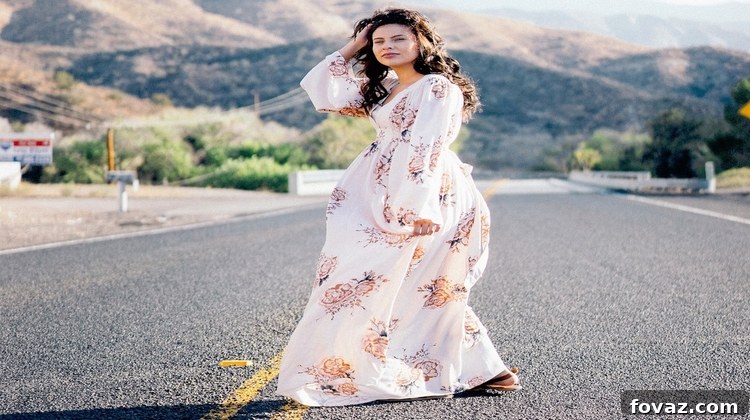
The maxi dress has transcended seasonal trends, establishing itself as a beloved wardrobe staple known for its effortless style and unparalleled comfort. Especially as the days lengthen and the air warms with the promise of spring, a vibrant maxi dress becomes the epitome of chic versatility. While high-fashion runways continue to showcase stunning designer creations, you don’t need to splurge on a luxury label to embrace this iconic look. With a sewing machine, a few basic tools, and a sprinkle of creativity, you can craft your very own bespoke maxi dress for a fraction of the cost. This comprehensive guide will walk you through each step of creating a beautiful, custom spring maxi dress that’s perfect for any occasion, from a casual brunch to an elegant evening out.
Craft Your Own Stylish Maxi Dress for Spring: A DIY Guide
Maxi dresses are truly year-round garments, but they particularly shine in the spring. This season invites us to celebrate with floral patterns, bright colors, and breathable fabrics that perfectly capture the fresh, renewing spirit of the warmer months. Imagine strolling through a park, attending a garden party, or simply enjoying a sunny afternoon in a dress that flows gracefully with every step, reflecting your personal style. Crafting your own maxi dress offers the unique opportunity to select the exact fabric, print, and fit that makes you feel fabulous.
The journey to creating a custom garment is incredibly rewarding. It begins with a vision and the exciting hunt for the perfect fabric. For this particular project, the inspiration stemmed from a desire to create a unique maxi dress that combined comfort with a touch of elegance. The fabric chosen, a sheer jersey printed knit, was absolutely stunning – a testament to an eye for beautiful patterns. However, working with certain fabrics can present unexpected challenges. In this case, the sheer nature of the outer fabric necessitated a lining, leading to the selection of a lightweight, off-white knit jersey. This decision, while necessary for modesty and drape, unexpectedly introduced a significant learning curve regarding fabric handling. It’s a crucial reminder that the choice of fabric, and particularly the combination of fabrics, can profoundly impact the sewing process.
Indeed, the initial experience of working with these two particular knit fabrics was quite challenging. They exhibited a frustrating tendency to cling and fight against alignment, with the lining fabric, in particular, stubbornly rolling into thick, unwieldy edges. This required considerable patience and innovative techniques to manage. It’s an important lesson for any DIY enthusiast: understanding fabric properties and selecting appropriate lining materials are paramount. While a simple knit jersey might seem suitable for a lining, a dedicated lining fabric, designed for smooth layering and minimal bulk, would have significantly streamlined the process. Learning from these minor setbacks is part of the crafting journey, transforming potential frustrations into valuable knowledge for future projects. Embracing a basting stitch, a temporary hand or machine stitch, proved indispensable in holding the challenging fabrics together, ensuring precise alignment before final seams were sewn.
Essential Materials and Tools for Your DIY Maxi Dress
Embarking on any sewing project requires thoughtful preparation, starting with the right materials and tools. For your DIY maxi dress, the fabric selection is perhaps the most personal and impactful choice you’ll make. Consider the season: for spring, lightweight, breathable fabrics like cotton jersey, rayon challis, chiffon, or a comfortable knit blend are ideal. Floral prints, vibrant solids, or subtle pastels will perfectly capture the essence of spring. When purchasing fabric, it’s always wise to consult with store assistants if you’re unsure about the yardage needed for a maxi dress, as requirements can vary based on your size and the dress design. A general rule of thumb is to buy a little extra fabric than estimated, allowing for pre-washing shrinkage, pattern matching, or any potential cutting mistakes. This small buffer can save you a trip back to the store and prevent frustration.
Beyond the main fabric, remember the importance of lining, especially if your chosen outer fabric is sheer or requires more structure. Opt for a smooth, lightweight lining fabric that complements your main fabric’s drape and color. Materials like polyester tricot, cotton voile, or even a soft rayon lining can work wonderfully. Ensure your lining choice won’t add unnecessary bulk or static.
Key Tools You’ll Need for Your DIY Maxi Dress Creation:
Having the right tools at hand ensures a smooth and enjoyable sewing experience. Before you begin, gather the following:
- Sewing Machine: A reliable machine is essential. For knit fabrics, a machine with a stretch stitch setting is a bonus, though a regular straight stitch can also work if handled carefully.
- Needles: Use a ballpoint or stretch needle specifically designed for knit fabrics. These needles have a rounded tip that pushes fabric fibers aside instead of piercing them, preventing holes and skipped stitches.
- Thread: All-purpose polyester thread is suitable. Choose a color that matches or complements your fabric.
- Measuring Tape: Crucial for accurate body measurements and fabric cutting.
- Fabric Scissors: Sharp, dedicated fabric scissors are a must for clean, precise cuts. Avoid using them on paper, which dulls the blades.
- Pins or Fabric Clips: Essential for holding fabric layers together. Clips are particularly useful for knits, as pins can sometimes snag delicate fabrics.
- Seam Ripper: An inevitable tool for correcting mistakes – every sewer needs one!
- Iron and Ironing Board: Pressing seams as you go is vital for a professional finish.
- Bias Tape: For creating casings for elastic at the waist and top of the dress. Choose a color that blends with your fabric.
- Elastic: The width of your elastic will depend on your preference for the waist and top. For this project, a one-inch thick elastic was used.
- Safety Pin or Bodkin: For easily threading elastic through casings.
- Fabric Marker or Chalk: For marking cutting lines or placement points on your fabric.
Step-by-Step Guide to Sewing Your Maxi Dress
Before you begin sewing, it’s highly recommended to pre-wash and dry your fabric according to its care instructions. This step is crucial to prevent shrinkage after your dress is completed. Once your fabric is prepared and all your tools are gathered, you’re ready to bring your maxi dress to life!
Step 1: Preparing and Cutting Your Fabric
Begin by folding your chosen fabric in half lengthwise, ensuring the right sides are together. This means the printed or “good” side of the fabric is facing inwards. Carefully align the selvage edges (the finished edges of the fabric) to ensure an even fold. Next, lay your dress pattern piece, or a well-fitting tank top or existing maxi dress as a guide, onto the folded fabric. For a strapless design, measure from armpit to armpit across the width of your body or the reference garment. Add a seam allowance (typically 1/2 to 5/8 inch) to this measurement. You will cut two identical pieces: one for the front and one for the back. For the length, measure from your armpit down to where you want the hem of your maxi dress to fall, adding extra length for the top casing, waist casing, and the bottom hem. Ensure your cuts are smooth and even. If you are using a lining, repeat this step with your lining fabric, cutting it to the same dimensions as your main dress pieces.
Once both the main fabric and lining pieces are cut, place the lining piece directly on top of the main fabric piece, right sides facing outwards (wrong sides together, or “wrong side of lining to wrong side of main fabric”). This will treat them as one single piece throughout the initial steps, helping to manage the layers. Baste stitch (a long, temporary stitch) around the raw edges of the two layers, about 1/4 inch from the edge. This will prevent the layers from shifting and rolling, especially with slippery knits.
Step 2: Creating the Elastic Waist Casing
With your fabric (main and lining basted together) laid flat, measure down approximately 12 inches from the top raw edge. This point will mark the top of your elastic waist casing. Take your bias tape and unfold it once, creating a single folded edge. Pin the unfolded edge of the bias tape along the marked line, ensuring it is straight and parallel to the top edge of the dress. The raw edge of the bias tape should point downwards towards the hem of the dress. Your elastic is an inch thick, so you’ll want the casing to be slightly wider than that to allow the elastic to move freely but still provide a snug fit. The unfolded bias tape, when stitched, should create a channel that perfectly accommodates your elastic. Pin securely all the way around the dress opening.
Inspiration: Nicole Miller Women’s Beach Blanket Maxi Dress
This example illustrates a beautiful maxi dress design with thoughtful details like neck ties and full lining.
- Features comfortable ties at the center back neck.
- Fully lined for optimal comfort and opacity.
View on Amazon for Design Ideas
Step 3: Stitching the Waist Casing to the Dress
Now that the bias tape is securely pinned, it’s time to stitch it to the dress. Using your sewing machine, sew along both the top and bottom edges of the bias tape, forming a channel. A simple straight stitch is perfectly adequate for this step, as this part of the dress will be gathered by elastic and is not subject to stretching in the same way a seam might be. Take care to keep your stitches straight and even, removing pins as you sew to avoid damaging your needle. This will create the clean tunnel through which your waist elastic will be threaded. Remember to backstitch at the beginning and end of your seams to secure them.
Step 4: Forming the Strapless Top Casing
Next, you’ll create the casing for the elastic at the top of the dress, which will form the secure, strapless neckline. Fold down the top raw edge of the dress (main fabric and lining together) by about 1.5 inches towards the wrong side of the fabric. Press this fold neatly with an iron to create a crisp edge. Then, fold it down again by another 1.5 inches, encapsulating the raw edge completely to form a clean casing. Pin this fold securely all the way around the top opening of the dress. Ensure that this channel is wide enough to comfortably accommodate your chosen elastic (e.g., if you’re using 1-inch elastic, aim for a 1.25-inch wide casing after sewing). This double-fold hem will create a durable and neat finish for the strapless top.
Inspiration: Rachel Zoe Women’s Sybilla Maxi Dress
This elegant maxi dress offers another perspective on design, featuring intricate details like lace and tassels.
- Showcases a beautiful pleated design with contrasting lace front.
- Features delicate double skinny straps and lacing at the back for a sophisticated touch.
Explore on Amazon for More Ideas
Step 5: Stitching the Side Seam and Inserting Elastic
Now, with your casings prepared, it’s time to close the side seam of the dress. Fold the dress in half lengthwise, right sides together, aligning the raw side edges. Pin these edges together, making sure the top and waist casings also align perfectly. Stitch down this open side seam from the top edge all the way to the bottom hem, using a stretch stitch if your machine has one, or a small zigzag stitch for knit fabrics to prevent the seam from breaking when stretched. If using a straight stitch, be careful not to pull the fabric too much as you sew. Press the seam open or to one side.
With the side seam sewn, your dress structure is nearly complete. Now for the elastic! Attach a safety pin or bodkin to one end of your elastic. Carefully thread the elastic through the top casing of the strapless dress, working it all the way around until it emerges from the other side of the opening. Be careful not to twist the elastic inside the casing. Once both ends are out, overlap them by about 1 inch and securely stitch them together, forming a loop. Then, gently ease the elastic back into the casing so the join is hidden. Repeat this process for the elastic waist casing. The elastic will gather the fabric, creating the desired shape and fit. At this point, the dress should start to take its final form.
Step 6: Adjusting the Fit and Finishing the Hem
This is arguably the most satisfying step! Carefully try on your newly constructed maxi dress. This allows you to assess the fit of the elastic at both the bust and waist, ensuring it’s comfortable and secure without being too tight or too loose. It’s also the perfect opportunity to check the overall drape of the dress and, crucially, to determine the final length. Maxi dresses are designed to be long, often brushing the floor or just above it. If the dress is too long and drags, mark your desired hemline while wearing it. For the final hem, you have a few options: a simple rolled hem, a double-fold hem, or if your fabric doesn’t fray, a raw edge can even be stylish for certain knits. For a clean finish, fold the bottom raw edge of the dress up by 1/2 inch, press, then fold again by another 1 inch, press, and stitch in place. For knit fabrics, use a twin needle or a narrow zigzag stitch for a professional-looking, stretchy hem.
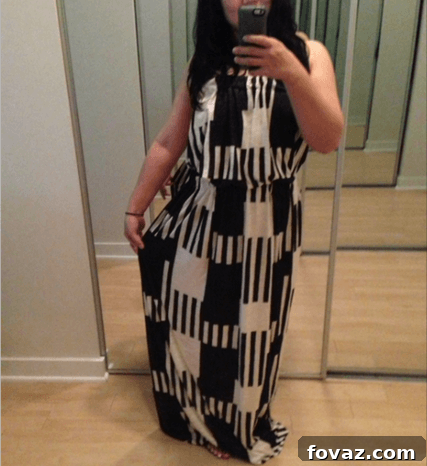
As you can see, creating your own maxi dress is a straightforward and achievable project, even for those with moderate sewing experience. The most challenging aspect can often be managing slippery or delicate fabrics, especially when working with multiple layers like knits and linings. Had a dedicated lining fabric been used, designed for smooth handling and minimal rolling, this dress could very likely have been completed in a remarkably short time—perhaps even under an hour! The key takeaway is that proper fabric selection and patience are your best allies in any sewing endeavor.
Recommended Sewing Machine: EverSewn Charlotte
A quality sewing machine can make all the difference in your DIY projects, especially when tackling various fabrics.
- Features 80 stitch package for versatility.
- 6.5-inch wide sewing space, perfect for larger projects like dresses.
- Includes an automatic needle threader and drop-in bobbin for ease of use.
- Adjustable sewing speed provides excellent control for beginners and experts alike.
Price: ~$199.00 (Check Amazon for current pricing)
Buy on Amazon
And there you have it: a beautiful, custom-made maxi dress, perfect for embracing the warmth and style of spring. This project not only yields a stunning garment but also enhances your sewing skills and confidence. Enjoy wearing your unique creation, knowing every stitch was made by you!
If you’re eager to explore more creative projects, discover other exciting DIY clothing ideas for kids and beyond.
This tutorial was inspired by an original post on Aeri’s blog. For the initial inspiration, you can view the original concept here: DIY Knit Lined Maxi Dress.
Stay Connected for More DIY Inspiration!
Don’t miss out on our latest project updates and inspiring DIY articles! Be sure to follow us on social media for fresh ideas and expert guides. Your feedback is important to us, so if you enjoyed this DIY maxi dress article or have any questions, please let us know in the comments below!
Explore More Creative DIY Projects
Looking for your next crafting adventure? Check out our guide on How To Make A DIY Book Clutch | DIY Projects for a unique accessory that combines literature and style.