
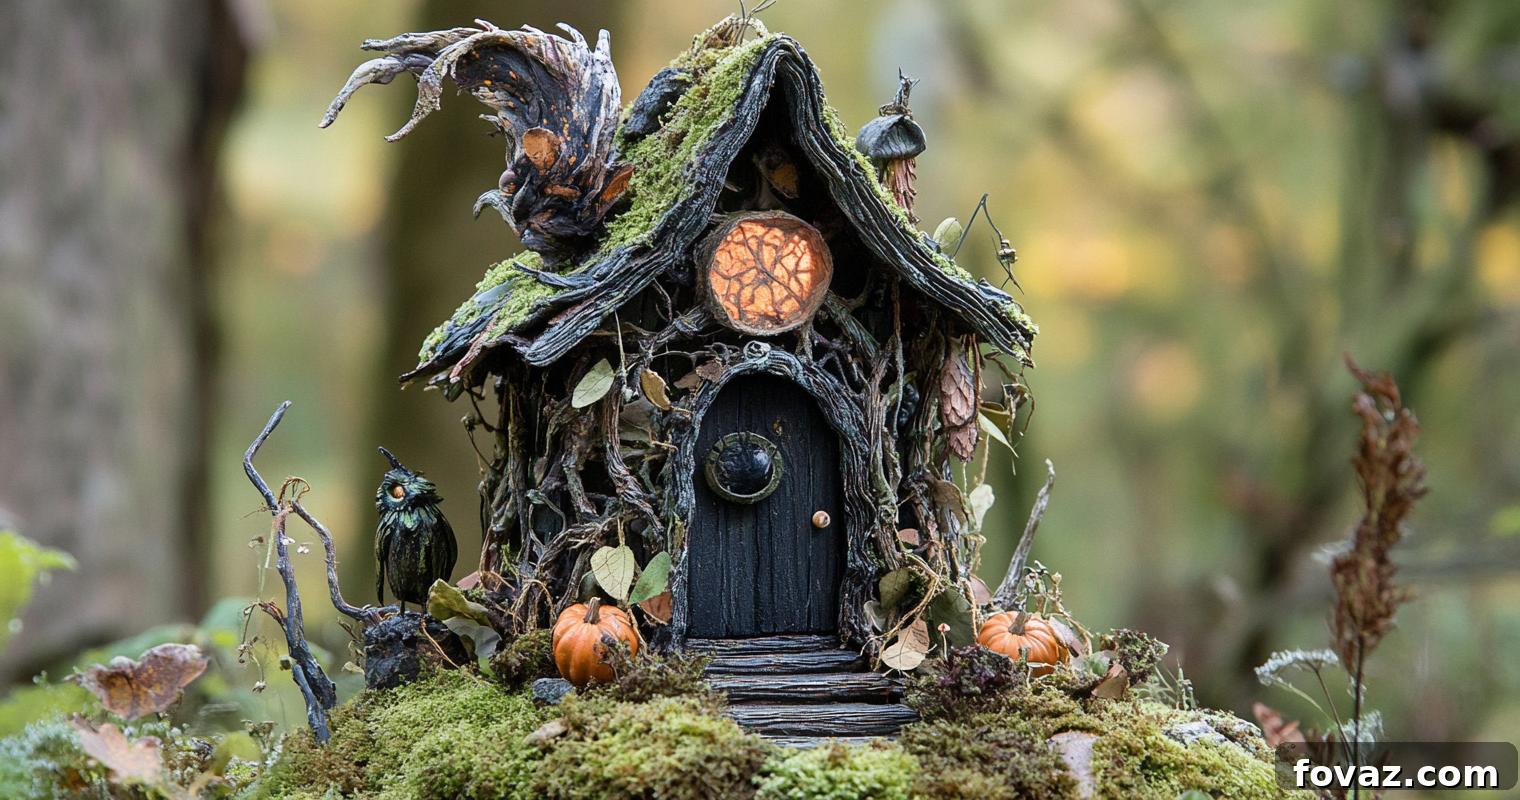
Are you tired of the predictable parade of witches, ghosts, and grinning pumpkins that dominate Halloween decorations year after year? If you’re yearning to captivate your friends and neighbors with something truly extraordinary and steeped in mystique, then look no further than the legendary Baba Yaga’s hut. This engaging DIY project offers a unique opportunity to transform your home into a realm of Slavic folklore, bringing the mythical and eerie hut on chicken legs to life as an unforgettable Halloween centerpiece. Crafting Baba Yaga’s dwelling isn’t merely a creative endeavor; it’s an immersive journey into ancient tales, culminating in a magical, one-of-a-kind décor piece that stands out from the ordinary.
In a season often defined by mass-produced spooky items, creating your own Baba Yaga’s hut allows for unparalleled personalization and charm. It’s a declaration of creativity, a conversation starter, and a fantastic way to embrace the darker, more whimsical side of Halloween. So, gather your materials and let’s embark on this exciting artistic adventure, exploring how you can easily bring this legendary, chicken-legged abode to spectacular life!
Unveiling the Myth and Magic of Baba Yaga’s Hut
Before we delve into the practical steps of construction, let’s take a moment to fully appreciate the rich, spine-tingling folklore that surrounds Baba Yaga and her extraordinary hut. Deep within the ancient, whispering forests of Slavic mythology resides Baba Yaga, a powerful and ambiguous witch figure. She is often depicted as a fearsome, crone-like entity who might offer either aid or peril to those who encounter her. Her most iconic attribute, however, is her dwelling: a peculiar hut that sits precariously on two gigantic, enchanted chicken legs.
This whimsical yet haunting design is more than just a quirky detail; it’s central to Baba Yaga’s mystique. The hut moves around the forest at will, often spinning and turning to face its visitors, its windows sometimes glowing with an otherworldly light. It’s not a static structure but a living, breathing part of the forest, imbued with its own magical properties. The crooked, uneven charm of this architectural marvel makes it an absolutely perfect subject for a standout Halloween showpiece. Its whimsical nature, combined with its eerie, ancient roots, makes it an ideal choice for a decoration that tells a story and sparks the imagination.
One of the most appealing aspects of this project is its accessibility. You won’t need an arsenal of complicated tools or an array of fancy, expensive materials. Whether you consider yourself an experienced crafter with a knack for intricate details or a beginner looking for a fun, manageable project, building Baba Yaga’s hut is both enjoyable and achievable for all skill levels. The beauty lies in its inherent imperfection; the more crooked, weathered, and aged your hut appears, the more authentic and magical it will feel. So, if you’re ready to conjure a piece of timeless folklore magic right in your own home, let’s gather our supplies and begin this enchanting journey!
Why Baba Yaga’s Hut Is the Ultimate Halloween Decoration
In a sea of generic Halloween décor, opting for Baba Yaga’s hut sets your display apart. Here’s why this mythical dwelling is an unbeatable choice for unique holiday charm:
- Unparalleled Uniqueness: Move beyond the standard ghosts and goblins. Baba Yaga’s hut is a distinctive symbol of folklore, instantly drawing attention and sparking curiosity. It’s not something you’ll see on every doorstep, making your home truly memorable.
- A Blend of Spooky and Whimsical: The hut perfectly balances eerie charm with a touch of playful fantasy. Its crooked structure and chicken legs evoke both wonder and a gentle shiver, appealing to a broad audience from avid horror fans to families with young children.
- Rich Storytelling Potential: Every detail you add to your hut contributes to a larger narrative. It’s more than just a decoration; it’s a portal to a world of ancient tales and legends. Your display becomes a piece of interactive storytelling, inviting viewers to explore the lore.
- High Crafting Satisfaction: There’s immense pride in creating something entirely by hand, especially when it’s as visually striking as Baba Yaga’s hut. The process itself is rewarding, offering a creative outlet and a tangible result of your artistic efforts.
- Adaptable to Any Skill Level: From simple constructions for beginners to intricate designs for advanced crafters, the project can be scaled to fit your comfort and ambition. Its rustic nature means perfection isn’t required, allowing for creative freedom.
- Versatile Display Options: While perfect for Halloween, this unique piece can also serve as an intriguing year-round display for those who appreciate folklore, fantasy, or eclectic home décor. It’s a timeless art piece.
Gathering Your Crafting Essentials: What You’ll Need to Build Baba Yaga’s Hut
Before you dive into the exciting world of crafting, it’s crucial to have all your necessary materials and tools neatly organized and ready. A well-prepared workspace ensures a smooth, enjoyable process and allows your creative energy to flow without interruption. Building Baba Yaga’s hut should be a fun, imaginative experience, not a frustrating scavenger hunt. Below is a comprehensive list of everything you’ll need to bring this spooky, mythical project to life, along with some tips for selection.
- Cardboard: This will form the core structure of your hut. Look for sturdy, clean cardboard boxes – moving boxes, appliance boxes, or even large shipping boxes work perfectly. The thicker the cardboard, the more robust your hut will be. You’ll need enough to cut out panels for the walls, roof, and possibly a base. Don’t worry about finding perfectly flat pieces; slightly warped cardboard can add to the rustic charm!
- Wire or Thick String: Essential for shaping the iconic chicken legs. For more stability and a firmer structure, craft wire (like floral wire, picture hanging wire, or even coat hangers straightened out) is ideal. If you prefer a softer, more flexible approach, thick jute twine or sisal rope can also work, though it may require more clay for reinforcement. Choose a material that can hold a bent shape.
- Air-Drying Clay: This is your primary sculpting medium for the legs and for adding intricate details to the hut. Air-drying clay is incredibly user-friendly as it doesn’t require baking and hardens on its own. It’s perfect for creating texture, scales, bumps, and other organic features. You’ll need a good amount to fully cover the wire legs and add structural details to the hut.
- A Glue Gun with Plenty of Glue Sticks: Your trusty adhesive for assembling the entire structure. A hot glue gun provides a quick, strong bond, which is perfect for securing cardboard panels and attaching the finished legs to the hut. Make sure you have extra glue sticks on hand, as you’ll be using a fair amount for initial construction and adding textures.
- Craft Paint: To give your Baba Yaga’s hut its ancient, weathered, and magical appearance. Opt for a range of dark, earthy tones such as deep browns, forest greens, charcoal grays, muted reds, and perhaps a touch of shadowy black. Acrylic craft paints are versatile and dry quickly. Consider having a lighter shade (like a pale grey or beige) for dry-brushing highlights and glow-in-the-dark paint for mystical accents.
- Utility Knife or Scissors: For precisely cutting cardboard and other materials. A sharp utility knife will make cleaner cuts on cardboard, but always use it with a cutting mat and extreme caution.
- Paintbrushes: Various sizes for different tasks – larger brushes for base coats and smaller, finer brushes for detailing and weathering effects.
- Water and Paper Towels: For cleaning brushes and tidying up.
- Protective Workspace Cover: Newspaper, old sheets, or a plastic tablecloth to protect your crafting surface from paint and glue.
Having all these items ready before you begin will make the entire crafting process a seamless and enjoyable experience, allowing you to focus on the creative transformation of your materials into a piece of Slavic legend.
The Journey of Creation: Step-by-Step Guide to Crafting Baba Yaga’s Spooky Hut
Building Baba Yaga’s hut is a deeply satisfying, hands-on project that fosters creativity at every stage. As you progress through each step, you’ll witness the magical, quirky essence of the hut gradually materialize, evolving from simple materials into a fantastical dwelling. This guide is designed to be accessible to everyone, from seasoned crafters to those just starting their DIY journey. Follow these instructions to create a truly unique and eye-catching display that will become the talk of your Halloween celebrations. Let’s roll up our sleeves and infuse some spooky folklore into your festive décor!
1. Constructing the Hut’s Foundation: Building the Frame and Adding Character
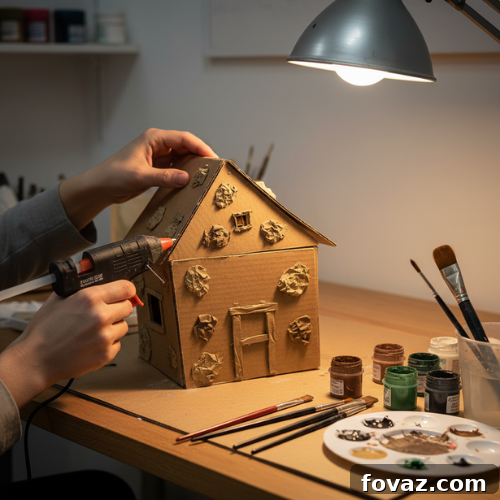
The first and foundational step is to create the basic structure of your hut. Begin by carefully cutting your chosen cardboard into panels that will form the walls, roof, and a potential base for your dwelling. What makes this particular project so wonderfully exciting and forgiving is Baba Yaga’s hut’s famously uneven, crooked, and rustic appearance—there is absolutely no need for architectural perfection! Embrace the asymmetry; slightly warped walls or an off-kilter roof will only enhance its mythical charm.
Once your panels are cut, use your trusty glue gun to firmly attach the walls and then secure the roof, working quickly as hot glue sets fast. Don’t be afraid to create slanting angles or irregular shapes to give the hut that signature, rickety look. Imagine it as a dwelling that has stood for centuries in a dark forest, enduring countless storms and shifting under its own magical power. Reinforce all seams with additional glue to ensure a sturdy structure. You can also cut out simple window and door shapes at this stage, or simply paint them on later.
Once the basic frame is securely in place, it’s time to add texture and depth, transforming flat cardboard into an aged, organic structure. Glue small, irregular pieces of clay, crumpled paper, or even torn strips of paper towel onto the surface of the walls and roof. These seemingly minor details are crucial; they will make the hut look weathered, ancient, and truly lived-in, as if it has been exposed to the elements for ages. This textured surface not only enhances its spooky, mythical appearance but also provides a fantastic base for your paint later, allowing for more realistic aging effects. You can also score the cardboard with your utility knife to mimic wood grain or rough planks, further building its character.
2. Sculpting the Iconic Chicken Legs: Bringing the Movement to Life
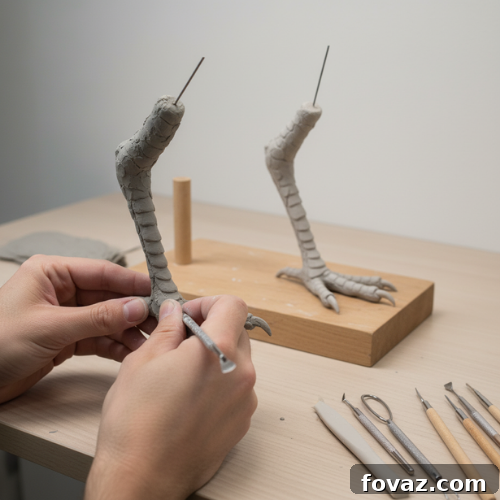
Now for arguably the most fun and distinguishing part of the entire project—sculpting Baba Yaga’s famous, animated chicken legs! Begin by using your wire to form the basic skeletal shape of two large, gnarled chicken legs. Think about how real chicken or bird legs bend and articulate, but exaggerate the knobbly knees and sharp angles for a more fantastical, creepy effect. Since these legs are supposed to be magical and organic, they don’t need to look perfectly symmetrical; in fact, the more crooked, twisted, and offbeat they are, the more authentic and magical your hut will appear. Ensure the wire framework is stable enough to support the hut and provides a good base for the clay.
Once you’re satisfied with the wire armature, begin covering the wire structure with generous amounts of air-drying clay. Work the clay around the wire, building up volume and definition to create the muscular, scaled appearance of a chicken leg. While the clay is still soft and pliable, this is your prime opportunity to add intricate textures and details. Use various tools (or even your fingernails) to create deep grooves, ridges, scales, bumps, and even small feather-like textures near the top where the leg would meet the hut. Think about cracked skin, bony protrusions, and rough, gnarled surfaces. These details are what will give your legs their rustic, enchanted, and slightly unsettling character.
Allow the clay to dry completely according to the manufacturer’s instructions. This usually takes 24-72 hours, depending on thickness and humidity. Once the clay is fully hardened, it’s time to bring color to your creation. Paint the legs in a palette of earthy, organic tones such as deep browns, reddish-browns, muted oranges, and touches of dark green or black. These colors will give them a natural, ancient, and truly enchanted feel, making them look as if they’ve emerged from the deep forest floor. You can use washes of darker paint in the crevices to emphasize texture and lighter dry-brushing on the raised areas to highlight the scales and bumps. If you’re looking for different sculpting techniques or more ideas for texturing air-drying clay, resources like the Artists Network offer a wealth of information and inspiration to refine your skills.
3. Uniting Hut and Legs: The Grand Assembly and Achieving Precarious Balance
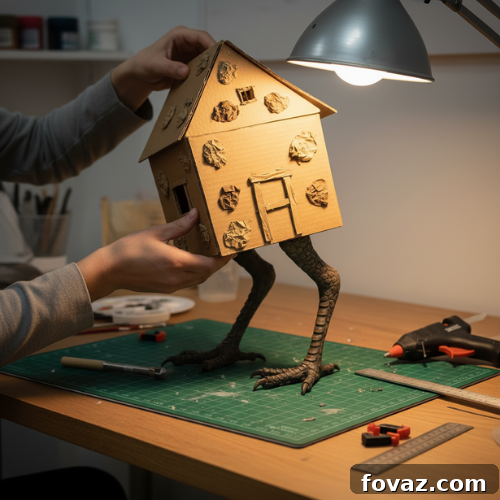
With both the hut and the chicken legs fully formed and dry, it’s time for the pivotal moment: uniting these two distinct elements to create the complete, iconic Baba Yaga’s dwelling. Carefully position your hut on top of the dried chicken legs. Use your glue gun to firmly attach the base of the hut to the top of the legs. This step requires a bit of patience and strategic placement to ensure stability while maintaining that characteristic, unsettling balance.
Adjust the angles of the legs and the hut’s placement to ensure the dwelling looks as though it’s balancing precariously, almost impossibly, on its spindly, gnarled limbs. The off-kilter, slightly unbalanced appearance is absolutely key to capturing the true spirit of Baba Yaga’s hut in all its eerie glory. You might need to hold the pieces in place for a minute or two while the hot glue sets. Consider adding extra glue around the attachment points for reinforcement, especially if your hut is on the heavier side. If your hut feels unstable, you can create a small cardboard or clay “nest” around the base of the legs where they meet the ground, or even affix them to a wider, flat base for added stability, which can then be covered with forest elements.
Once everything is securely attached, take a step back and admire your progress! You’ve successfully brought the primary structure of this mythical dwelling to life. You’re well on your way to creating a truly show-stopping Halloween display that will enchant and spook everyone who sees it. At this point, the basic form is complete, and the next steps will focus on layering on the magical details that truly make it pop.
4. Enchanting Embellishments: Bringing the Magic to Life with Spooky Details
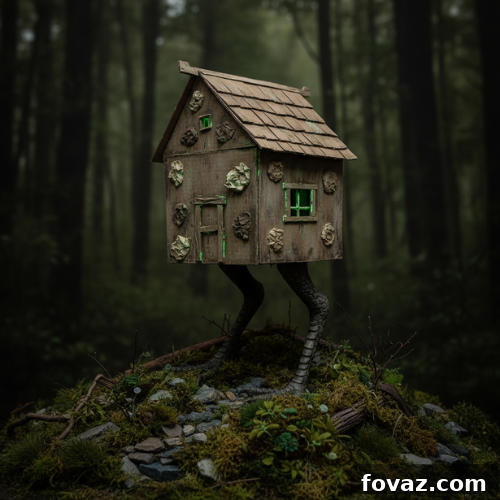
To truly elevate your Baba Yaga’s hut from a mere craft project to an awe-inspiring, show-stopping centerpiece, it’s time to unleash your creativity with a series of enchanting embellishments. These additional details are what will breathe life into your creation, adding depth, character, and an undeniable touch of eerie magic to your Halloween display. They will make the hut feel less like a model and more like a piece of living, enchanted folklore right in your home.
Forest Details: Creating an Immersive, Mystical Habitat
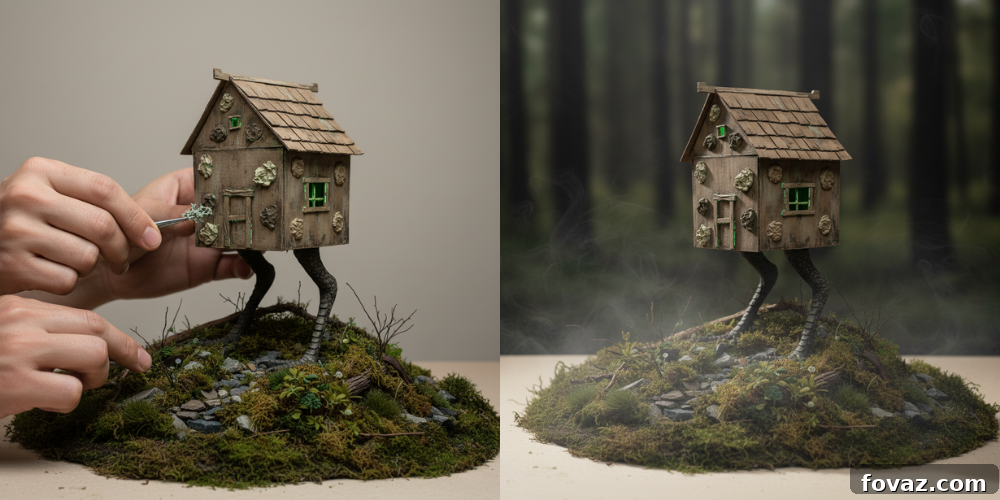
To truly sell the illusion that Baba Yaga’s hut is nestled deep within a dark, mystical forest, surround its base with natural or faux elements. Gather materials like real dried moss, small twigs, tiny pinecones, and various-sized stones. Alternatively, you can purchase faux moss, craft twigs, and miniature plants from any craft store. These additions create immediate texture, dimension, and a sense of environment, making it feel as though the hut has been standing in its enchanted clearing for centuries.
Strategically position the twigs to resemble fallen branches or the undergrowth of a dense forest. Arrange the stones around the base to give the scene a more rugged, untouched look. You could even sprinkle a few dried leaves, collected from your yard or bought from a craft store, to further immerse the hut in a realistic, forest-like setting. Secure these elements with dabs of hot glue. For an extra touch of realism, consider using small pieces of burlap or brown felt as a base layer before adding your natural elements, mimicking forest soil.
Aged Effects: Simulating Centuries of Forest Life
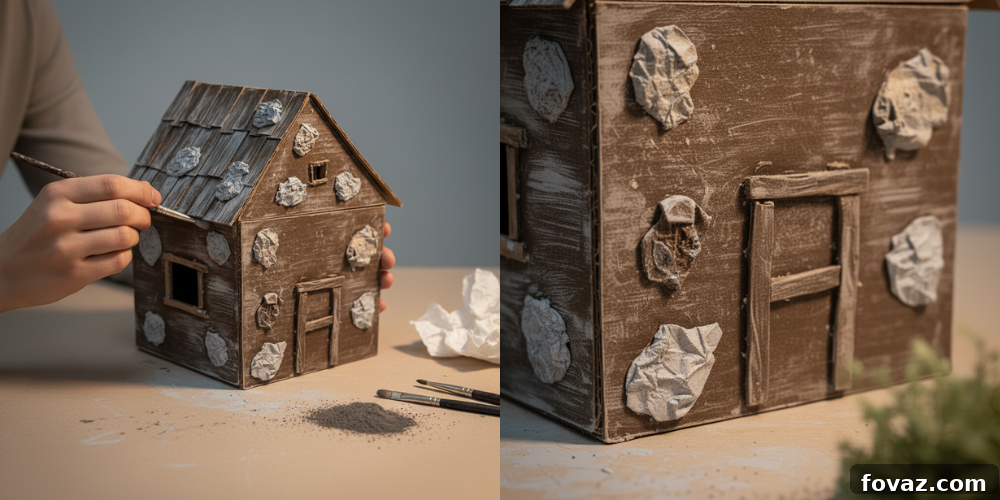
To give your hut an authentic, weathered, and ancient appearance, mastering the art of “aging” is crucial. Lightly brush highly diluted black or dark brown paint along the edges of the walls, the roof seams, and around the base of the legs. Focus especially on areas where natural wear and tear, grime, or moisture would typically accumulate—corners, crevices, and the bottom edges. This technique, often called a “wash,” mimics the look of accumulated dirt, mold, or the darkening effects of age, giving the hut a truly haunted, ancient vibe.
Another effective technique is “dry-brushing.” Dip a nearly dry paintbrush into a lighter shade of paint (like a pale grey, dusty brown, or even a very light green), then gently drag it across the raised textures and surfaces. This highlights the textures you created with clay or crumpled paper, making them stand out and giving a distressed, sun-faded, or moss-covered effect. Experiment with both techniques to create layers of aging, making your Baba Yaga’s hut look like it has genuinely weathered centuries of mystical existence in the deep woods.
Glow-in-the-Dark Accents: Infusing Supernatural Energy
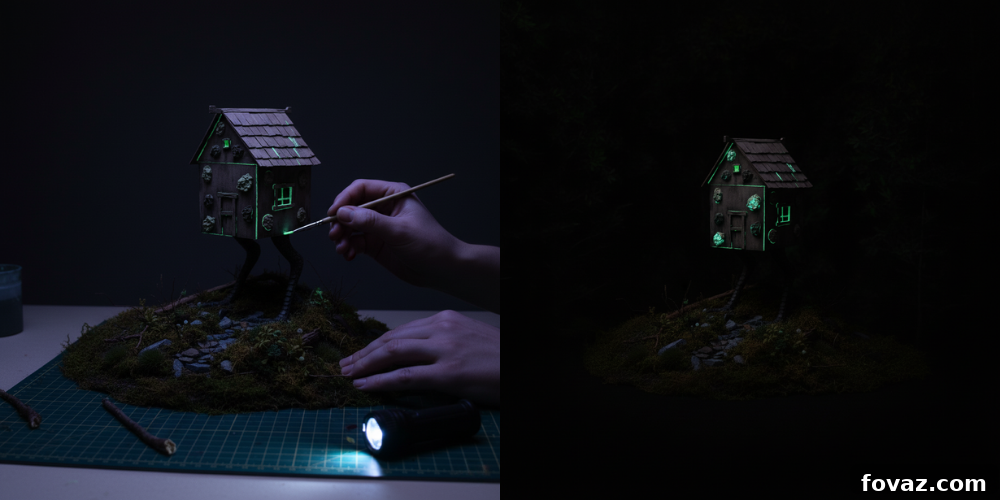
For an extra dose of Halloween magic and an undeniable supernatural quality, strategically apply glow-in-the-dark paint to specific areas of your hut. Consider painting the window frames, the edges of the roof, the “eyes” of the chicken legs (if you sculpted any), or even small, intricate patterns on the walls. When the lights dim or go out, these painted areas will emit an eerie, soft glow, bringing your creation to life as if it’s imbued with mystical energy.
You can also subtly paint hidden symbols or runes with glow-in-the-dark paint that only reveal themselves in darkness, adding a fun, secret element to your display. Alternatively, tiny battery-operated LED fairy lights or a flickering LED tea light placed inside the hut (if you’ve created windows or a door) can also create a mesmerizing, spectral glow that hints at the witchy presence within. This luminous touch will truly make your Baba Yaga’s hut a captivating and memorable sight after dusk.
Displaying Your Masterpiece: Setting the Scene
Once your Baba Yaga’s hut is complete with all its enchanting details, the final step is to decide how to display it for maximum impact. Consider placing it on a small table draped with a black or dark green cloth to mimic the forest floor. You can enhance the scene with additional elements like artificial spiderwebs, miniature plastic spiders, a small cauldron, or even a tiny broom leaning against the hut’s door. Ambient lighting, such as purple or green LED spotlights, can dramatically transform the mood and highlight the glow-in-the-dark features. Positioning it where natural shadows fall can add to its mysterious allure. Remember, presentation is key to truly bringing this piece of folklore to life!
Bring Baba Yaga’s Hut to Life and Enchant Your Home!
Crafting Baba Yaga’s hut is far more than just another Halloween project—it’s a truly fun, imaginative, and deeply rewarding way to connect with ancient folklore, exercise your creativity, and produce something extraordinary for your home. Whether this magical dwelling becomes the undisputed centerpiece of your Halloween décor, a talking point at your spooky gathering, or even a unique, year-round display for those who appreciate the fantastical, this captivating hut on chicken legs is sure to mesmerize and spark wonder in anyone who beholds it.
With just a handful of readily available materials, a touch of artistic flair, and the detailed guide you’ve just followed, you have the power to bring a tangible piece of rich Slavic mythology directly into your living space. Don’t hesitate—embrace the magic, unleash your inner crafter, and start building your own mystical creation today. The satisfaction of seeing your handmade Baba Yaga’s hut come to life, standing proudly with its unique charm, is an experience you won’t soon forget. Get ready to impress and inspire with your very own legendary dwelling!
To delve deeper into the fascinating world of Slavic folklore and the enigmatic figure of Baba Yaga, explore further insights from Britannica.