
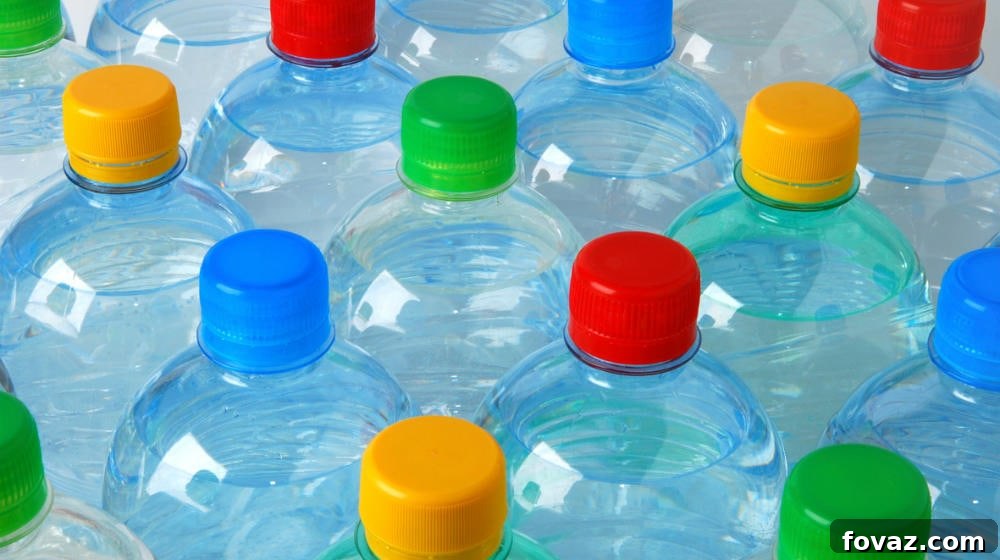
In a world increasingly focused on sustainability, the humble plastic bottle, often discarded without a second thought, holds immense potential for creative reuse. Far from being mere waste, these everyday containers can be transformed into remarkably useful and ingenious DIY life hacks, adding a touch of innovation to your home while significantly reducing your environmental footprint. Instead of contributing to the growing plastic pollution crisis, imagine turning those empty bottles into practical items that serve a new purpose. This article unveils five fascinatingly simple yet incredibly effective plastic bottle DIY projects, encouraging you to embrace upcycling and unlock your inner crafter. Get ready to discover how a little creativity can go a long way in making your life easier and more eco-friendly, proving that one person’s trash can truly be another’s treasure.
Beyond the Bin: Ingenious Ways to Repurpose Plastic Bottles for a Sustainable Home
Plastic bottles are ubiquitous in our daily lives, typically serving a single purpose before being tossed. However, with a dash of creativity and minimal effort, these versatile items can be given a second life, becoming practical tools and decorative accents around your home. Embracing plastic bottle recycling and upcycling isn’t just about reducing waste; it’s about fostering resourcefulness, saving money, and even creating unique, personalized items. From kitchen essentials to innovative gadgets, these DIY projects demonstrate the incredible potential hidden within everyday plastic. Join us as we explore clever ways to transform ordinary plastic bottles into extraordinary solutions, making your home more organized, fun, and sustainable.
DIY Life Hack #1: Craft Your Own Salt & Pepper Shakers
Elevate your dining experience or simplify your camping trips with custom-made salt and pepper shakers crafted from recycled plastic bottle necks. This clever hack not only repurposes plastic but also allows for personalized seasoning dispensers that are both functional and compact. Perfect for picnics, travel, or just adding a unique touch to your kitchen, these shakers are surprisingly sturdy and easy to create. Gather your supplies and get ready to add a pinch of creativity to your culinary adventures.
Step 1: Precisely Cut the Bottle Neck
For this ingenious DIY project, you’ll need two plastic bottle caps and their corresponding necks. Choose bottles with sturdy plastic for durability. Carefully use a sharp blade or utility knife to cut around the neck of each bottle, ensuring you detach the section that includes the cap and a small portion of the bottle itself. Precision is key here to achieve a neat finish. Always exercise extreme caution when working with sharp tools, and if possible, use a cutting mat to protect your work surface.
Step 2: Smooth and Sand the Cut Edges
Once you have your two bottle neck pieces, you’ll notice the cut edges can be sharp and uneven. To ensure safe handling and a professional appearance, gently sand these rough edges. Use fine-grit sandpaper (around 120-220 grit) and carefully scrape off any burrs or sharp plastic. This step creates a smooth, finished surface, preventing accidental scrapes and improving the overall aesthetic of your new salt and pepper shakers. Take your time to achieve a clean, polished result.
Step 3: Create Dispensing Holes on Each Cap
Now, it’s time to transform one of the caps into a dispenser. Using a sharp, pointed object like an Exacto knife, a small drill bit, or even a heated needle (handle with extreme care), poke several small holes in the center of one cap. These holes will allow your chosen seasoning to sprinkle out. For salt, you might want more holes, and for pepper, slightly fewer or larger ones. Experiment to find your preferred flow. Once the holes are made, apply a thin bead of strong, waterproof adhesive (like super glue or epoxy) around the outer edge of this cap, preparing it for assembly.
Step 4: Securely Glue the Caps Together
With the first cap prepared, take your second bottle cap and apply a similar bead of adhesive around its outer edge. Carefully align the bottoms of the two prepared caps and firmly press them together. Hold them in place for a few moments to allow the glue to set. Ensure a strong bond so your shakers don’t come apart. Repeat the process to create a second shaker, if desired, for your pepper. Once the glue has fully cured, fill each shaker with your favorite seasonings, screw on their respective top caps, and you’re all set! Your custom, eco-friendly salt and pepper shakers are now ready for use, demonstrating a brilliant way to upcycle plastic.
DIY Life Hack #2: Ingenious Makeshift Egg Holder
Whether you’re decorating Easter eggs, serving soft-boiled eggs for breakfast, or simply need a stable spot to prevent eggs from rolling off the table, this incredibly simple plastic bottle cap hack is a lifesaver. This project requires virtually no effort, highlighting just how easy it can be to find new uses for items you might typically discard. It’s a quick, free, and surprisingly effective solution for a common household problem, proving that sometimes the best innovations are the simplest.
Forget elaborate stands or worries about your beautifully decorated Easter eggs taking an unfortunate tumble. This incredibly simple DIY life hack requires nothing more than a single bottle cap. Grab any standard plastic bottle cap – from a water bottle, soda, or milk jug – and place it flat side down on your table. Carefully set your egg on top of the cap, nestling it into the slight depression. Voila! You now have a stable, individual egg holder that prevents rolling and showcases your eggs beautifully. This trick is not only perfect for holiday crafts but also comes in handy for serving soft-boiled eggs or keeping delicate eggs secure during preparation. It’s a testament to the overlooked utility of everyday items.
A post shared by DIY Projects (@diyprojectsdotcom) on
DIY Life Hack #3: Create a Mesmerizing Smartphone Hologram Projector
Step into the future with this captivating DIY hologram projector! Imagine displaying stunning 3D images and videos right from your smartphone. This project transforms a simple plastic bottle into an optical illusion device that will amaze your friends and family. It’s a fantastic way to explore the principles of optics and projection while making incredible use of recycled materials. Get ready to experience the magic of holography in your own home with this surprisingly easy and impressive hack.
Step 1: Preparing and Cutting the Plastic Bottle
To begin your journey into 3D holography, select a clear, smooth plastic bottle (a larger, straight-sided bottle works best). The key is to create a reflective pyramid shape. Start by carefully cutting off the very top, including the cap, and the bottom of the bottle, leaving a cylindrical section. From this cylinder, you will cut four identical trapezoidal shapes. These shapes should be wider at the base and narrower at the top, resembling the sides of a pyramid. Aim for clean, straight cuts to ensure the best projection quality.
Step 2: Forming the Hologram Projector Cone
Once you have your four trapezoidal plastic pieces, it’s time to assemble them into the pyramid. Carefully bring the edges of the plastic pieces together, using a strong, clear adhesive (like super glue or hot glue) to bond them. You’re essentially forming a truncated pyramid or a cone with four flat sides. Ensure the connections are strong and the pyramid maintains its shape. You might need to gently trim or smooth the edges to achieve a neat, symmetrical structure. The goal is a stable, transparent pyramid that will sit perfectly on your smartphone screen.
Step 3: Experience the Magic of Your New Hologram
With your plastic pyramid projector complete, it’s time for the grand reveal! Grab your smartphone or tablet and search for “hologram video” or “3D projector video” on YouTube. There are many specially designed videos that will work with your new device. Prop your newly crafted plastic pyramid directly onto the center of your phone’s screen, with the wider base sitting flush. For the best effect, dim the lights in the room, or even turn them off completely. As the video plays, you’ll be mesmerized by a seemingly three-dimensional image floating above your phone. Gather your friends and family and prepare to impress them with your very own homemade hologram – a truly astounding way to upcycle a plastic bottle!
DIY Life Hack #4: Construct a Versatile Mini Storage Container
Tiny treasures, emergency supplies, or travel essentials often get lost or damaged without proper storage. This brilliant DIY hack transforms an ordinary plastic bottle into a compact, secure, and even water-resistant mini storage container. It’s perfect for stashing small items like pills, matches, spare change, or emergency sewing kits, making it an ideal companion for camping, hiking, or simply organizing your everyday carry items. Learn how to create a personalized, practically indestructible mini container with just a few household items.
Step 1: Preparing the Plastic Bottle Base
To embark on this useful DIY life hack, gather an empty plastic bottle (a sturdier one like from soda or juice works well), a pair of sharp scissors, a balloon, and a roll of duct tape. Begin by taking your plastic bottle and carefully cutting off the bottom section. The goal is to create a cup-like container while keeping the bottle’s cap mechanism intact at the top. The size of your cut will determine the depth of your storage container, so consider what items you plan to store. Ensure the cut edge is as straight and smooth as possible.
Step 2: Creating a Secure and Waterproof Seal
Now, take your balloon and cut it in half horizontally. You’ll use the top half (the part with the opening) to create a flexible, protective seal for your container. Stretch the cut balloon opening over the raw, cut edge of your plastic bottle base. Ensure it fits snugly and covers the sharp plastic. Once the balloon is in place, use your duct tape to wrap firmly around the intersection of the balloon and the plastic bottle. This not only secures the balloon but also creates a more robust and potentially water-resistant seal, adding an extra layer of protection for your stored items.
Step 3: Your Mini Storage Container is Ready
With the balloon and duct tape securely in place, turn your plastic bottle base right side up. The original bottle cap can still be screwed on and off, acting as the lid for your new storage container. Now, your versatile mini storage container is ready to be filled! It’s perfect for organizing small craft supplies, storing emergency items for a bug-out bag, carrying medication discreetly, or keeping tiny hardware pieces from getting lost. This simple yet effective hack showcases the endless possibilities of repurposing plastic bottles into functional items, promoting both organization and sustainability in your daily life.
Don’t throw those soda cans just yet. Check out these cute, chic, & environment-friendly recycling ideas first! ♻️️ https://t.co/RmSk6bHcZw pic.twitter.com/o4CpuwLjLt
— DIY Projects (@DIYProjectsCom) March 15, 2017
DIY Life Hack #5: Craft an Eco-Friendly Green-Hued Flashlight
Transform your smartphone’s standard flashlight into a unique, mood-setting green-hued light with this incredibly simple and effective DIY project. Perfect for creating ambient lighting, signaling, or just adding a cool aesthetic to your phone’s utility, this hack utilizes a colorful plastic bottle to diffuse and tint your phone’s LED flash. It’s a quick, fun, and eco-conscious way to enhance your phone’s capabilities without needing any specialized tools or complex wiring. Get ready to illuminate your world with a vibrant, recycled glow!
Step 1: Preparing the Colored Plastic Bottle Section
This vibrant DIY project comes together effortlessly with the help of a colored plastic bottle (green works wonderfully for a striking effect, but any color will do!) and some hot glue. Begin by carefully cutting off the part of the plastic bottle where the lid screws on – often referred to as the bottle’s mouth or neck. This section typically has a threaded edge that will be useful for attachment. Once separated, remove the cap itself, as you’ll only need the clear or colored plastic ring that forms the opening. Ensure the cut is clean and even for the best results.
Step 2: Securely Attaching to Your Phone’s Flash
Now, take the plastic mouth section you just cut. Apply a generous amount of super glue or hot glue around the wider edge of this plastic ring. Carefully and quickly center this glued edge over the flash area of your smartphone. Press firmly and hold it in place until the glue sets. It’s crucial to ensure a good seal so light doesn’t escape from the sides. Before applying glue directly to your phone, consider placing a clear phone case on your device. This acts as a protective layer, preventing any potential damage or residue from the adhesive directly on your phone’s exterior. Safety first!
Step 3: Activating Your Green-Hued Flashlight
Once the glue has completely dried and your plastic ring is firmly attached to your phone’s flash area (or phone case), it’s time to test your creation. Simply activate the flashlight setting on your smartphone. For the most dramatic effect, find a dark room or wait until evening. Viola! You’ll observe the cap emitting a distinctive and cool green light when you use your camera’s flash as a steady light source. The color of the emitted light will directly correspond to the color of the plastic bottle section you used, allowing for endless customization. Experiment with different bottle colors to create a spectrum of unique mood lights or emergency signals, turning a discarded item into a functional and fun gadget!
Check out all these brilliant DIY life hacks in this comprehensive video from Wearex for full, visual instructions:
The Power of Upcycling: Why Every Plastic Bottle Counts
Beyond the immediate utility and fun of these DIY projects, there’s a profound environmental benefit to upcycling plastic bottles. Every bottle you repurpose is one less bottle ending up in a landfill, polluting our oceans, or contributing to the demand for new plastic production. Plastic waste takes hundreds of years to decompose, releasing harmful chemicals into the environment during its slow degradation. By transforming these materials into something new and useful, you actively participate in the circular economy, reducing waste and conserving valuable resources.
Moreover, embracing upcycling fosters creativity and problem-solving skills, making it an excellent activity for individuals and families alike. It teaches children about environmental responsibility and the value of giving objects a second life. These simple hacks are just the beginning; the world of plastic bottle crafts is vast and inspiring, limited only by imagination. By choosing to reuse, you’re not just making a shaker or a light; you’re making a statement about your commitment to a more sustainable future.
There you have it, crafters and eco-conscious enthusiasts – five brilliant plastic bottle recycling hacks that prove resourcefulness can indeed save the day! From practical kitchen aids like the Salt & Pepper Shakers (my personal favorite for its sheer ingenuity and usefulness) to exciting tech projects like the Hologram Projector, these DIY life hacks offer tangible ways to reduce waste and ignite creativity. They also provide a fantastic opportunity to involve kids in hands-on recycling projects, teaching them valuable lessons about sustainability. So, don’t let those empty plastic bottles gather dust in the recycling bin; let’s start putting them to work again, transforming them into valuable assets for your home and lifestyle!
Which of these innovative DIY plastic bottle life hacks are you most excited to try first? Share your thoughts and tell us in the comments below! We love hearing about your upcycling adventures!
Eager for more inspiring recycling projects to beautify your space? Discover these 15 Impressive & Easy DIY Recycle Projects For Your Home and continue your journey towards a more sustainable and creative lifestyle!
Stay inspired and connected with our vibrant community! Follow us on Facebook, Twitter, Pinterest, and Instagram for daily doses of DIY brilliance and sustainable living tips!
Feature image gracefully provided by KS Environmental