
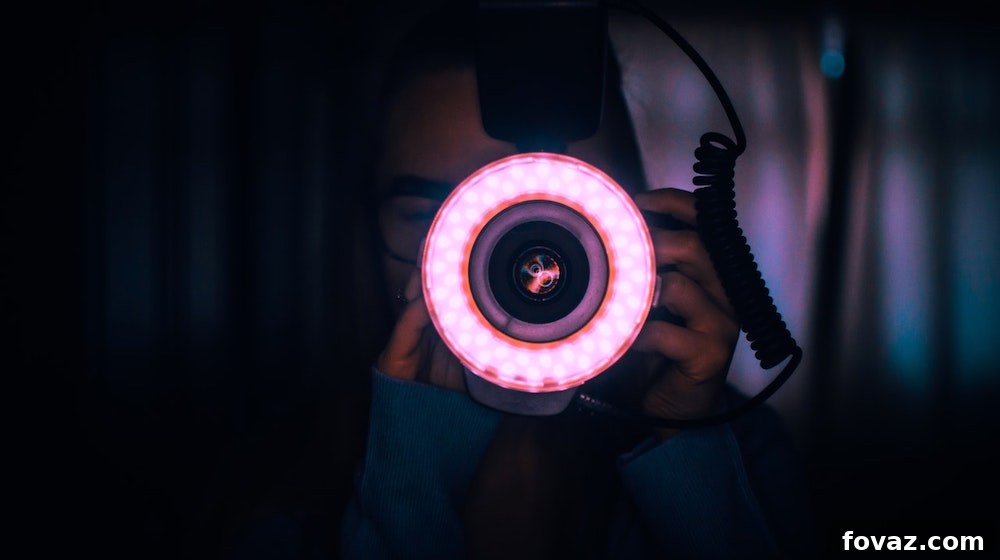
In today’s visually-driven world, captivating photographs and videos are no longer just for professionals. From everyday selfies to burgeoning YouTube channels and booming e-commerce, quality lighting is the undisputed secret ingredient that elevates ordinary content to extraordinary. At the heart of this lighting revolution stands the ring light – a simple yet incredibly powerful tool designed to cast an even, flattering glow on its subject. However, the price tag associated with professional-grade ring lights can often be a significant barrier, with many models retailing for upwards of $200. But what if you could achieve that coveted, flawless lighting for a fraction of the cost?
Get ready to unleash your inner innovator! This comprehensive guide will show you how to construct your very own high-performance ring light for an astonishingly low budget – around $25. Say goodbye to harsh shadows, uneven illumination, and costly equipment. It’s time to take control of your visual content and step into the spotlight with a DIY solution that’s both effective and incredibly rewarding to build.
Illuminate Your Content: The Power of Perfect Lighting for Selfies, Vlogs, and More
Do you ever wonder how your favorite influencers and content creators manage to look so perfectly lit in every shot? The answer often lies in the strategic use of a ring light. Unlike traditional lighting setups that can create harsh shadows and unflattering contrasts, a ring light provides a soft, diffused, and remarkably even illumination that envelops your subject. This unique quality makes it indispensable for a variety of applications:
- Flawless Selfies: Eliminate shadows under your eyes and chin, smooth out skin tones, and achieve that coveted “airbrushed” look effortlessly.
- Professional Vlogging and Live Streams: Ensure your audience sees you in the best possible light, maintaining visual engagement and enhancing your on-screen presence.
- Makeup Tutorials: Precisely illuminate your face, allowing you to showcase intricate makeup application details with unparalleled clarity.
- Product Photography: Cast an even glow over small items, highlighting textures and details without distracting shadows, perfect for online sellers.
- Video Conferencing and Online Meetings: Look sharp and professional during virtual interactions, making a stronger impression.
- Catchlight Effect: The circular design creates a distinctive, attractive “ring” reflection in your eyes, adding a spark of life and professionalism to portraits.
Whether you’re an aspiring influencer, a small business owner, or simply someone who loves taking well-lit photos, understanding the impact of good lighting is the first step. And the next step? Learning that achieving this professional quality doesn’t require a hefty investment, especially when you can build it yourself.
Your Budget-Friendly Glow-Up: Building a DIY Ring Light for Under $25
The idea of a professional-grade ring light for a mere $25 might sound too good to be true, but it’s entirely achievable with a bit of creativity and some readily available materials. This project is designed for everyone, from absolute beginners to seasoned DIY enthusiasts, offering a straightforward path to superior lighting without breaking the bank. Forget about settling for poorly lit pictures or saving up for expensive gear; your journey to perfectly illuminated content begins right here.
What You’ll Need: The Essential Materials for Your DIY Ring Light
Before diving into the construction, gather these few simple items. Most can be found at local hardware stores, craft shops, or online, making this project accessible to nearly everyone.
- 12″ Wire Wreath: Choose one with at least two or three distinct rings. This will form the sturdy circular frame for your light. You can often find these in the floral or craft section of stores.
- 18 ft. White Rope Lights: The heart of your ring light’s illumination. White (cool or warm, depending on your preference) is ideal for natural-looking light. Ensure it’s a single, continuous strand.
- Zip Ties: A pack of standard plastic zip ties will be invaluable for securely attaching the rope lights to the wreath frame.
- Scissors: For cutting the zip ties and any optional materials. A sharp pair is recommended.
- Extension Cords (Optional, but Recommended): Depending on where you plan to use your ring light, an extension cord will provide flexibility in placement.
- Aluminum Foil (Optional, but Highly Recommended): This material will act as a reflector, significantly boosting the brightness and directionality of your light.
- Hot Glue Gun (Optional, but Recommended for Foil): Essential if you choose to incorporate aluminum foil for reflectivity, ensuring it stays firmly in place.
#Prismverse is a brilliantly immersive installation by @honhim and @xex_hk for @drjart that will make you feel like you’re standing inside a diamond 💎. #DoubleTap if you want to experience it too! #DIYProjects #WeAreReaDIY
A post shared by DIY Projects (@diyprojectsdotcom) on
Crafting Your DIY Ring Light: A Step-by-Step Guide
Building your own ring light is a surprisingly simple process, but paying attention to detail will ensure a sturdy, safe, and effective lighting tool. Follow these steps carefully to achieve optimal results.
Step 1: Preparation and Initial Placement
Safety is paramount when working with electrical components. Before you begin, ensure your rope lights are completely unplugged from any power source. Locate the end of the rope light that does *not* have the plug attached. This is your starting point. Carefully position this end onto the second innermost ring of your 12-inch wire wreath. The goal is to start coiling the light from a point that allows the plug to eventually hang freely or be easily accessible when the entire light is assembled. Secure this initial placement slightly with a zip tie to prevent it from shifting as you work.
Step 2: Master the Coil – Winding the Rope Light
Now, begin the systematic process of coiling your rope lights around the wreath. Starting from your secured point, meticulously wrap the rope light around the innermost ring first. Ensure the coils are snug and evenly spaced to create a consistent light output. As you wind, periodically secure sections of the rope light to the wreath using zip ties. This is crucial for maintaining the structure and preventing the lights from unwinding or sagging over time. Once you’ve completed one full loop or a significant section on the first ring, move to the next adjacent ring and repeat the coiling and securing process. Continue this method, working your way outwards, until you have utilized the entire length of your 18-foot rope light. The aim is to create a dense, continuous circle of light around the wreath frame.
Step 3: Refine and Secure – Cleaning Up the Edges
Once all the rope lights are securely coiled and zip-tied to the wreath, it’s time for the finishing touches. Carefully inspect your work and use scissors to snip off all the excess tails from the zip ties. Exercise extreme caution during this step, as the cut edges of zip ties can be surprisingly sharp and scratchy. For a cleaner and safer finish, consider using flush cutters if you have them, which will leave a smoother edge. Ensure no sharp protrusions remain that could snag clothing or skin.
Step 4: Maximize Brightness with Reflectivity (Optional, but Recommended)
To significantly enhance the output and direct the light more effectively, adding an aluminum foil reflector is highly recommended. Flip your ring light over so the wire wreath structure is more visible and the light bulbs are facing inwards. Tear or cut pieces of aluminum foil into manageable strips or sections. Using a hot glue gun, carefully adhere the aluminum foil to the inner and outer edges of the wreath frame, ensuring it reflects light back towards the center. The goal is to create a reflective surface behind and around the rope lights, bouncing light forward and preventing it from dissipating backwards. Once the foil is securely in place and the glue has dried, reattach the rope light’s extra cord with the plug. Your ring light is now structurally complete and ready for action.
Step 5: Power Up and Pose – Time to Work Those Selfies!
With your DIY ring light fully assembled, it’s time for the moment of truth. Plug in your rope light (ideally into an extension cord if needed for placement flexibility). Watch as your creation comes to life, emitting a beautiful, even glow. Position your new ring light where desired – typically, your camera lens or smartphone will sit directly in the center opening for optimal lighting. Now, step into the light and get ready to capture some truly killer selfies, stunning portraits, or perfectly illuminated product shots!
Safety First: Important Considerations for Your DIY Project
While this DIY ring light project is straightforward, it involves working with electrical components. Always prioritize safety to ensure a functional and hazard-free device:
- Unplug Before Working: Never work on the rope lights while they are plugged into an electrical outlet.
- Inspect Components: Before assembly, check your rope lights for any fraying, exposed wires, or damage. Do not use damaged lights.
- Avoid Overheating: Rope lights generate some heat. Ensure adequate ventilation and avoid covering the lights with materials that could trap heat excessively. Never leave the light on unattended for extended periods.
- Secure Connections: Make sure all zip ties are tight and the rope light is firmly attached to the wreath. Loose connections can lead to damage or hazards.
- Keep Dry: This ring light is designed for indoor use. Keep it away from water or damp environments to prevent electrical shock.
- Adult Supervision: If children are involved in the project, ensure they are supervised by an adult, especially when handling tools or electrical components.
Beyond Selfies: Creative Applications for Your Versatile DIY Ring Light
Don’t limit the potential of your new DIY ring light to just selfies! Its soft, even illumination makes it a incredibly versatile tool for various creative and practical applications:
- Makeup Application Mirror: Place your mirror in the center of the ring light for perfectly even illumination while applying makeup, ensuring no missed spots or uneven blending.
- Small Product Photography: Ideal for e-commerce sellers, providing professional lighting for jewelry, crafts, cosmetics, or other small items, making them pop in product listings.
- Food Photography: Illuminate dishes beautifully to capture their textures and colors, enhancing your culinary creations for social media or recipe blogs.
- Video Conferencing: Boost your appearance during Zoom calls, online classes, or virtual meetings, ensuring you look sharp and engaged.
- Crafting and Detail Work: Provide focused, shadow-free light for intricate tasks like model building, painting miniatures, or fine needlework.
- Reading Light: A surprisingly comfortable and effective reading light that reduces eye strain, especially for late-night reading sessions.
- Temporary Room Lighting: In a pinch, it can serve as a soft, ambient light source for a corner of a room, creating a cozy atmosphere.
Experiment with different distances and angles to discover the myriad ways this simple DIY project can elevate your daily activities and creative endeavors.
Pro Tips for Maximizing Your Ring Light’s Potential
Now that you’ve built your ring light, here are some expert tips to help you get the most out of it:
- Camera Placement is Key: For the classic ring light effect, position your smartphone or camera lens directly through the center opening of the ring light. This ensures the light surrounds the lens, casting an even glow on your face and creating those signature catchlights in your eyes.
- Distance Matters: The closer you are to the ring light, the softer and more intense the illumination will be. Experiment with varying distances to find the perfect balance for your desired look. Moving further away will diffuse the light more broadly.
- Background Simplicity: A simple, uncluttered background will help your subject stand out against the even illumination provided by the ring light. Avoid busy patterns or distracting elements.
- Camera Settings: For optimal results, consider adjusting your camera’s white balance to match the color temperature of your rope lights (usually cool white or warm white). If your camera allows, try adjusting ISO for brightness and aperture for depth of field.
- Experiment and Play: Don’t be afraid to try different angles, poses, and expressions. The beauty of a ring light is its ability to make almost any shot look better, so have fun exploring its capabilities!
Conclusion: Light Up Your World, Affordably!
Congratulations! You’ve successfully built a powerful, versatile, and incredibly affordable DIY ring light. This project is a testament to how resourcefulness and a bit of creativity can lead to professional-grade results without the hefty price tag. No longer will you worry about poorly lit selfies, dim video calls, or struggling with product photography. You now possess the key to consistent, flattering illumination that will undoubtedly elevate the quality of your visual content across the board.
Embrace your newfound lighting prowess and let your creativity shine! Remember, the world of DIY projects is vast and full of possibilities. This is just one step on your journey to mastering skills and enhancing your everyday life on a budget. Always remember to prioritize safety when working with electrical components, and enjoy the radiant results of your hard work!
This will definitely take your selfie-Sunday up a notch! Let us know how yours turned out in the comments section below.
Up Next: How To Make A Smartphone Projector Out Of A Shoebox
Stay connected with us on Facebook, Twitter, Pinterest, and Instagram!