
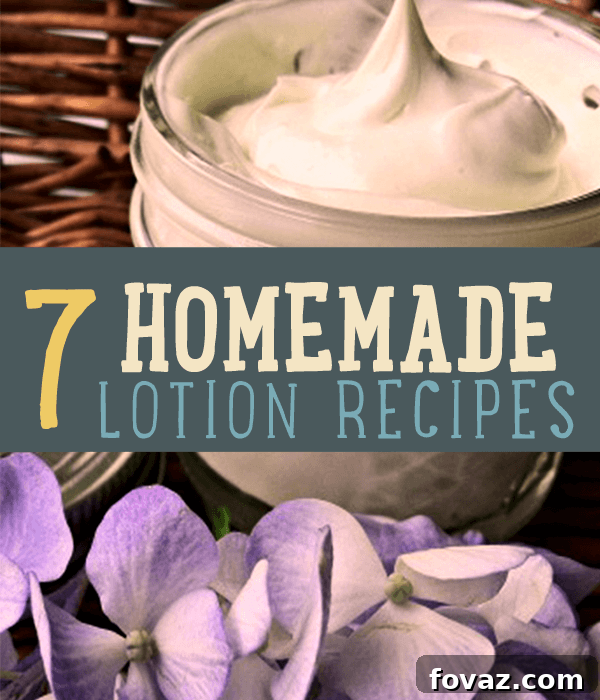
Unlock Radiant Skin: The Ultimate Guide to DIY Homemade Lotions
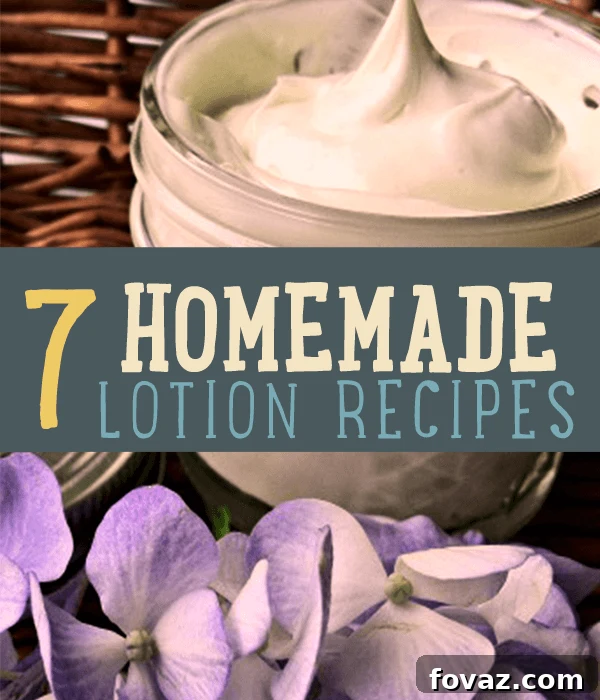
Why Choose Homemade Lotions? The Benefits of DIY Skincare
In a world inundated with cosmetic products promising miraculous results, it’s easy to overlook what truly goes into the creams and lotions we apply to our skin daily. Many commercial lotions, despite their appealing labels and fragrances, often contain a cocktail of synthetic chemicals, preservatives, and artificial ingredients that can do more harm than good in the long run. This is where the beauty of crafting your own homemade lotion truly shines.
Making your lotion at home offers a plethora of benefits, empowering you to take control of your skincare routine and nourish your skin with pure, wholesome ingredients. Here’s a closer look at why switching to DIY lotions is a game-changer for your skin and overall well-being:
1. Complete Control Over Ingredients: Say Goodbye to Harmful Chemicals
One of the most compelling reasons to make your own lotion is the ability to dictate every single ingredient. Commercial lotions often feature an extensive list of unpronounceable chemicals, many of which are linked to skin irritation, allergies, and even more serious health concerns. Ingredients like parabens, phthalates, synthetic fragrances, and mineral oils are commonplace, yet their long-term effects on human health are often debated and a cause for concern among health-conscious consumers.
- Parabens: Widely used as preservatives, parabens (like methylparaben, propylparaben, butylparaben) prevent the growth of bacteria and mold. However, they are endocrine disruptors, meaning they can interfere with your body’s hormone system.
- Phthalates: Often found in synthetic fragrances, phthalates are linked to reproductive and developmental issues.
- Synthetic Fragrances: “Fragrance” or “parfum” on an ingredient label can hide hundreds of chemicals, many of which are allergens or irritants.
- Mineral Oil & Petroleum Jelly: These petroleum-derived ingredients can create a barrier on the skin, but they don’t allow it to breathe and can clog pores, leading to breakouts.
By making your own, you eliminate these questionable additives, opting instead for pure, natural ingredients like nourishing plant oils, therapeutic essential oils, and enriching butters.
2. Tailored to Your Unique Skin Needs
Every skin type is unique, with its own specific needs and sensitivities. Store-bought lotions are mass-produced with a “one-size-fits-all” approach, often failing to address individual concerns effectively. When you create your own lotion, you can customize it precisely for your skin type:
- Dry Skin: Increase moisturizing butters like shea butter or cocoa butter, and heavier oils such as avocado or argan oil.
- Oily/Acne-Prone Skin: Opt for lighter, non-comedogenic oils like jojoba or grapeseed oil, and add essential oils known for their purifying properties, such as tea tree or lavender.
- Sensitive Skin: Choose gentle, hypoallergenic ingredients like calendula-infused oil or chamomile essential oil, avoiding potential irritants.
- Anti-Aging Concerns: Incorporate ingredients rich in antioxidants, like rosehip oil or frankincense essential oil.
This level of personalization ensures your lotion is perfectly attuned to deliver the best results for your skin.
3. Cost-Effective Skincare Solution
High-quality, organic, and natural lotions in stores often come with a hefty price tag. The good news is that making your own is surprisingly economical. Basic ingredients like coconut oil, shea butter, and beeswax can be bought in bulk and go a long way. While the initial investment in ingredients might seem like a small outlay, the cost per batch of homemade lotion is significantly lower than purchasing premium commercial alternatives. Plus, you’re investing in your health and avoiding potentially costly skin issues caused by synthetic ingredients.
4. Eco-Friendly and Sustainable Choice
Beyond personal health, DIY lotions contribute to a more sustainable lifestyle. By reusing jars and containers, you reduce plastic waste associated with store-bought products. You also have the option to source your ingredients from ethical and sustainable suppliers, further minimizing your environmental footprint. It’s a small step that makes a big difference for the planet.
5. The Joy and Empowerment of Creation
There’s immense satisfaction in creating something with your own hands, especially when it directly benefits your well-being. The process of blending oils, melting butters, and watching your lotion come to life is a therapeutic experience. It’s not just about the end product; it’s about the journey of learning, experimenting, and feeling empowered to provide truly nourishing care for yourself and your loved ones.
Getting Started: Essential Tips for Making Homemade Lotions
Before diving into specific recipes, understanding a few basic principles will ensure your DIY lotion-making journey is successful. Most lotions involve combining an oil phase (butters, oils, waxes) and a water phase (water, aloe vera, hydrosols) with an emulsifier to create a stable, creamy consistency. However, some simpler recipes, like body butters, are anhydrous (water-free) and require only melting and mixing oils and butters.
Here are some general tips:
- Sanitation is Key: Always sterilize your equipment (jars, bowls, spatulas) before use to prevent bacterial contamination, which can shorten the shelf life of your natural lotions.
- High-Quality Ingredients: Invest in high-quality, organic, and unrefined oils and butters for the best results and maximum skin benefits.
- Storage: Store your homemade lotions in airtight containers, preferably in a cool, dark place. Lotions containing water have a shorter shelf life and may benefit from refrigeration.
- Shelf Life: Without synthetic preservatives, homemade lotions typically last from a few weeks to a few months. Always check for changes in smell, color, or texture, and discard if anything seems off.
- Essential Oils: Use pure essential oils for fragrance and added therapeutic benefits. Always research their properties and safe dilution rates.
7 Divine DIY Homemade Lotion Recipes You Must Try
Ready to embark on your homemade lotion adventure? Here are seven fantastic recipes, ranging from everyday essentials to specialized treatments, that are simple to make and incredibly beneficial for your skin.
1. Organic Homemade Hand Lotion: Deeply Nourishing for Hardworking Hands
Our hands endure a lot, from frequent washing to exposure to environmental elements. This rich, emollient hand lotion provides intense hydration and protection, leaving your hands soft and smooth without greasy residue.
Ingredients:
- 1/2 cup almond oil or olive oil (can be infused with calming herbs like calendula or chamomile for extra benefits)
- 1/4 cup coconut oil
- 1/4 cup beeswax pellets or grated beeswax
- Optional: 1 teaspoon Vitamin E oil (a natural antioxidant and preservative)
- Optional: 2 tablespoons Shea Butter or Cocoa Butter (for extra richness and skin repair)
- Optional: 10-20 drops of Essential Oils, Vanilla Extract, or other natural extracts (e.g., sweet orange, lavender, lemon) to suit your preference
Instructions:
- Combine the almond/olive oil, coconut oil, and beeswax in a heat-safe glass jar or a double boiler.
- Gently heat the mixture over low heat, stirring occasionally, until all the ingredients are completely melted and well combined. A double boiler method is ideal to prevent overheating the oils.
- Once melted, remove from heat. Stir in the optional Vitamin E oil and Shea or Cocoa Butter until fully incorporated.
- Allow the mixture to cool slightly, then add your chosen essential oils or extracts. Stir thoroughly.
- Pour the warm liquid into clean, sterilized jars or tins.
- Let the lotion cool completely at room temperature until it solidifies into a creamy texture.
- Store in a cool, dark place. This lotion typically lasts for several months due to its water-free composition.
2. How to Make Homemade Body Lotion/Butter: Luxuriate Your Whole Body
Indulge your entire body with this deeply moisturizing body butter. It’s perfect for dry patches and provides long-lasting hydration, leaving your skin feeling supple and smooth.
Ingredients:
- 1 tbsp coconut oil (excellent for hydration and its antimicrobial properties)
- 2 tbsp sesame oil (rich in antioxidants, great for skin health)
- 1 tbsp avocado oil (deeply nourishing, packed with vitamins A, D, and E)
- 1 tbsp grated beeswax (provides a protective barrier and helps emulsify)
- Optional: 5-10 drops of your favorite essential oil (e.g., patchouli, ylang-ylang, sandalwood for a luxurious scent)
Instructions:
- Combine all the oils and beeswax in a heatproof glass container (like a mason jar).
- Create a double boiler by placing the glass container into a saucepan filled with 1-2 inches of water.
- Heat the pan over medium-low heat, allowing the ingredients in the jar to melt gently. Stir occasionally until everything is liquid and well blended.
- Once melted, carefully remove the container from the heat.
- Let the mixture cool down to room temperature. As it cools, it will start to solidify and become opaque.
- Once cooled but not yet fully hardened, stir the mixture vigorously for a few minutes (you can use a hand mixer for a whipped texture if desired) until it reaches a smooth, creamy body butter consistency.
- Transfer the finished body butter to a clean, sterilized jar with a lid.
- Store in a cool, dark place. This body butter can last for up to 6 months.
3. How to Make Face Lotion: Gentle Care for Delicate Skin
Your face deserves the purest ingredients. This recipe focuses on gentle yet effective hydration, ideal for maintaining a healthy complexion without clogging pores or irritating sensitive skin.
Ingredients:
- 3 1/2 Tablespoons organic Shea butter (highly moisturizing, anti-inflammatory, and skin-healing)
- 2 Tablespoons Jojoba oil (mimics skin’s natural sebum, excellent for all skin types, including oily)
- 3 Tablespoons of Aloe Leaf Juice (soothing, hydrating, and anti-inflammatory)
- 4 drops Lavender essential oil (calming, antiseptic, and promotes skin regeneration)
- A pint-sized mason jar for mixing
- A small glass jar or pump bottle to store your finished lotion
Instructions:
- Melt the shea butter in a double boiler over low heat until completely liquid.
- Remove from heat and stir in the jojoba oil. Allow this oil mixture to cool slightly (to just above room temperature).
- In a separate bowl, gently warm the aloe leaf juice to roughly the same temperature as your oil mixture. This helps prevent the emulsion from breaking.
- Slowly drizzle the aloe leaf juice into the oil mixture while continuously whisking or using a hand blender. Emulsification is key here; continue mixing until the lotion thickens and becomes uniform.
- Once emulsified, add the lavender essential oil and mix thoroughly.
- Pour the lotion into your sterilized storage jar.
- Store in the refrigerator to extend shelf life (due to the water content). This lotion will typically last 2-4 weeks when refrigerated.
4. How to Make Foot Lotion: Soothe Tired Soles
Treat your feet to a revitalizing lotion that combats dryness and provides a refreshing sensation. Perfect for after a long day or as part of your pampering routine.
Ingredients:
- 1/2 oz (15g) Beeswax (creates a protective barrier)
- 1/2 oz (15g) Cocoa Butter (deeply moisturizing, great for cracked heels)
- 2 oz (50g) Coconut Oil (hydrating and antifungal properties)
- 2 tablespoons (30ml) Sweet Almond Oil (lightweight, easily absorbed, and nourishing)
- 1 1/2 teaspoon (6ml) Lemon essential oil (refreshing, deodorizing, and invigorating)
- 1/2 teaspoon (2ml) Ginger essential oil (warming, stimulating, and can help reduce soreness)
- 4 tablespoons (60ml) mineral water (for the water phase of the emulsion)
Instructions:
- In a double boiler, combine the beeswax, cocoa butter, coconut oil, and sweet almond oil. Melt gently until all solids are fully liquid.
- While the oils are melting, gently warm the mineral water in a separate container. Both phases should be approximately the same temperature when combined (around 150-160°F or 65-70°C).
- Remove the oil phase from heat. Slowly pour the warm mineral water into the oil mixture while continuously blending with an immersion blender or whisk until a creamy emulsion forms. This may take several minutes.
- Once the lotion has emulsified and begun to cool slightly, add the lemon and ginger essential oils. Mix thoroughly.
- Pour the warm lotion into sterilized jars or pump bottles.
- Allow to cool completely before sealing. Store in a cool, dark place. This lotion may require refrigeration due to its water content and will last 2-4 weeks.
5. How to Make Tanning Lotion: Enhance Your Natural Glow
Achieve a subtle, natural-looking tan or enhance your existing one with this unique DIY tanning lotion. Please note this is not an SPF product and should not be used as sun protection.
Ingredients:
- Strongly brewed Black Tea (approximately 1/4 cup – the tannins in black tea can stain the skin for a temporary tanning effect)
- 3/4 cup of water
- 1/4 cup of coconut oil (moisturizing base)
- 1/4 cup of lanolin (an excellent emollient and emulsifier, helps blend ingredients)
- Blender for mixing
Instructions:
- First, brew a very strong cup of black tea and let it cool completely. You’ll need 1/4 cup of this concentrated tea.
- In a blender, combine the cooled black tea, water, coconut oil, and lanolin.
- Blend on high speed until the mixture is completely smooth and evenly combined. The lotion should have a consistent color and texture.
- Pour the tanning lotion into a clean, airtight container.
- To use: Apply evenly to clean, dry skin. Start with a small amount to test the color, and build up as desired. Wash hands thoroughly after application to avoid staining.
- Store in the refrigerator to prolong freshness, as it contains water. It should last for about 1-2 weeks.
6. How to Make Baby Lotion: Gentle & Pure for Delicate Skin
Protect and moisturize your baby’s delicate skin with this ultra-gentle, natural lotion. Free from harsh chemicals, it’s perfect for sensitive skin.
Ingredients:
- 2 cups water (purified or distilled)
- ½ cup olive oil (mild, nourishing, and gentle for baby’s skin)
- ¼ cup coconut oil (moisturizing, with natural antibacterial properties)
- ¼ cup grated beeswax (creates a protective barrier)
- 2 Vitamin E capsules (natural preservative and skin-healing)
- 2 tbsp shea butter or cocoa butter (extra nourishing and softening)
- 1 tsp aloe vera gel (soothing and hydrating)
- 1 tsp 100% lanolin (excellent emollient and protective barrier)
- 1 medium size mason jar with a lid (for melting)
- Glass jars or soft squeeze bottles for holding the finished lotion
- Optional: No essential oils are recommended for baby lotion unless specifically formulated and approved for infants. The natural scent of shea and cocoa butter is usually preferred.
Instructions:
- Combine all ingredients (water, olive oil, coconut oil, beeswax, contents of Vitamin E capsules, shea butter/cocoa butter, aloe vera, and lanolin) in the mason jar.
- Loosely screw the lid onto the mason jar.
- Fill a medium saucepan with about 2 cups of water and place it on the stove over medium heat.
- Place the mason jar into the saucepan (creating a double boiler). Heat until all the ingredients inside the jar are completely melted, shaking the jar occasionally to combine.
- Once fully melted and well mixed, remove the mason jar from the saucepan.
- Let the mixture cool down to room temperature. As it cools, it will start to thicken.
- Once cooled, if you desire a whipped consistency, you can use a hand mixer to whip the lotion for a few minutes until light and fluffy.
- Transfer the finished baby lotion to clean, sterilized glass jars. Avoid using pump bottles, as the lotion might be too thick.
- Store in a cool, dark place. Due to the water content and lack of strong preservatives, this lotion should be used within 2-3 weeks, or refrigerated for a longer shelf life (up to 1 month).
7. How to Make Calamine Lotion: Soothe Irritated Skin
Calamine lotion is a classic remedy for itchy, irritated skin from insect bites, rashes, or minor skin irritations. Make your own natural version for instant relief.
Ingredients:
- 1/4 cup zinc oxide (the active ingredient, provides soothing and protective benefits)
- 4 teaspoons pink Kaolin clay (adds color and helps absorb oils, detoxifies)
- 4 teaspoons baking soda or 2 teaspoons calcium hydroxide (soothing and anti-itch)
- 1/4 cup water (purified or distilled)
- 1/2 teaspoon glycerin (optional, a humectant that draws moisture to the skin)
- 3-4 drops Lavender, Peppermint, Camphor, or Tea Tree essential oil (optional, for additional antibacterial, antipruritic, or cooling effects; choose based on specific need and safety for application area)
Instructions:
- In a small bowl, combine the zinc oxide, pink Kaolin clay, and baking soda (or calcium hydroxide). Whisk thoroughly to break up any clumps and ensure a smooth powder blend.
- Gradually add the water to the dry ingredients, stirring constantly to form a smooth paste. Continue mixing until there are no lumps.
- If using, add the optional glycerin and chosen essential oils. Whisk again until everything is fully incorporated.
- The mixture should have a consistency similar to store-bought calamine lotion. If it’s too thick, add a tiny bit more water; if too thin, add a pinch more clay and zinc oxide.
- Pour the homemade calamine lotion into a clean, airtight glass jar or bottle.
- Store in the refrigerator for optimal freshness and a cooling sensation upon application. It typically lasts for 1-2 weeks when refrigerated. Shake well before each use.
Embrace the World of Natural Skincare
Making your own lotions is a rewarding journey into the world of natural skincare. It’s an opportunity to nurture your skin with pure, wholesome ingredients, free from the synthetic chemicals and questionable additives found in many commercial products. Not only will your skin thank you for the gentle, effective care, but you’ll also experience the satisfaction of creating something truly beneficial with your own hands.
Experiment with different oils, butters, and essential oil blends to discover your perfect formulations. Your journey to radiant, healthy, and chemical-free skin starts here. Enjoy the process, and revel in the glow of natural beauty!