
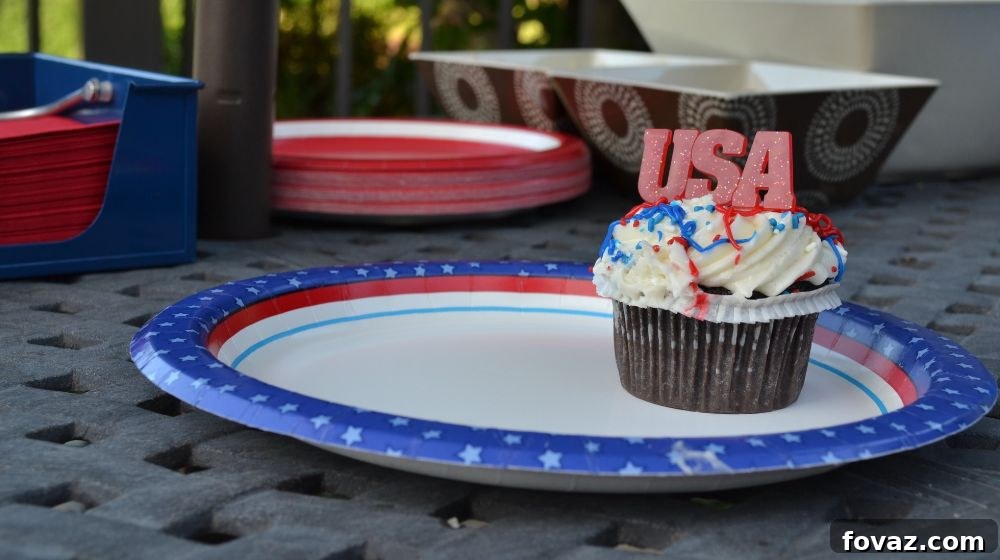
No Independence Day celebration is truly complete without the quintessential American barbecue. As the aroma of grilled delights fills the air, there’s no better way to cap off your patriotic feast and showcase your spirit than with a delightful spread of 4th of July cupcakes. These bite-sized treats offer a burst of flavor and visual appeal, perfectly embodying the red, white, and blue essence of the holiday. Whether you’re a seasoned baker or just starting, these festive cupcake recipes are designed to be simple, fun, and incredibly rewarding, guaranteeing smiles all around your celebration table.
RELATED: 45 Festive 4th Of July Recipes And Party Food Ideas You Can DIY
Delicious & Patriotic 4th of July Cupcake Recipes for an Unforgettable Independence Day Celebration
Ignite your patriotic spirit this Independence Day with a collection of dazzling 4th of July cupcake recipes that are as enjoyable to make as they are to eat. From classic flag designs to whimsical firecracker themes, these desserts are perfect for any backyard barbecue, family gathering, or community celebration. Get ready to bake, decorate, and celebrate with these truly American treats!
1. Classic Patriotic Cupcakes with American Flag Design
View Image on Flickr
These simple American flag-topped cupcakes are timeless classics, perfect for beginners eager to try their hand at baking festive treats. With their vibrant red, white, and blue hues, they embody the essence of the 4th of July without requiring advanced decorating skills. This recipe yields a dozen delicious cupcakes, making them an ideal dessert for smaller gatherings or as part of a larger dessert spread.
Ingredients:
- 1 stick (1/2 cup) unsalted butter or margarine, softened
- 3/4 cup granulated sugar
- 1/4 teaspoon fine salt
- 1 1/2 teaspoons baking powder
- 1 cup all-purpose flour, sifted
- 1/2 cup 1% low-fat milk (or whole milk for richer flavor)
- 1 teaspoon pure vanilla extract
- 1 tub (approx. 16 oz) whipped vanilla frosting
- 2 large eggs, at room temperature
- Blue and red paste or gel food colors
- Blue, white, and red coarse or crystal sugar for sprinkling
- 2 disposable plastic decorating bags fitted with a #16 star piping tip
Instructions:
- Preheat your oven to 350°F (175°C). Line a 12-cup standard muffin pan with festive cupcake liners. This ensures easy removal and a clean presentation.
- In a large mixing bowl, cream together the softened butter, granulated sugar, salt, and baking powder using an electric mixer set on high speed. Beat for at least one minute until the mixture is light, fluffy, and well combined.
- Add the two large eggs to the creamed mixture, one at a time, beating well after each addition. Continue to beat on high speed for another two minutes, scraping down the sides of the bowl as needed, until the mixture is thoroughly aerated.
- Reduce the mixer speed to low. Gradually add the vanilla extract and milk, mixing until just combined. Slowly incorporate the sifted all-purpose flour into the wet ingredients, mixing until the batter is smooth and no dry streaks remain. Be careful not to overmix, as this can lead to tough cupcakes.
- Evenly spoon the cupcake batter into the prepared lined muffin cups, filling each approximately two-thirds full. This allows room for the cupcakes to rise without overflowing.
- Bake in the preheated oven for 20-25 minutes, or until a wooden skewer or toothpick inserted into the center of a cupcake comes out clean. The tops should be lightly golden and spring back when gently touched.
- Allow the cupcakes to cool in the muffin pan for about five minutes before carefully transferring them to a wire rack to cool completely. Ensuring they are fully cooled is crucial before frosting to prevent the frosting from melting.
- Once cooled, prepare your decorating bags. Divide the vanilla frosting into two bowls. Tint one portion with blue gel food coloring and the other with red. You can also leave some white.
- Using the star piping tip, pipe swirls of frosting onto each cupcake. Get creative with alternating red, white, and blue frosting or creating a unified design.
- Finish by generously sprinkling the red, white, and blue coarse sugars over the frosted cupcakes. For an extra touch of patriotism, gently insert a small American flag pick into the center of each cupcake before serving.
2. Whimsical Firecracker Cupcakes
View Pin on Pinterest
These adorable and highly realistic firecracker cupcakes are an absolute showstopper for your Independence Day barbecue. They’re not only incredibly cute and visually striking but also surprisingly simple to assemble, making them a fantastic project for all skill levels. With a preparation time of just about 15 minutes for 24 servings, you can easily whip up a large batch of these delightful treats to impress your guests.
Ingredients:
- 1 black licorice wheel (or black string licorice)
- 24 pre-baked and frosted cupcakes
- 24 large marshmallows
- 12 ounces red melting chocolate-flavored wafers (candy melts)
Instructions:
- Begin by carefully unwinding the black licorice wheel. Gently separate the long strands and then cut them into small, approximately one-inch-long pieces. These pieces will serve as the “fuses” for your firecrackers.
- Place the red melting chocolate wafers into a microwave-safe bowl. Ensure the bowl is suitable for microwaving to prevent any damage.
- Microwave the wafers in 30-second increments, stirring thoroughly after each interval. Continue this process of heating and stirring until the chocolate is completely smooth and melted with no lumps. Avoid overheating, as this can cause the chocolate to seize.
- Line a baking sheet with parchment paper or waxed paper. This will prevent the marshmallows from sticking as the coating sets.
- One at a time, skewer a large marshmallow with a toothpick. Carefully dip the marshmallow into the melted red chocolate, ensuring it’s completely covered. Alternatively, use a spoon to coat the marshmallow thoroughly. Allow any excess chocolate to drip back into the bowl before proceeding.
- Place the chocolate-coated marshmallow onto the prepared baking sheet. Gently twist and remove the toothpick, leaving a small hole at the top. While the coating is still wet, take one of your inch-long licorice pieces and insert it into the hole left by the toothpick, making it stand upright as a fuse.
- Repeat this dipping and “fusing” process for all 24 marshmallows. Once all marshmallows are decorated, refrigerate the entire tray for about 10-15 minutes to allow the chocolate coating to set completely and firm up.
- Once the chocolate firecrackers are set, retrieve your pre-frosted cupcakes. Carefully stick one “firecracker” on top of each frosted cupcake, positioning it upright in the center. Serve these festive and fun treats immediately and watch them disappear!
3. Cozy Campfire Cupcakes
A post shared by Ookies (@ookiescake) on
Nothing evokes the spirit of Americana quite like an old-fashioned camping trip and a crackling bonfire. If you can’t head outdoors this year for a traditional campout, you can still infuse your Independence Day celebration with that cozy, rustic charm by making these delightful campfire-themed 4th of July cupcakes. These cupcakes are surprisingly easy to create, with a total preparation and baking time of approximately 40 minutes for 24 cupcakes, making them perfect for larger gatherings.
Ingredients:
- 1 box Devil’s food cake mix (plus ingredients listed on the box, typically eggs, oil, and water)
- 6 cups powdered sugar, sifted
- 1/4 cup heavy cream (or milk)
- 1 1/2 cups unsalted butter, softened to room temperature
- 2 teaspoons pure vanilla extract
- A pinch of kosher salt
- Pretzel sticks (thin ones work best)
- 48 mini marshmallows
- Gel food coloring (yellow and orange for flame effect)
- 24 toothpicks
Directions:
- Preheat your oven to 350°F (175°C). Line two standard 12-cup cupcake pans with cupcake liners. This recipe yields 24 cupcakes, so two pans are necessary.
- Follow the package instructions for your Devil’s food cake mix to prepare the batter. Ensure all ingredients are well combined and the batter is smooth.
- Divide the prepared cake batter evenly among the 24 lined cupcake cups, filling each about two-thirds full to allow for proper rising.
- Bake for approximately 20 minutes, or until a toothpick inserted into the center of a cupcake comes out clean. Once baked, allow the cupcakes to cool in the pans for a few minutes before transferring them to a wire rack to cool completely.
- While the cupcakes are cooling, prepare your buttercream frosting. In a large bowl, use a hand mixer to beat the softened butter until it is light and fluffy, about 2-3 minutes.
- Gradually add the sifted powdered sugar to the butter, one cup at a time, beating on low speed until combined, then increasing to medium-high until smooth and creamy. Scrape down the sides of the bowl as needed.
- Add the heavy cream, vanilla extract, and kosher salt to the buttercream mixture. Beat again on medium-high speed for another 2-3 minutes until the frosting is light, fluffy, and perfectly combined.
- Divide the finished buttercream into two separate bowls. Dye one bowl of frosting with yellow gel food coloring and the other with orange gel food coloring, mixing until the colors are vibrant and streak-free.
- Prepare a large piping bag fitted with a large star tip. Carefully fill the piping bag by alternating spoonfuls of the yellow and orange buttercream. This technique will create a beautiful swirled “flame” effect when piped.
- Pipe generous swirls of the swirled buttercream onto each cooled cupcake, creating a mound that resembles a small bonfire.
- For your final, creative touch, arrange several pretzel sticks upright around the base of the piped buttercream on each cupcake, mimicking logs in a bonfire. Then, skewer two mini marshmallows onto each toothpick. Carefully insert these marshmallow-skewered toothpicks into the top center of the buttercream swirls, making them look like toasted marshmallows over a flame. Serve these imaginative cupcakes to a round of applause!
RELATED: DIY Firework Hot Dog Recipe For The 4th Of July | The Most Patriotic Recipe You’ll Eat This Year
4. Luscious Red Velvet 4th of July Cupcakes
View Pin on Pinterest
Everyone adores the rich, subtle cocoa flavor and striking crimson hue of red velvet cupcakes. By adding a simple yet elegant cream cheese frosting and a scattering of fresh blueberries, these beloved treats are transformed into yet another fantastic patriotic dessert, perfectly suited for your Independence Day festivities. The deep red, creamy white, and vibrant blue combination makes them an instant hit!
Ingredients:
- 1 box (approx. 15.25 oz) red velvet cake mix (plus ingredients listed on the box)
- 1 cup whole milk
- 1/3 cup vegetable oil
- 1/2 cup plain yogurt or sour cream (adds moisture and tang)
- 3 teaspoons pure vanilla extract (divided: 1 tsp for cake, 2 tsp for frosting)
- 1 cup powdered sugar, sifted
- 1 pint (2 cups) heavy whipping cream, chilled
- 8 ounces cream cheese, softened to room temperature
- 3 large eggs, at room temperature
- Fresh blueberries, for topping
Instructions:
- Preheat your oven to approximately 350°F (175°C). Line two standard 12-cup muffin pans with festive cupcake liners to prepare for baking.
- In a large mixing bowl, sift the red velvet cake mix to remove any lumps. Add the milk, eggs, sour cream (or plain yogurt), vegetable oil, and 1 teaspoon of vanilla extract to the bowl. Stir the mixture with a whisk or electric mixer on low speed until the batter is smooth and well combined, being careful not to overmix.
- Evenly fill your prepared cupcake liners about 3/4 full with the vibrant red batter. This allows them to rise beautifully without spilling over.
- Bake the cupcakes for about 15-20 minutes, or until a toothpick inserted into the center comes out clean. The baking time may vary slightly depending on your oven. Once baked, allow them to cool in the pans for a few minutes before transferring them to a wire rack to cool completely.
- While the cupcakes are cooling, begin preparing your luscious whipped cream cheese frosting. In a large bowl, using the whisk attachment of your electric mixer, beat the softened cream cheese and sifted powdered sugar together on medium speed until the mixture is incredibly smooth and free of lumps.
- Add the remaining 2 teaspoons of vanilla extract to the cream cheese mixture and mix briefly. Then, slowly pour in the chilled heavy whipping cream. Increase the mixer speed to high and beat continuously until stiff peaks form. The frosting should be light, airy, and hold its shape.
- Once the cupcakes are completely cooled, transfer the whipped cream cheese topping to a piping bag fitted with your desired decorative tip (a star tip or round tip works well). Pipe generous swirls of the creamy frosting onto each red velvet cupcake.
- For the grand finale, generously scatter fresh blueberries on top of the piped frosting. The contrast of the dark blue against the white frosting and red cupcake creates an undeniable patriotic display. For an alternative, you can also use sliced strawberries or raspberries for extra color and flavor. Serve chilled for the best experience.
5. Impressive 4th of July Cupcake Cake Flag Assembly
When all else fails, or if you simply want to make an undeniable statement of patriotism, you can never go wrong with the iconic stars and stripes. This innovative “cupcake cake” transforms individual cupcakes into one magnificent, edible American flag. It’s a quick, simple, and incredibly impactful way to showcase your love for your country, making it a perfect centerpiece for any Independence Day celebration. Best of all, it eliminates the need for slicing a traditional cake, as guests can simply pull off their desired cupcake!
Ingredients:
- 24 pre-baked cupcakes (any flavor you prefer, perhaps vanilla or white cake for a neutral base), cooled completely
- American-themed cupcake liners (optional, but adds a nice touch if visible)
- Red, white, and blue icing (pre-made tubs or homemade buttercream tinted with gel food coloring)
- Edible white star sprinkles (or small white candies in star shapes)
Instructions:
- Ensure all 24 of your cupcakes are completely cooled before you begin the decorating process. This prevents the icing from melting or sliding off.
- Prepare your red, white, and blue icings. If using store-bought, simply ensure they are at a good piping consistency. If making your own buttercream, divide it and tint each portion with red, white, or blue gel food coloring until you achieve vibrant, patriotic shades.
- Using red icing (either spread with an offset spatula or piped with a round tip), generously cover nine of your cooled cupcakes. These will form the red stripes of your flag.
- Next, use the white icing to cover another nine of your cooled cupcakes. These will represent the white stripes of the flag.
- With the remaining six cupcakes, apply the blue icing to cover their entire tops. These blue-frosted cupcakes will form the “union” or the star-spangled field of your flag. Immediately after icing, carefully place edible white star sprinkles on top of the blue cupcakes, ensuring each cupcake has a few stars to represent the constellations.
- Now comes the fun part: arranging your masterpiece! On a large serving platter, cutting board, or flat surface, carefully arrange the cupcakes to form the shape of the American flag. Typically, this involves creating alternating rows of red and white cupcakes for the stripes, and then placing the blue star-studded cupcakes in the upper-left corner to complete the flag’s iconic look. You might use a 6×4 arrangement for the main body of the flag and then overlay a 3×2 section for the blue field.
- Once arranged, step back and admire your stunning, edible American flag. This impressive cupcake cake is not only a patriotic display but also a delicious and convenient dessert for your guests to enjoy without the fuss of cutting slices.
Other than those 4th of July cupcakes, Tastemade shows you some other patriotic desserts perfect for your Independence Day celebration:
Many aspiring home bakers shy away from creating elaborate desserts, often intimidated by what seems like complicated techniques or extensive preparation. However, these 4th of July cupcake recipes prove that festive and impressive treats can be both easy to make and incredibly rewarding. They’re not just simple additions to your holiday menu; they are the perfect, delightful topping to cap off your Independence Day celebration, leaving a sweet and patriotic impression on all your guests.
Is there other 4th of July cupcakes or dessert recipes you’d like to learn about? Ask us in the comments section below!
UP NEXT:
- 4th Of July Drink Recipes In Mason Jars To Mix At Home
- 17 DIY Memorial Day Decorations You Can Make And Reuse On July 4th
- How To Paint A Marbled Wine Glass Using Nail Polish
Calling all crafting DIYhards, DIY Projects needs YOU! Click here if you want to contribute for us.
Don’t forget to stay connected with us on Facebook, Twitter, and Instagram!