
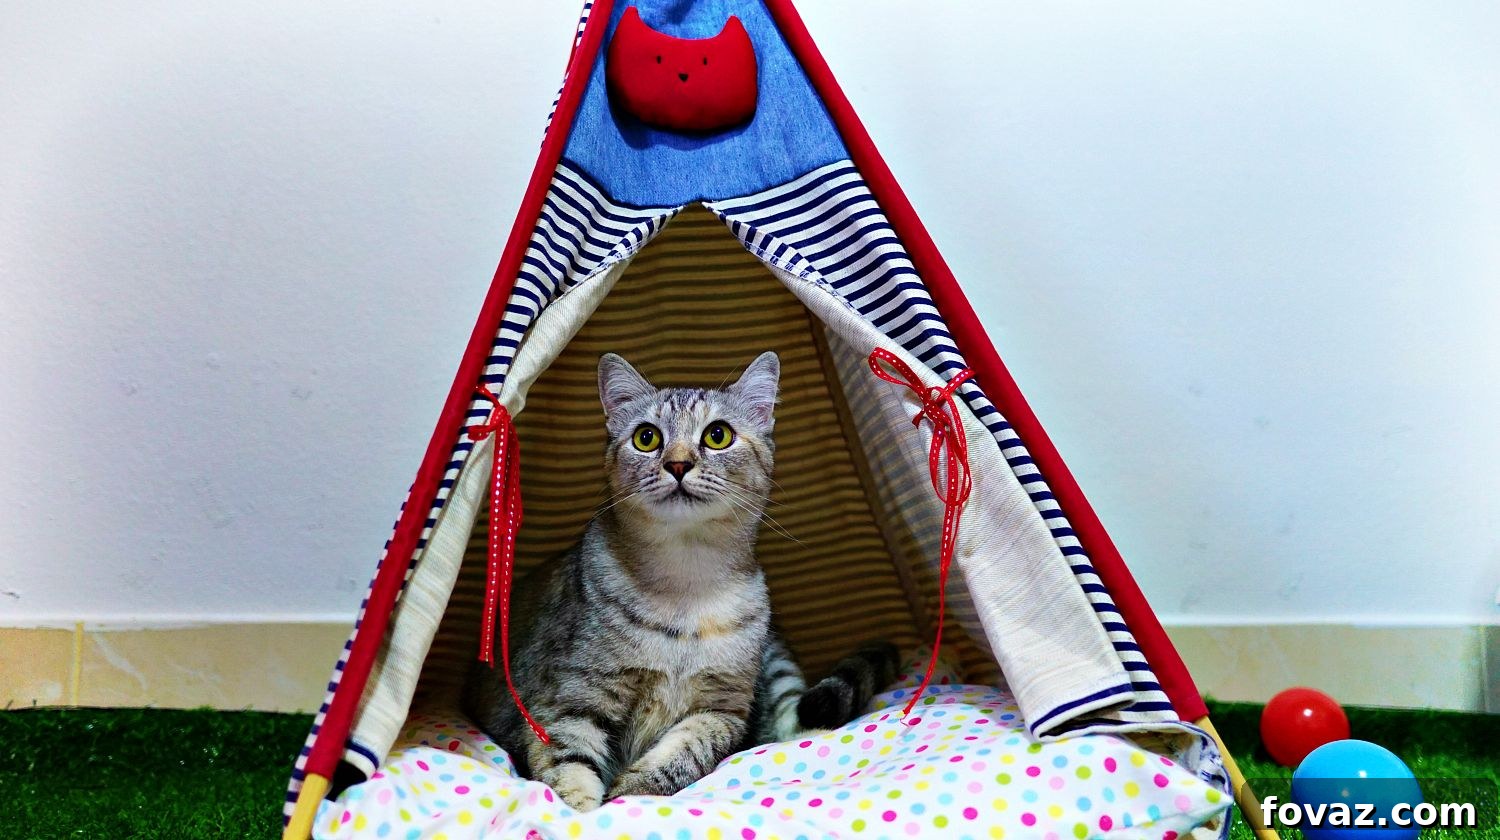
Every cat owner dreams of providing their beloved furball with a personal sanctuary—a cozy corner they can truly call their own. Imagine a dedicated retreat where your feline friend can nap, observe their surroundings, or simply escape for a moment of peace. This guide will walk you through creating a simple, charming, and incredibly satisfying DIY cat tent using materials you likely already have around your home. Not only is this an excellent way to show your pet some extra love, but it’s also a fantastic upcycling project that’s kind to your wallet and the environment. Get ready to transform everyday items into a comfortable haven for your cherished companion!
RELATED: 11 Creative Cat DIY Home Projects For Cat Lovers
DIY Cat Tent: Crafting a Cozy Haven for Your Feline Friend
Why Your Cat Needs a Personal Retreat
Cats, by nature, are creatures that value security, comfort, and a sense of personal space. Whether it’s to escape the hustle and bustle of a busy household, find a warm spot for an afternoon nap, or simply feel protected while observing their environment, a designated hideaway can significantly contribute to their well-being. A DIY cat tent offers just that: a snug, private, and secure spot where your cat can feel safe and relaxed. This project taps into their natural instincts for denning and seeking sheltered areas, providing an enriching addition to their daily lives. Furthermore, for cats in multi-pet households, a personal tent can reduce stress by giving them a retreat from other animals, ensuring they have a place to unwind without interruption.
The beauty of this project lies in its upcycling nature. Instead of purchasing an expensive, mass-produced cat bed, you can repurpose common household items into a unique and custom shelter. This not only saves you money but also allows you to infuse your personal touch into an item your pet will adore. It’s an incredibly rewarding experience to craft something with your own hands that brings joy and comfort to your furry family member. Let’s dive into how you can easily create this delightful cat tent with just a few simple steps and readily available materials.
Essential Materials for Your Upcycled Cat Tent
Gathering your materials is the first exciting step toward creating your cat’s new favorite spot. This project is designed to be accessible and budget-friendly, utilizing items that might otherwise be discarded or are easily found around your home. Each item plays a crucial role in forming a stable, comfortable, and inviting structure for your feline companion.
- 2 Wire Hangers: These form the foundational arch of your tent. Opt for sturdy metal hangers, as they will provide the necessary support and can be easily shaped. The metal allows for flexibility while retaining its form once bent.
- 1 Small T-Shirt: This will become the cozy fabric cover for your tent. Choose a t-shirt that is soft, breathable, and ideally made from a material your cat finds comforting. An old t-shirt from a favorite band or a comfortable cotton tee works perfectly. Its size should be sufficient to drape over the wire frame, providing ample coverage.
- Durable Tape: Strong adhesive tape, such as duct tape or electrical tape, will be used to secure the wire frame components, ensuring stability and preventing any shifting of the structure. This is critical for the tent’s longevity and safety.
- Pliers: A good pair of pliers is essential for cutting and bending the wire hangers accurately and safely. They provide the leverage needed to manipulate the sturdy metal into the desired shapes.
- 15″ x 15″ Cardboard Square: This piece of cardboard serves as the base of your cat tent, providing a flat, stable foundation. The size is ideal for most average-sized cats, offering enough room to stretch out comfortably. Ensure the cardboard is thick and rigid enough to support the frame and your cat’s weight.
- 4 Safety Pins: These small but mighty fasteners will be used to secure the t-shirt fabric to the wire frame, keeping it taut and preventing it from flapping. They allow for easy adjustment and removal for cleaning.
With these simple items in hand, you’re well on your way to crafting a comfortable and secure personal space for your cherished cat. The beauty of this project lies in its simplicity and the use of repurposed materials, proving that you don’t need to spend a fortune to provide your pet with something truly special.
Step 1: Transforming Hangers into Arches
Begin by preparing your wire hangers, which will form the skeletal structure of your cat tent. Take one of your wire hangers and, using your pliers, carefully cut off the hook portion. The goal is to create a long, straight piece of wire. Once the hook is removed, gently but firmly bend the straightened wire into a smooth, symmetrical U-shape. This U-shape will serve as one of the two main arches for your tent, creating the dome-like structure. Focus on making the bend gradual and even to ensure a well-balanced frame. Repeat this process with the second wire hanger, aiming for two identical U-shaped arches. Precision here is key for a stable and aesthetically pleasing tent.
Step 2: Preparing the Cardboard Base
Now, take your 15″ x 15″ cardboard square. This will be the sturdy foundation for your cat tent. Select one corner of the cardboard and, using one end of your U-shaped wire hanger, carefully poke a hole through it. The wire should penetrate the cardboard cleanly. Once the hole is made, push the wire through until you have approximately one inch of wire sticking out from the underside of the cardboard. This protruding length is crucial for securely anchoring the frame to the base. Ensure the hole is snug enough to hold the wire firmly but not so tight that it damages the cardboard or bends the wire excessively.
Step 3: Securing the Wire to the Base
With the wire end poking out from the underside of the cardboard, grab your pliers again. Carefully bend this protruding end of the wire at a sharp 90-degree angle. This bend acts as an anchor, preventing the wire from pulling back through the hole. Once bent, apply a generous amount of strong tape (like duct tape or electrical tape) over the bent wire and firmly press it onto the underside of the cardboard. This tape will reinforce the hold, ensuring the wire remains securely fastened to the base and the tent frame stays stable, even with playful cats.
Step 4: Completing the Frame Foundation
Turn your attention back to the first U-shaped hanger. Take the other end of this hanger and poke it through the diagonally opposite corner of your cardboard base. This creates the first full arch of your tent. Just like in Step 3, ensure about an inch of wire extends from the underside, then bend it at a 90-degree angle with your pliers and secure it firmly with tape. Repeat this entire process (Steps 2, 3, and 4) with the second U-shaped wire hanger, inserting its ends into the remaining two opposite corners of the cardboard base. When finished, you should have two arches crossing each other in the middle, forming a stable, dome-like structure on your cardboard base. The crossing point will be the highest point of your tent.
RELATED: 23 Awesome DIY Pet Projects To Keep Your Furry Friends Happy
Step 5: Reinforcing the Tent’s Apex
With both wire hangers now securely attached to the cardboard base and forming intersecting arches, the next crucial step is to stabilize the apex of your tent. Where the two U-shaped hangers cross at the top, they create the peak of your feline friend’s new home. To ensure these hangers won’t shift or collapse under pressure from curious paws or playful pounces, wrap this intersection point tightly with your durable tape. Apply several layers of tape, making sure to bind the wires together firmly. This reinforcement will significantly enhance the overall structural integrity of the tent, making it sturdy and safe for your cat to enjoy for many hours of lounging.
Step 6: Dressing the Frame with Fabric
Now that your wire frame is robust and secure, it’s time to give your cat tent its soft, inviting exterior. Take your chosen small t-shirt and carefully drape it over the entire wire frame. Position the t-shirt so that the neck opening is centered at the front, creating the main entrance for your cat. The goal is to cover the frame completely, allowing the fabric to fall naturally around the structure. Adjust the t-shirt to ensure even coverage, smoothing out any major wrinkles. The hem of the t-shirt should ideally reach or extend slightly beyond the cardboard base, and the sleeves will hang down, ready for the next step.
Step 7: Securing the Fabric Cover
Once the t-shirt is draped over the frame, you’ll notice that the sleeves and the bottom hem might be loose or flapping. To create a snug, tent-like enclosure, gather the excess fabric from the sleeves and the lower parts of the t-shirt. Pull the sleeves taught and fold them inward or backward, then secure them firmly against the main body of the t-shirt or directly to the wire frame using your safety pins. Similarly, if the bottom hem is too loose, you can gather it and pin it to the cardboard base or discreetly fold it under. The aim is to create a neat, enclosed space while keeping the fabric taut enough to maintain the tent’s shape, preventing it from drooping or becoming a tripping hazard for your cat. Ensure the pins are placed on the outside or in a way that won’t poke your cat.
Step 8: Adding the Final Touch of Comfort
With the structure complete and the fabric secured, your DIY cat tent is almost ready for its first occupant. The final, and arguably most important, step is to make it irresistibly comfortable. Flip your newly constructed cat tent upright, ensuring it sits squarely on its cardboard base. Now, it’s time to add soft bedding inside. This could be a small, plush blanket, a cozy cat bed that fits perfectly within the tent, or even a soft towel your cat already loves. The goal is to create a warm, inviting, and wonderfully soft surface where your cat can curl up and feel utterly secure. The addition of familiar scents on the bedding can also help your cat adapt to their new hideaway more quickly, making it a truly welcoming retreat.
If you’d like to see how this DIY cat tent was made, watch the video tutorial from Purina Friskies:
Why Every Cat Deserves a Cozy Retreat
Beyond simply providing a place to sleep, a cat tent fulfills several crucial aspects of feline welfare. Cats are inherently creatures of habit and territory. A personal tent establishes a clear, safe zone that they can claim as their own, offering a sense of security and ownership. This is especially vital in multi-pet households or homes with active children, where a cat might need a quiet escape from overstimulation. The enclosed nature of a tent mimics the safety of a den, which is deeply ingrained in their wild instincts, providing comfort and reducing anxiety. Furthermore, a tent offers warmth and insulation, creating a snug microclimate perfect for napping during colder months or for cats who simply enjoy being toasty. It’s more than just a piece of furniture; it’s an investment in your cat’s emotional and physical well-being, fostering a calmer, happier pet.
Personalizing Your Cat Tent: Making it Uniquely Theirs
While the basic structure of your DIY cat tent is complete, there’s ample room for personalization to make it truly unique to your feline friend. Consider adding a small, soft cushion or a favorite blanket inside to boost the comfort factor. You can also hang a small, non-toxic cat toy from the inside of the tent’s arch, providing a subtle enrichment element. For an extra touch of coziness, try draping a string of battery-operated LED fairy lights (ensuring they are out of reach and safe for pets) around the exterior of the tent for a magical glow. You might even personalize the t-shirt itself before constructing the tent, perhaps by painting their name on it with pet-safe fabric paint or adding iron-on patches of fish or paw prints. These small customizations not only make the tent more appealing to your cat but also integrate it seamlessly into your home decor, reflecting your love and attention to detail.
Caring for Your DIY Cat Tent: Longevity and Hygiene
To ensure your DIY cat tent remains a cherished and hygienic haven for your pet, regular cleaning and maintenance are essential. The beauty of using a t-shirt as the cover is that it’s typically machine washable. Periodically, you can carefully remove the safety pins, slip off the t-shirt cover, and toss it in the washing machine according to its care instructions. This helps remove cat hair, dander, and any odors that may accumulate over time. While the t-shirt is washing, you can wipe down the cardboard base with a damp cloth and a pet-safe cleaner, allowing it to air dry completely before reassembling. Check the wire frame occasionally for any signs of wear or instability, reinforcing any loose tape or adjusting the wires if needed. By maintaining a clean and sturdy tent, you’re ensuring a healthy and inviting space that your cat will continue to enjoy for years to come.
And there you have it! A beautiful, functional, and eco-friendly DIY cat tent, crafted with love and care, ready to provide a safe and cozy haven for your beloved feline. This project is not only incredibly easy and budget-friendly but also immensely rewarding, offering you the satisfaction of creating something special for your pet. Observe your furball as they explore their new sanctuary, claiming it as their private domain. This upcycling project is a wonderful starting point for a deeper dive into DIY pet projects, and it proves that with a little creativity, you can offer immense comfort and joy to your furry family members. Who knows, this might be the first of many handmade treasures you create for them!
You’ll have fun making cat tents, even if you have a few more cats to make them for, each one reflecting a unique personality!
What do you think about this DIY cat tent? Share your thoughts with us in the comments section below!
UP NEXT:
- 15 DIY Pet Projects & Recipes
- Easy DIY No Sew Dog Jacket
- 15 Homemade Dog Treats | Recipes and Instructions
Editor’s Note: This post was originally published on February 4, 2016, and has been updated for quality and relevancy.