
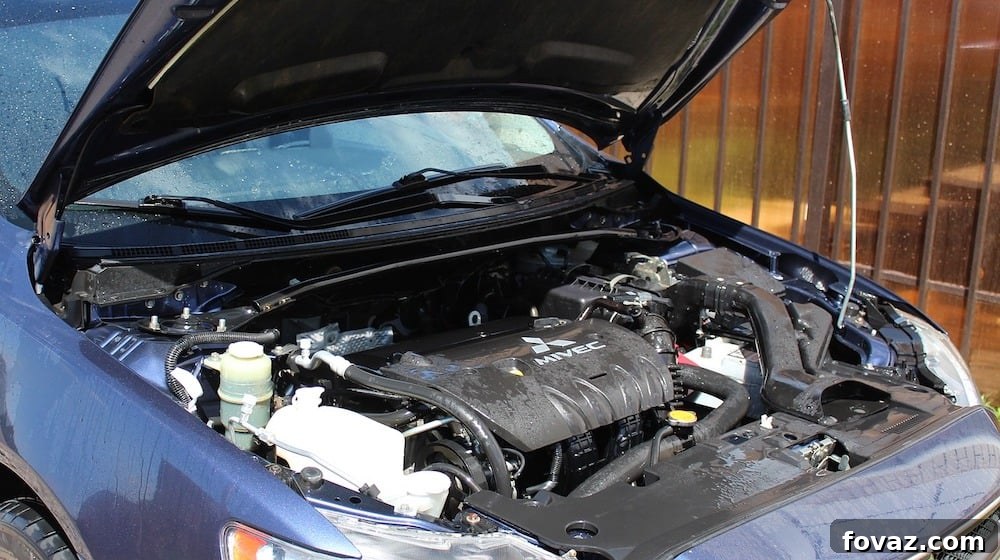
How to Safely and Effectively Clean Your Car Engine: A Comprehensive DIY Guide
A clean engine isn’t just about aesthetics; it’s a vital component of proper car maintenance that contributes significantly to your vehicle’s longevity, performance, and even resale value. While many shy away from cleaning their car’s engine bay, considering it a complex task best left to professionals, the truth is, it’s a perfectly manageable DIY project. With the right tools, a bit of preparation, and our detailed, step-by-step guide, you can achieve a sparkling clean engine bay safely and effectively, without the hefty mechanic fees.
In this comprehensive guide, we’ll demystify the process of how to clean a car engine, breaking down each step into simple, actionable instructions. We’ll cover everything from essential safety precautions and the necessary tools to advanced tips for achieving professional results. Get ready to transform your engine bay and give your car the attention it deserves!
Why Cleaning Your Car Engine is Crucial for Performance and Longevity
Beyond the visual appeal, maintaining a clean engine bay offers a multitude of practical benefits for your vehicle. Over time, road grime, dust, oil leaks, and various contaminants accumulate on engine components. This build-up can lead to several problems that impact your car’s health and performance:
- Improved Heat Dissipation: A layer of dirt and grease acts as an insulator, trapping heat within the engine bay. A clean engine can dissipate heat more efficiently, preventing overheating and reducing strain on critical components.
- Easier Diagnosis of Issues: When your engine is clean, it becomes much easier to spot fluid leaks, cracked hoses, or other emerging mechanical problems. Early detection can save you from costly repairs down the line.
- Enhanced Electrical System Reliability: Dirt and moisture can corrode electrical connections, leading to erratic performance or outright failures. A clean, dry engine bay helps protect these sensitive components.
- Extended Component Lifespan: Grime and contaminants can accelerate wear and tear on belts, pulleys, and plastic parts. Regular cleaning helps preserve these components, extending their operational life.
- Better Resale Value: A well-maintained engine bay signals to potential buyers that the vehicle has been cared for, significantly increasing its perceived value and making it more attractive on the used car market.
- Reduced Fire Risk: Excessive oil and grease buildup can pose a fire hazard, especially if they come into contact with hot exhaust components. Regular cleaning mitigates this risk.
Understanding these benefits underscores why cleaning your engine isn’t just an aesthetic choice, but a fundamental part of responsible car ownership.
Essential Tools and Materials for a DIY Engine Cleaning
Before you embark on your engine cleaning journey, it’s crucial to gather all the necessary tools and materials. Being prepared ensures a smooth, efficient, and hassle-free process. Here’s a comprehensive list of what you’ll need:
- Engine Degreaser / All-Purpose Cleaner (APC): Opt for a dedicated automotive engine degreaser. Many are designed to be safe for plastics and rubber. Alternatively, a high-quality, dilutable all-purpose cleaner can work effectively.
- Stiff Bristle Brush: Ideal for agitating stubborn dirt and grease on durable metal surfaces.
- Soft Bristle Brushes / Detailing Brushes: Essential for reaching into crevices, around delicate components, and gently cleaning plastic or painted surfaces without scratching.
- Microfiber Towels / Drying Towel: For drying various surfaces and wiping away excess product.
- Pressure Washer (Low Setting) or Garden Hose with Spray Nozzle: A garden hose with a controlled spray is often safer for beginners. If using a pressure washer, ensure it’s on a very low-pressure setting and maintain a safe distance.
- Plastic Bags / Plastic Wrap: Crucial for covering sensitive electrical components.
- Painter’s Tape: To secure plastic coverings and mask off areas you want to protect.
- Vinyl & Rubber Protectant Spray: To condition and protect plastic, rubber, and vinyl surfaces after cleaning, restoring their luster and preventing drying/cracking.
- Safety Glasses & Gloves: To protect your eyes from splashes and your hands from chemicals and grime.
- Compressed Air (Optional): Excellent for blowing water out of tight spaces and drying the engine quickly.
Step-by-Step Guide: How to Safely Clean Your Car Engine
Step 1: Safety First & Pre-Cleaning Preparation
Safety is paramount when working with automotive chemicals and water around electrical components. Proper preparation will protect both you and your vehicle. Follow these critical steps:
- Ensure the Engine is Cool: Never clean a hot engine. The heat can quickly evaporate cleaning products, leaving residues, and can also warp plastic components or crack hot metal when cold water is applied. Let your engine cool down completely for at least an hour, or until it’s cool to the touch.
- Wear Safety Gear: Put on your safety glasses to protect your eyes from splashes and gloves to protect your hands from chemicals and dirt.
- Disconnect the Battery (Optional but Recommended): For maximum safety, especially if you’re new to engine cleaning, disconnect the negative terminal of your car battery. This eliminates any electrical current flow and reduces the risk of short circuits. Secure the cable away from the terminal.
- Cover Sensitive Electrical Components: This is the most crucial step. Identify and cover your alternator, distributor, exposed electrical connectors, battery terminals (if not disconnected), fuse box, and any exposed wiring or sensors. Use plastic bags and secure them tightly with painter’s tape or rubber bands. Ensure water cannot seep in.
- Protect the Air Intake: If your car has an exposed air intake (e.g., aftermarket cold air intake), cover it to prevent water from entering the engine.
- Address Any Open Filters: If you have an exposed cabin air filter or a washable cone air filter in the engine bay, remove it or cover it thoroughly.
- Inspect for Cracks or Damage: Quickly check for any visibly cracked hoses or exposed wires that might be vulnerable to water or cleaning solutions. Address these before proceeding, or take extra care around them.
Step 2: Apply Engine Degreaser
Now that your engine is prepped and protected, it’s time to tackle the grime. Choose a high-quality, automotive-specific engine degreaser or a suitable all-purpose cleaner, and follow the product’s instructions for dilution if required.
- Spray Evenly: Liberally spray the engine degreaser over all soiled surfaces of the engine bay. Focus on areas with heavy oil, grease, and dirt build-up, such as the engine block, valve covers, and frame rails.
- Avoid Sensitive Areas (Initially): While most degreasers are relatively safe, try to avoid directly saturating areas you’ve covered with plastic, especially the alternator and fuse box, during the initial spray.
- Allow Dwell Time: Let the degreaser sit for the recommended time, usually 5-15 minutes, allowing it to penetrate and break down the grime. Do not let the degreaser dry on the engine, especially on painted surfaces, as it can leave stains. If it starts to dry, lightly mist with water to reactivate it.
Step 3: Agitate and Scrub Away Stubborn Dirt
The degreaser does most of the heavy lifting, but agitation is key to removing truly stubborn dirt and grime that has been baked onto surfaces over time.
- Use Appropriate Brushes: With your stiff brush, scrub the heavily soiled metal components like the engine block, chassis components, and underhood painted surfaces. Use softer detailing brushes for plastic covers, hoses, and more delicate areas to avoid scratching. A long-handled brush can help you reach deeper into the engine bay.
- Work Methodically: Start from one side of the engine bay and work your way across, ensuring you cover all dirty areas. Don’t forget the underside of the hood (if it’s dirty) and the firewall.
- Focus on Crevices: Pay special attention to hard-to-reach crevices and corners where dirt tends to accumulate. Small detailing brushes or even old toothbrushes can be very effective here.
- Reapply Degreaser if Needed: For extremely caked-on grease, you might need to reapply a small amount of degreaser to specific spots and agitate again.
Step 4: Rinse Your Engine Bay
Once you’ve agitated all the dirt and grime, it’s time to rinse it away. This step requires careful control to prevent water from damaging electrical components.
- Low-Pressure Rinse is Key: Use a garden hose with a gentle spray nozzle or a pressure washer set to its lowest pressure setting and widest fan pattern. A high-pressure stream can force water into electrical connections, sensors, or seals, causing damage.
- Maintain Distance: Keep a safe distance (at least 1-2 feet) between the nozzle and engine components.
- Rinse from Top to Bottom: Start rinsing from the top of the engine bay and work your way down, allowing gravity to carry the dirty water away. Avoid spraying directly into covered electrical components.
- Thorough Rinse: Ensure all degreaser residue is completely rinsed off. Leftover cleaner can leave streaks or attract new dirt quickly.
- Avoid Prolonged Soaking: While rinsing, try to avoid prolonged direct saturation of any single area, especially those with many electrical connections.
Step 5: Dry and Protect Your Engine Bay
Thorough drying is crucial to prevent water spots, corrosion, and electrical issues. After rinsing, you’ll move on to protecting the various surfaces.
- Initial Drying: Use clean microfiber towels or a chamois cloth to hand-dry accessible surfaces. For hard-to-reach areas, compressed air or a leaf blower on a low setting can effectively remove trapped water.
- Natural Drying / Engine Run: After the initial drying, remove all the plastic coverings from your electrical components. Start your car and let it run for 10-15 minutes. The engine’s heat will help evaporate any remaining moisture, especially in hidden nooks and crannies. This is an important step to prevent corrosion and ensure all systems are fully dry before operating the vehicle normally.
- Apply Protectant: Once the engine is completely dry and cool to the touch again, apply a vinyl and rubber protectant spray. Spray the protectant onto a microfiber cloth first, then wipe it onto all plastic covers, rubber hoses, and trim pieces. This conditions these materials, restores their original sheen, and provides UV protection, preventing them from drying out, cracking, or fading.
- Final Inspection: Do a final visual check to ensure everything is clean, dry, and all coverings have been removed. Make sure your battery is reconnected if you disconnected it earlier.
Additional Tips for an Impeccable Engine Bay
- Regular Maintenance: Don’t wait until your engine bay is heavily soiled. A light cleaning every few months will make subsequent deep cleans much easier and quicker.
- Specific Product Use: Always read the labels of your cleaning products. Some degreasers might require dilution, while others are ready to use.
- Detailing Brushes: Invest in a good set of detailing brushes of various sizes and stiffness for maximum reach and effectiveness.
- Avoid Aerosol Sprays on Hot Engine: Be cautious with highly flammable aerosol products (like brake cleaner) around a recently run engine, even if it feels cool.
- Check for Leaks: A clean engine bay makes it easy to spot new fluid leaks, helping you address potential problems early.
Common Mistakes to Avoid When Cleaning Your Car Engine
To ensure a safe and successful cleaning experience, steer clear of these common pitfalls:
- Cleaning a Hot Engine: As mentioned, this can cause chemical evaporation, streaking, and thermal shock to components. Always wait for the engine to cool down.
- Using High-Pressure Water Directly: High pressure can force water into electrical connectors, bearings, and seals, leading to shorts, corrosion, and component failure.
- Forgetting to Cover Electricals: This is the quickest way to cause costly damage. Always protect your alternator, fuse box, distributor, and any exposed wiring.
- Using Harsh Household Cleaners: Avoid strong acidic or alkaline household cleaners that are not formulated for automotive use, as they can damage plastics, rubber, and painted surfaces.
- Letting Degreaser Dry: If degreaser dries on the surface, it can leave difficult-to-remove stains or residues. Keep the surface moist during the dwell time.
- Neglecting Thorough Drying: Any lingering moisture can lead to corrosion or electrical issues. Ensure the engine bay is completely dry before driving.
Frequently Asked Questions About Engine Cleaning
How often should I clean my car engine?
For most vehicles, cleaning your engine bay once or twice a year is sufficient to prevent excessive buildup. If you frequently drive on dusty roads, through mud, or live in areas with heavy road salt usage, more frequent cleaning (e.g., quarterly) might be beneficial.
Is it safe to clean a modern car engine with all its electronics?
Yes, it is safe, provided you take the necessary precautions. Modern engines have more electronics, but they are also designed with better seals and water resistance. The key is to avoid high-pressure water, properly cover sensitive electrical components, and ensure thorough drying.
What happens if I get water on my car’s electrical components?
If water gets into critical electrical components like the alternator, fuse box, or sensors, it can cause immediate problems like misfires, erratic sensor readings, or complete electrical failures. In the long term, it can lead to corrosion and permanent damage. This is why covering these parts and ensuring thorough drying is so important.
Can I use dish soap to clean my engine?
While dish soap can cut grease, it’s generally not recommended for engine cleaning. Many dish soaps contain strong detergents that can strip away protective waxes or coatings on various engine components, and they can be harsh on rubber and plastic over time. A dedicated engine degreaser or automotive APC is a much safer and more effective choice.
What’s the best time of day to clean my engine?
Choose a cool, overcast day or work in the shade. This prevents the degreaser from drying too quickly and makes the process more comfortable for you. Ensure you have ample time for the engine to cool down before you start and for it to dry completely afterward.
Watch this video for a complete tutorial on how to clean a car engine:
By following these steps and incorporating regular engine bay cleaning into your car maintenance routine, you’ll not only enjoy a visually appealing engine but also contribute significantly to its overall health and performance. This simple DIY task can save you money, extend your car’s life, and make you proud of your vehicle’s condition, both inside and out!
Click Here For More DIY Car Care Tips!
Related Car Care Guides You Might Also Like:
How To Fix Your Own Car Part 1 – Remove Dents With A Suction Cup
12 Easy Steps To Fix Clear Coat Scratches On Your Car
5 TIPS FOR A SEAMLESS AND LONG LASTING CAR AIR CONDITIONING SYSTEM
Featured Image Via readersdigest