
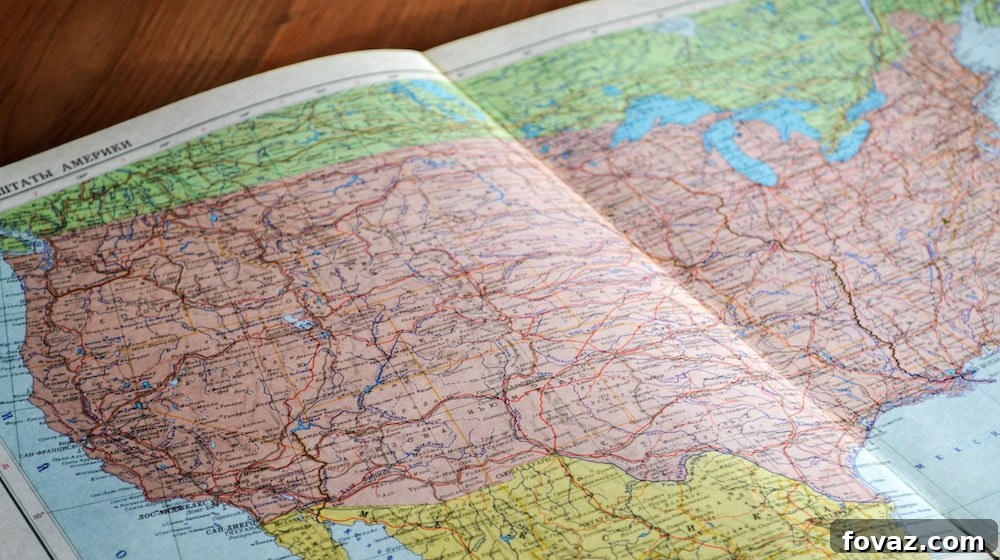
Unlock your inner artisan and transform reclaimed wood into a stunning focal point for your home. This DIY USA puzzle map isn’t just a piece of decor; it’s a testament to your woodworking skills and a vibrant expression of patriotism. Dive into a project that promises both creative satisfaction and a truly unique result!
Craft Your Own Patriotic Masterpiece: The Ultimate USA Puzzle Map Wood Wall Art
Are you searching for an impactful way to personalize your living space? Beyond conventional photo galleries and store-bought wall hangings, lies a world of creative possibilities with DIY wall art. Imagine a magnificent, hand-crafted wooden map of the United States, meticulously pieced together from reclaimed pallet wood. This isn’t just a craft; it’s a journey into detailed woodworking that culminates in a versatile piece of art. Whether you envision it as an engaging tabletop puzzle for family fun or a proud, mounted display showcasing your patriotic spirit, this USA puzzle map offers boundless charm and conversation.
Choosing to embark on a woodworking project like this allows you to infuse your home with character and a sense of accomplishment. It’s an opportunity to utilize readily available materials, like pallet scraps, and turn them into something extraordinary. Each state, individually cut and uniquely stained, contributes to a cohesive and striking representation of the nation. This guide will walk you through every step, ensuring you have all the knowledge and tips to create a beautiful and enduring piece of wooden wall art that will be admired for years to come.
Why a USA Puzzle Map is the Perfect DIY Wood Wall Art Project
The appeal of the USA puzzle map goes beyond its aesthetic value. This project stands out for several compelling reasons, making it an ideal choice for both seasoned woodworkers and enthusiastic beginners looking for a challenge.
Unleash Your Creativity and Skill
This project is a fantastic way to hone your woodworking skills. From precise cutting with a scroll saw to working with different wood grains and stains, you’ll gain valuable experience. It allows for artistic expression in your choice of wood finishes, making each state a unique element within the larger tapestry of the map.
Eco-Friendly and Sustainable Decor
Utilizing pallet wood scraps is a brilliant way to embrace sustainability. Instead of contributing to landfill waste, you’re giving discarded materials a new life and purpose. This not only makes your project environmentally conscious but also adds an authentic, rustic charm that new wood often lacks.
A Striking and Meaningful Home Accent
Few pieces of decor command attention quite like a large, hand-crafted map. It serves as a powerful statement piece, reflecting a love for your country and an appreciation for craftsmanship. Whether displayed in a living room, study, or even a child’s bedroom, it instantly elevates the space and sparks conversation.
Educational and Engaging for All Ages
Beyond its decorative function, this USA puzzle map offers an excellent educational tool. Children and adults alike can learn geography in a tactile and interactive way, piecing together states and understanding their relative positions. It transforms passive learning into an active, enjoyable experience, making it a valuable addition to any family home.
A Thoughtful and Personalized Gift Idea
Imagine presenting this meticulously crafted map as a gift. Its handmade nature, combined with the personal effort invested, makes it an incredibly thoughtful and cherished present for a special occasion, a housewarming, or for anyone with a love for the USA.
Essential Materials You’ll Need for Your USA Puzzle Map
Gathering the right materials is the first step towards a successful woodworking project. Here’s a detailed look at what you’ll need to create your stunning USA puzzle map:
- Pallet Wood Pieces (or other reclaimed wood): The heart of your project. Look for various shades, grains, and even different types of wood to add depth and contrast to your map. Pallets are excellent for their rustic appeal, but ensure they are clean, free of chemicals, and in good condition. You’ll need enough pieces to cut out all 50 states.
- Large Printout of a USA Map: The accuracy of your map depends on this. Choose a detailed, high-resolution map, ideally one that can be printed at a substantial size to make cutting easier and ensure the final product is impactful. Consider printing it in sections and carefully taping them together for a seamless template.
- Spray Adhesive: A temporary, repositionable spray adhesive works best for attaching your paper stencils to the wood without damaging the wood surface or leaving excessive residue. Ensure you use it in a well-ventilated area.
- Pencil: A standard pencil (HB or 2B) for tracing, marking, and outlining. Keep it sharp for precision.
- Large Sheet of Plywood (1/4 inch or 6mm thick): This will serve as the sturdy base for your puzzle map. The size should accommodate the entire map once assembled. A smoother finish plywood will make routing easier and provide a cleaner look for the frame.
- Wood Stains/Finishes (Optional but Recommended): To enhance the natural beauty of the wood and create distinct visual separation between states. A variety of light and dark stains can be used, or simply clear varnish to seal and protect the wood.
- Wood Glue: For permanently attaching the state pieces to the plywood base if you choose a mounted wall art display rather than a removable puzzle.
- Sandpaper (various grits): Essential for smoothing the edges of your cut states and the plywood base, ensuring a professional and tactile finish.
- Protective Sealant/Varnish: To protect the finished wood from moisture, dust, and wear, ensuring longevity.
- Wall Mounting Hardware (if displaying as wall art): D-rings, picture wire, or a French cleat for secure installation.
Essential Tools for Precision and Craftsmanship
Having the right tools is crucial for achieving clean cuts and a professional finish. Here are the tools you’ll need, along with a brief explanation of their role:
- Scroll Saw: This is your primary tool for cutting the intricate, curved, and detailed outlines of each state. Its fine blade allows for incredible precision, making it indispensable for this project. Familiarize yourself with its operation and safety guidelines.
- Miter Saw: While the scroll saw handles curves, a miter saw is perfect for achieving perfectly straight edges. Some states, or parts of states, have straight borders, and a miter saw will provide cleaner, more accurate cuts for these sections.
- Router: A router is used to cut the plywood base to the exact shape of your map and, more importantly, to create the shallow inset border where your puzzle pieces will snugly fit. This tool gives your finished piece a polished, framed appearance. Different bits will be needed for cutting the outline and for creating the dado/inset.
- Clamps: Essential for securing your wood pieces while cutting, routing, and gluing, ensuring stability and safety.
- Safety Glasses and Hearing Protection: Always wear appropriate personal protective equipment when operating power tools.
- Utility Knife or Scissors: For cutting out your paper map stencils.
Step-by-Step Guide to Crafting Your USA Puzzle Map
Let’s dive into the detailed process of bringing your patriotic wood wall art to life.
Step 1: Preparing Your Map Stencils with Precision
Begin by printing your chosen USA map. Ensure it’s scaled to the desired size for your final art piece. The larger and more detailed your printout, the easier it will be to achieve accurate cuts. Once printed, carefully use a sharp utility knife or scissors to cut along the outline of each individual state. Precision here is paramount, as these paper stencils will guide all your subsequent cuts. Take your time to achieve clean, crisp edges for every state, paying close attention to the intricate coastlines and borders.
Step 2: Attaching Stencils and Cutting Individual States from Pallet Wood
With your state stencils ready, select a piece of pallet wood that is large enough for the state you are about to cut. Using a spray adhesive, lightly and evenly coat the back of one state stencil and carefully press it onto your chosen piece of wood. Allow the adhesive to set briefly. Next, using your scroll saw, meticulously trace along the edges of the paper stencil to cut out the exact shape of the state. For any straight borders, such as those found on states like Colorado or Wyoming, a miter saw can be used to achieve perfectly clean and straight cuts, enhancing the overall precision of your puzzle pieces. After cutting, gently peel off the paper stencil from the wooden state piece. Repeat this process for all 50 states, ensuring each is a unique and accurate representation.
Step 3: Creating Visual Distinction with Varied Wood Tones and Stains
As you progress through cutting each state, strategically select different shades, grains, or even apply various wood stains to the pallet wood pieces. The goal is to create a defined and visually appealing contrast between adjacent or closely located states. This deliberate variation will make each state clearly distinguishable when the map is laid out, adding depth and artistic gradation to your finished piece. Consider light and dark contrasts, or even subtle differences in natural wood tones. After cutting and before assembly, you might also want to lightly sand the edges of each state to remove any rough spots and prepare them for an optional stain or protective finish.
Step 4: Dry-Fitting and Refining Your Puzzle Layout
Once all the individual state pieces are cut and perhaps stained, it’s crucial to perform a dry fit. Lay out all the finished pieces on a large, flat surface in their correct geographical positions. This step allows you to assess how well the edges align and fit together. Pay close attention to the shared borders between states. If any pieces don’t fit perfectly, use sandpaper or a small carving tool to make minor adjustments, shaving off tiny bits of wood until you achieve a snug and satisfactory fit. This meticulous attention to detail at this stage will ensure a seamless and professional-looking final map.
Step 5: Preparing the Plywood Base and Tracing the Map Outline
Select your quarter-inch plywood sheet, ensuring it’s large enough to comfortably accommodate the entire assembled map with a slight border around it. Carefully arrange all your finished wooden state puzzle pieces onto the plywood in their proper geographical positions, just as you did during the dry fit. Once you are satisfied with the arrangement and fit, use a pencil to meticulously trace the entire outer edge of the assembled puzzle map onto the plywood sheet. This outline will serve as your guide for cutting the plywood base to match the exact contour of your map.
Step 6: Cutting the Plywood Base to Match the Map’s Contour
With the outline traced, it’s time to cut the plywood base. Secure the plywood firmly to your workbench using clamps. Using a router fitted with a straight cutting bit, carefully cut along the traced pencil line. Take your time to maintain a steady hand and ensure the router follows the exact contour of the map. This step will create a plywood base that perfectly matches the overall shape of your USA puzzle, ready to house the individual state pieces.
Step 7: Creating the Inset Border for a Perfect Puzzle Fit
This is a critical step for giving your puzzle map a professional, framed appearance and ensuring the pieces sit snugly. After cutting the plywood to the map’s outline, you’ll use the router again, this time to create an interior border or inset. Adjust your router bit to cut a shallow groove, just deep enough for your wooden state pieces to sit comfortably within. Run the router through the interior of the plywood border, carefully shaving off the inset material. This creates a recessed area within the plywood that acts as a frame, allowing the puzzle pieces to sit flush or slightly below the edge of the plywood border. The result is a clean, finished look and a more secure fit for your puzzle.
Step 8: Finishing Touches and Displaying Your Masterpiece
Once the plywood base is routed, give all surfaces (both the state pieces and the plywood frame) a final sanding to ensure they are smooth to the touch. You may choose to apply a protective sealant or varnish to all wood surfaces to enhance their durability and bring out the natural beauty of the wood grain. Now, you have a choice for displaying your stunning creation:
- As Wooden Wall Art: If you prefer a permanent display, apply wood glue to the back of each state piece and carefully affix them into their respective recessed spots on the plywood frame. Once dry, attach appropriate wall-mounting hardware to the back of the plywood, such as D-rings or a French cleat, and proudly mount your patriotic art on a prominent wall in your home.
- As an Interactive Puzzle: Alternatively, you can keep the state pieces separate from the plywood base. This transforms your creation into an engaging, tactile puzzle that people of all ages can enjoy assembling and reassembling. It’s a fantastic educational tool and a unique form of interactive decor.
Watch the complete video from Scott Brooks on how to make this wood wall art:
Beyond Decor: The Enduring Value of Handmade Wood Art
Creating this USA puzzle map from pallet wood is more than just a craft project; it’s an investment in your home and your skills. It allows you to express your personal style in a truly authentic way, harnessing practical woodworking techniques for profoundly creative purposes. The satisfaction of stepping back and admiring a piece of art that you’ve meticulously crafted with your own hands is immeasurable. This eye-catching, handmade work of art is destined to become a cherished feature in your home, reflecting your dedication and passion for DIY. We wholeheartedly encourage you to carve out a special place for this unique piece and enjoy the pride it brings.
Have you ventured into other wood wall art projects? Share your experiences, tips, and creations in the comments below! Happy woodworking and happy crafting!
Looking for more inspiring craft ideas? Explore these easy Valentine’s Day crafts now before it’s too late to create something special!
Stay connected with us for more DIY inspiration and project guides on Facebook, Twitter, Pinterest and Instagram!