
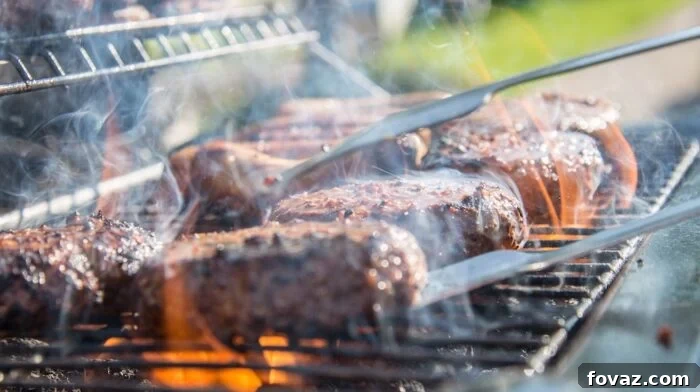
There’s an undeniable magic to smoked meats – that deep, rich flavor, the tender texture, and the inviting aroma that fills the air. Imagine achieving that culinary excellence right in your own backyard, without breaking the bank. Forget generic store-bought grills; it’s time to unleash your inner pitmaster and become the envy of your neighborhood with a custom, inexpensive DIY smoker grill.
Building your own smoker isn’t just about saving money; it’s about the satisfaction of crafting something with your hands, tailoring it to your specific needs, and imbuing every meal with a personal touch. Whether you’re a seasoned DIY enthusiast or a weekend warrior looking for a rewarding project, this guide will inspire you to transform ordinary materials into an extraordinary outdoor cooking appliance. Get ready for a creative adventure this weekend as we explore a fantastic list of innovative and easy-to-build homemade smoker projects that will revolutionize your backyard barbecues and make you the ultimate host.
Why Embrace the DIY Smoker Grill Trend?
The allure of smoked food is universal, but the price tag of a high-quality commercial smoker can often be a deterrent. This is where the beauty of a DIY smoker truly shines. Opting to build your own offers a multitude of benefits that extend beyond mere cost savings:
Cost Savings That Make You Smile
One of the primary motivations for undertaking a DIY smoker project is the significant reduction in cost. Many of the materials required can be repurposed, upcycled, or purchased affordably. By utilizing items like old metal drums, terracotta pots, or even filing cabinets, you can construct a fully functional smoker for a fraction of the price of a brand-new retail unit. This allows you to invest more in premium cuts of meat and your favorite rubs!
Unmatched Customization and Personalization
Unlike off-the-shelf options, a homemade smoker can be designed to your exact specifications. Need more grilling space? Want specific temperature controls? Desire a unique aesthetic that complements your outdoor decor? Building it yourself means every detail, from the size of the cooking chamber to the placement of vents and thermometers, can be tailored to your preferences. This level of personalization ensures your smoker is not just a cooking appliance, but a true extension of your outdoor living space.
The Joy of Learning a New Skill and Accomplishment
Embarking on a DIY BBQ smoker project is an excellent opportunity to expand your handyman skills. You’ll learn about material properties, temperature dynamics, airflow management, and basic construction techniques. There’s immense satisfaction in seeing your vision come to life and then successfully smoking your first brisket or rack of ribs on a grill you built with your own hands. It’s a rewarding experience that builds confidence and provides a great story to share with friends and family.
Sustainable and Resourceful Living
Many DIY smoker ideas revolve around repurposing discarded items. This eco-friendly approach reduces waste and gives new life to materials that might otherwise end up in a landfill. It’s a testament to ingenuity and a way to contribute to a more sustainable lifestyle while enjoying delicious food.
Essential Components of Any Effective Smoker Grill
Before diving into specific homemade smoker plans, it’s beneficial to understand the core components that make any smoker function efficiently. Regardless of the materials you choose, these elements are crucial for successful low-and-slow cooking:
The Firebox or Heat Source
This is where your fuel (wood chips, charcoal, wood chunks) is burned to create heat and smoke. In some designs, like vertical drum smokers, the firebox is integrated into the bottom of the main cooking chamber. In offset smokers, it’s a separate chamber connected to the side. Proper airflow into the firebox is essential for maintaining consistent heat and smoke.
The Cooking Chamber
The main area where your food cooks. It needs to be spacious enough for your desired amount of meat and ideally designed to maintain a stable, even temperature. Good insulation is key here, which is why materials like steel, ceramic, or concrete are often chosen.
Cooking Grates
These are the surfaces on which your food rests. They should be made from food-grade materials like stainless steel or chrome-plated steel and be sturdy enough to hold significant weight. Multiple levels of grates are a common feature in many smokers, allowing you to cook various items simultaneously or at different distances from the heat source.
Ventilation and Airflow Control
Crucial for regulating temperature and smoke intensity. Smokers typically have an intake vent (damper) near the firebox to control oxygen flow to the fuel, and an exhaust vent (chimney) to release smoke and spent gasses. Precise control over these vents is what separates a good smoker from a great one.
Accurate Temperature Gauges
A reliable thermometer is your best friend when smoking. While some DIY projects might incorporate a gauge directly into the design, many pitmasters opt for external, probe-style thermometers for greater accuracy, allowing them to monitor both the internal temperature of the smoker and the internal temperature of the meat without opening the lid.
7 Ingenious DIY Smoker Grill Ideas to Elevate Your BBQ Game
Now that you understand the fundamentals and appreciate the benefits, let’s explore some truly creative and accessible DIY smoker plans. These projects range from simple weekend builds to more ambitious undertakings, ensuring there’s a perfect fit for every skill level and budget. Get ready to transform everyday objects into powerful smoking machines!
1. The Charming Terracotta Pot Smoker: Simple & Effective
Who knew your garden center held the secret to incredible smoked flavors? Terracotta pots, typically reserved for vibrant flora, can be ingeniously repurposed into a surprisingly efficient and visually appealing portable smoker grill. This project is a fantastic entry point for beginners due to its simplicity and minimal material requirements.
What You’ll Need: Two large terracotta pots (one for the base, one for the lid), a terracotta saucer, a sturdy cooking grate, a charcoal pan or small hot plate (for electric versions), a rack for water/wood chips, and a thermometer. You might also need some hardware like bolts and nuts to create ‘legs’ or spacers for airflow between the pots, and a handle for the lid.
The Concept: The porous nature of terracotta provides decent insulation, helping to maintain a stable cooking temperature. The design typically involves stacking two pots: the bottom pot houses the heat source (charcoal or a hot plate for electric models), while the top pot, inverted, acts as the cooking chamber with a grate inside. The saucer often serves as the base for the charcoal, or a heat diffuser.
Assembly Insights: For a charcoal-based model, you’ll place your lit charcoal and wood chips in the bottom pot (perhaps on a small stand or saucer). Above this, a water pan helps regulate temperature and adds moisture to the smoke. Then, you’ll position your cooking grate, often supported by bolts drilled through the sides of the bottom pot, before placing the inverted top pot as the lid. Ensure there’s a small gap at the bottom for oxygen intake and consider drilling a small hole in the top pot for a thermometer probe. A matching terracotta lid with a simple handle completes the look, making it not just functional but also a conversation starter.
Advantages: Extremely inexpensive, highly portable, easy to assemble, and surprisingly effective for small cuts of meat, fish, or vegetables. It’s perfect for picnics, camping trips, or intimate backyard gatherings where you want to show off a truly unique flower pot smoker.
2. The Advanced Motor-Operated Rotisserie Smoker: For the Ambitious DIYer
For those who relish a challenge and desire a truly hands-off smoking experience, a motorized rotisserie smoker grill is the ultimate upgrade. This project takes backyard smoking to a professional level, ensuring perfectly even cooking and succulent results every time. It’s an impressive feat of engineering that will undoubtedly make you the talk of your next BBQ party.
Complexity & Materials: This build requires more advanced DIY skills and a commitment to acquiring specific components. Essential materials typically include sturdy steel plates or an existing drum/container for the main chamber, angled iron bars for the frame and rotisserie supports, heavy-duty sprockets, a durable chain, and, crucially, a robust electric motor designed for rotisserie use. Welding skills or access to a welder will be incredibly beneficial for creating a sturdy and long-lasting structure.
How It Works: The core principle is continuous rotation. The motor, via the chain and sprocket system, slowly turns a spit or a basket of food within the smoking chamber. This constant movement ensures that all sides of the meat are exposed equally to heat and smoke, resulting in an incredibly even cook, perfect bark formation, and self-basting that keeps the meat moist and tender. It’s especially ideal for larger cuts like whole chickens, turkeys, or roasts.
Key Considerations: Precision is paramount here. The alignment of sprockets and the strength of the motor need to be carefully calculated based on the weight of the food you intend to smoke. Safety features for electrical components and proper insulation are also crucial. While more involved, the reward is an automated rotisserie smoker that produces consistent, restaurant-quality results with minimal intervention once set up. This project truly elevates your handyman skills and your bragging rights!
3. Quick & Easy Temporary Brick Grills: Instant BBQ Solution
Sometimes, spontaneity calls for an immediate grilling solution. Whether you’re hosting an impromptu backyard gathering or enjoying an outdoor adventure, a temporary brick grill is the perfect, no-fuss answer. This incredibly simple setup allows you to focus entirely on perfecting your BBQ recipes without the commitment of a permanent structure or the need for complex construction.
The Ultimate in Simplicity: All you essentially need are a good number of sturdy bricks (fire bricks are ideal for heat retention, but any dense, heat-resistant brick will do), and a metal grill grate. The beauty lies in its modularity and ease of assembly. You can configure the bricks in various shapes and sizes to create a U-shaped or rectangular fire pit, stacking them to the desired height.
Setup & Usage: To build, simply arrange the bricks to form the walls of your cooking chamber, leaving gaps for airflow if desired. Once the walls are built, place your charcoal or wood in the base and light it. Position the grill grate on top of the bricks, ensuring it’s stable and secure. You can easily adjust the height of your cooking surface by adding or removing layers of bricks. This adaptability makes it suitable for direct grilling or, with a little ingenuity (like adding a makeshift lid), even a basic smoking setup.
Perfect For: Campouts, tailgating, beach days (where permitted), or simply as an emergency grill when your main unit is out of commission. It’s also an excellent way to test out the waters of outdoor cooking without a significant initial investment. When the party’s over, the bricks can be disassembled and stored, leaving no permanent footprint. This versatile brick grill concept proves that sometimes, the simplest solutions are the most effective.
4. The Resourceful Trash Can Smoker: A Vertical Powerhouse
Transforming an ordinary metal trash can into a highly effective vertical smoker is a classic example of backyard ingenuity. This project is beloved for its cost-effectiveness, relatively straightforward construction, and excellent smoking capabilities, often producing results comparable to more expensive commercial units. It’s a fantastic way to embrace the “ugly drum smoker” (UDS) philosophy.
Core Materials: A new, unused, galvanized metal trash can (important for food safety!), a charcoal basket or pan, one or two cooking grates, a lid, bolts, nuts, and a drill. You’ll also want an accurate thermometer for monitoring internal temperatures.
Construction Overview: The process involves strategically drilling holes in the trash can. A larger opening near the bottom serves as an access door for your charcoal pan and for adding wood chips during the smoking process. Smaller holes around the bottom provide vital air intake for the fire. Higher up, holes are drilled to insert bolts that will support your cooking grates. The lid of the trash can, with an added handle and possibly a drilled exhaust vent, completes the main chamber.
Optimizing Performance: For optimal control, consider adding adjustable dampers to your intake holes and an exhaust stack on the lid. Installing a good quality thermometer through a drilled hole at grate level is non-negotiable for consistent results. Some builders also add a water pan between the charcoal basket and the lowest cooking grate to help regulate temperature and keep the smoking environment moist. The resulting trash can smoker is incredibly efficient, easy to load, and delivers amazing smoked flavor, making it a favorite among many DIY pitmasters.
5. The Robust Concrete Block Smoker & Fire Pit: Built to Last
For those seeking a permanent, incredibly durable, and virtually maintenance-free outdoor cooking solution, a concrete block smoker grill is an outstanding choice. This type of smoker often doubles as a versatile fire pit, allowing you to enjoy cozy evenings by the fire or slow-smoke large quantities of meat with ease. Its solid construction ensures excellent heat retention and a long lifespan.
Design & Materials: The core of this project involves standard concrete blocks (cinder blocks), typically stacked dry or with mortar for a more permanent structure. You’ll also need steel rebar or thick metal rods for grill supports, cooking grates, and potentially a metal sheet for a lid or a dedicated door. Fire bricks can be used for the internal firebox lining to enhance heat resistance and longevity.
Construction & Versatility: Building a concrete block smoker involves creating a chamber with stacked blocks. The design can range from a simple rectangular box with rebar spanning the top to support grates, to more elaborate multi-chamber setups with separate fireboxes. Gaps in the block structure or carefully placed opening blocks can serve as air intake and exhaust vents. The mass of the concrete means once it heats up, it maintains temperature exceptionally well, making it ideal for long smoking sessions.
Benefits: Beyond its low maintenance, a concrete block smoker offers unparalleled durability, weather resistance, and the ability to handle substantial amounts of food. It integrates seamlessly into a backyard landscape, often becoming a focal point. This robust backyard project is perfect for those who envision a dedicated, permanent outdoor cooking station that will serve generations of BBQ enthusiasts.
6. The Classic Metal Drum BBQ Grill: Versatility & Capacity
The iconic 55-gallon metal drum is a cornerstone of DIY smoker construction, offering incredible versatility and capacity for serious pitmasters. These drums, often available for free or at a low cost, can be transformed into highly efficient smokers in several popular configurations, making them a fantastic foundation for a homemade grill.
Variation 1: The Vertical Drum Smoker (UDS – Ugly Drum Smoker): This is arguably the most popular and straightforward drum smoker build. The drum stands upright, with a charcoal basket at the bottom, a water pan above it, and one or more cooking grates further up. Strategic holes for air intake near the bottom and an exhaust vent in the lid provide excellent airflow control. UDS smokers are known for their incredible heat retention, fuel efficiency, and ability to produce exceptionally moist and flavorful meat.
Variation 2: The Offset Barrel Smoker: For those seeking a more traditional offset smoker design, two drums can be utilized. One smaller drum typically serves as the firebox, connected to a larger horizontal drum that acts as the cooking chamber. This design allows for indirect heat smoking, with the heat and smoke flowing from the firebox, through the cooking chamber, and out a chimney on the opposite end. This setup provides more precise temperature control over the cooking grates and is ideal for larger cuts or multiple items simultaneously.
Key Considerations: Always ensure you use a clean, food-grade drum that has not contained hazardous chemicals. Thorough cleaning and burning out any residues are critical for safety. With either variation, a metal drum smoker is a powerful addition to any backyard BBQ setup, promising years of delicious smoked feasts.
7. The Upcycled File Cabinet Smoker: Unexpectedly Chic & Functional
Who would have thought that a discarded file cabinet could become a sophisticated and highly functional smoker? This ingenious DIY project takes repurposing to an art form, transforming a common office item into a multi-level smoking chamber. It’s an excellent choice for those who appreciate unique designs and clever solutions to outdoor cooking needs.
Transformation Process: The key to building a file cabinet smoker involves preparing the cabinet for high heat. Start by thoroughly cleaning it and removing all plastic or non-metal components. The bottom of the upper drawers (or the entire drawer structure if preferred) is typically removed, and metal grates are installed in their place, creating multiple cooking levels. The very bottom drawer or compartment is designated as the firebox.
Heat Source & Control: You have flexibility with your heat source. You can place a charcoal pan directly in the bottom compartment, or for a more controlled approach, install a small electric hot plate or a dedicated electric heating element with wood chips for smoke generation. Ventilation is crucial; you’ll need to create intake vents near the bottom and an exhaust vent near the top, often by drilling holes or adding small chimney pipes. A reliable thermometer mounted on the cabinet door is essential for monitoring internal temperatures.
Advantages & Aesthetics: A file cabinet smoker offers multiple cooking racks, making it ideal for smoking various items simultaneously. Its vertical design is space-efficient, and the ability to easily open drawers for checking food or adding wood chips is a distinct advantage. Furthermore, with a coat of high-temperature paint, these smokers can look surprisingly modern and sleek, proving that functionality and style can indeed go hand-in-hand in a repurposed smoker project.
Crucial Safety Tips for Your Homemade Smoker
While the joy of building and using a DIY smoker is immense, safety should always be your top priority. Working with fire, metal, and potentially repurposed materials requires careful attention to detail:
- Use Food-Grade Materials: This is paramount. Ensure any materials coming into contact with food or smoke are safe. For drums and cans, make sure they were previously used for food-grade contents (e.g., olive oil, syrup) and are thoroughly cleaned. Avoid anything that held chemicals, paints, or unknown substances.
- Thoroughly Clean and Burn Out: For metal drums or cans, a rigorous cleaning process followed by a “burn out” (heating the empty drum to very high temperatures) is essential to remove any residual coatings or contaminants that could release toxic fumes.
- Ventilation is Key: Ensure your smoking area is well-ventilated, especially when first lighting the smoker. Carbon monoxide is odorless and deadly. Never use a smoker indoors or in an enclosed space.
- Stable Construction: Your smoker must be stable and secure, especially if using stacked components or heavy materials like concrete. Prevent tipping hazards.
- Heat Resistance: All components that will be exposed to heat must be heat-resistant. This includes handles, latches, and structural elements.
- Fire Safety: Always operate your smoker on a non-combustible surface, away from structures, fences, and overhanging branches. Keep a fire extinguisher or a bucket of sand/water nearby.
- Temperature Control: Overheating can be dangerous. Learn how to control your smoker’s temperature effectively using vents and fuel management.
Seasoning Your New DIY Smoker for Optimal Performance
Before you cook your first delicious meal in your new custom-built smoker, it’s crucial to “season” it. This process creates a protective layer, burns off any manufacturing oils or paint fumes, and starts building that coveted “smoker smell” that will infuse your future dishes.
Steps to Season Your Smoker:
- Thorough Cleaning: Even with new materials, give the interior a good wipe-down with soap and water to remove any dust or residues. Rinse thoroughly and allow to dry completely.
- Apply Cooking Oil: Lightly coat all interior metal surfaces (cooking grates, walls) with a high-smoke-point cooking oil like vegetable, canola, or flaxseed oil. Avoid olive oil, which can polymerize into a sticky mess.
- First Burn (Empty): Load your firebox with charcoal and a few chunks of wood (hickory or oak work well). Bring the smoker up to a temperature of around 250-275°F (120-135°C) and hold it there for 2-3 hours. This will bake on the oil, creating a non-stick, rust-resistant layer, and burn off any residual chemicals.
- Second Burn (Optional, with Food Scraps): Some pitmasters like to follow up with a burn using cheap cuts of fatty meat (like chicken skin or bacon scraps) or even just some wood chips. The rendered fat and aromatic smoke further condition the interior.
- Cool Down: Allow the smoker to cool down completely before its first use. You’ll notice the interior has darkened and developed a seasoned aroma.
Unleash Your Inner Pitmaster with a Custom Smoker!
There’s truly something uniquely satisfying about creating functional and interesting pieces for your home, especially when they contribute to memorable culinary experiences. As you’ve seen, transforming everyday objects into powerful smoking machines is not only achievable but immensely rewarding. Whether you’re drawn to the rustic charm of a terracotta pot smoker, the robust permanence of concrete, or the efficient capacity of a metal drum, each DIY smoker project offers a path to incredible smoked flavors right in your backyard.
We hope this comprehensive guide has ignited your passion for building your own smoker and inspired you to embark on a creative journey. The personal touch you add to your outdoor cooking setup will not only elevate your BBQ parties but also serve as a fantastic conversation starter with friends and family. Imagine the bragging rights as you serve up perfectly smoked brisket or tender ribs, all cooked in a smoker you built with your own hands!
Ready to transform your backyard into an extension of your personal culinary space? Take the plunge this weekend! Which DIY smoker grill caught your eye the most? Share your favorite ideas or perhaps your own successful builds in the comment section below. We love hearing about your creative outdoor adventures!
For even more inspiration to enhance your home’s outdoor sanctuary, delve into this ultimate collection: 687 DIY Outdoor Projects – you’re sure to discover the perfect addition to your backyard!
Stay connected with us on Facebook, Twitter, Pinterest, and Instagram!