
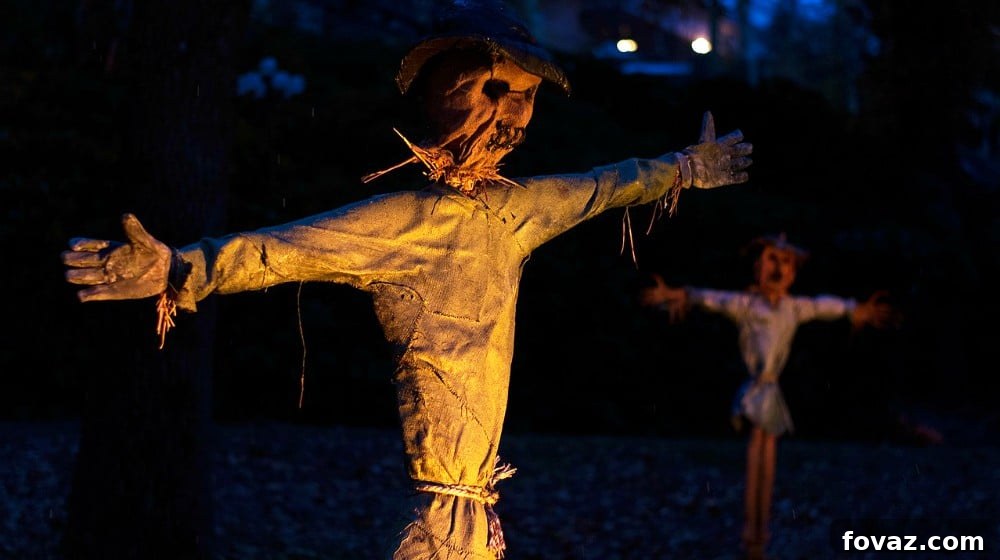
Are you ready to create the most spine-chilling outdoor Halloween decorations on your block? Forget generic ghosts and plastic pumpkins; this year, it’s time to unleash true terror with a DIY rotting corpse scarecrow. Imagine the gasps and screams as trick-or-treaters and neighbors encounter this ghastly figure looming in your yard. This step-by-step guide will walk you through crafting a truly freaky and realistic decomposing scarecrow that will make your Halloween display unforgettable. Get ready to transform your outdoor space into a scene straight out of a horror movie!
DIY Spooky Outdoor Halloween Decorations: Crafting a Rotting Corpse Scarecrow
Halloween is the perfect season to embrace your inner ghoul and create some truly terrifying outdoor displays. While store-bought decorations can be convenient, there’s nothing quite like the satisfaction of crafting your own unique and horrifying props. This rotting corpse scarecrow project is not only incredibly impactful but also surprisingly achievable with readily available materials. It’s an excellent way to add a custom, professional-grade scare to your yard without breaking the bank. Let’s dive into bringing this gruesome vision to life!
Why Choose a DIY Rotting Corpse Scarecrow?
Choosing to create a DIY rotting corpse scarecrow for your Halloween yard decorations offers numerous advantages. Firstly, it allows for unparalleled customization; you can control every gruesome detail, from the skeletal hands to the decaying flesh effect, ensuring your scarecrow is truly one-of-a-kind. Secondly, it’s often more cost-effective than purchasing high-quality horror props, utilizing common household items and inexpensive craft supplies. Beyond the practical benefits, there’s immense satisfaction in personally bringing such a terrifying vision to life. This project promises to be a conversation starter, making your home the talk of the neighborhood long after Halloween night.
What You Will Need for Your Scary Scarecrow
Before embarking on this chilling creative journey, gather all your materials. Having everything at hand will make the process smoother and more enjoyable as you assemble your ultimate spooky outdoor Halloween decoration. Many of these items can be found around your house or at local craft and thrift stores, making this an accessible project for any DIY enthusiast.
- Long PVC Pipe (approximately 10ft. for height and stability)
- PVC “T”-shaped joint (essential for the scarecrow’s arms)
- Tinfoil (for shaping the torso and securing branches)
- Masking Tape (a generous amount for sculpting and securing)
- Twisted willow branches (ideal for a gnarly, skeletal look; regular twigs also work)
- Foam Skull (readily available at craft stores like Michael’s)
- Gnarly Wig (optional, from a thrift store like Goodwill, for added realism)
- Old Sheets (2-3 of them, from Goodwill or old linens, for tattered clothing)
- Caramel brown + dark brown spray paint (for realistic decaying flesh and shadowing)
- Scissors (for cutting sheets and tape)
- Plastic sheeting or newspaper (to protect your work surface during spray painting)
Instructions: Bringing Your Gruesome Scarecrow to Life
Follow these detailed steps to construct your very own terrifying rotting corpse scarecrow. Each stage is crucial for achieving that authentic, spine-chilling look that will make your outdoor Halloween display truly stand out.
Step 1. Framing the Foundation: The Core Structure
Begin by establishing the central support for your scarecrow. Take your mega-long PVC pole, which will serve as the primary upright support, and securely pop the “T”-shaped PVC joint onto one end. There’s no need for adhesive at this stage; a snug fit is sufficient. Next, select a sturdy tree branch, ideally one with some character. Wad up a good amount of tinfoil around the base of this branch and firmly insert the tinfoil-wrapped end into one side of the PVC “T” joint. This branch will form the initial part of one of your scarecrow’s arms, setting the stage for its formidable presence.
Step 2. Crafting the Scarecrow Arms Frame: Adding the Limbs
Now, focus on shaping the arms for your terrifying figure. Choose additional thin limbs, ideally around 4-5 feet long, that possess some spindly twigs at their ends. These natural formations will lend themselves perfectly to the skeletal appearance you’re aiming for. Once satisfied with your selection, firmly secure the tinfoil-wrapped base of these arm branches into the remaining open side of the PVC “T” joint. Use generous layers of masking tape to seal the tinfoil-twig-wad within the PVC pipe, ensuring a very strong and stable connection. The more tape, the more secure and robust the arms will be, capable of holding their gruesome pose.
Step 3. Detailing the Spindly Hands: The Touch of Terror
This is where your scarecrow truly starts to take on its terrifying form. Begin wrapping masking tape all the way up your chosen arm branches, extending over the smaller twigs at their ends. Don’t strive for perfection; in fact, a messy, uneven application will enhance the skeletal, rotting effect we desire. We want grotesque, not smooth, corpse arms – achieving that decaying bone look is key. If your chosen branch naturally has three or more twigs at its end, you’re off to a great start for forming fingers. For additional fingers, snap off curly willow branch pieces or regular small twigs and tape them securely onto the “hand” area. Continue taping and tweaking each taped-twig finger until you achieve a ghastly, spindly hand. Repeat this meticulous arm and finger process on the other side, ensuring both hands are equally horrifying. Perfect, mwahahaha!
Step 4. Forming the Scarecrow Torso: Building the Body
With your super creepy arms now protruding from either side of the PVC pipe, it’s time to give your scarecrow a body. The torso helps ground the figure and adds to its terrifying realism. To create the shape, tear off generous pieces of tinfoil and begin wrapping and wadding them around the top of the main pole, precisely between the two arm connections. Continue adding tinfoil wads, packing everything down firmly and strategically. Your goal is to build up a satisfactory torso shape that gradually tapers off towards what would be the waist, creating the illusion of a decrepit, almost dismembered corpse. This tapering effect adds a macabre touch, as if our unfortunate figure was tragically cut in half.
Step 5. Finishing the Torso: Reinforcing the Form
Once you are pleased with the overall shape and volume of your tinfoil torso, it’s time to solidify its form. Take your masking tape and begin wrapping it tightly and thoroughly around the entire tinfoil torso. This layer of tape serves multiple purposes: it secures the tinfoil in place, provides a smooth-yet-textured surface for painting, and adds structural integrity to the scarecrow’s body. As you wrap, you’ll see your rotting corpse scarecrow truly beginning to take shape, transitioning from a basic frame to a gruesome figure ready for its horrifying details. The more complete and defined this torso, the more impactful your final outdoor Halloween decoration will be.
Step 6. Prepping the Skull: The Face of Fear
The skull is undeniably the focal point of your terrifying scarecrow. Take your foam skull and, you guessed it, wrap it meticulously in masking tape. This step isn’t just about covering the foam; it’s about adding texture and creating the illusion of decaying flesh clinging to bone. What’s creepier than a bony skull? A rotting flesh skull, of course! Apply the tape in a way that suggests flayed skin or mummified tissue, purposefully leaving the teeth exposed to maximize the ghastly effect. This sets the stage for the detailed painting to come, giving your scarecrow a truly horrifying visage.
Step 7. Connecting the Skull to the Torso: Forming the Neck
Creating the neck for our corpse is surprisingly straightforward yet crucial for realism. Select a sturdy stick, about a foot long, and carefully stab one end deep into the base of the foam skull. Ensure it’s firmly embedded to provide a stable connection. Next, wrap this stick thoroughly in tinfoil, then cover the entire tinfoil-wrapped stick with several layers of masking tape. This process not only reinforces the neck but also builds up its girth, giving it a more substantial and gruesome appearance. As you complete this step, you’ll notice your scarecrow looking creepier by the minute, with its head now poised to join the body.
Step 8. Assembling the Full Scarecrow Figure: Bringing It All Together
Now it’s time to merge the head and body, completing the main structure of your terrifying outdoor Halloween decoration. Take the stick-and-skull assembly you just created and firmly attach the corpse neck to the corpse body. The simplest method is often the most effective: wedge the taped neck stick down into the top of the torso. Once positioned, use even more masking tape to liberally secure the neck to the torso. Don’t be shy with the tape; you want a strong, stable connection that ensures the skull stays in place, giving your scarecrow a robust and menacing posture. This critical step truly brings the rotting corpse to life.
Step 9. Starting the Painting Process: Eyes of Darkness
With the physical structure complete, it’s time to add the macabre colors that will define your scarecrow’s decaying appearance. Lay down your plastic sheeting to protect your work surface. Grab your dark spray paint – either a deep black or a rich chocolate brown will work perfectly. Begin by giving the eye sockets of the skull a quick, targeted spray. This initial application of dark paint will create deep shadows, making the eye sockets appear hollow and menacing. This simple step adds immediate depth and a profound sense of dread to the scarecrow’s face, making its gaze truly chilling for any passerby.
Step 10. Applying Flesh-Colored Paint: The Rotting Effect
Now for the truly gruesome touch: the rotting flesh. Take your caramel brown spray paint, which will serve as the base for the decaying flesh effect. Begin spraying the rest of the corpse, including the arms, hands, torso, and the main body of the skull. As you paint, be mindful not to entirely cover the exposed teeth. You can give them a very light dusting with the spray paint to suggest decay and discoloration, but it’s crucial to maintain that stark, terrifying definition between the teeth. This contrast between the pale, exposed teeth and the dark, rotting flesh will significantly enhance the overall horrifying realism of your outdoor Halloween decoration.
Step 11. Dressing Up the Rotting Corpse Scarecrow: Tattered Rags
No rotting corpse is complete without tattered, decaying garments. It’s time to dress our disgusting scarecrow in rags that amplify its fright factor. Take your old sheets from Goodwill and, using scissors, begin to create messy, shredded robes. A great way to start is by finding the center of a sheet, cutting a hole large enough for the corpse’s head to pass through. Then, using your scissors, snip and tear around the edges of the fabric. The more irregular, frayed, and ripped the fabric looks, the better. Drape these tattered pieces over your scarecrow, letting them hang loosely and dramatically to suggest centuries of decay and neglect. This adds immense character and a final layer of chilling detail to your monster.
Step 12. Installing Your Outdoor Halloween Prop: Placement for Maximum Impact
With your terrifying creation complete, it’s time to find its perfect resting place to maximize its scare potential. Lift this hauntingly realistic corpse high into the air on its tall PVC pole. You have a few options for securing it:
- Directly into the ground: Dig a narrow but deep hole in your yard and sink the base of the PVC pipe directly into it. This worked splendidly for a quick and effective setup (just be mindful of the hole in your yard afterward!).
- Large bucket with rocks/sand: For a more portable solution, place the base of the pole into a large, heavy bucket filled with rocks, sand, or gravel. This provides stability without digging.
- Cement (for permanence): If you want to go the extra mile for long-term stability or a truly permanent fixture, use cement in a bucket or directly in the ground.
Ensure the scarecrow is stable and secure, especially in windy conditions, to prevent it from toppling over and ensure safety for all.
Step 13. Adding the Finishing Touches: Unleashing the Full Terror
The final steps are all about atmosphere, transforming your scary scarecrow from a prop into a terrifying experience. To truly elevate the fright factor of your outdoor Halloween decoration:
- Ghoulish Lighting: Shine some eerie, colored lights (green, red, or blue work well) onto your creation from below or the side. This will cast dramatic shadows and make the rotting corpse appear even more sinister after dark.
- Fog Machine: Place a fog machine at the base of your scarecrow. The swirling mist will create an otherworldly, creepy ambiance, obscuring the figure just enough to make it appear as if it’s emerging from a cursed swamp.
- Sound Effects: Consider adding subtle, unsettling sound effects like groans, whispers, or chilling music to complete the immersive horror experience.
With these finishing touches, your rotting corpse scarecrow is ready to do some serious frightening of your Halloween guests and all who dare to approach your yard. Just imagine the screams and fright you’ll bring to anyone who sees your masterful Halloween decor!
Tips for Customizing Your Rotting Corpse Scarecrow
While the basic design is terrifying enough, you can personalize your rotting corpse scarecrow to make it even more unique and horrifying. Consider adding a few extra details to distinguish your outdoor Halloween decoration. Perhaps attach some faux cobwebs for an aged, long-forgotten look, or drape some plastic chains around its neck and wrists for a prisoner vibe. For an extra grotesque touch, you could even incorporate faux insects or plastic rats clinging to its tattered rags. Experiment with different poses for the arms – reaching out, hunched over, or even clutching a small, eerie prop like a plastic knife or a severed limb. These small additions can significantly amplify the overall scare factor and customize your spooky Halloween display.
Safety First: Important Considerations for Your DIY Project
While creating a chilling Halloween display is exciting, safety should always be a top priority. When working with spray paint, ensure you are in a well-ventilated area, preferably outdoors, and wear appropriate protective gear like gloves and a mask to avoid inhaling fumes. Be cautious when using scissors or snapping branches to prevent cuts or splinters. When installing the scarecrow, ensure the PVC pole is firmly secured to prevent it from toppling over, especially in windy conditions. If using electrical elements like lights or fog machines, ensure all connections are weatherproof and properly installed to avoid hazards. A safe Halloween is a fun Halloween!
You might also want to make one of these equally terrifying Halloween decorations–a DIY decayed corpse props!
Complement your scare rotting corpse outdoor Halloween decorations with these skull tiki torches. Watch this video from Wicked Makers to find out how:
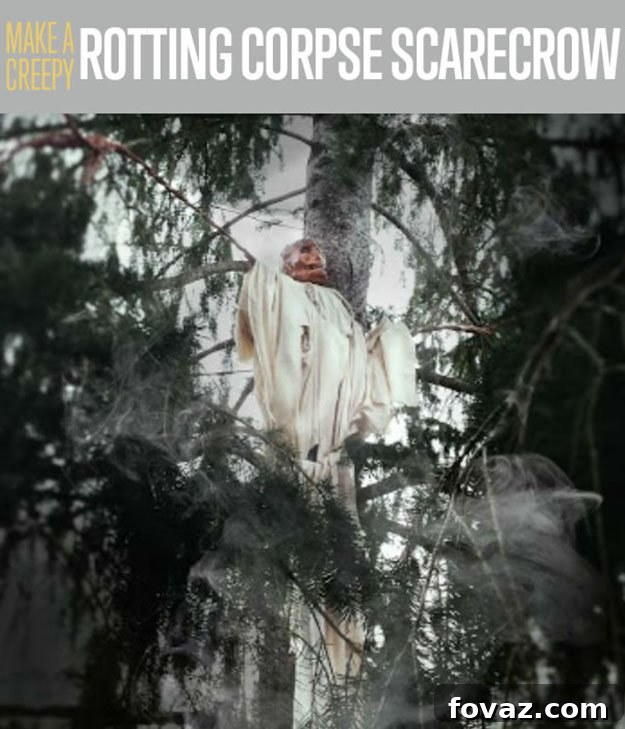
Bag the award for the scariest Halloween decorations ever on the block with this creepy rotting corpse scarecrow dangling or standing prominently in your front yard. Have immense fun making these truly cheap yet impactful outdoor Halloween decorations with your family and use the money you saved for even more Halloween candy!
Would you work on this outdoor Halloween decoration idea? Let us know in the comments section below what your thoughts are on this scary rotting corpse scarecrow and share your own spooky DIY experiences!
Up Next: 31 Breathtakingly Easy-to-Make DIY Halloween Decorations
Stay connected with us on Facebook, Twitter, Pinterest, and Instagram for more terrifyingly good DIY ideas!
Editor’s Note: This post was originally published on October 24, 2014, and has been updated for quality and relevancy, ensuring it remains a timeless guide for terrifying outdoor Halloween decorations.