
There’s an undeniable satisfaction that comes from enjoying something you’ve created with your own hands. For beer enthusiasts, this often translates to the rewarding journey of homebrewing. While the idea of crafting your own brew might seem daunting at first, especially for beginners, it’s a wonderfully accessible hobby with the right guidance. This comprehensive guide provides essential homebrewing tips that will empower you through every stage of the process – before you begin, during the active brewing phase, and in the critical post-brewing period. From selecting your first simple recipe to understanding the nuances of fermentation and storage, these insights are designed to transform you from a novice brewer into a confident expert, ensuring your homemade beer is not just drinkable, but truly exceptional.
RELATED: How to Make Beer | Home Brewing Instructions
Master Homebrewing: Essential Tips to Elevate Your Brew from Novice to Expert
Tips for Success Before You Start Homebrewing
Embarking on your homebrewing adventure requires careful planning and preparation. The groundwork you lay before even touching your first ingredient can significantly impact the quality and enjoyment of your final product. These crucial tips will help you set up for success and avoid common pitfalls, making your initial brewing experience smoother and more rewarding.
1. Start Simple: Embrace the Basics
The world of beer offers an incredible spectrum of styles and flavors, and the freedom of homebrewing means you have complete control over every ingredient and process. While this creative liberty is exciting, it can also be overwhelming for newcomers. Trying to tackle a complex recipe right from the start can lead to frustration and potential mistakes that discourage further attempts.
Instead, begin with a straightforward recipe that uses a minimal number of ingredients and a clear, easy-to-follow process. Styles like a simple pale ale, a basic blonde ale, or even a classic stout are excellent starting points. Focusing on the fundamentals will allow you to grasp the core principles of mashing, boiling, fermentation, and sanitation without being bogged down by intricate details. Gradually building your skills ensures a solid understanding of each step, allowing you to confidently tackle more advanced techniques and recipes as your expertise grows. This gradual progression not only builds your confidence but also fosters a deeper appreciation for the brewing craft.
2. Understand Your Recipe Thoroughly
It’s tempting to jump straight into brewing with a recipe merely as a checklist. However, homebrewing is a meticulous art that demands attention to detail. Every step, no matter how small it seems, plays a vital role in the final flavor and quality of your beer. A minor oversight, while not always catastrophic, can lead to subtle off-flavors or inconsistencies.
Before brew day, read your chosen recipe multiple times. Don’t just skim; try to understand the *why* behind each instruction. Why mash at a specific temperature? Why add hops at different stages of the boil? Familiarizing yourself with the entire process beforehand helps you anticipate steps, organize your equipment, and identify any potential issues. This proactive approach significantly reduces the likelihood of avoidable mistakes, ensuring a smoother brew day and a better beer. Consider watching videos of the process or reading different perspectives on the same style to deepen your understanding.
3. Prioritize Sanitation: Avoid Bleach at All Costs
Sanitation is, without exaggeration, the single most critical factor in brewing good beer. Any equipment that comes into contact with your wort (unfermented beer) after it has been boiled, especially during the crucial cooling and fermentation phases, must be scrupulously clean and sanitized. Contamination from wild yeasts or bacteria can ruin an entire batch, leading to off-flavors, sourness, or even undrinkable beer.
While bleach is a powerful and inexpensive disinfectant, it is emphatically *not* suitable for homebrewing. Bleach is notoriously difficult to rinse completely, and even trace amounts can react with compounds in your beer to create highly unpleasant, lingering medicinal or plastic-like off-flavors (chlorophenols). Furthermore, the time and excessive water required for thorough rinsing make it inefficient and wasteful. Instead, invest in purpose-designed, no-rinse sanitizers like Iodophor or Star San. These products are incredibly effective at killing microbes, leave no harmful residue when used correctly, and are much more user-friendly, allowing you to sanitize quickly and efficiently, drastically reducing the risk of contamination.
4. Quality Water Matters: Filter If You Can
Water is the foundation of your beer, often making up over 90% of the final product. Many homebrewers start with tap water because of its convenience, and while it’s perfectly safe to drink, tap water can contain chemicals like chlorine or chloramines that are detrimental to beer flavor. These compounds can react with yeast and malt during fermentation to create undesirable plastic or medicinal off-flavors, even in small quantities.
While you can certainly brew with tap water, using higher quality water can dramatically improve your beer. The simplest upgrade is to attach a carbon filter to your faucet or use a pitcher filter to remove chlorine and other impurities. For even better control, consider using spring water, distilled water (with added brewing salts for mineral balance), or reverse osmosis (RO) water. Understanding your local water profile and making appropriate adjustments (e.g., adding a Campden tablet to neutralize chlorine in tap water) can elevate your beer from good to outstanding, allowing the true flavors of your malt and hops to shine through.
5. Know Your Local Homebrewing Laws
Before you even think about purchasing equipment or ingredients, it’s crucial to understand the legal landscape of homebrewing in your specific area. While homebrewing for personal consumption is legal in all 50 U.S. states (though quantity limits may apply), laws vary significantly across different countries and even local municipalities. For example, countries like Malaysia and Ukraine have outright prohibitions on homebrewing.
Failing to comply with local regulations could lead to legal complications. Do your due diligence and research federal, state/provincial, and local laws regarding alcohol production for personal use. Ensure you understand any restrictions on volume, sharing, or selling your homemade beer. This step is less about brewing technique and more about responsible citizenship, ensuring your brewing journey remains enjoyable and worry-free. For more information, explore resources like Homebrewing Laws here and here.
RELATED: Make Your Own Green Beer For St. Patrick’s Day
Key Tips for an Efficient Homebrewing Process
Once you’ve completed your preparations, the actual brewing process begins. This phase involves transforming raw ingredients into wort, and then guiding that wort through fermentation into beer. Mastering these techniques will help ensure a clean, flavorful, and successful brew every time.
6. Opt for Dry Yeast Packets for Simplicity
Yeast is the magical microorganism that transforms sugary wort into alcoholic beer. While cultivating your own liquid yeast starter can offer more control and unique characteristics, it’s an additional layer of complexity that can be overwhelming for beginners. Yeast starters require specific conditions, nutrients, and can add another day or two to your brewing schedule.
For your initial batches, dry yeast packets are an absolute godsend. They are stable, have a long shelf life, and are incredibly easy to use. Most dry yeasts simply need to be rehydrated in a small amount of warm water just before pitching into your wort on brew day. This convenience means you can focus on mastering the core brewing steps without the added stress of managing a yeast starter. As you gain experience and confidence, you can then explore the vast world of liquid yeasts and starter propagation to fine-tune your recipes and expand your brewing horizons.
7. Boil Your Wort for at Least an Hour
The boil is a critical stage in beer production, serving multiple vital functions. It not only sterilizes the wort, eliminating any potential wild yeasts or bacteria that could lead to spoilage, but also isomerizes hop acids (which contributes bitterness), coagulates proteins (leading to clearer beer), and drives off unwanted volatile compounds like Dimethyl Sulfide (DMS), which can cause a cooked corn or vegetable flavor.
While some recipes might suggest shorter boil times (e.g., 15-30 minutes for certain hop additions), a vigorous boil of at least 60 minutes is generally recommended, especially for beginners. This duration ensures complete sterilization, effective hop utilization, and sufficient time for DMS precursors to vaporize and escape. For certain styles or larger batches, longer boils (90 minutes or more) might be beneficial for deeper color, increased gravity, or greater DMS reduction. Prioritizing a thorough boil is a simple yet effective way to guarantee a clean, stable, and flavorful beer.
8. Invest in a Wort Chiller for Rapid Cooling
After boiling, the wort needs to be cooled rapidly to fermentation temperature (typically between 60-75°F or 15-24°C) as quickly as possible. This rapid cooling, known as the “cold break,” helps to precipitate unwanted proteins and tannins, leading to a clearer final beer. More importantly, it significantly reduces the window of vulnerability during which your unfermented wort is susceptible to contamination by airborne bacteria or wild yeasts.
While submerging your hot kettle in an ice bath can work for small batches, it’s less efficient and often takes longer than ideal. An immersion wort chiller is an affordable and highly recommended upgrade for any homebrewer. These devices typically consist of a coil of copper or stainless steel tubing that sits directly in your wort, with cold water flowing through it. They are remarkably efficient at rapidly bringing down the temperature, thereby minimizing the risk of infection and improving beer clarity. They are also easy to clean and sanitize, and simple to set up by attaching to a standard faucet. Explore options like this immersion wort chiller and its water-efficient counterpart for effective cooling solutions.
9. Keep the Kettle Lid Partially Open During the Boil
One common mistake for new brewers is to cover the boiling kettle completely. While it might seem logical to retain heat, doing so counteracts one of the critical purposes of the boil: the vaporization and escape of undesirable volatile compounds. Specifically, Dimethyl Sulfide (DMS) is a compound that can lead to a cooked corn, cabbage, or vegetable-like aroma and flavor in your beer. DMS precursors are formed during malting and boiling, and they need to be actively boiled off and allowed to escape.
If you keep the lid tightly closed, these volatile compounds will condense on the lid and drip back into your wort, reintroducing the very flavors you’re trying to eliminate. Instead, keep the lid ajar or slightly off-center to allow steam and these unwanted compounds to escape freely into the air. This simple adjustment ensures a cleaner, purer flavor profile for your finished beer, allowing the desirable malt and hop characteristics to truly shine.
10. Ensure Proper Headspace When Bottling
After primary fermentation is complete and you’re ready to package your beer, bottling requires precise attention to headspace. Headspace is the empty space left between the beer and the cap of the bottle. This space is crucial for two main reasons: firstly, it allows room for the carbon dioxide (CO2) produced during bottle conditioning (secondary fermentation from priming sugar) to dissolve into the beer, creating the desired carbonation. Secondly, and perhaps more importantly, adequate headspace prevents dangerous over-pressurization.
If too little headspace is left, the CO2 generated can create excessive pressure within the bottle, potentially leading to a “bottle bomb” – where the bottle explodes, causing a mess and a safety hazard. Conversely, too much headspace can lead to under-carbonation or increased oxidation risk. A good rule of thumb is to leave about 1 to 1.5 inches of headspace in the bottle’s neck. This provides ample room for carbonation while minimizing oxygen exposure. Use a bottling wand or filler that ensures a consistent fill level across all your bottles for optimal results.
RELATED: How to Make Beer at Home | Best Homebrew Recipes
Essential Tips for Post-Homebrewing Care and Enjoyment

Congratulations, your beer has been brewed and bottled! But the journey isn’t over yet. The post-brewing phase, encompassing conditioning, storage, and patience, is just as vital as the active brewing process. These final tips will ensure your hard work results in a perfectly conditioned, delicious, and safely stored homemade beer.
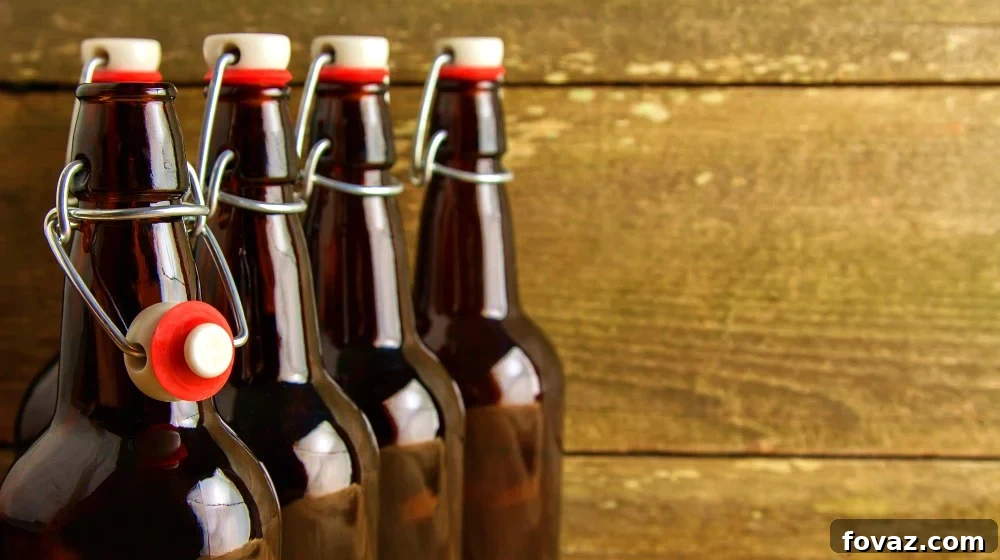
11. Choose Brown Bottles for Protection Against Light
Have you ever noticed that most commercial beer bottles are brown, with some green, and very few clear? This is no accident or mere stylistic choice; it’s a critical defense mechanism against one of beer’s greatest enemies: light. Ultraviolet (UV) rays, particularly from sunlight and even fluorescent lights, can cause a chemical reaction within your beer. Specifically, UV light interacts with iso-alpha acids (derived from hops) and riboflavin (a natural component in beer) to produce compounds that are chemically similar to a skunk’s defensive spray.
This phenomenon is famously known as “lightstruck” or “skunky beer.” Brown bottles offer superior protection because their color absorbs the specific wavelengths of light that trigger this unpleasant reaction. Green bottles provide some protection, but less than brown, which is why beers in green bottles can still become lightstruck if exposed for too long. Clear bottles offer virtually no protection and should be avoided for long-term beer storage unless the beer is designed to be consumed immediately or stored in complete darkness. Always opt for brown bottles to safeguard the delicate flavors you’ve worked so hard to create.
12. Store Your Beer in a Cool, Dark Place
Once bottled, your freshly brewed beer, particularly during its conditioning phase, is highly sensitive to environmental factors. Exposure to light and fluctuating temperatures can significantly compromise its quality and even safety. Elevated temperatures can accelerate undesirable chemical reactions, leading to off-flavors, and can also reactivate yeast, potentially causing over-carbonation. Light, as discussed, leads to skunking.
Improper storage, particularly warm conditions combined with residual fermentable sugars, can lead to a dangerous phenomenon known as “bottle bombs.” This occurs when excessive pressure builds up inside the bottle, causing it to violently rupture, creating a hazardous mess and a painful loss of your precious brew. To prevent this, always store your bottled beer in a consistently cool (ideally between 50-65°F or 10-18°C) and completely dark environment. A basement, a dark closet, or a dedicated fermentation chamber are ideal. While it’s tempting to chill your beer immediately, allow it at least two weeks (or more, depending on the style) in these conditions for proper carbonation and conditioning before transferring it to the refrigerator for serving. This ensures safety and optimal flavor development.
13. Practice Patience: Give Your Beer Time to Condition
The waiting period after bottling is often the hardest part of homebrewing, but it’s arguably the most crucial for achieving excellent beer. It’s incredibly tempting to crack open a bottle the moment it’s been capped, but good things truly do come to those who wait. This period, known as bottle conditioning or aging, allows several vital processes to occur.
Firstly, the priming sugar you added initiates a secondary fermentation within the bottle, naturally producing the carbonation that gives beer its delightful fizz and contributes to head retention. This process typically takes about two to three weeks. Secondly, and just as important, the flavors of your beer need time to meld, mature, and smooth out. Harsh or raw flavors present immediately after fermentation often soften and integrate beautifully with a few extra weeks of conditioning. While five weeks is often a suggested minimum for many styles, some complex or higher-alcohol beers benefit immensely from several months, or even a year, of aging. Homemade beer, when stored correctly, can have a shelf life of up to a year or even longer for certain robust styles. Resist the urge, be patient, and you will be rewarded with a truly remarkable beer that far exceeds immediate gratification.
14. Properly Store Unused Brewing Ingredients
Homebrewing can be an involved process, and after a long brew day, it’s natural to want to put everything away quickly. However, neglecting the proper storage of your leftover ingredients can significantly impact the quality of your future brews. High-quality ingredients are the foundation of great beer, and their freshness is paramount.
Hops, for instance, are highly susceptible to degradation from oxygen, heat, and light, quickly losing their aromatic and bittering properties. Store them in airtight, vacuum-sealed bags in the freezer. Malt extracts and specialty grains should be kept in cool, dry, dark places, away from moisture and pests. Opened sacks of grain should be sealed tightly. Yeast, whether dry or liquid, requires refrigeration (or freezing for some dry yeasts) to maintain viability and prevent spoilage. Investing a little time in proper ingredient storage after each brew ensures that your next batch starts with fresh, potent components, protecting your investment and the quality of your subsequent brews.
15. Maintain Detailed Brewing Records
Record-keeping is an invaluable habit for any homebrewer, moving you beyond simply following instructions to truly understanding and mastering the craft. A detailed log of each brewing endeavor serves as a comprehensive reference point for replication, improvement, and troubleshooting. At a minimum, record the recipe used, including precise quantities of malt, hops (with additions times), yeast strain, and water treatment.
Beyond the basics, note key process parameters such as mash temperatures and times, boil vigor, original gravity (OG), final gravity (FG), fermentation temperatures, and any specific observations during fermentation (e.g., yeast activity, krausen formation). Also, document any deviations from the recipe, new techniques attempted, and sensory notes on the finished beer (aroma, flavor, mouthfeel, appearance). What did you like? What would you change? Keeping these records allows you to reproduce successful batches, identify the root cause of any off-flavors, and systematically refine your process and recipes over time. It transforms each brew into a learning experience, accelerating your journey from novice to expert.
Want to enjoy your very own beer? Watch this video by Joshua Weissman and brew your first homemade beer:
The art of homebrewing is a testament to the rewards of dedication and patience. While it may require significant time and effort, and the allure of store-bought beer is always present, there’s an unparalleled sense of accomplishment that comes with savoring a bottle of your own handcrafted brew. Each sip represents not just a beverage, but the culmination of your meticulous planning, careful execution, and unwavering commitment. It’s a journey well worth the effort, delivering not just delicious beer, but also a deeply fulfilling hobby that connects you to an ancient and revered craft.
Do you have your own homebrewing tips and tricks that have helped you on your journey? We’d love to hear them! Share your insights and experiences in the comments section below!
UP NEXT:
- How to Make Beer Bottle Glasses
- Uses For Beer Bottles | 24 Creative Projects And Cool DIY Ideas
- How To Make Survival Paracord Bracelets | DIY Projects
Calling all crafting DIYhards, DIY Projects needs YOU! Click here if you want to write for us.
Don’t forget to stay connected with us on Facebook, Twitter, and Instagram!