
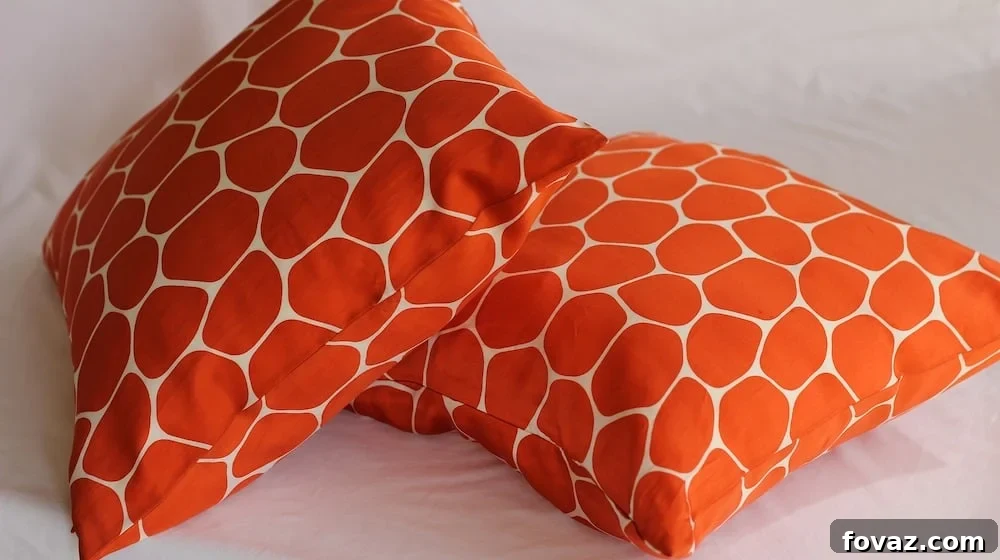
Transform Your Home with DIY Rit Dye Shibori Pillows: A Creative Guide to Unique Decor
Are you looking to infuse your living space with a touch of unique artistry and personalized charm? The term “Rit Dye Pillow” might not be an everyday phrase, but it encapsulates a world of creative possibilities for home decorators. Today, we’re diving into an exciting DIY project inspired by the ingenious designs of Taryn Whiteaker, who consistently brings fresh ideas to the DIY community. This project transforms ordinary fabric into stunning, custom-dyed throw pillows, allowing you to create a high-end look without the high-end price tag.
Inspired by the captivating patterns of Shibori pillows seen online, Taryn embarked on a journey to create something truly distinctive. Her chosen medium: vibrant blue Rit dye, applied to fabric using simple, yet effective, tie-dye techniques. The outcome is a collection of absolutely breathtaking dyed pillows that you can easily replicate and customize from the comfort of your own home. This guide will walk you through the essential steps, encouraging you to experiment with various colors, folding methods, and pillow sizes to perfectly complement your existing home decor and personal style.
The Allure of Shibori: An Ancient Art for Modern Homes
Shibori is a traditional Japanese dyeing technique that involves folding, twisting, pleating, or bunching fabric before binding it to create unique patterns when dyed. While often compared to tie-dye, Shibori typically focuses on a more intricate, controlled process that results in sophisticated, organic designs. Taryn Whiteaker’s approach to Rit Dye pillows draws heavily from this ancient art, simplifying the techniques to make them accessible for any DIY enthusiast. By manipulating the fabric and then applying dye, areas of the fabric are protected, preventing the dye from reaching them and thus creating beautiful, resist patterns. This method guarantees that no two pillows will ever be exactly alike, making each piece a one-of-a-kind work of art for your home.
Why Choose DIY Dyed Pillows? Unleash Your Creativity and Style
The decision to DIY your home decor, especially something as impactful as throw pillows, comes with a myriad of benefits. Firstly, it offers unparalleled personalization. Store-bought pillows, while convenient, often lack the unique flair that truly reflects your personality and aesthetic. With DIY Rit Dye pillows, you have complete control over the color palette, pattern intensity, and overall design, ensuring that each piece perfectly harmonizes with your interior design vision. Secondly, it’s a wonderfully cost-effective solution. High-quality, custom-designed pillows can be quite expensive. By investing a little time and effort, and using readily available materials like Rit dye and cotton fabric, you can achieve a luxurious look for a fraction of the cost. Thirdly, it’s an incredibly satisfying creative outlet. The process of transforming plain fabric into a vibrant, patterned masterpiece is rewarding and provides a sense of accomplishment. Lastly, it promotes sustainability by encouraging you to create rather than consume, and even allows for revitalizing old fabrics or pillow covers.
Your DIY Journey Begins: Gathering Essential Materials
Before you embark on your fabric dyeing adventure, it’s crucial to gather all the necessary materials. Having everything at hand will ensure a smooth and enjoyable crafting process. The beauty of this project lies in its simplicity and the accessibility of its components. Here’s a detailed list of what you’ll need to create your stunning Shibori-inspired Rit Dye pillows, with some additional tips for selection:
Materials Needed:
- Rit Dye: Taryn specifically used Navy Blue, which creates a classic and elegant Shibori effect. However, the world of Rit Dye offers an incredible spectrum of colors. Feel free to unleash your imagination and choose any color or combination of colors that speak to your style. Consider vibrant fuchsias, earthy greens, or even sophisticated grays to match different decor schemes.
- 22″ x 22″ Piece of 100% Cotton Fabric: This measurement is for one pillow, so adjust according to the number of pillows you wish to create. The “100% cotton” specification is vital as natural fibers like cotton, linen, silk, and wool absorb Rit All-Purpose Dye much more effectively than synthetic materials. For best results, use pre-washed, unbleached cotton fabric to ensure even dye absorption.
- Rubber Bands: A generous supply of various sizes will be helpful. These are essential for binding the fabric tightly and creating the resist patterns. Strong, durable rubber bands are preferred to ensure they hold up during the dyeing process.
- Scrap Pieces of Wood: Small, flat pieces of wood (like craft sticks, wood blocks, or even rulers) are used to create specific resist patterns. Their size and shape will influence the final design.
- 1 Cup of Salt: Salt acts as a dye fixative, especially for cotton and other cellulosic fibers. Adding it to the dye bath helps the dye penetrate the fabric more thoroughly and improves color vibrancy and washfastness.
- 1 Teaspoon of Dish Soap: A small amount of liquid dish soap helps the dye penetrate the fabric evenly by breaking down the surface tension of the water. This prevents splotchiness and ensures a more uniform application of color.
- Protective Gear: Old clothes, rubber gloves, and a plastic tablecloth or old sheets to protect your work surface are highly recommended to prevent staining.
- Dyeing Container: A large plastic bucket or stainless steel sink that you don’t mind potentially staining. Avoid using anything that will be used for food preparation.
- Measuring Spoons and Cups: For accurate dye and additive measurements.
- Stirring Utensil: An old spoon or stick specifically for stirring the dye bath.
- Water: Hot water (ideally 140°F/60°C) is generally recommended for Rit All-Purpose Dye to achieve the most vibrant results.
Step-by-Step Guide: Crafting Your Shibori-Inspired Pillows
Now that you have all your materials, let’s dive into the exciting process of transforming plain cotton into a vibrant work of art. Remember, patience and attention to detail will lead to the most beautiful results.
Preparation is Key
Before you begin dyeing, prepare your workspace. Lay down plastic sheets or old newspapers to protect surfaces from spills. Put on your rubber gloves and old clothes. Ensure your cotton fabric is pre-washed and still damp, as damp fabric absorbs dye more readily and evenly.
Dye Bath Creation
In your designated dyeing container, fill it with enough hot water to fully submerge your fabric. The water should be hot, ideally around 140°F (60°C) – if tap water isn’t hot enough, heat water on the stove and add it carefully. Dissolve the Rit dye completely in a separate small container with hot water, then add this concentrated dye solution to your main dye bath. Stir in the cup of salt and the teaspoon of dish soap, ensuring everything is well combined. The dye bath should be uniform in color.
Folding Techniques for Unique Patterns
The magic of Shibori lies in the folding. Taryn showcased two distinct techniques, but the possibilities are endless once you understand the principle of resist dyeing.
Technique 1: The Rolled Quarter-Fold
For a symmetrical and striking pattern, begin by folding your square pillow fabric into quarters. Ensure the folds are crisp and precise. Once folded into a smaller square, carefully roll the entire fabric piece tightly around one of your scrap pieces of wood. This central wood piece acts as a core resist. To secure this shape, place a second piece of wood directly on top of the rolled fabric (sandwiching the fabric between the two pieces of wood), then tightly secure both wood pieces and the fabric with multiple rubber bands. The rubber bands should be wrapped tightly to prevent dye from reaching the bound areas, creating sharp, defined lines and geometric patterns.
Technique 2: The Rolled Half-Fold
This technique offers a slightly different pattern, often resulting in more elongated or organic shapes. Start by folding your pillow square in half, creating a rectangle. Take a 2.5-inch piece of scrap wood (or a similarly sized flat object) and place it along one edge of the folded fabric. Now, carefully roll the fabric tightly around this piece of wood. The wood will act as a central resist, while the rolling action will create a spiral or striped pattern. Once rolled, secure the entire bundle with rubber bands, wrapping them tightly at various intervals along the length of the roll. The tighter the rubber bands, the clearer the resist lines will be.
Exploring Other Folds and Resists
Don’t stop at just these two! Experiment with other Shibori-inspired techniques: scrunching the fabric into a ball and binding it with rubber bands for a circular pattern; pleating the fabric like an accordion and then bending it and binding with bands for linear designs; or twisting the fabric into a rope-like form before securing it. Each method will yield unique and beautiful results, allowing you to build a diverse collection of dyed pillows.
The Dyeing Process
Once your fabric bundles are prepared, carefully submerge them into the hot dye bath. Ensure the fabric is fully immersed and the dye liquid surrounds all accessible surfaces. Use your stirring utensil to gently push the fabric around, ensuring even dye absorption. The duration of soaking will impact the final color intensity. For a lighter shade, soak for 10-20 minutes. For a deeper, more saturated hue, allow the fabric to soak for 30-60 minutes, stirring occasionally. You can even leave it for a few hours for maximum color uptake. Keep in mind that the fabric will appear darker when wet.
Rinsing and Revealing Your Masterpiece
Once you’re satisfied with the color intensity, carefully remove the fabric from the dye bath using your stirring utensil. Immediately rinse the fabric under cool running water. Continue rinsing until the water runs clear. This step is crucial for removing excess dye and preventing it from bleeding onto the white (resist) areas. Once the water runs clear, you can begin to carefully remove the rubber bands and wood pieces. This is often the most exciting part, as the unique patterns are finally revealed! Be gentle as you unfold your newly dyed fabric.
Washing, Drying, and Finishing Touches
After unwrapping, wash your dyed fabric in warm water with a mild detergent (and preferably a fabric fixative like Rit ColorStay Dye Fixative for enhanced color retention). You can hand wash or machine wash on a gentle cycle, separate from other laundry, especially for the first few washes, to prevent any residual dye from transferring. Once washed, either tumble dry on low heat or air dry completely. For a crisp finish, you can lightly iron the fabric. Finally, insert your chosen pillow form into your new, custom-dyed pillow cover. Stand back and admire your handcrafted creation!
Personalizing Your Dyed Pillows: Beyond the Basics
The beauty of DIY lies in its endless possibilities for customization. Don’t feel limited to a single color or technique. Here’s how you can truly make these dyed pillows your own:
Color Palette Exploration
Beyond Taryn’s beautiful navy, consider experimenting with multiple colors. You could create an ombre effect by dipping different sections of the fabric into progressively darker dye baths, or try a two-tone design by dyeing one part of the fabric first, rinsing, then re-binding and dyeing another section with a different color. Consider how colors blend – blue and yellow can make green, for instance. The Rit Dye website offers extensive color mixing guides to inspire your next creation.
Fabric and Size Variations
While 100% cotton is ideal, you can also experiment with other natural fabrics like linen for a different texture. Consider dyeing pillow covers of various sizes and shapes – rectangular, round, or bolster pillows – to add visual interest to your sofa or bed. You could even dye an entire piece of fabric and then cut and sew it into multiple pillow covers, ensuring a cohesive look.
Integrating into Your Decor
Your new Rit Dye Shibori pillows can be statement pieces or subtle accents. Pair bold, vibrant colors with neutral furniture to make them pop. Alternatively, choose muted tones like grays, indigos, or earth tones for a more sophisticated and calming aesthetic, perfect for a bohemian, coastal, or minimalist decor theme. Use them in your living room, bedroom, or even on outdoor patio furniture (ensure the fabric and dye are suitable for outdoor exposure if doing so). The organic patterns of Shibori blend seamlessly with natural textures like wood, rattan, and linen, enhancing a relaxed and inviting atmosphere.
Beyond the Basics: Tips for Success and Troubleshooting
To ensure your Rit Dye pillow project is a smashing success, keep these additional tips in mind:
- Test First: If you’re unsure about a color or technique, always test a small scrap of fabric before committing to your main pillow cover.
- Consistency is Key: For uniform results, try to maintain consistent water temperature, dye concentration, and soaking times across multiple pieces.
- Patience with Rinsing: Thorough rinsing is critical to prevent dye transfer and ensure crisp white resist areas. Don’t rush this step.
- Safety First: Always work in a well-ventilated area and wear protective gear to avoid skin contact with the dye.
- Clean Up: Clean your dyeing container and tools immediately after use to prevent stubborn stains.
Conclusion: Unleash Your Inner Artist with DIY Rit Dye Pillows
Creating your own Rit Dye Shibori pillows is more than just a craft project; it’s an opportunity to inject personality, creativity, and bespoke style into your home. Following Taryn Whiteaker’s inspiring lead, you can transform simple fabric into stunning, conversation-starting decor pieces. Embrace the process, experiment with colors and folds, and revel in the satisfaction of creating something beautiful with your own hands. These unique dyed pillows are not just accessories; they are reflections of your artistic spirit and a testament to the charm of handmade home decor.
Ready to start your own Rit Dye adventure? For Taryn Whiteaker’s full, detailed tutorial and additional visual guidance, be sure to check out her original post here. Dive in and let your creativity flow!
Share Your Creations and Feedback
We absolutely love hearing from you and seeing your incredible DIY projects! After you’ve crafted your own Rit Dye pillows, please share your feedback, tips, and photos with us below. Your experiences inspire our entire community.
Explore More DIY Home Decor Ideas and Tutorials
If you’ve enjoyed this creative journey, you might be interested in expanding your DIY horizons with these other fantastic home decor and crafting tutorials. Discover new ways to personalize your space and tackle exciting projects:
- Learn to Make a Wooden Wall Backdrop: Elevate any room with a rustic and stylish DIY wooden backdrop.
- 15 Stylish Throw Pillow Ideas for Your Home: Explore a variety of designs and inspiration to further enhance your pillow collection.
- Creative DIY Throw Pillow Ideas: Discover more innovative ways to craft and decorate your own unique pillows.
- 10 Super Cheap DIY Home Decor Projects: Find budget-friendly ways to refresh every corner of your home.
- Minecraft Pillow Plushies: For the gaming enthusiasts, a fun project to create themed pillows.
- Inspiring Woodworking Projects: Delve into the world of woodworking to create functional and decorative pieces for your home.
- 8 Creative Upcycling Projects for Your Home: Transform old items into new treasures with these sustainable ideas.